S13 300ZX Rear Brake Install
 09-09-2007, 01:06 AM
#1
Contributing Member
Thread Starter
Join Date: Sep 2002
Location: Starkville, MS.
Posts: 1,192
S13 300ZX Rear Brake Install
I did the Z32 rear brake upgrade today. I read this page http://importnut.net/300zxbrakeswap.htm and was compelled to attempt this upgrade. Props to Al because it can be done and quite easily.
Tools needed:
Jack
Jackstands
Socket wrench
Socket kit
36mm socket
27mm socket
22mm socket
19mm socket
17mm socket
10mm socket
Wrenches/10mm line wrench(for the brake hardlines)
Hammer
Screwdrivers
Needle nose pliers
Brake fluid
Drain pan

Z32 rear calipers.
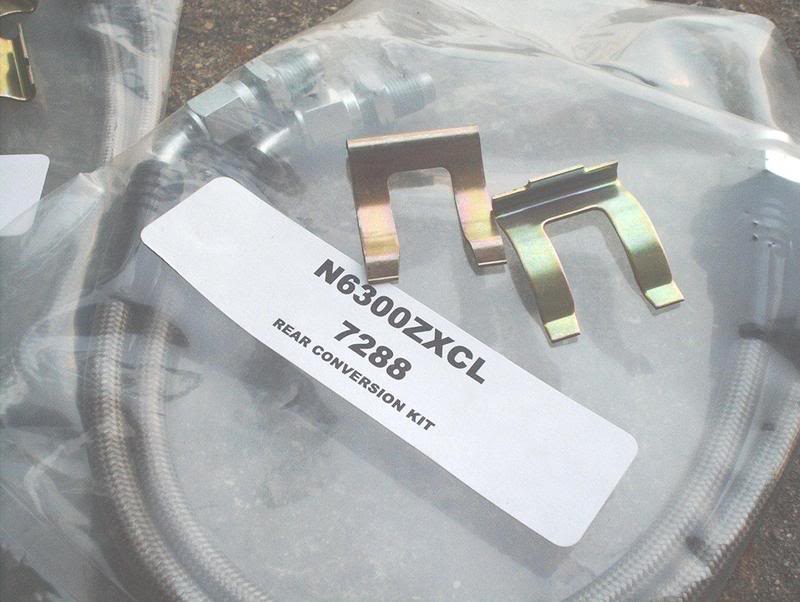
240SX to Z32 stainless steel rear conversion brake lines from ProjectNissan.
Z32 ebrake extension kit from SuperautoBacs.
Z32 spindles and hub assembly...
I'm staying four lug so I only really needed the dust shield/ebrake assemblies and not the 5lug hubs or the aluminum spindles.
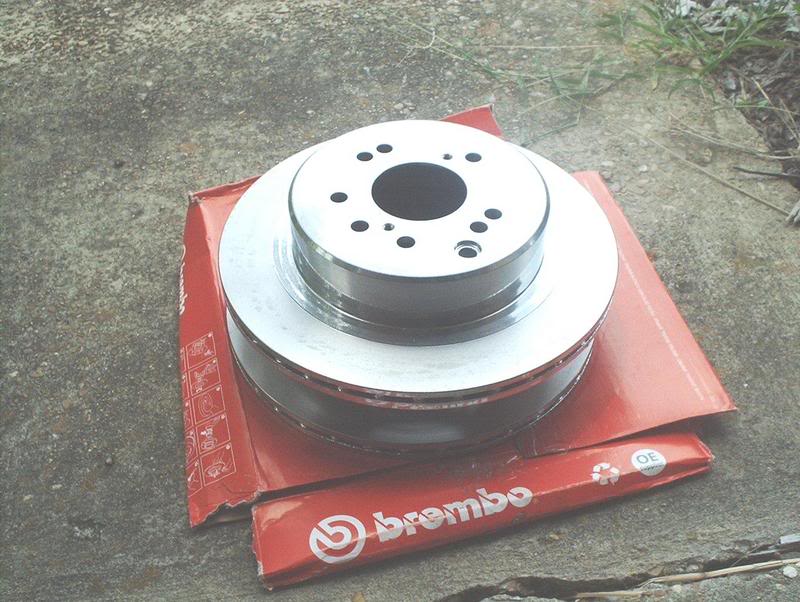
Z32 Brembro rotors redrilled to 4lug from Heavythrottle.
To do this brake upgrade and stay 4lug you'll need to remove the spindles, rotors, calipers and brake lines both normal and ebrake, that is if you want to keep your ebrake.
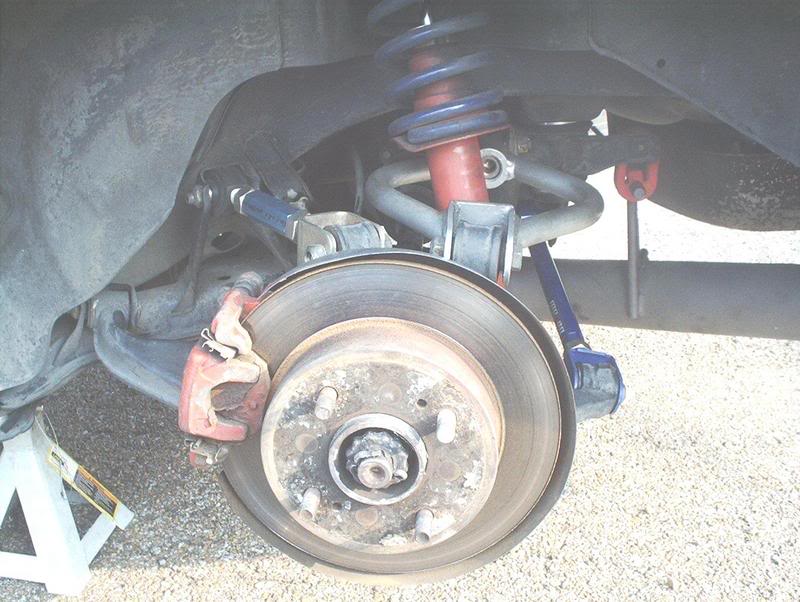
First you jack the car up and place jackstands in the appropriate places.
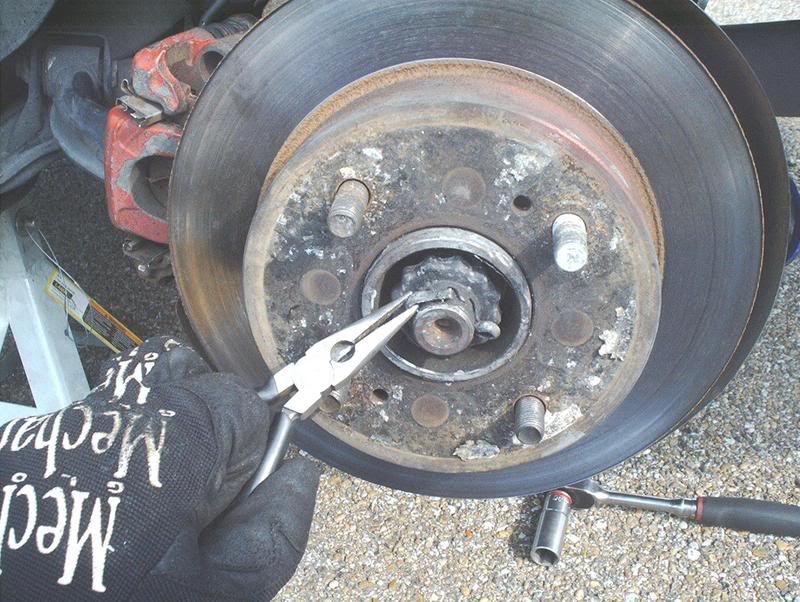
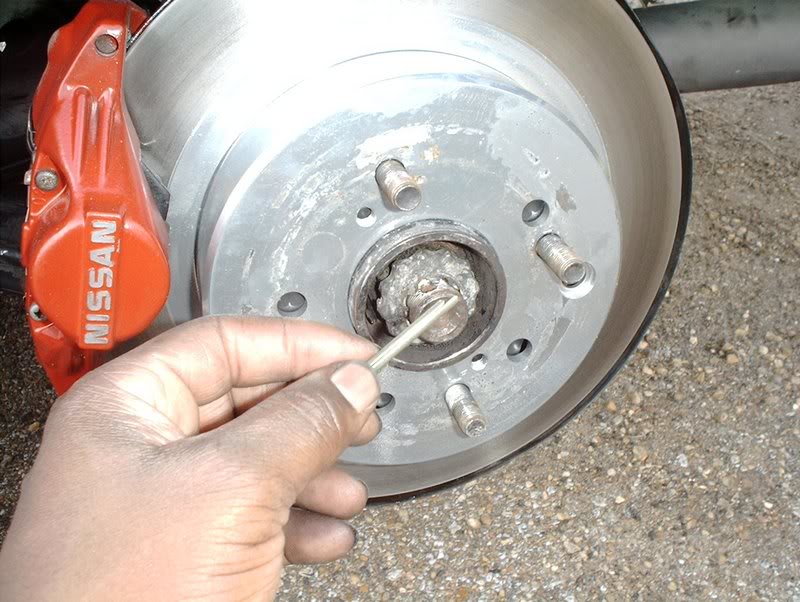
You'll need the ebrake engaged in order to bust the axle nuts loose so that's where you should start. Don't be like me, disconnect an ebrake line first not realizing that the wheels will spin without them and waste valuable time putting them back on....estupido!!! Remove the axle cotter pin and adjustment cap.
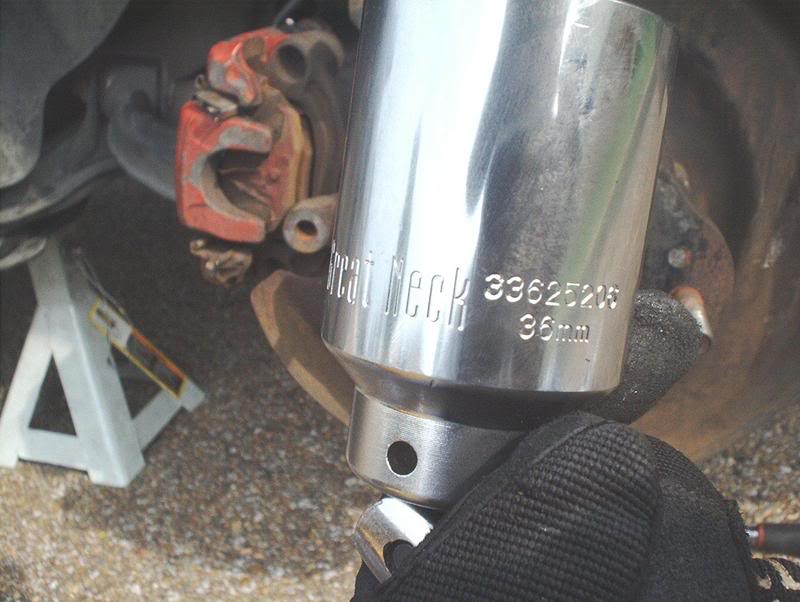
Use a breaker bar and the massive 36mm socket to bust the axle nut loose. You'll hear a loud screeching when it busts. Now that the axle nuts are loose you need to get to the spindles.
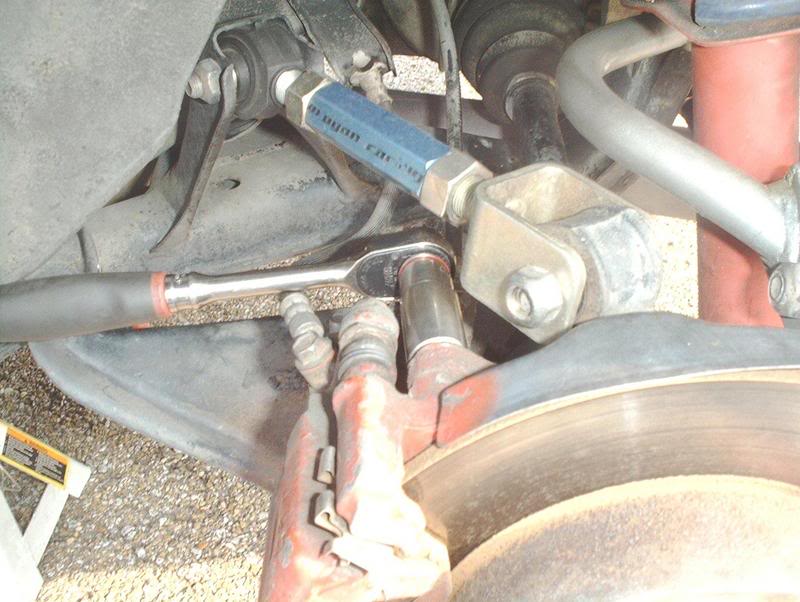
Remove the top and bottom caliper bolts with a 17mm socket.
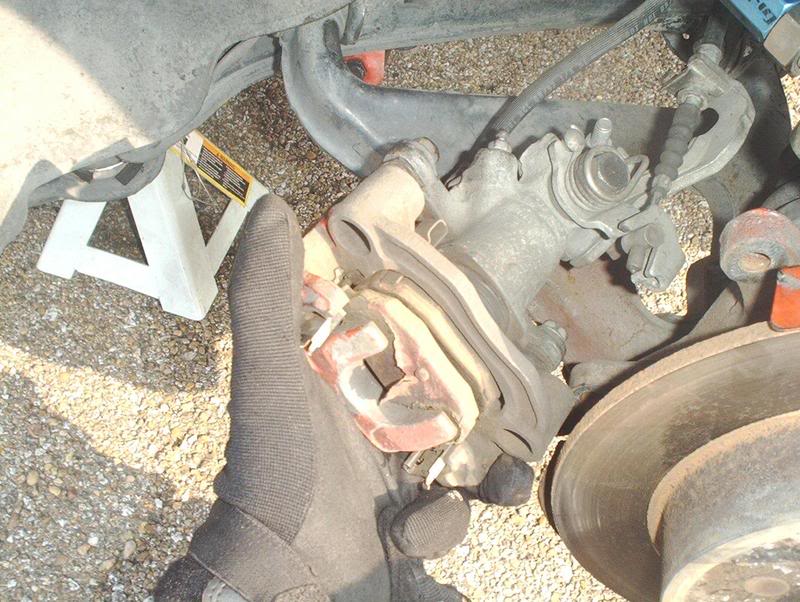
You may have to wriggle it a little but the caliper comes off the rotor.
You need to use something to suspend it and keep it out of your way.

Go ahead and remove the axle nut that you bust earlier.
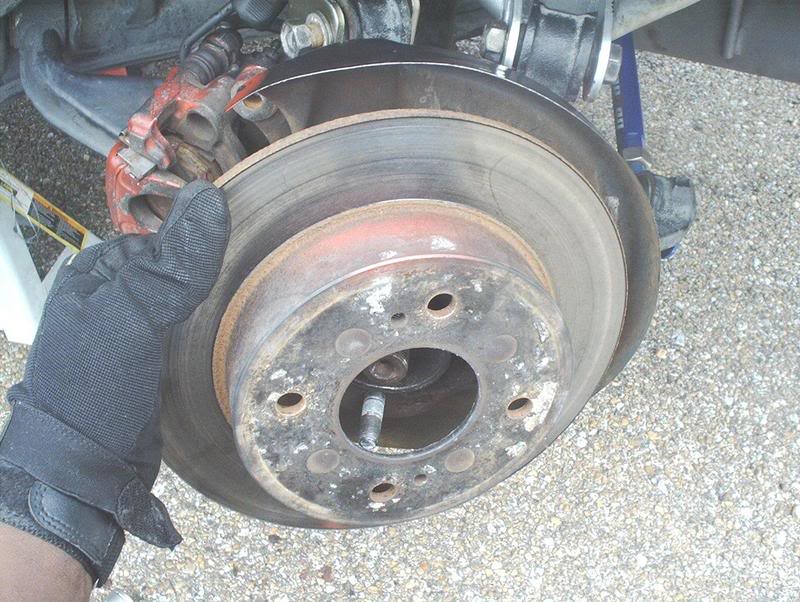
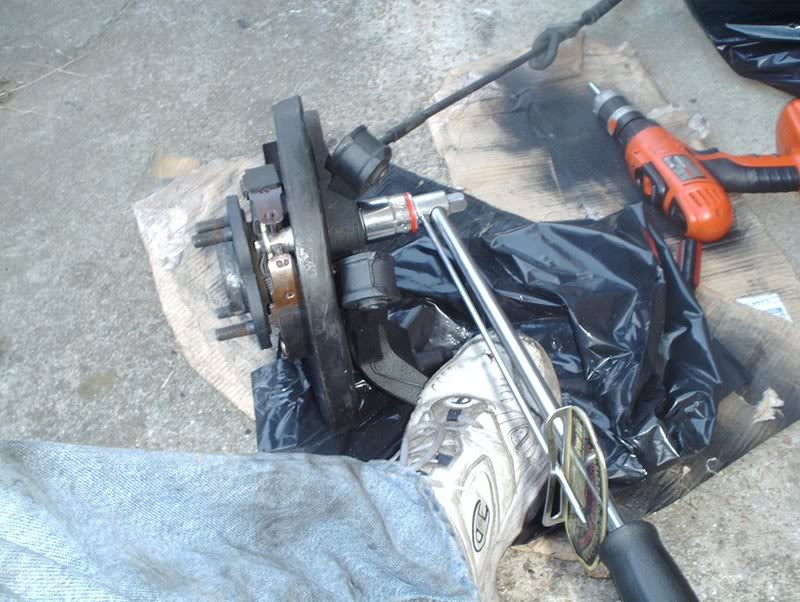
The rear rotors are slip fit so just pull them off unless yours are rusted to the hub.
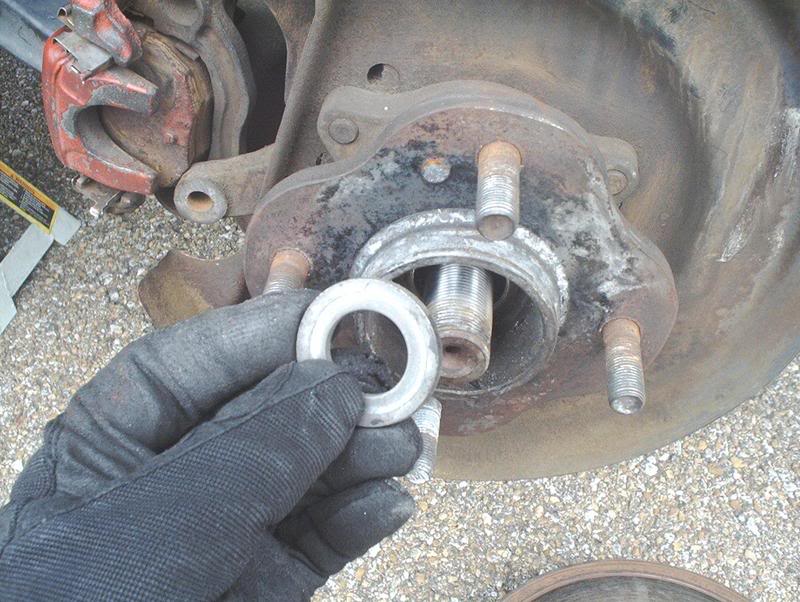
Remove the axle spacer.
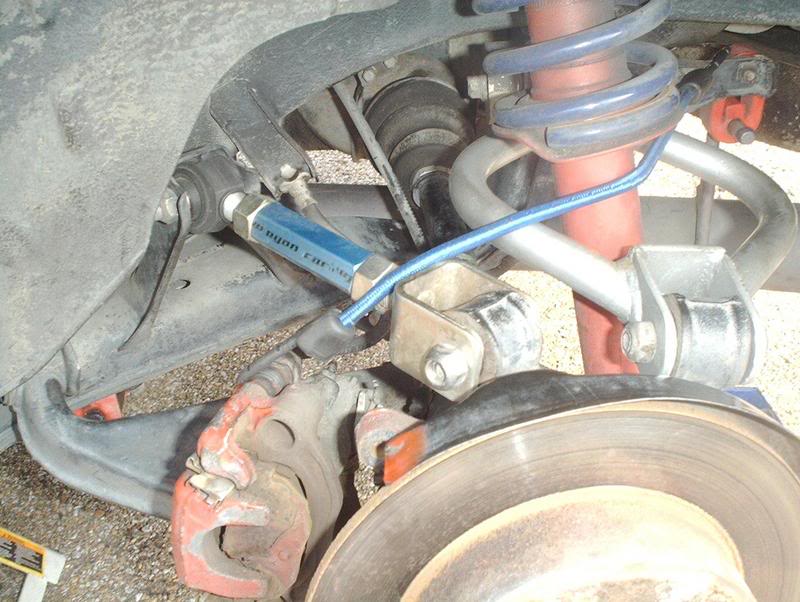
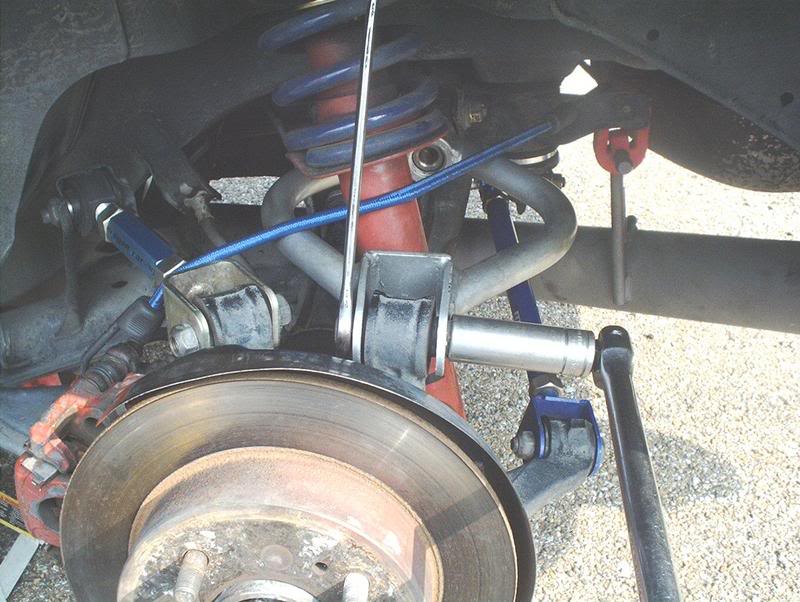
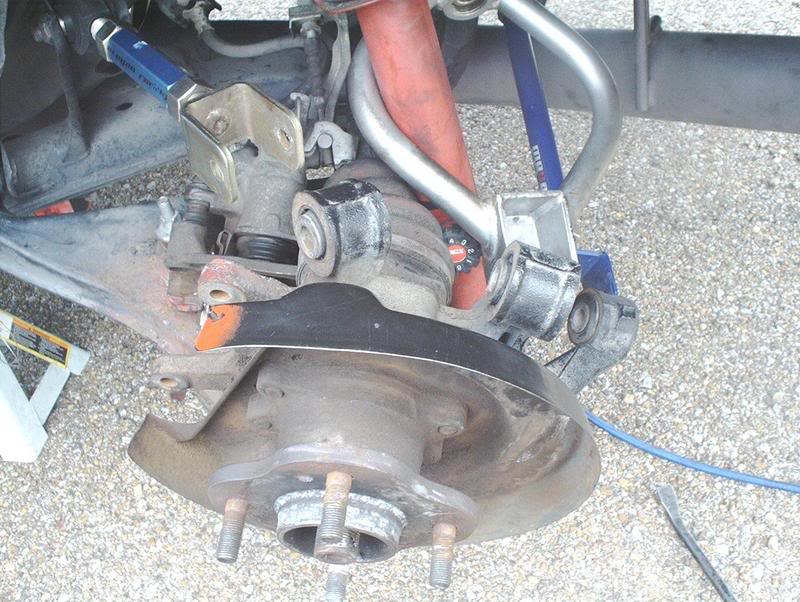
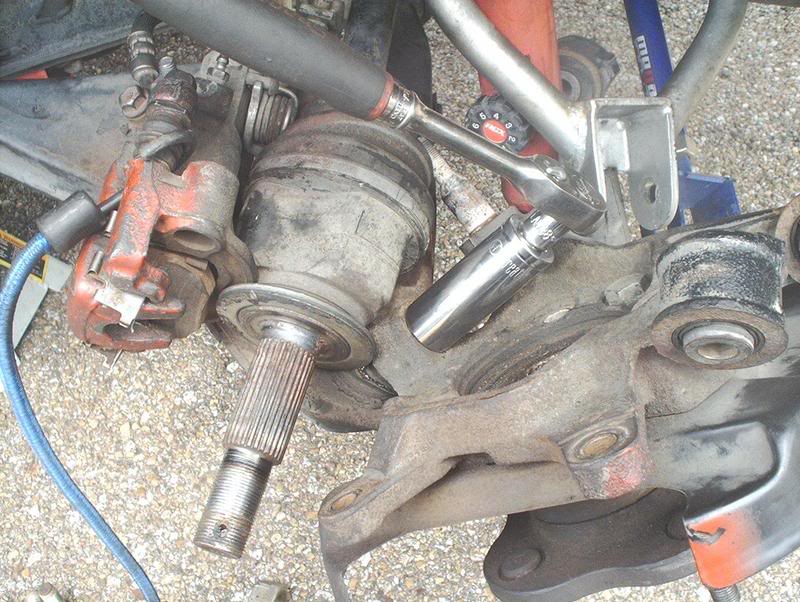
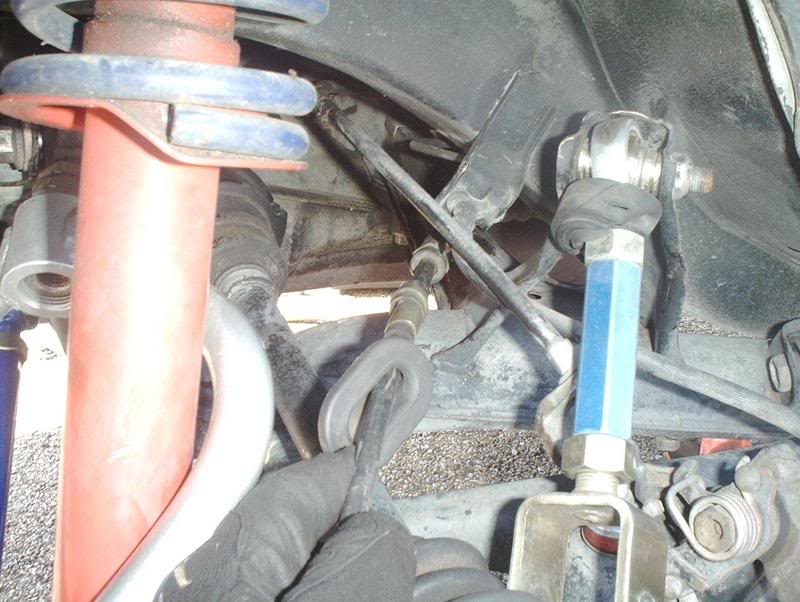
Your're almost to the spindles, now you need to disconnect the rear suspension arms from the spindle next.
The traction link(18mm socket/ 3/4 wrench).
The rear upper control arm(18mm socket/ 3/4 wrench).
The toe rod(18mm socket/ 3/4 wrench)....
...and the strut to spindle nut(17mm socket).

You may need a pry bar to persuade some of the arms off of the spindle.
All arms removed.
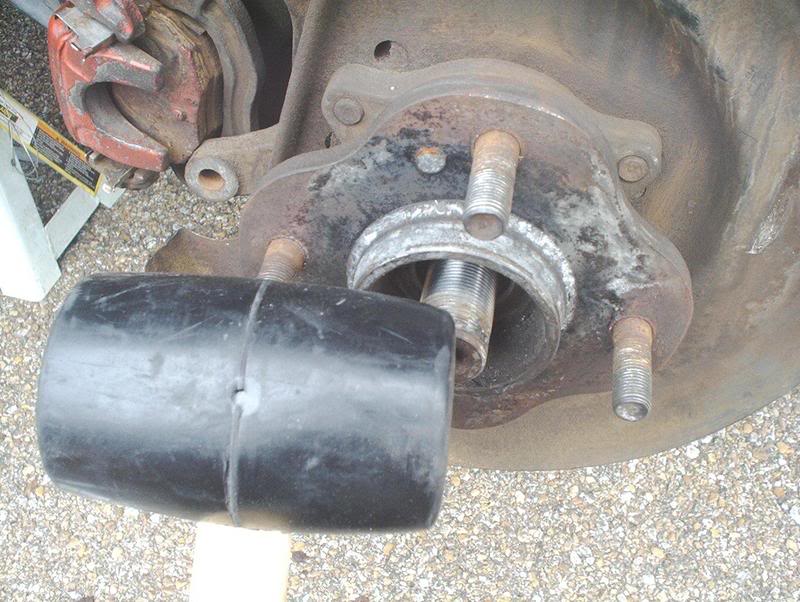
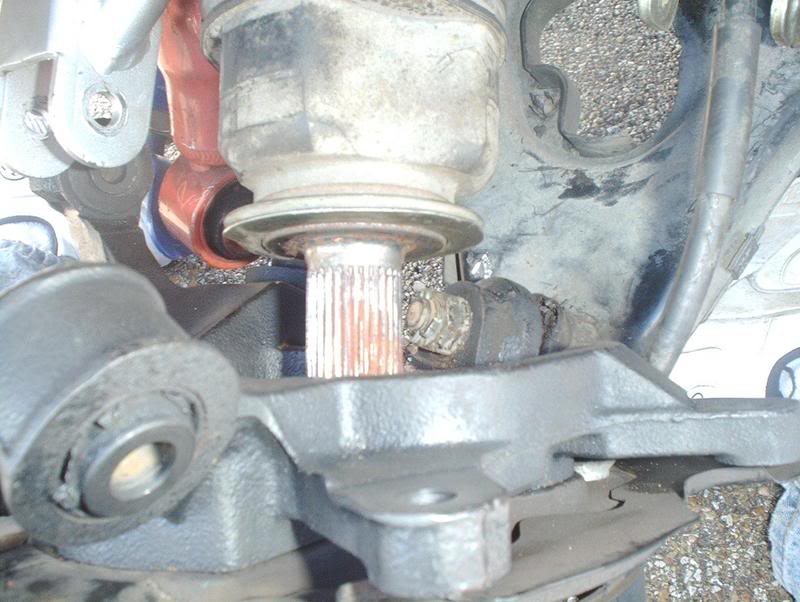
Use a rubber mallet to knock the axles out of the spindle. I only had to use the mallet on the passenger side, I pushed the axle out with my fingers on the drivers side.
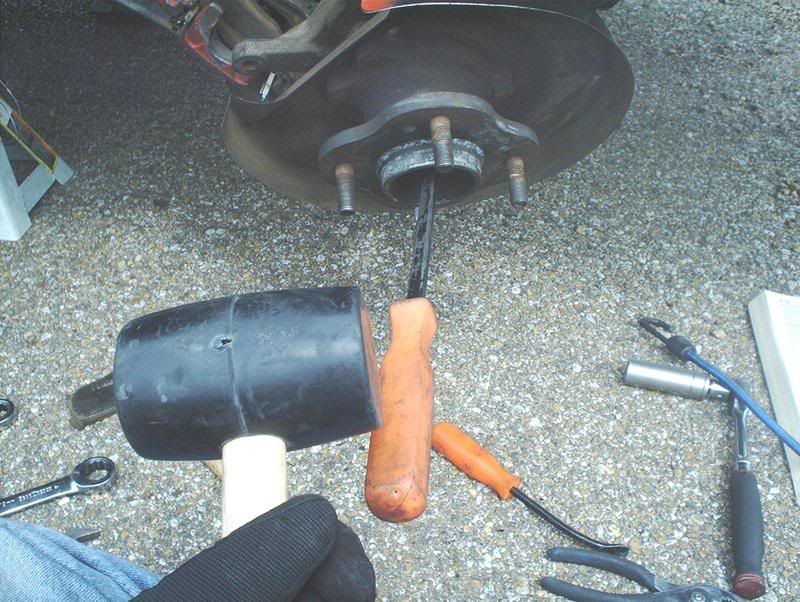
If it doesn't want to budge then use something to hold against the tip of the axle so you can "hammer and chisel" it out.
Axle out.
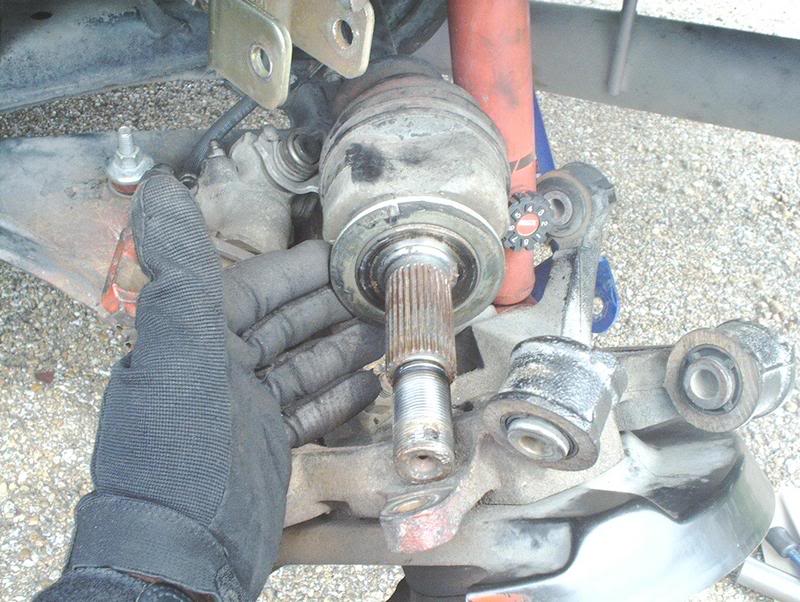
Push the axle to the side and you have access to the rear lower control arm nut.
Use a pair of needle nose pliers to remove the cotter pin.
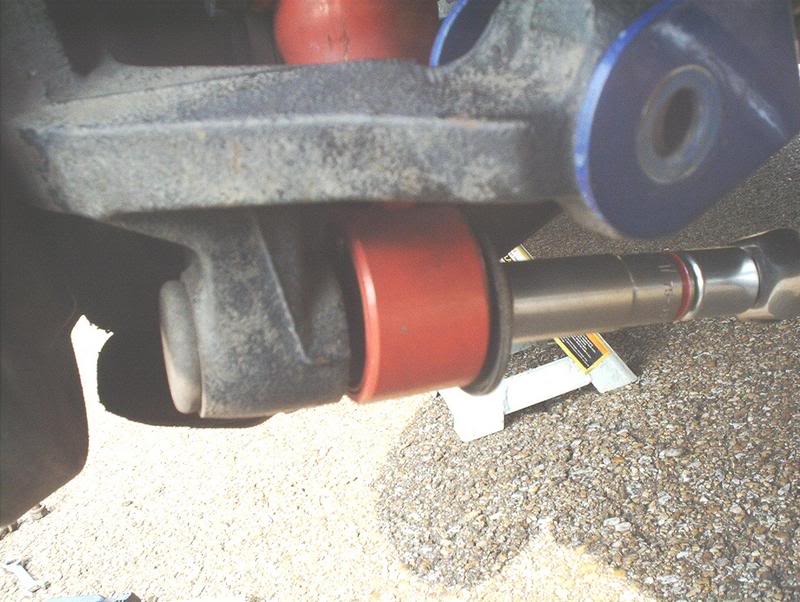
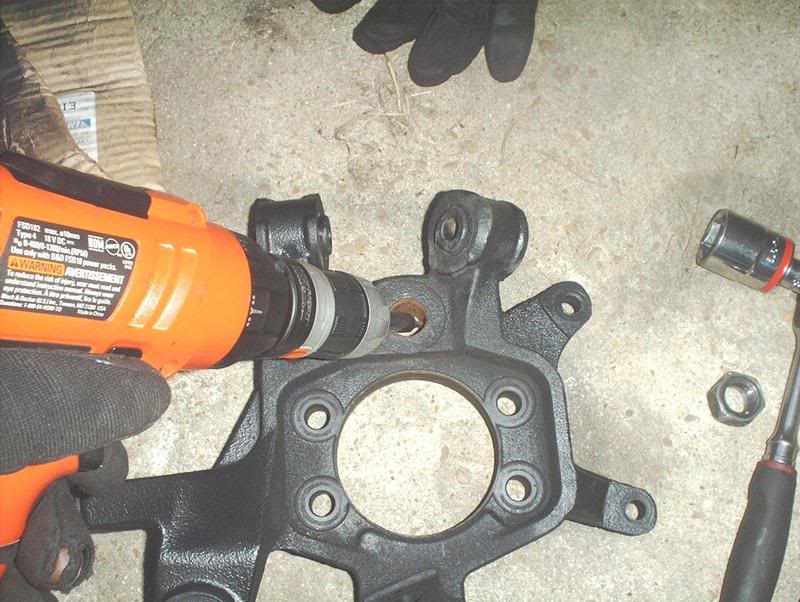
If you're a poor man like me and don't have access to a impact gun then you need bust the hub bolts loose while the spindle is still attached to the RLCA...you'll need the leverage to do so. There are four hub bolts that need to come off with a 19mm socket.
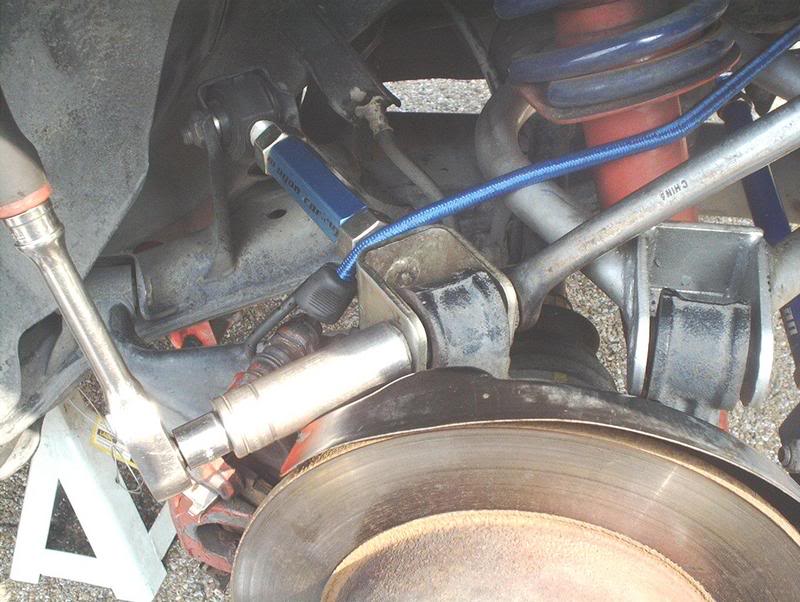
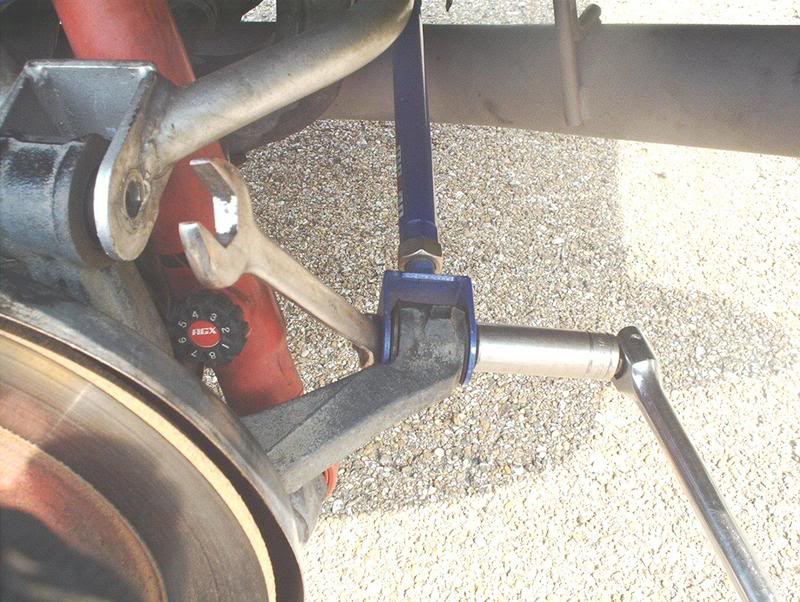
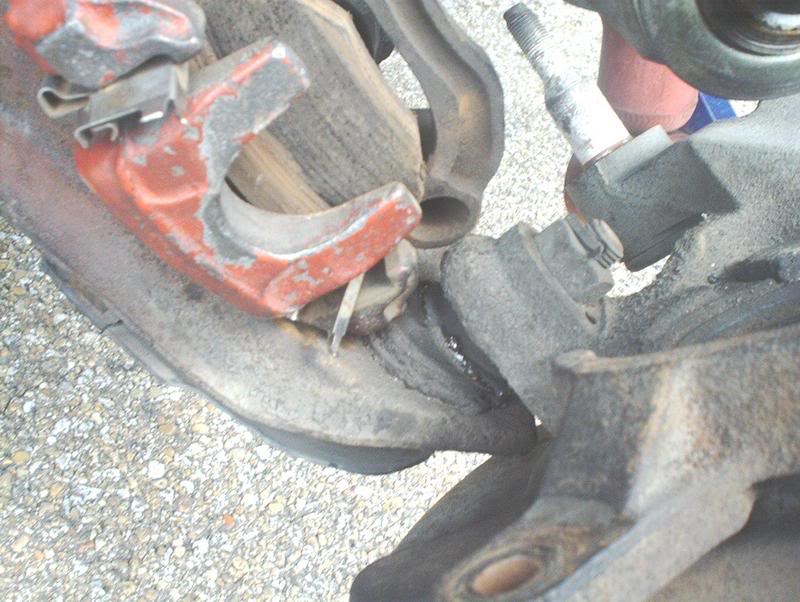
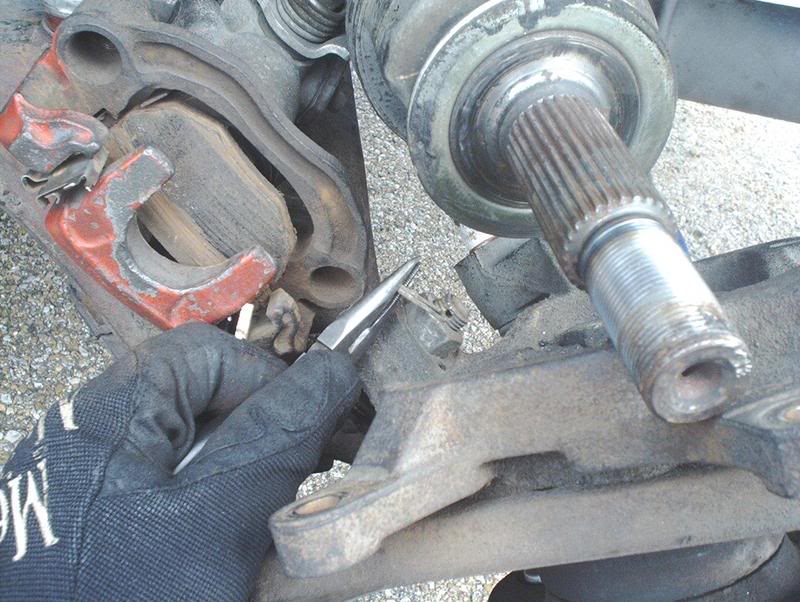
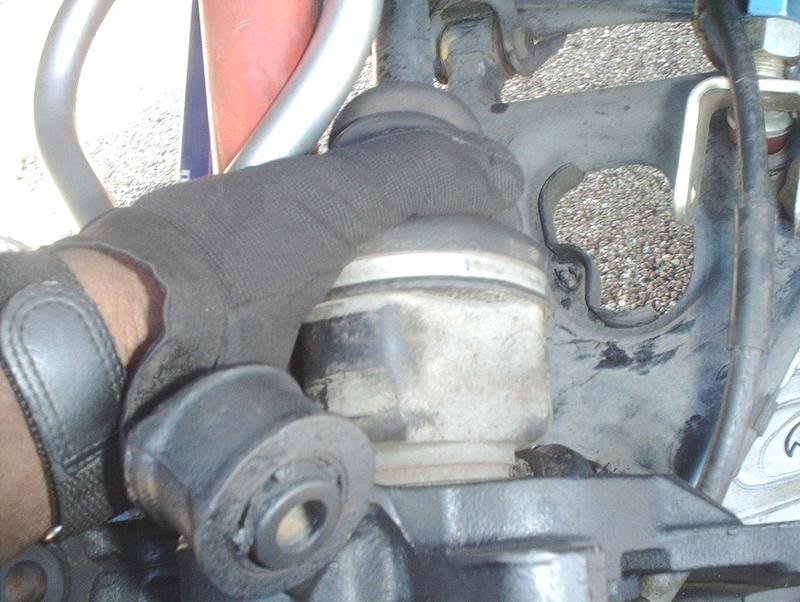
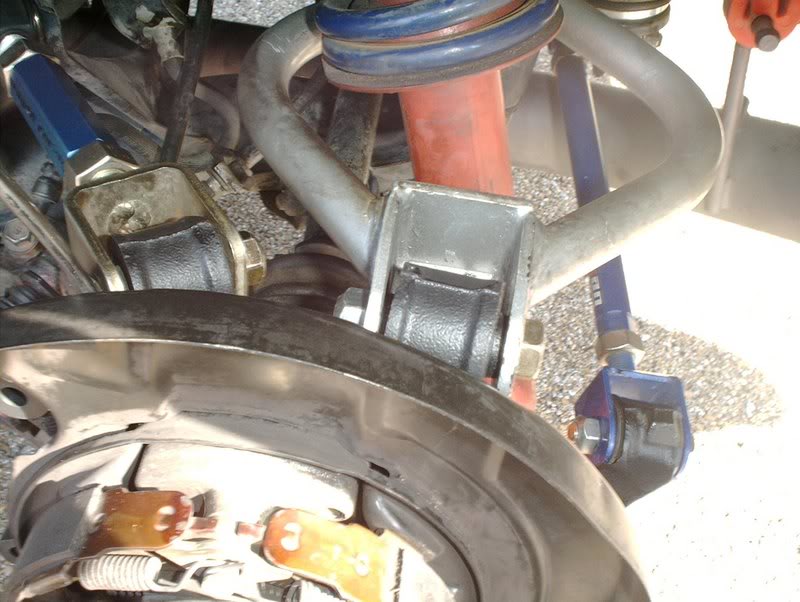
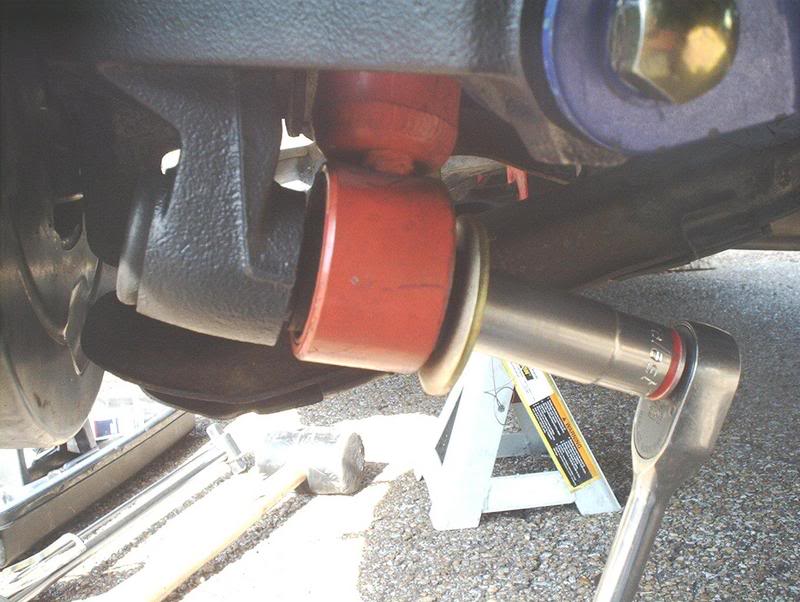
Use a 22mm socket to bust the RLCA ball joint nut loose.
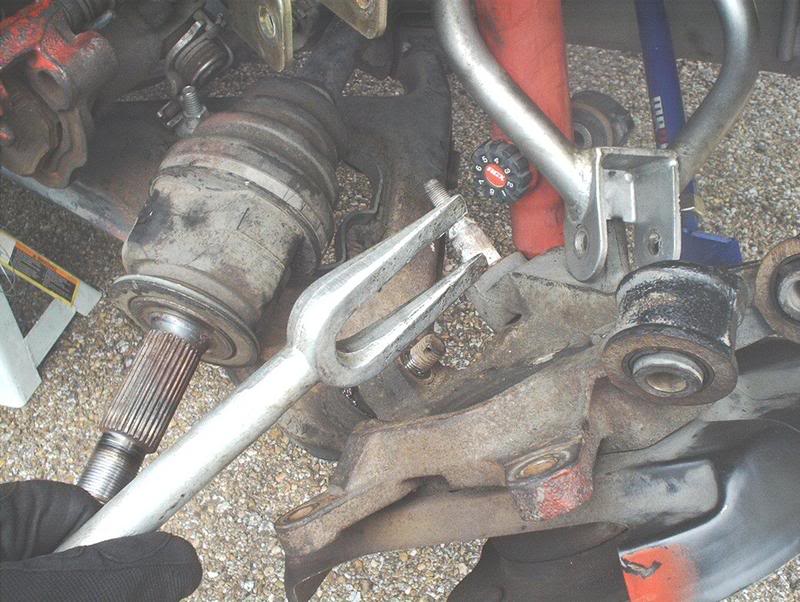
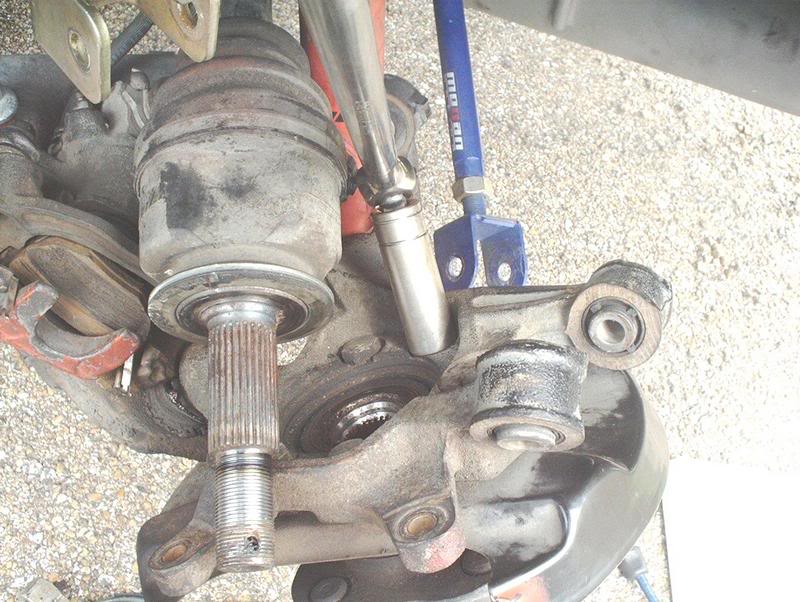
Use a ball joint tool to pop the ball joint loose from the spindle.
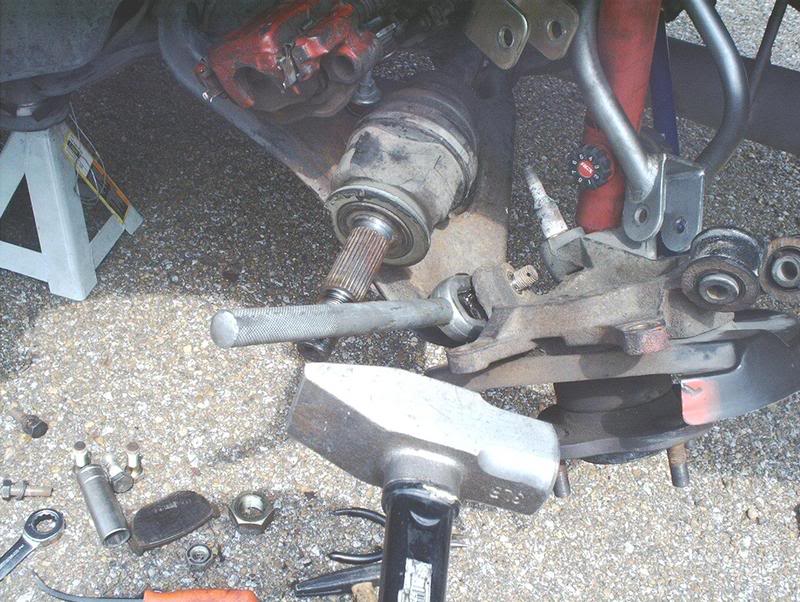
Insert the tool between the spindle and the ball joint and use a hammer to hit the end of the tool to pop it out.
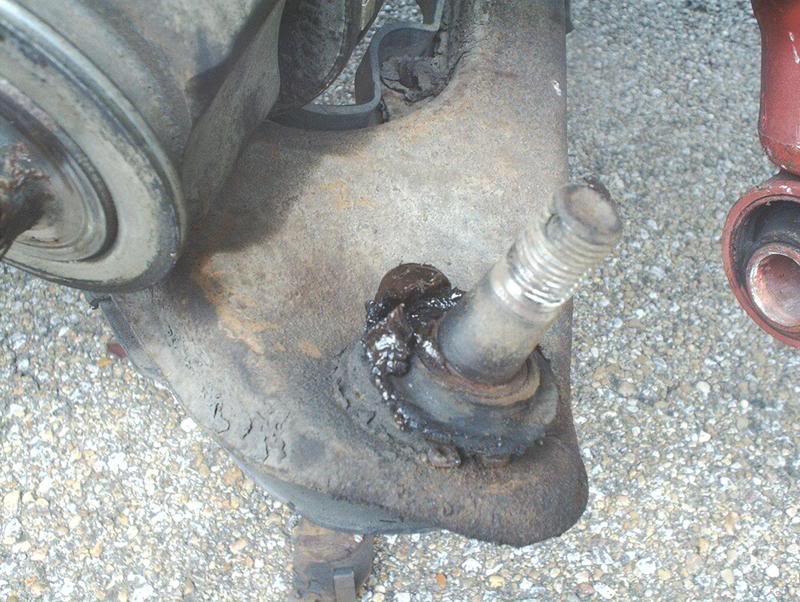
My next project needs to be a new set of RLCA's because these ball joints are shot...pudding anyone?
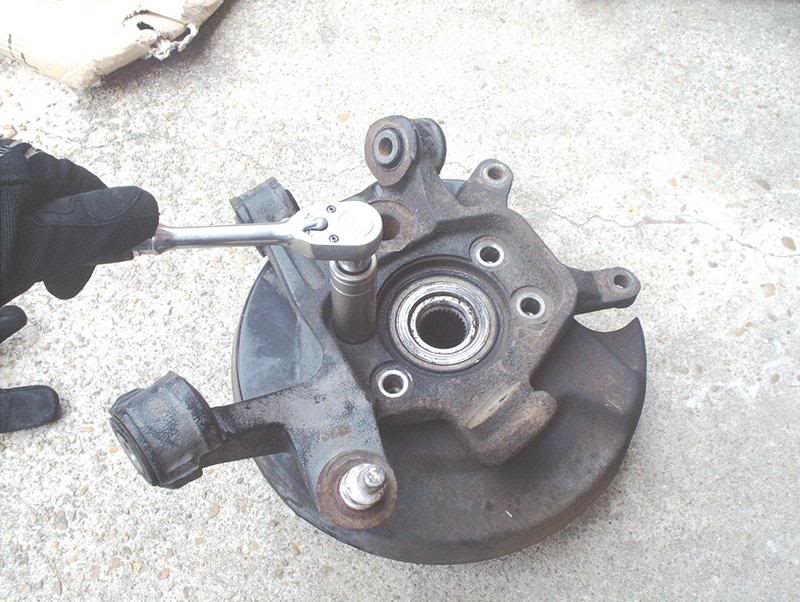
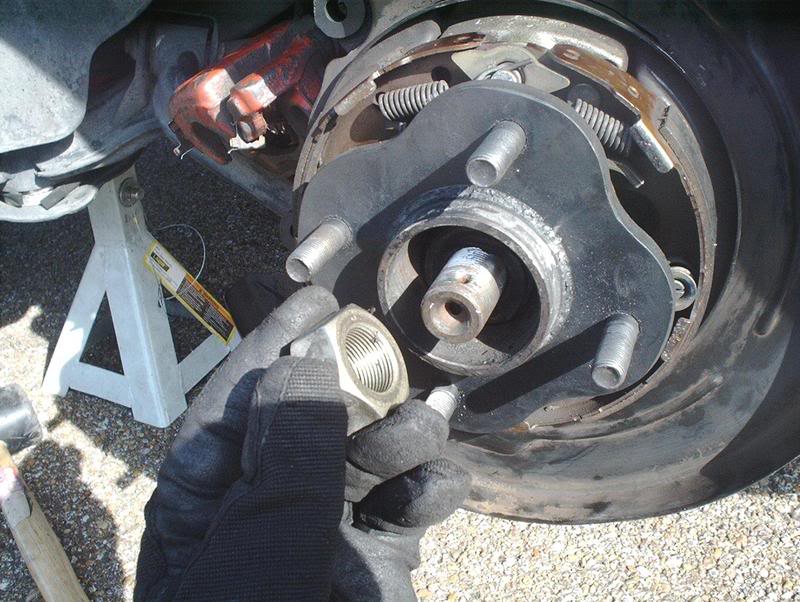
Now that you have the spindle off you can remove the hub bolts.
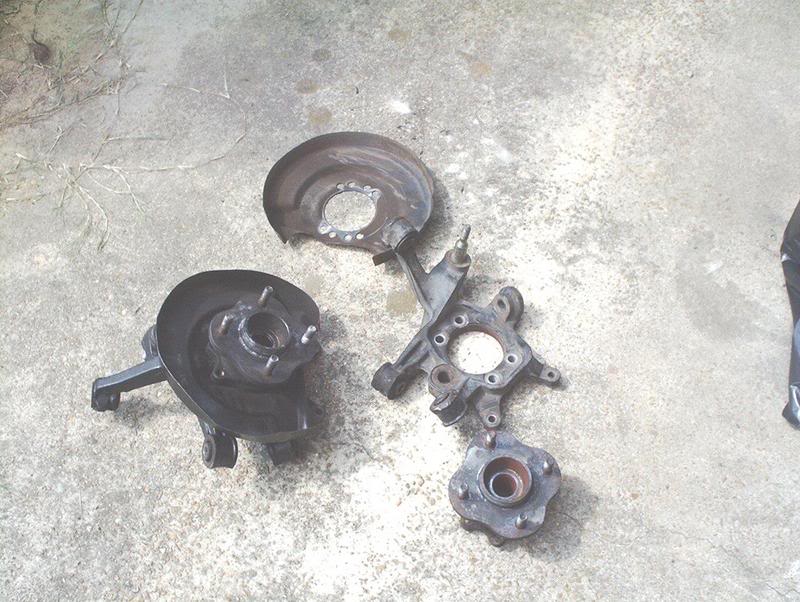
Ran into a little problem here, when you take the hub bolts out the one part separates into three parts, the spindle, the hub and the dust shield. My drivers side spindle was seized apparently by the heat that was generated over a period of time and it would not come apart. I took it to a friend at a dealership and he pressed the hub out of the spindle for me. The passenger side spindle fell apart the second I removed the last bolt.
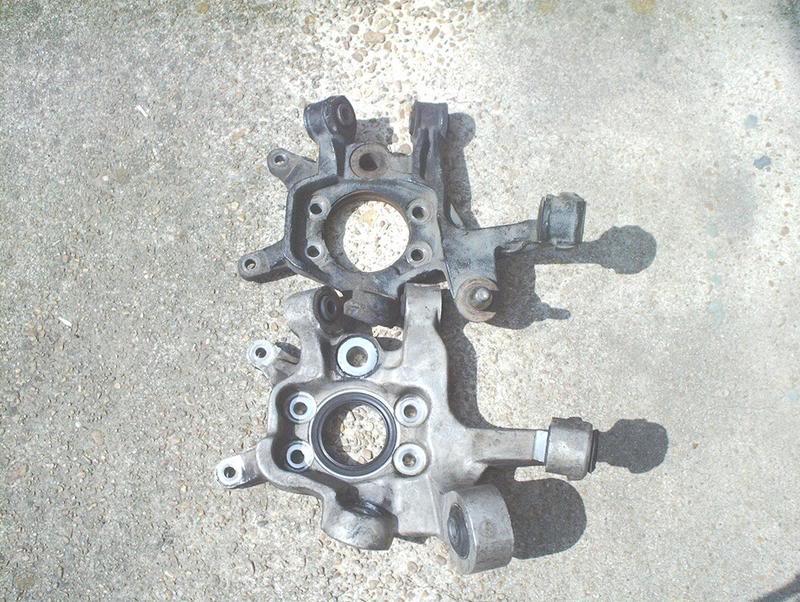
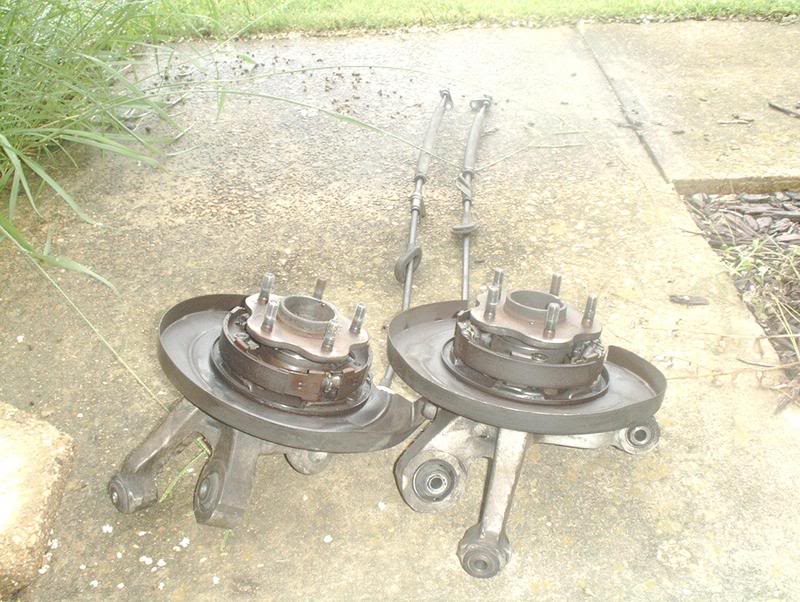
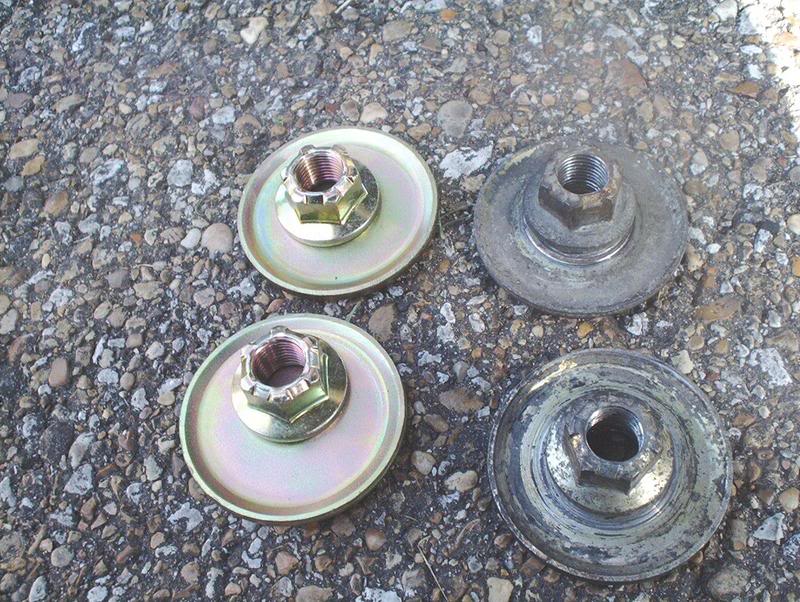
Here's the comparison between the 240SX spindle(top) and the Z32 spindle(bottom). The 240SX spindle is iron where the Z32 is aluminum. I would have liked to use the Z32 which is 7lbs. lighter but I would have had to get coilovers or Z32 shocks/struts because as you can see the only thing different is where the strut to spindle mounts are. They are completely different.
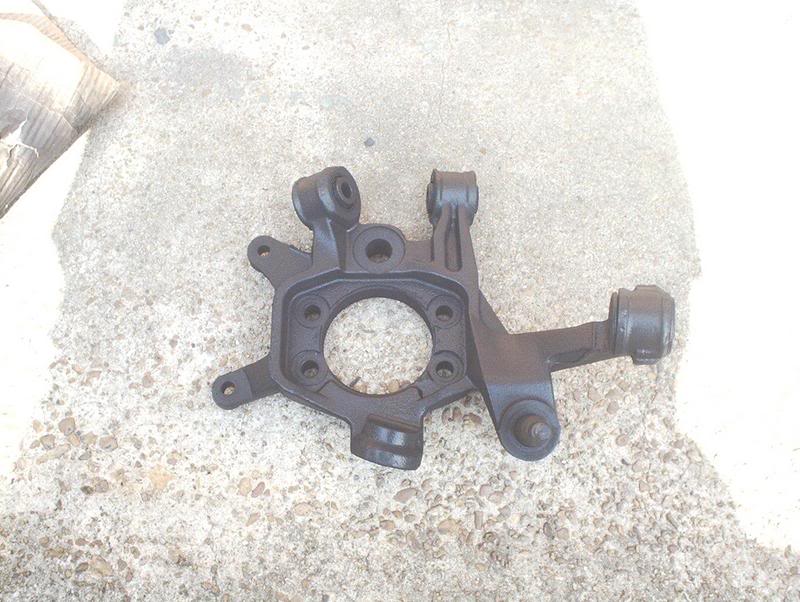
While I had my spindles off, I gave them a fresh coat of black.
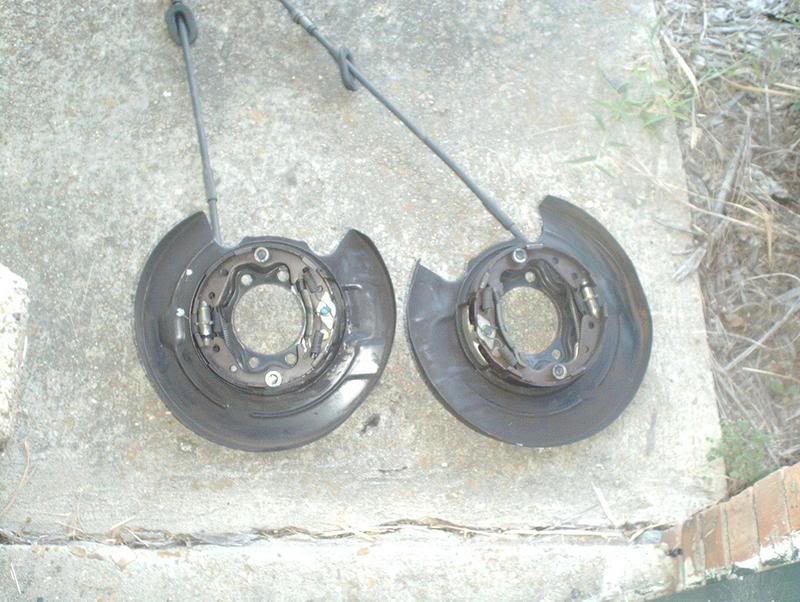
The Z32 ebrake assemblies bolt up to the 240SX spindles by way of the hub bolts and this hole above the hub bolt holes on the spindle. These holes were crusted so I had to dremel them out.
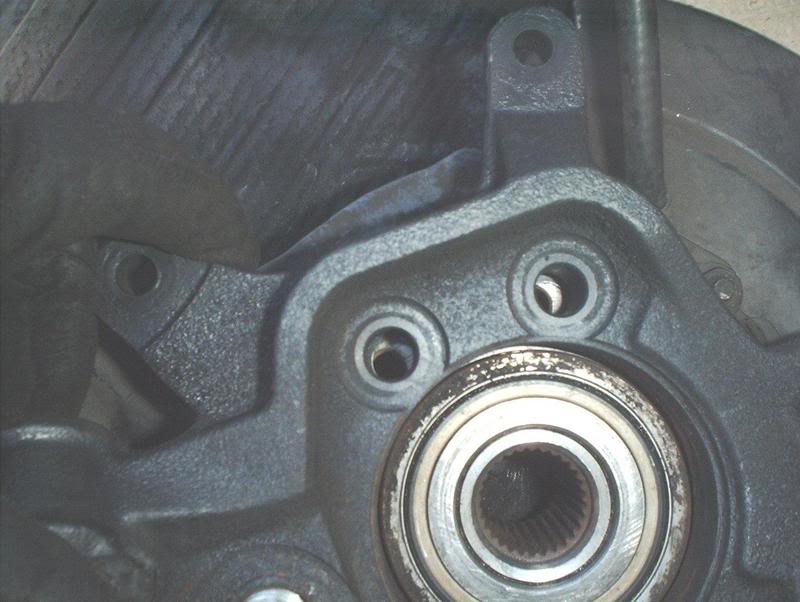
Take three parts, hub, spindle and dust shield assembly and assemble them. Make sure you have the hub bolt holes aligned properly so you can reinsert the bolts properly.
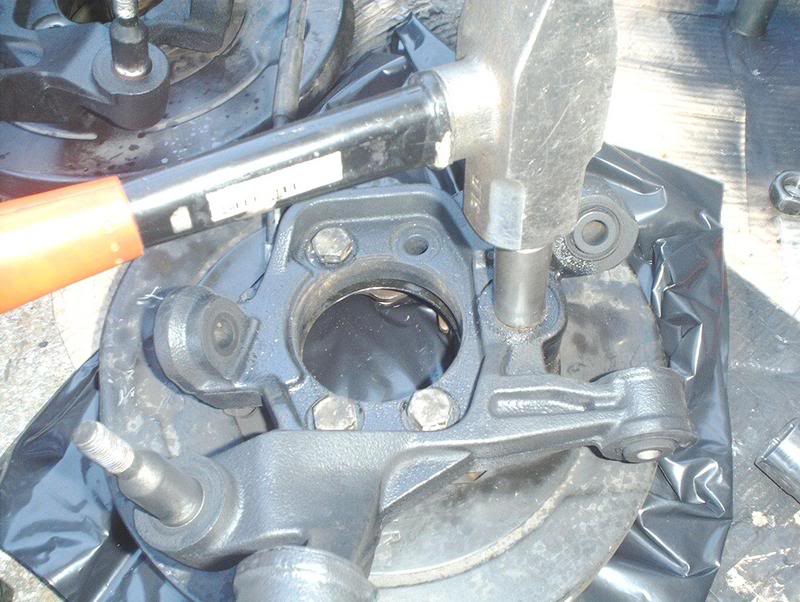
Even after dremmeling out the hole for the dust shield, the mount that goes into the hole did not want to go so I took a note from a friend and used a old socket as a press and hammered down the spindle onto the mounting point. Once you get it started you may want to insert the hub bolts to keep it lined up. Once you get the spindle completely knocked down, use a 27mm socket for the nut that secures the ebrake assembly to the spindle.
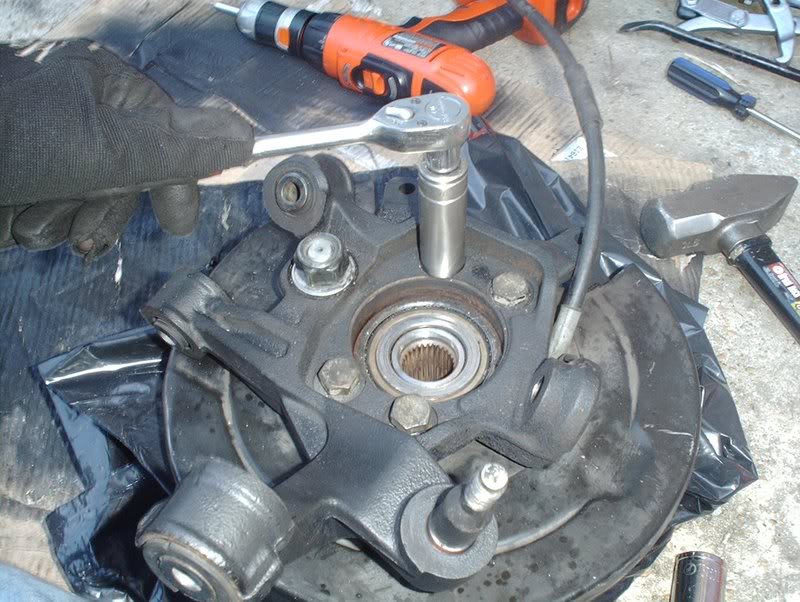
Torque the hub bolts to 57-72ft. lbs.

The spindles are complete and need to be put back on the car.
Lay the ebrake lines across the subframe.
Place the spindle back on the ball joint, torque the nut to 52-64ft. lbs and reinstall a new cotter pin.
Put the axle back into the spindle.

I decided to replace my old suspension arm bolts...
and strut to spindle spacers/bolts.
Reinstall your suspension arms. Torque the traction links, rear upper control arms and toe rods to 57-72ft. lbs.
Torque the strut to spindle nut to 72-87ft. lbs.
Put the axle spacer back then the axle nut.
You won't be able to tighten the axle nut until you secure the Z32 ebrake lines.

Tools needed:
Jack
Jackstands
Socket wrench
Socket kit
36mm socket
27mm socket
22mm socket
19mm socket
17mm socket
10mm socket
Wrenches/10mm line wrench(for the brake hardlines)
Hammer
Screwdrivers
Needle nose pliers
Brake fluid
Drain pan
Z32 rear calipers.
240SX to Z32 stainless steel rear conversion brake lines from ProjectNissan.
Z32 ebrake extension kit from SuperautoBacs.
Z32 spindles and hub assembly...
I'm staying four lug so I only really needed the dust shield/ebrake assemblies and not the 5lug hubs or the aluminum spindles.
Z32 Brembro rotors redrilled to 4lug from Heavythrottle.
To do this brake upgrade and stay 4lug you'll need to remove the spindles, rotors, calipers and brake lines both normal and ebrake, that is if you want to keep your ebrake.
First you jack the car up and place jackstands in the appropriate places.
You'll need the ebrake engaged in order to bust the axle nuts loose so that's where you should start. Don't be like me, disconnect an ebrake line first not realizing that the wheels will spin without them and waste valuable time putting them back on....estupido!!! Remove the axle cotter pin and adjustment cap.
Use a breaker bar and the massive 36mm socket to bust the axle nut loose. You'll hear a loud screeching when it busts. Now that the axle nuts are loose you need to get to the spindles.
Remove the top and bottom caliper bolts with a 17mm socket.
You may have to wriggle it a little but the caliper comes off the rotor.
You need to use something to suspend it and keep it out of your way.
Go ahead and remove the axle nut that you bust earlier.
The rear rotors are slip fit so just pull them off unless yours are rusted to the hub.
Remove the axle spacer.
Your're almost to the spindles, now you need to disconnect the rear suspension arms from the spindle next.
The traction link(18mm socket/ 3/4 wrench).
The rear upper control arm(18mm socket/ 3/4 wrench).
The toe rod(18mm socket/ 3/4 wrench)....
...and the strut to spindle nut(17mm socket).
You may need a pry bar to persuade some of the arms off of the spindle.
All arms removed.
Use a rubber mallet to knock the axles out of the spindle. I only had to use the mallet on the passenger side, I pushed the axle out with my fingers on the drivers side.
If it doesn't want to budge then use something to hold against the tip of the axle so you can "hammer and chisel" it out.
Axle out.
Push the axle to the side and you have access to the rear lower control arm nut.
Use a pair of needle nose pliers to remove the cotter pin.
If you're a poor man like me and don't have access to a impact gun then you need bust the hub bolts loose while the spindle is still attached to the RLCA...you'll need the leverage to do so. There are four hub bolts that need to come off with a 19mm socket.
Use a 22mm socket to bust the RLCA ball joint nut loose.
Use a ball joint tool to pop the ball joint loose from the spindle.
Insert the tool between the spindle and the ball joint and use a hammer to hit the end of the tool to pop it out.
My next project needs to be a new set of RLCA's because these ball joints are shot...pudding anyone?
Now that you have the spindle off you can remove the hub bolts.
Ran into a little problem here, when you take the hub bolts out the one part separates into three parts, the spindle, the hub and the dust shield. My drivers side spindle was seized apparently by the heat that was generated over a period of time and it would not come apart. I took it to a friend at a dealership and he pressed the hub out of the spindle for me. The passenger side spindle fell apart the second I removed the last bolt.
Here's the comparison between the 240SX spindle(top) and the Z32 spindle(bottom). The 240SX spindle is iron where the Z32 is aluminum. I would have liked to use the Z32 which is 7lbs. lighter but I would have had to get coilovers or Z32 shocks/struts because as you can see the only thing different is where the strut to spindle mounts are. They are completely different.
While I had my spindles off, I gave them a fresh coat of black.
The Z32 ebrake assemblies bolt up to the 240SX spindles by way of the hub bolts and this hole above the hub bolt holes on the spindle. These holes were crusted so I had to dremel them out.
Take three parts, hub, spindle and dust shield assembly and assemble them. Make sure you have the hub bolt holes aligned properly so you can reinsert the bolts properly.
Even after dremmeling out the hole for the dust shield, the mount that goes into the hole did not want to go so I took a note from a friend and used a old socket as a press and hammered down the spindle onto the mounting point. Once you get it started you may want to insert the hub bolts to keep it lined up. Once you get the spindle completely knocked down, use a 27mm socket for the nut that secures the ebrake assembly to the spindle.
Torque the hub bolts to 57-72ft. lbs.
The spindles are complete and need to be put back on the car.
Lay the ebrake lines across the subframe.
Place the spindle back on the ball joint, torque the nut to 52-64ft. lbs and reinstall a new cotter pin.
Put the axle back into the spindle.
I decided to replace my old suspension arm bolts...
and strut to spindle spacers/bolts.
Reinstall your suspension arms. Torque the traction links, rear upper control arms and toe rods to 57-72ft. lbs.
Torque the strut to spindle nut to 72-87ft. lbs.
Put the axle spacer back then the axle nut.
You won't be able to tighten the axle nut until you secure the Z32 ebrake lines.
Last edited by positron; 10-31-2007 at 08:04 AM.
 09-09-2007, 01:09 AM
#2
Contributing Member
Thread Starter
Join Date: Sep 2002
Location: Starkville, MS.
Posts: 1,192
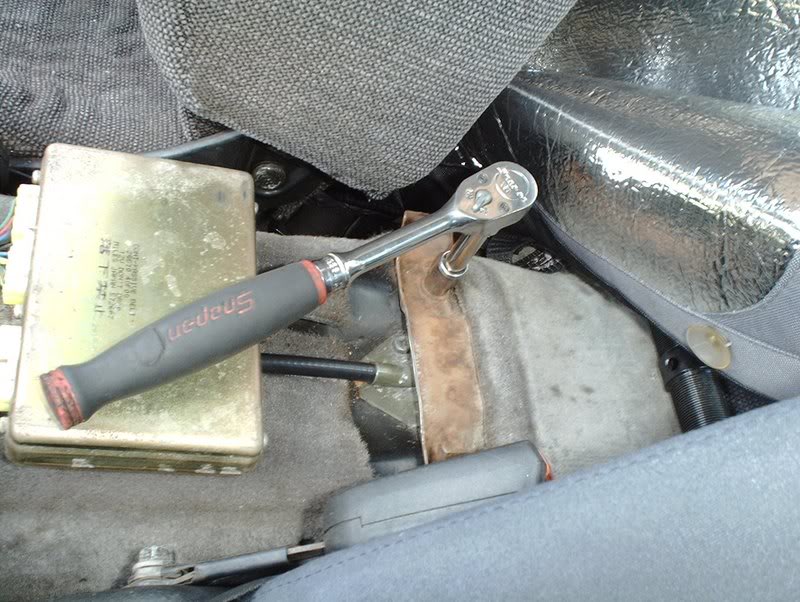
Remove your center console and the ebrake boot and use a 10mm wrench to loosen the tension on the ebrake lines so that you can remove them.
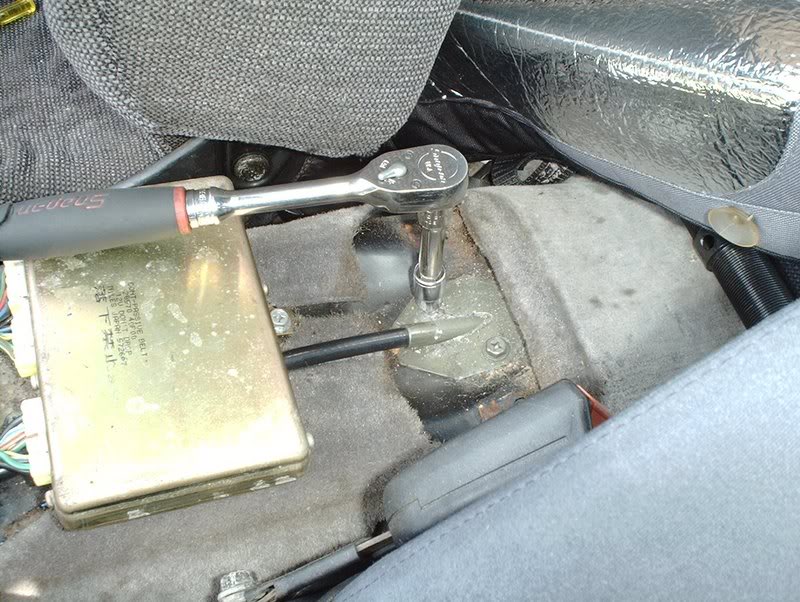
The 240SX lines can be taken out by removing the screws from the mounts here in the driveshaft tunnel.
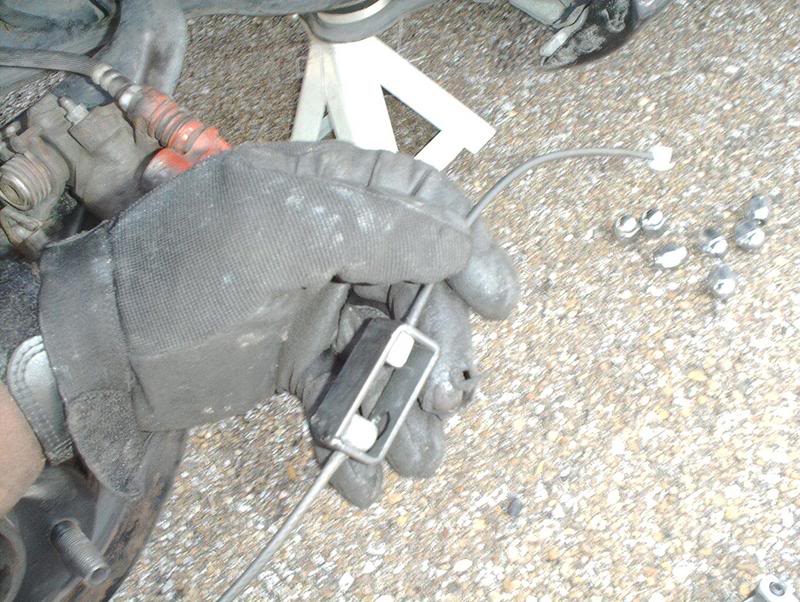
To remove the lines from the T-bracket, turn the lines to the side of the bracket where there is an opening and use a screwdriver to pop the cylinder out by pressing from the bottom.
Done!
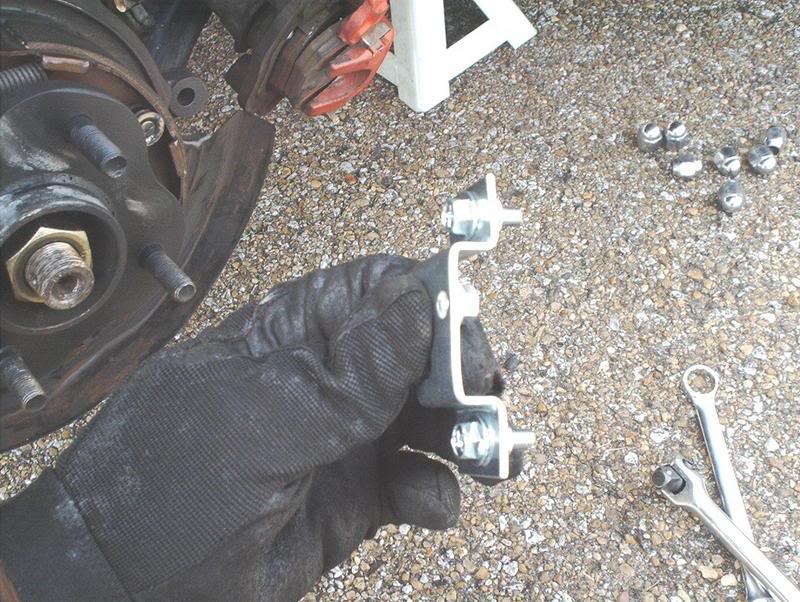
Use a 10mm wrench to remove the ebrake mounts from the subframe.
You can pull the 240SX ebrake out and done!
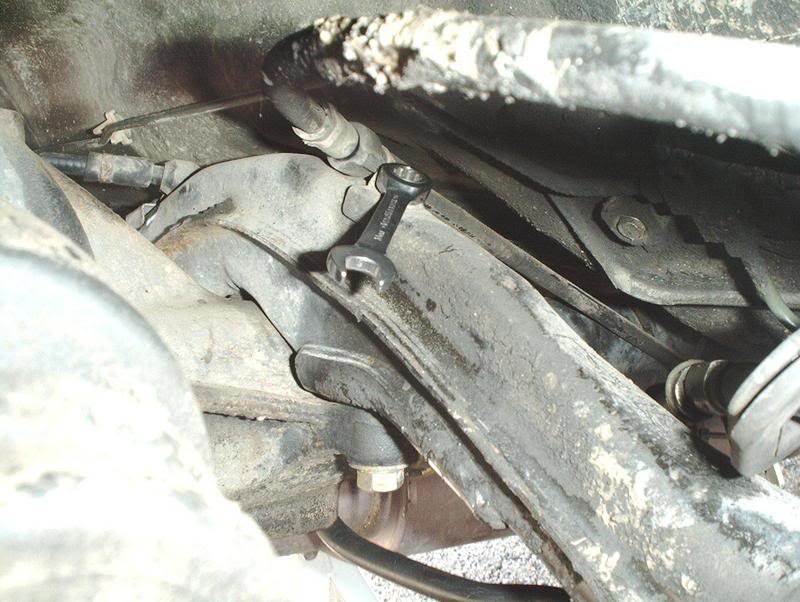
When you install the Z32 ebrake cables there are two stock mounting points on the rear subframe that you can use to bolt them to if you wish.
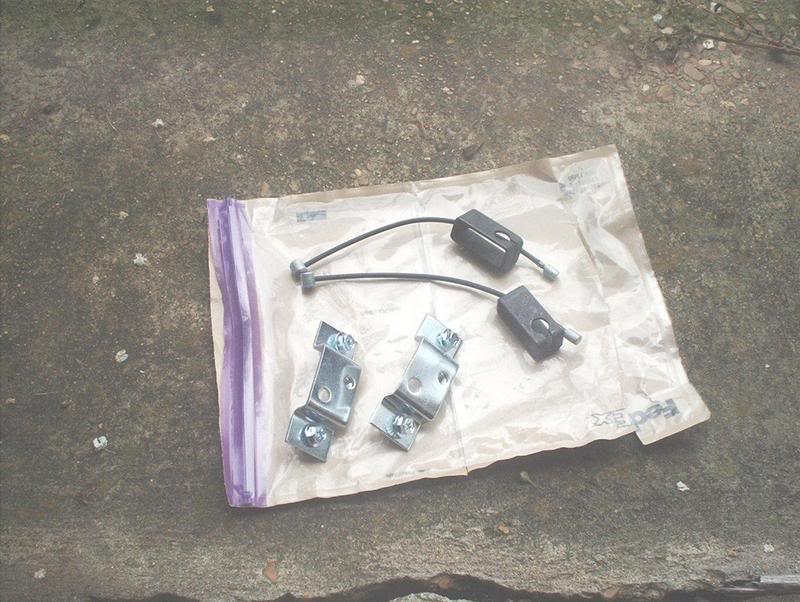
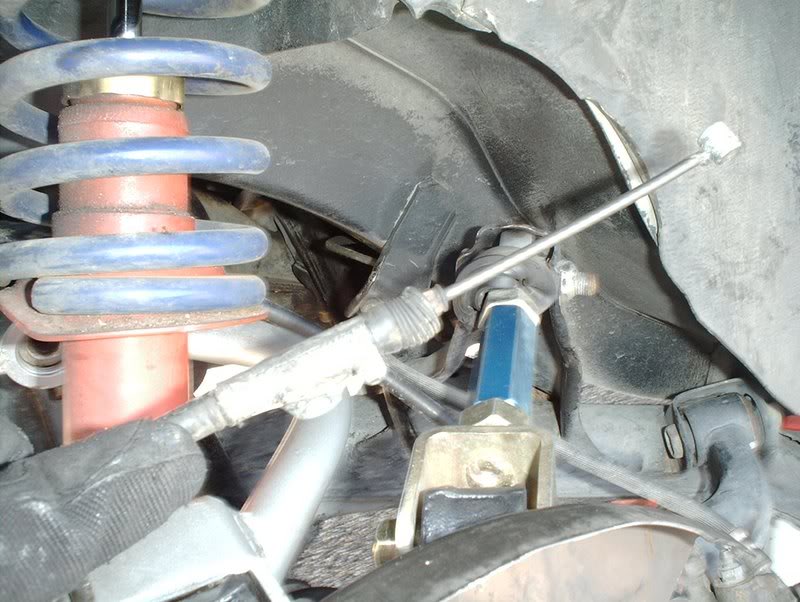
If the lines that you have need to be extended in order to reach the T-bracket then take the ebrake extension kit...
and connect the lines.
Run the lines across or thru the subframe.

Insert them both into the T-bracket.
You'll need to secure the cables onto the floorboard in order to get them to function correctly.
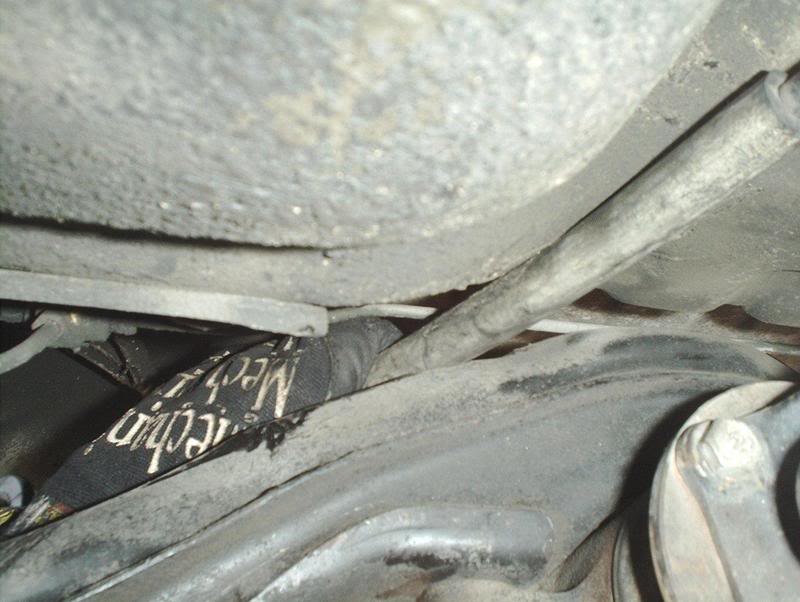
These brackets came with the ebrake extension kit for mounting the cables but I used these to mount the cables to the subframe...
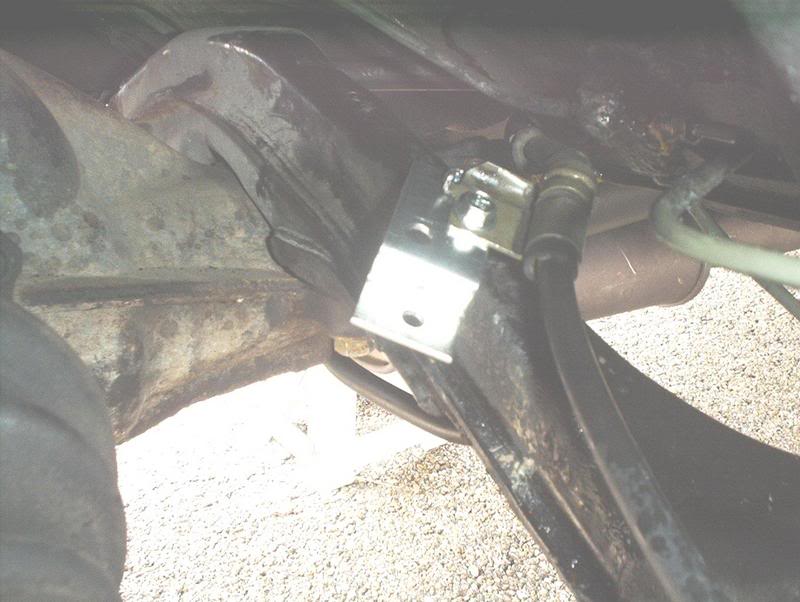
You can see them if you look closely.
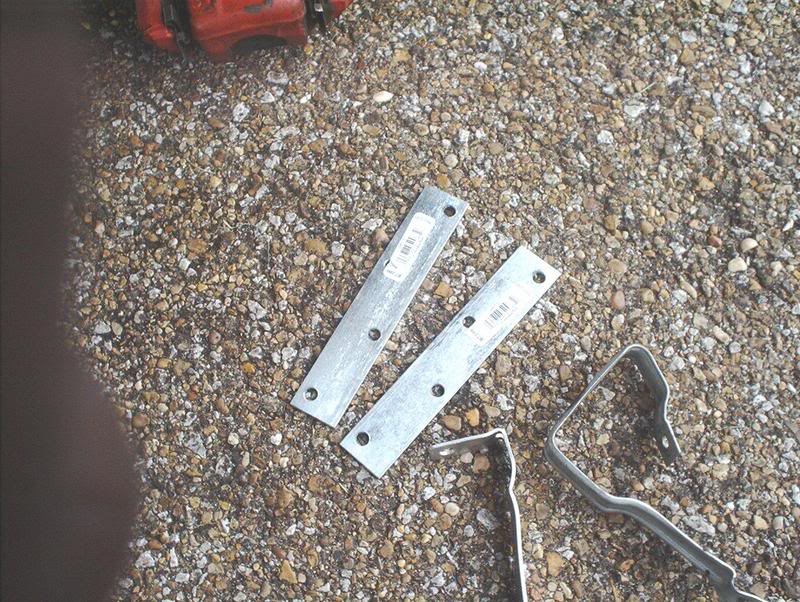
I used some metal brackets that I got from Lowes to secure the ends of the ebrake cables to the floorboard. I bent them into a L formation, bolted the lines on and was able to bolt the brackets to the same stock location that the 240SX lines were bolted to.
Now that your ebrake functions, you can install the rotors, calipers and torque down the axle bolts.
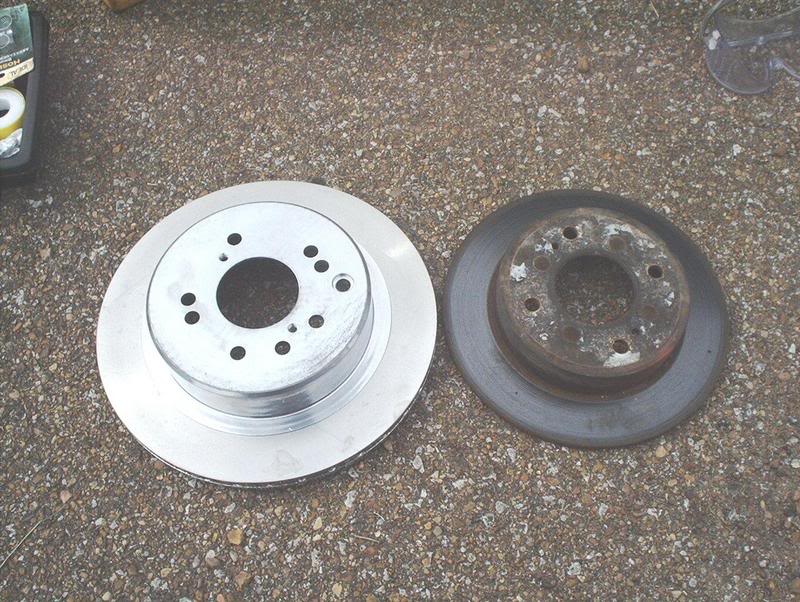
Z32 vs. 240SX rotors.

You won't be able to remove the 240SX calipers until you take the 240SX regular brake lines off the car.
Place the Z32 rotor on the hub.
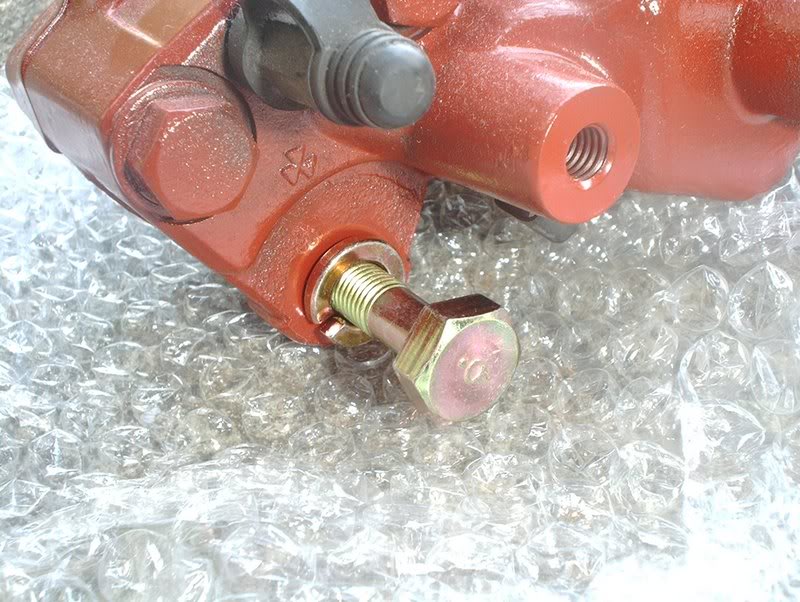
Decided to replace my old caliper bolts with new bolts also.
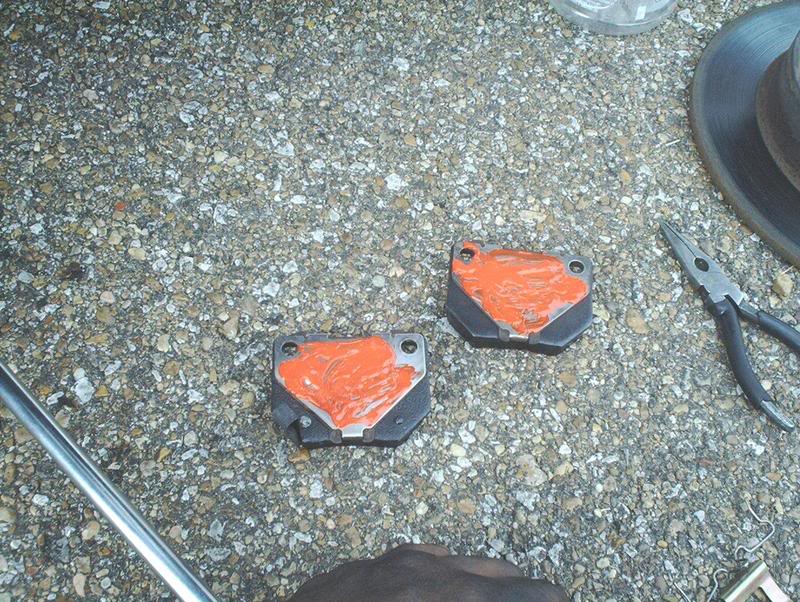
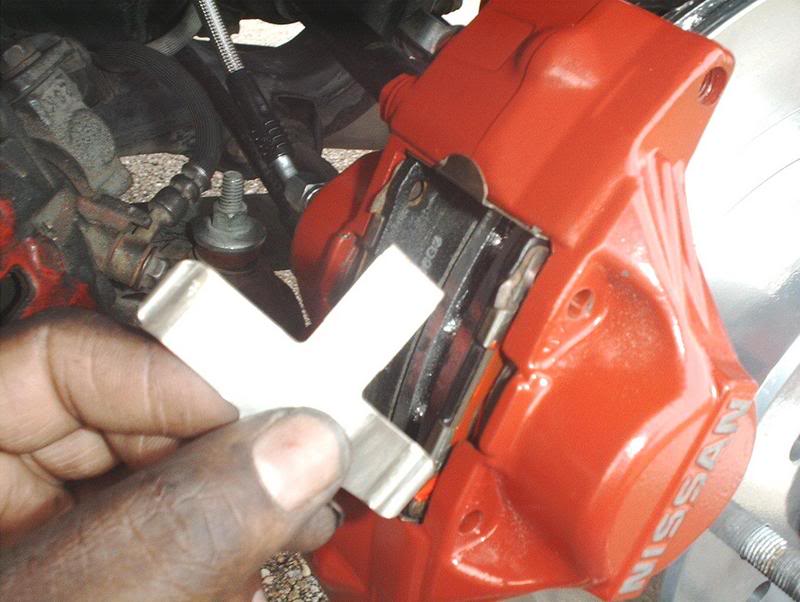
Apply brake quiet to your pads and insert the pad with the mounting tab into the caliper before you bolt the caliper to the spindle. I tried but you can't install the pad with the tab on it unless the caliper is off the car.
Use a 17mm socket to reinstall the caliper bolts and torque to 28-38ft. lbs.
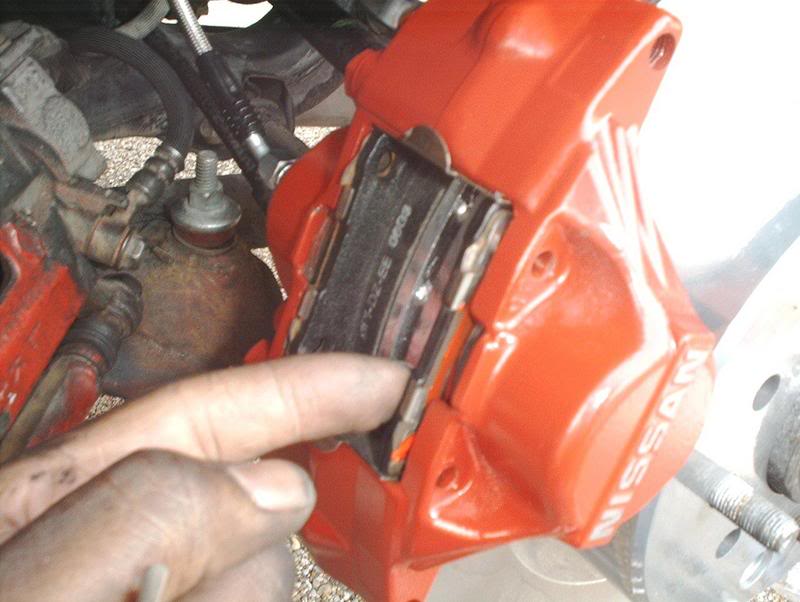
Now you can insert the other pad from the top of the caliper.
Pad retainer.
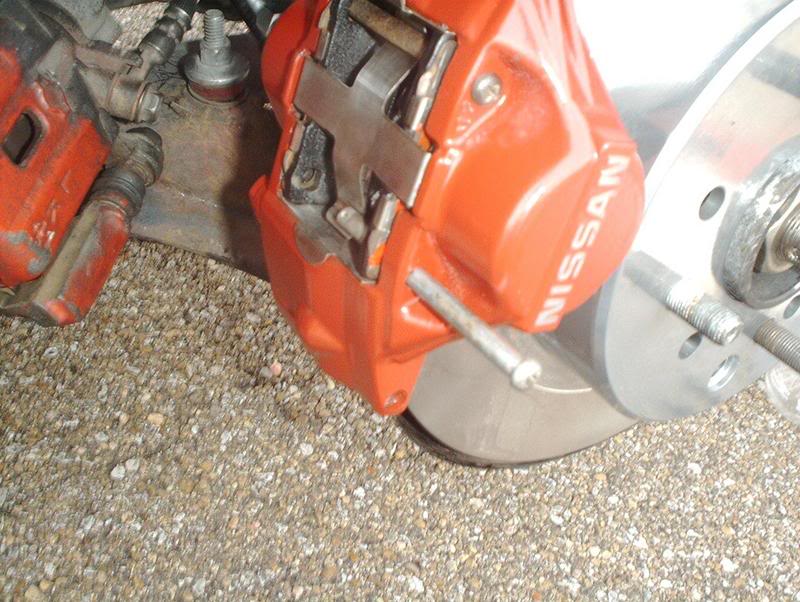
Bolts.
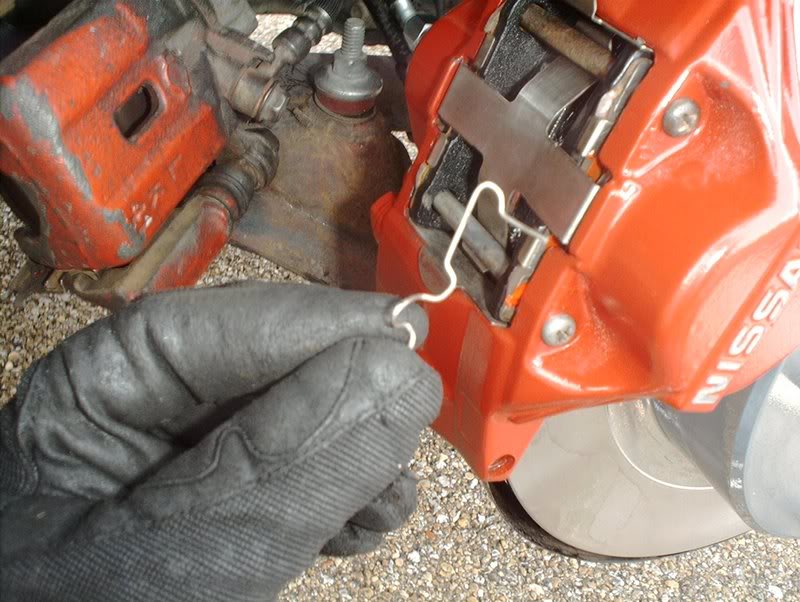
Spring retainer.
Done with the caliper install.
Now on to the brake lines.
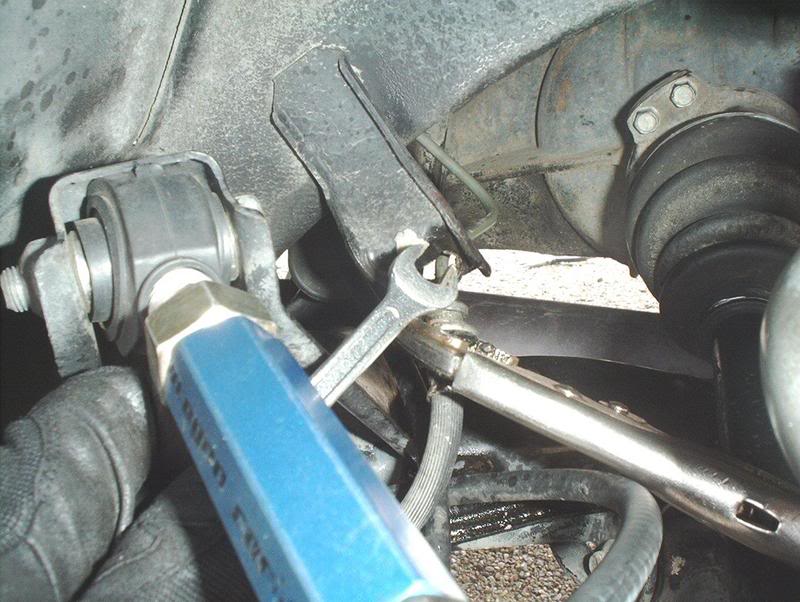
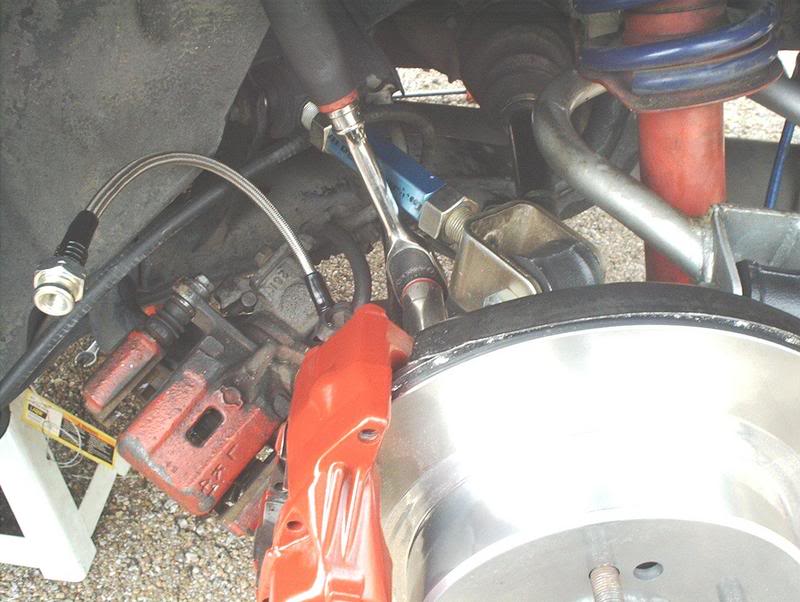
After removing the brake hose clip, use a 10mm wrench(preferably a line wrench) to remove the brake hose hard line fittings...
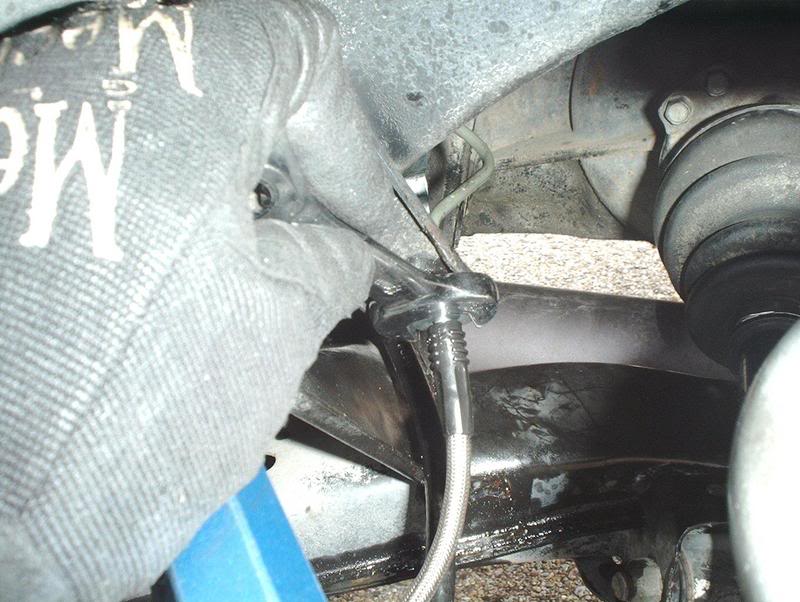
and replace with the stainless steel line...
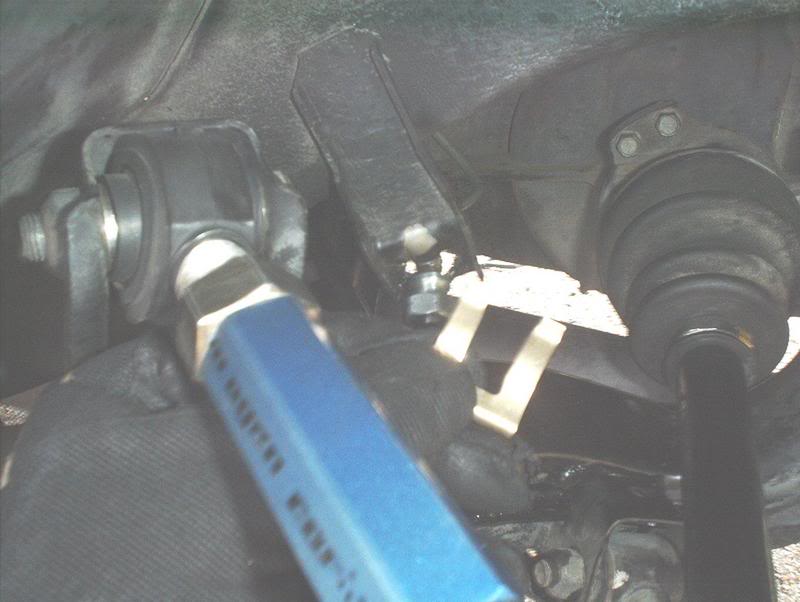
and clip it down. The stainless steel line uses a 19mm wrench. Keep the 10mm wrench on the hardline to hold it steady while you turn the fitting on the new line. The hardlines anywhere on a car can be a pain to get off without rounding them off so I hit it with PB Blaster and after letting it sit, I would turn and wipe in order to get the PB risidue off the hardline to keep it from getting in with the brake fluid.
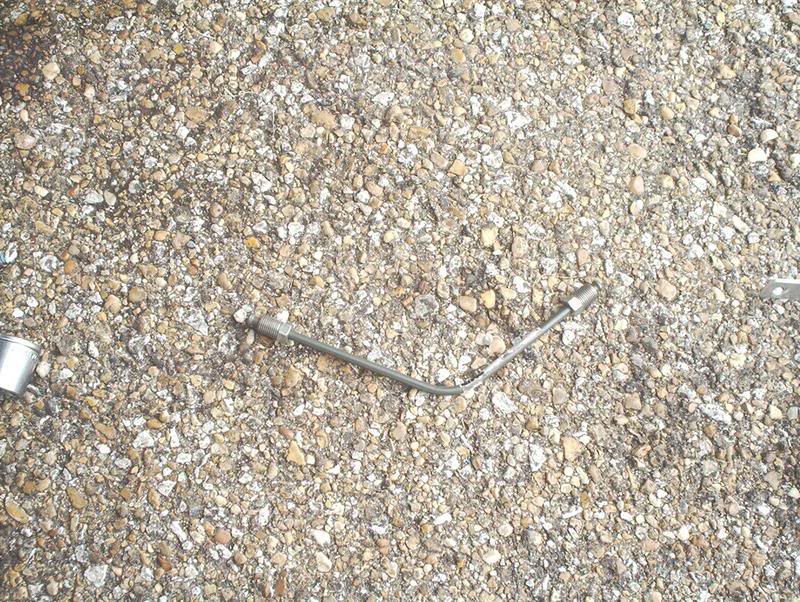
During this procedure I busted one of my brake hardlines from the chassis to the brake hose so I removed it, went to Autozone and had another hardline cut and bent to replace it with. You'll need to bleed the brakes later.
Reinstall the adjuster cap and the cotter pin to the axle after you torque the axle nut to 151-201ft. lbs.
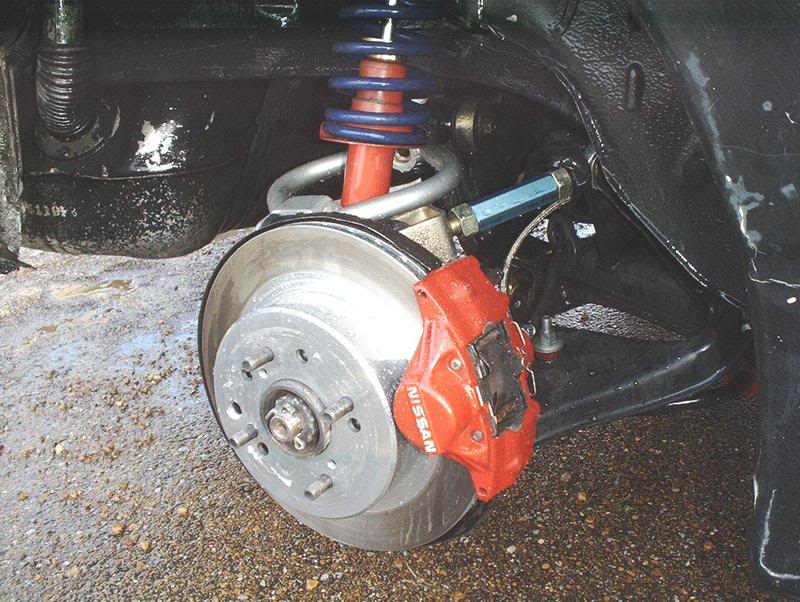
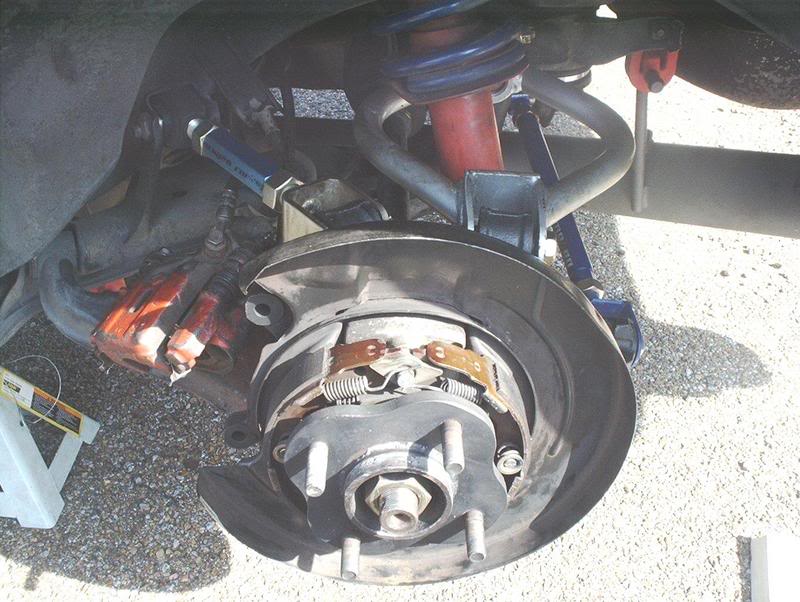
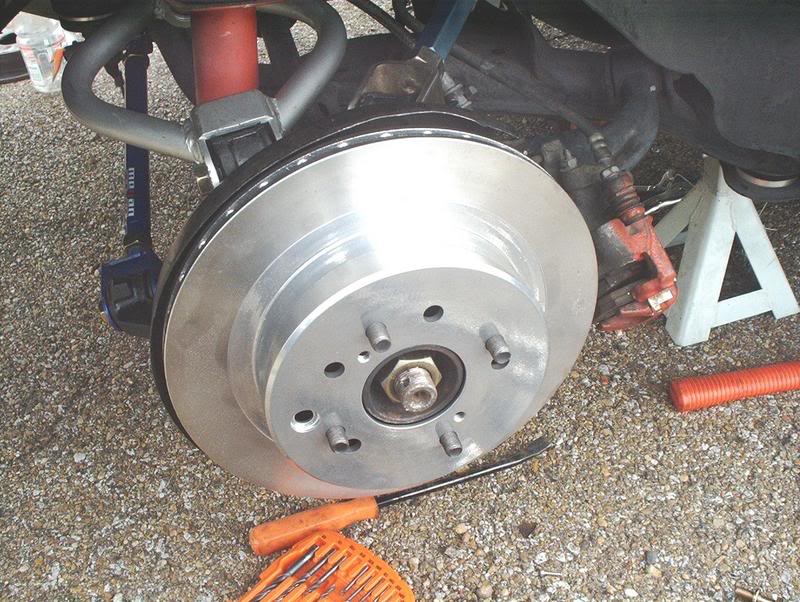
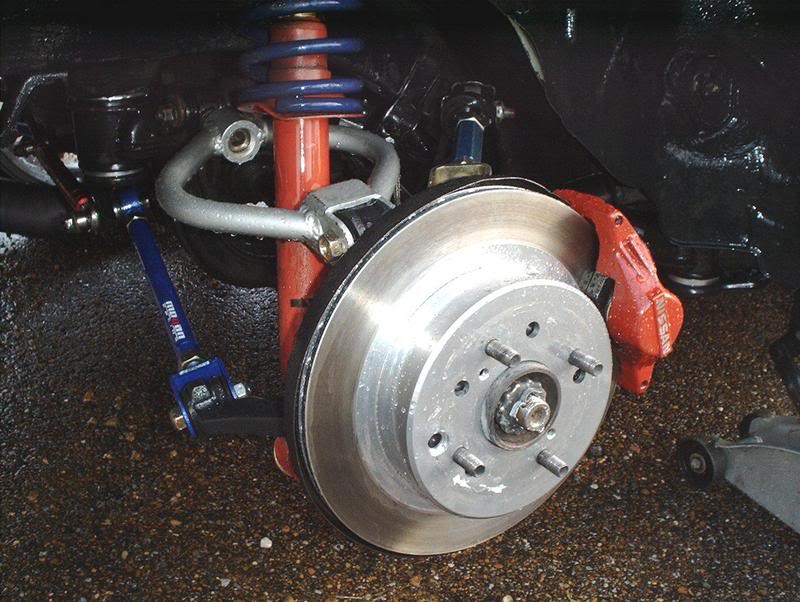
Z32 rear setup...
Finished!
As far as using wheels goes, I found out that the stock S13 alloy wheels could possibly be used with the brake upgrade. Apparently there were three types of Z32 calipers, 26mm aluminum, 30mm aluminum and 30mm iron.
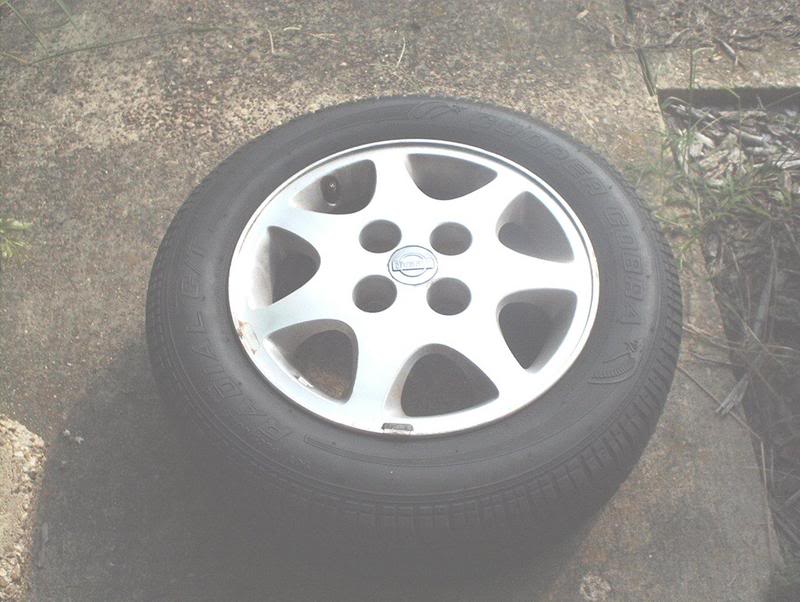
There were also two types of S13 stock alloy wheels that looked the same but were different on the backside....
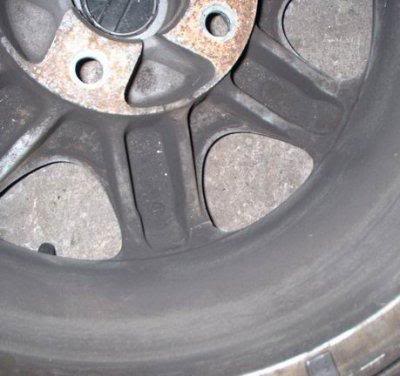
This type with the grooves in them...
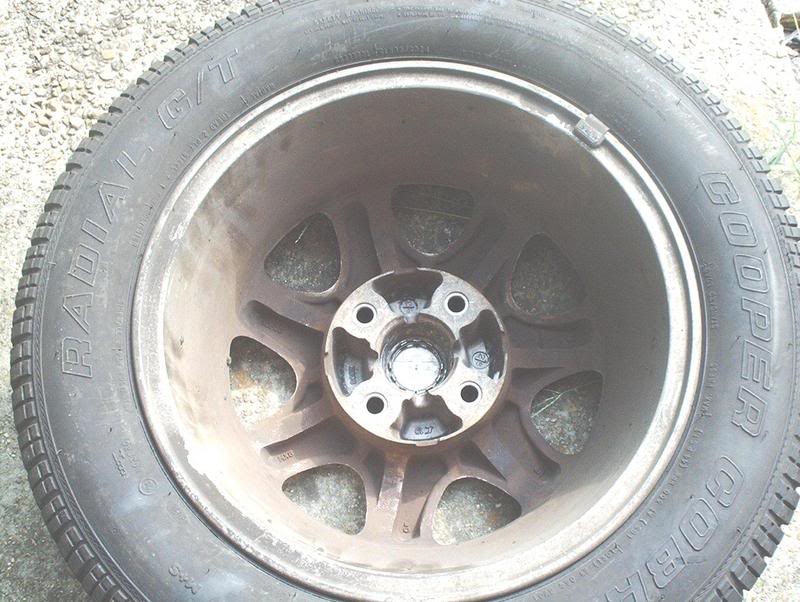
and this type without the grooves. You can use the 26mm aluminum calipers with the stock alloys without the grooves in them.
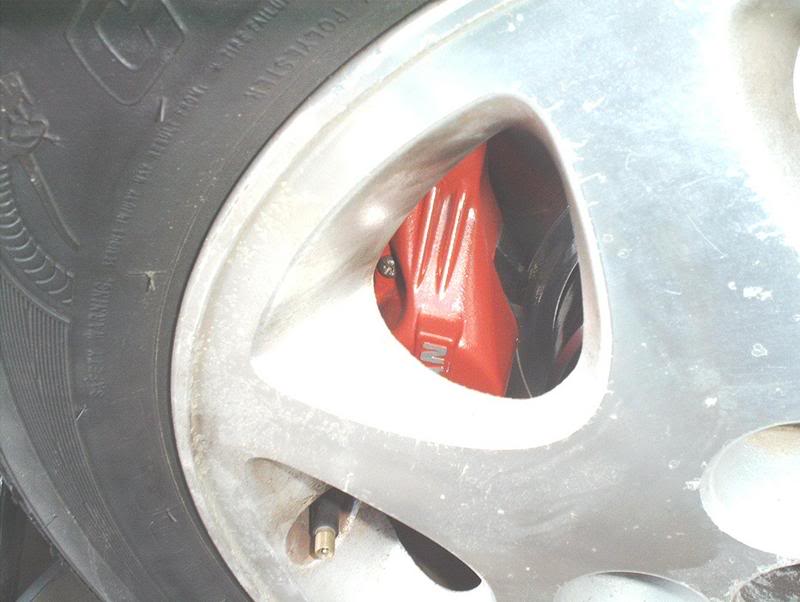
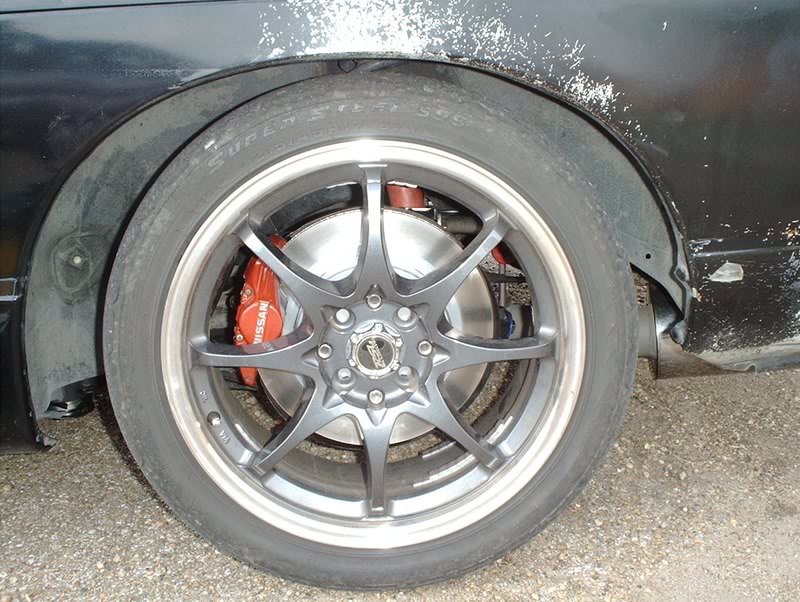
I was able to mount these wheels on the car with the 26mm calipers and spin the wheel without any contact between the caliper and wheel...
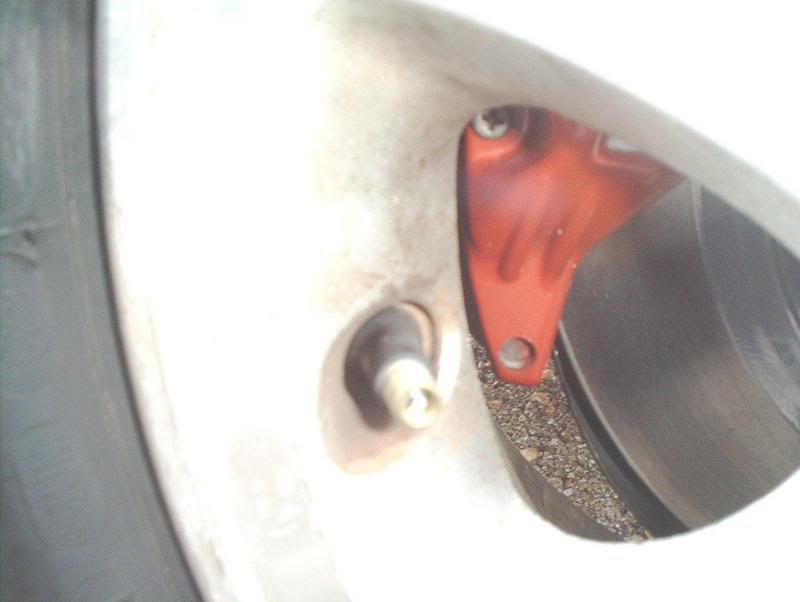
but there was absolutely very little space in between the two...but it is possible.
The 240SX lines can be taken out by removing the screws from the mounts here in the driveshaft tunnel.
To remove the lines from the T-bracket, turn the lines to the side of the bracket where there is an opening and use a screwdriver to pop the cylinder out by pressing from the bottom.
Done!
Use a 10mm wrench to remove the ebrake mounts from the subframe.
You can pull the 240SX ebrake out and done!
When you install the Z32 ebrake cables there are two stock mounting points on the rear subframe that you can use to bolt them to if you wish.
If the lines that you have need to be extended in order to reach the T-bracket then take the ebrake extension kit...
and connect the lines.
Run the lines across or thru the subframe.
Insert them both into the T-bracket.
You'll need to secure the cables onto the floorboard in order to get them to function correctly.
These brackets came with the ebrake extension kit for mounting the cables but I used these to mount the cables to the subframe...
You can see them if you look closely.
I used some metal brackets that I got from Lowes to secure the ends of the ebrake cables to the floorboard. I bent them into a L formation, bolted the lines on and was able to bolt the brackets to the same stock location that the 240SX lines were bolted to.
Now that your ebrake functions, you can install the rotors, calipers and torque down the axle bolts.
Z32 vs. 240SX rotors.
You won't be able to remove the 240SX calipers until you take the 240SX regular brake lines off the car.
Place the Z32 rotor on the hub.
Decided to replace my old caliper bolts with new bolts also.
Apply brake quiet to your pads and insert the pad with the mounting tab into the caliper before you bolt the caliper to the spindle. I tried but you can't install the pad with the tab on it unless the caliper is off the car.
Use a 17mm socket to reinstall the caliper bolts and torque to 28-38ft. lbs.
Now you can insert the other pad from the top of the caliper.
Pad retainer.
Bolts.
Spring retainer.
Done with the caliper install.
Now on to the brake lines.
After removing the brake hose clip, use a 10mm wrench(preferably a line wrench) to remove the brake hose hard line fittings...
and replace with the stainless steel line...
and clip it down. The stainless steel line uses a 19mm wrench. Keep the 10mm wrench on the hardline to hold it steady while you turn the fitting on the new line. The hardlines anywhere on a car can be a pain to get off without rounding them off so I hit it with PB Blaster and after letting it sit, I would turn and wipe in order to get the PB risidue off the hardline to keep it from getting in with the brake fluid.
During this procedure I busted one of my brake hardlines from the chassis to the brake hose so I removed it, went to Autozone and had another hardline cut and bent to replace it with. You'll need to bleed the brakes later.
Reinstall the adjuster cap and the cotter pin to the axle after you torque the axle nut to 151-201ft. lbs.
Z32 rear setup...
Finished!
As far as using wheels goes, I found out that the stock S13 alloy wheels could possibly be used with the brake upgrade. Apparently there were three types of Z32 calipers, 26mm aluminum, 30mm aluminum and 30mm iron.
There were also two types of S13 stock alloy wheels that looked the same but were different on the backside....
This type with the grooves in them...
and this type without the grooves. You can use the 26mm aluminum calipers with the stock alloys without the grooves in them.
I was able to mount these wheels on the car with the 26mm calipers and spin the wheel without any contact between the caliper and wheel...
but there was absolutely very little space in between the two...but it is possible.
Last edited by positron; 09-14-2007 at 02:51 PM.
09-09-2007, 01:10 PM
#4
Good write-up man.
I can see we are very alike, buying little things like new bolts and what not so everything is 'fresh' and not half-assed style
No Hammer of Thor pix?
Good Write-Up dude. I will be using this for reference in the near future.
I can see we are very alike, buying little things like new bolts and what not so everything is 'fresh' and not half-assed style
No Hammer of Thor pix?
Good Write-Up dude. I will be using this for reference in the near future.

 09-14-2007, 10:11 AM
#7
Contributing Member
Thread Starter
Join Date: Sep 2002
Location: Starkville, MS.
Posts: 1,192
From what I've researched, you can use the Z32 coilovers and struts/shocks but there is a small stock spacer that you will need to close a gap for where the 240SX RLCA's bolt up.
10-03-2007, 02:39 PM
#8
Contributing Member
Thread Starter
Join Date: Sep 2002
Location: Starkville, MS.
Posts: 1,192
Update!!!
I messed up the adjustment nut on my ebrake handle when I first did this conversion so I've been riding around with barely an ebrake because I could not adjust it. I bought another handle from a forum guy, got it yesterday and installed it today. I also reinstalled my Z32 ebrake cables and this time I did so without the use of the ebrake extensions.
Tools needed:
10mm socket
12mm socket
Phillipshead screwdriver
Prybar
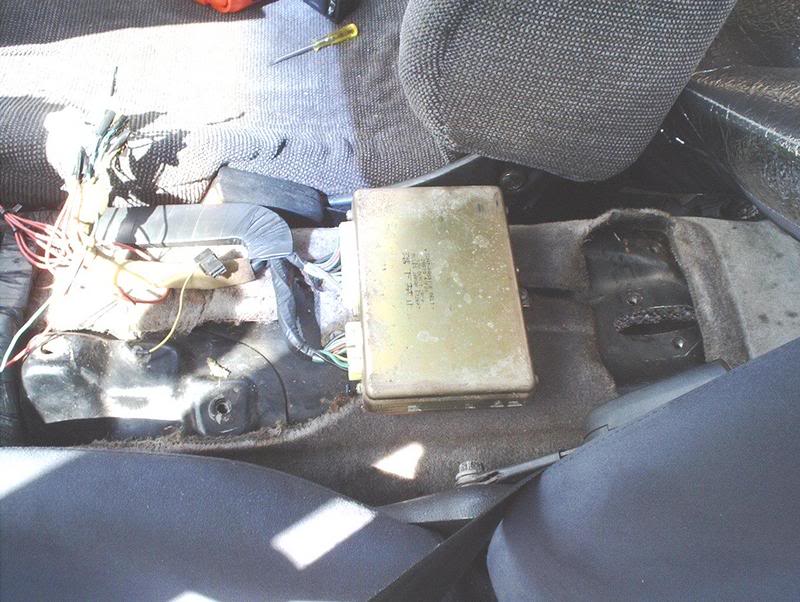
After removing the console, use a 10mm socket to remove the console bracket.
Take the console bracket off and use a 10mm socket to get the ebrake line off.
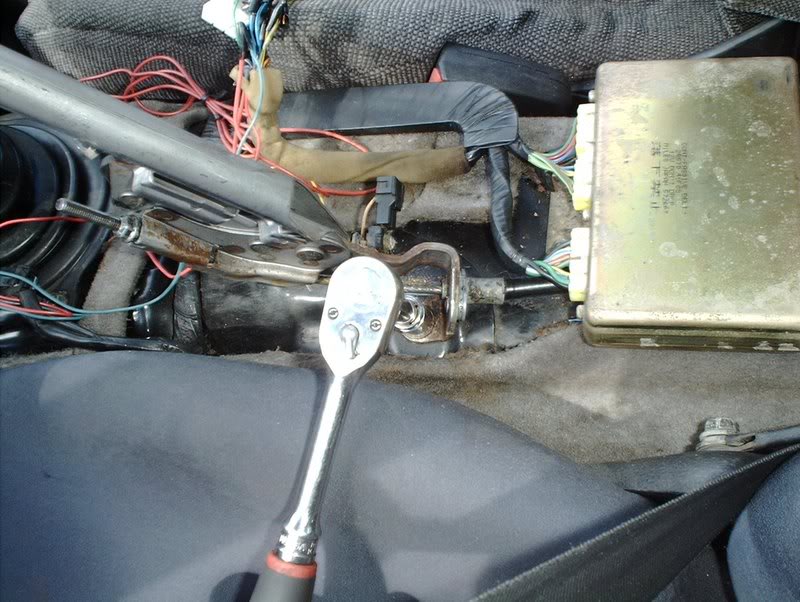
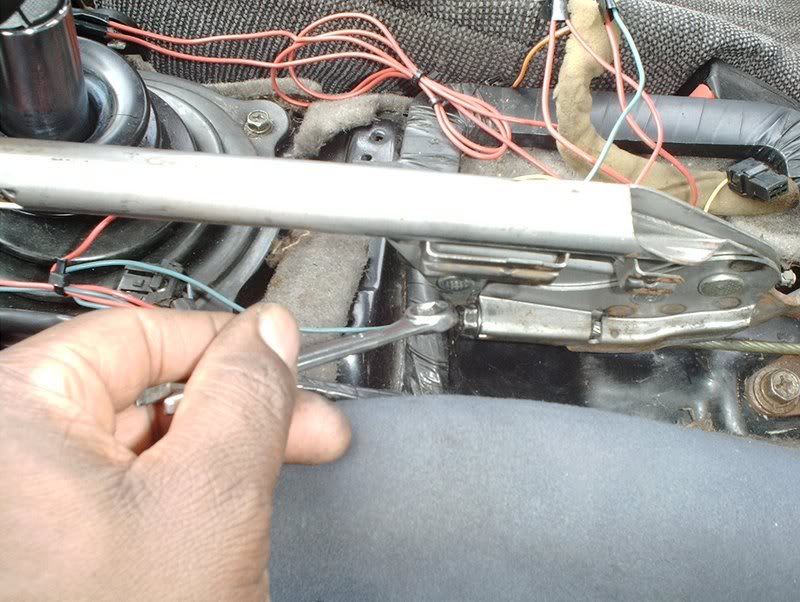
Use a 12mm to remove two bolts holding the handle to the chassis, one on each side.
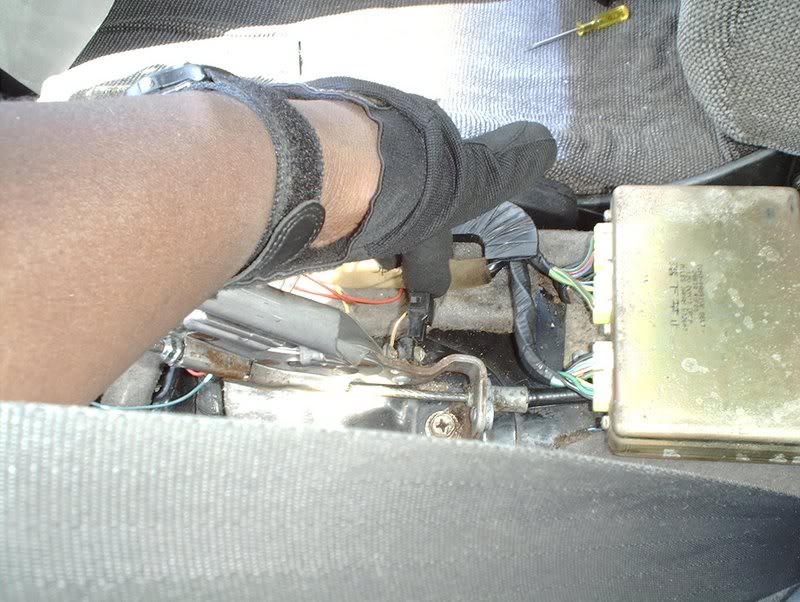
Disconnect the harness from the ebrake, this lights up the "BRAKE" on your gauge cluster.
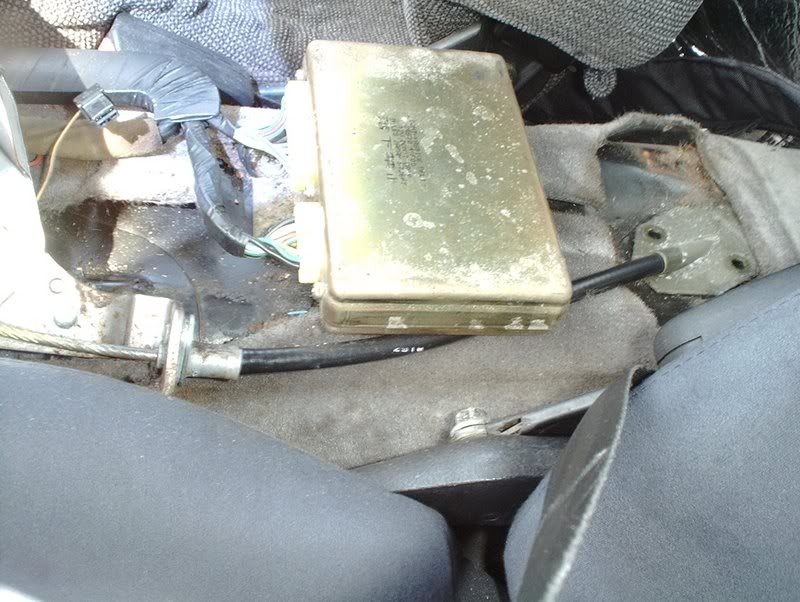
Now you can slide the cable out from under the copper box and remove it.
Done!
Put the new handle in and reinstall.
Adjustment nut.
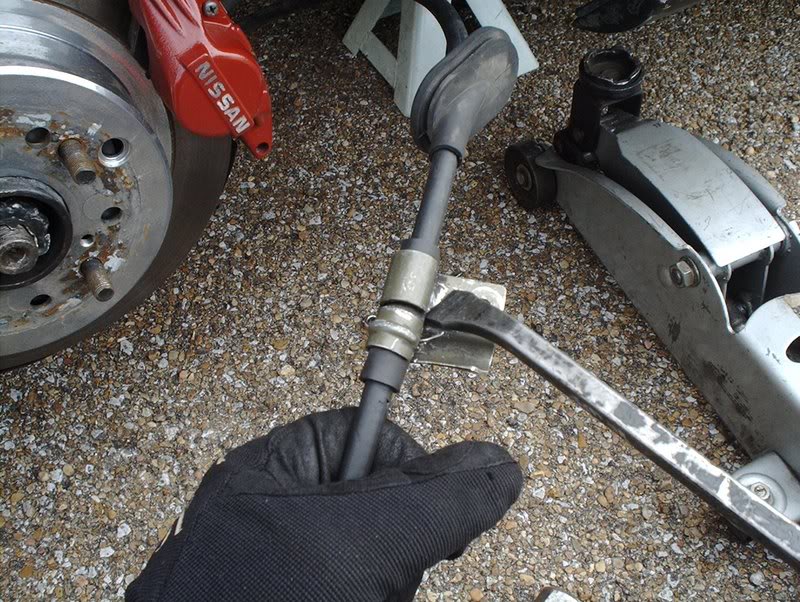
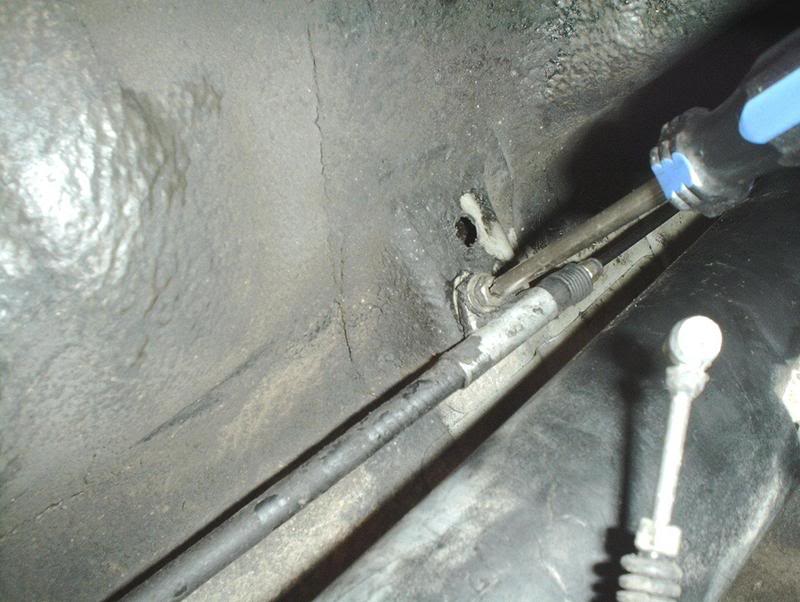
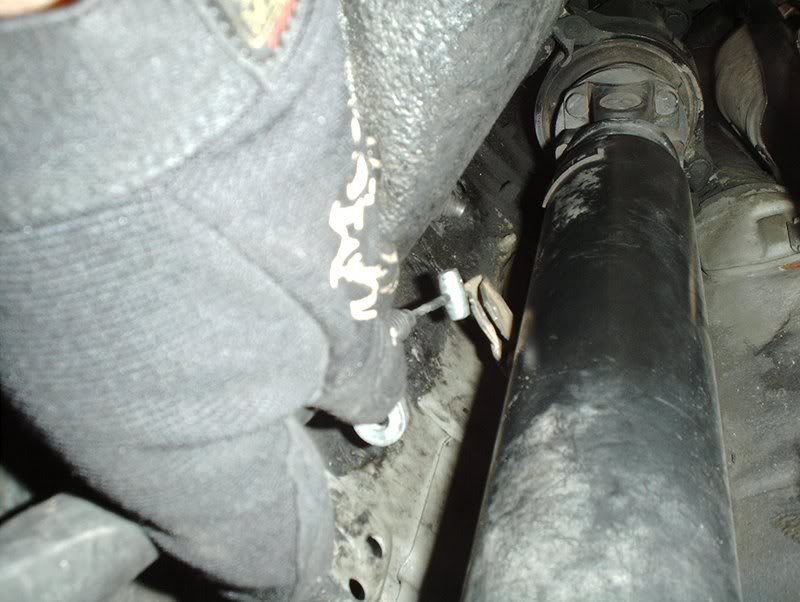
For the Z32 ebrake cables I removed the extensions and used a prybar...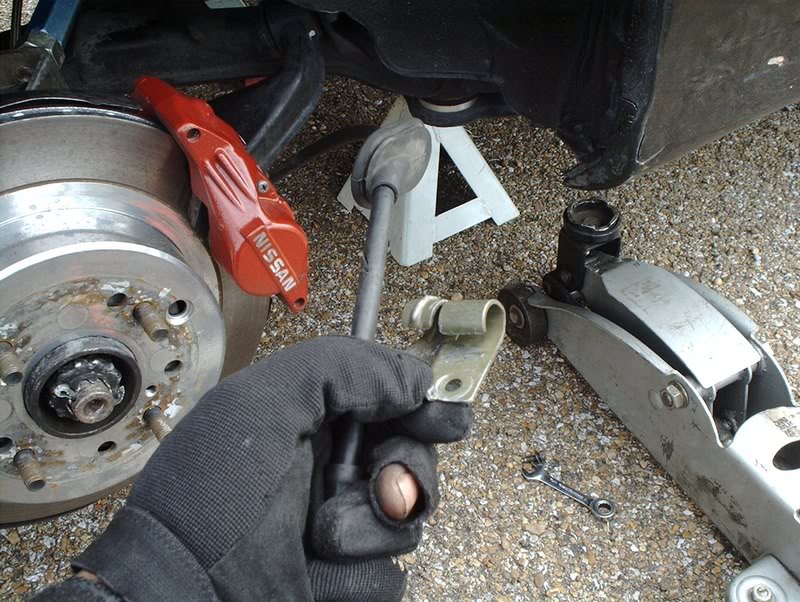
to remove the mounting brackets from the cables.
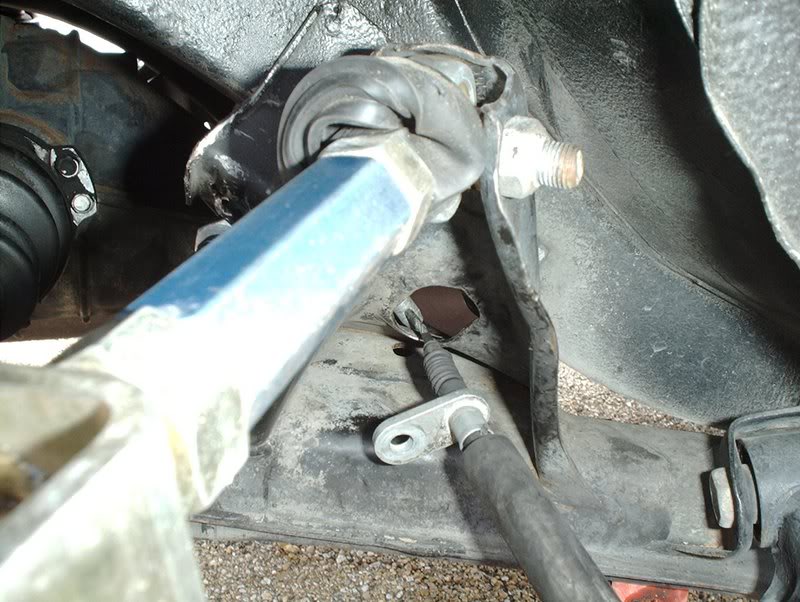
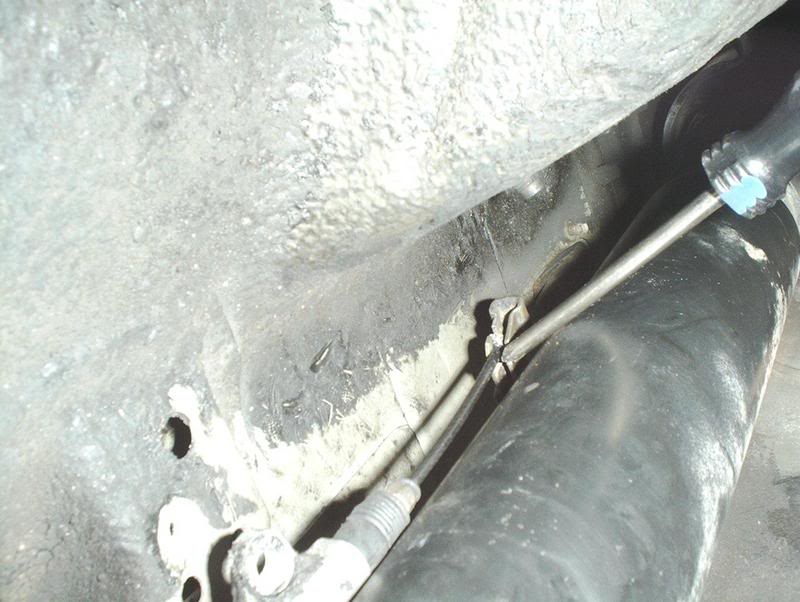
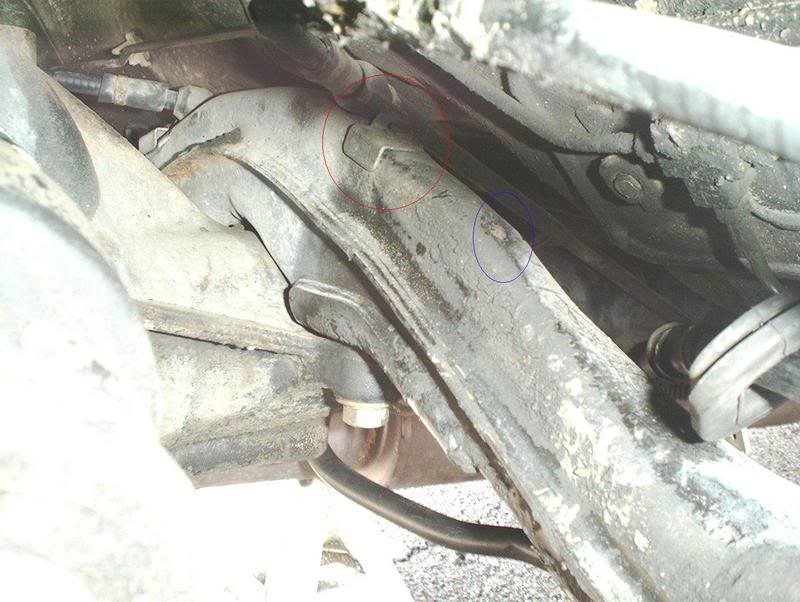
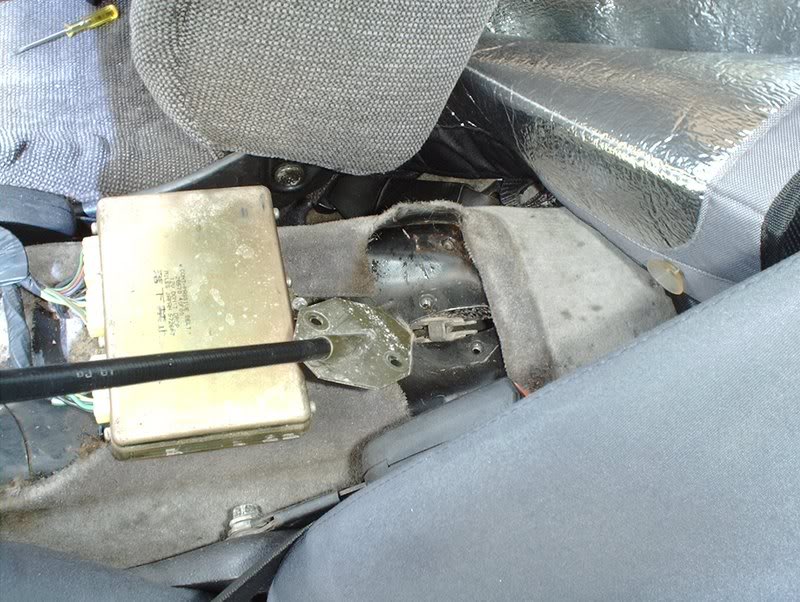
Now I can run the cables throught the stock location on the subframe, this opening here. You wouldn't be able to get them through the hole with the mounting brackets attached.
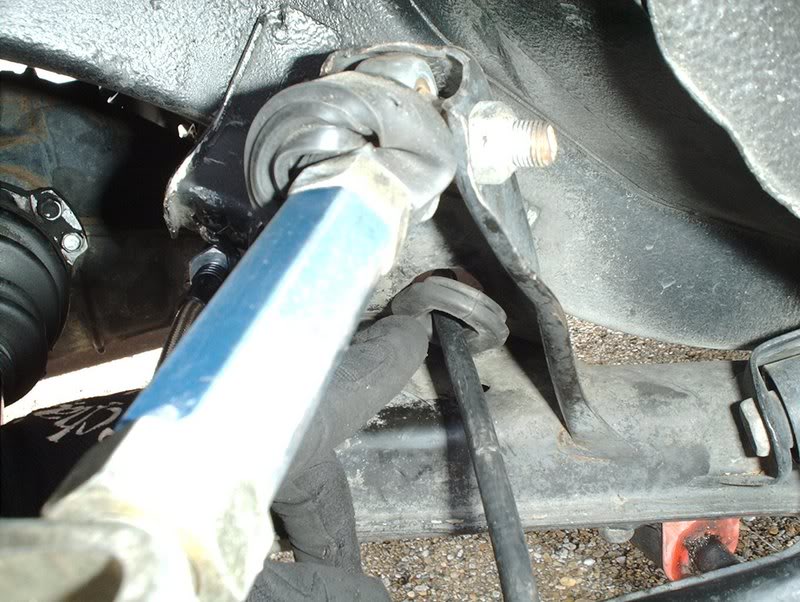
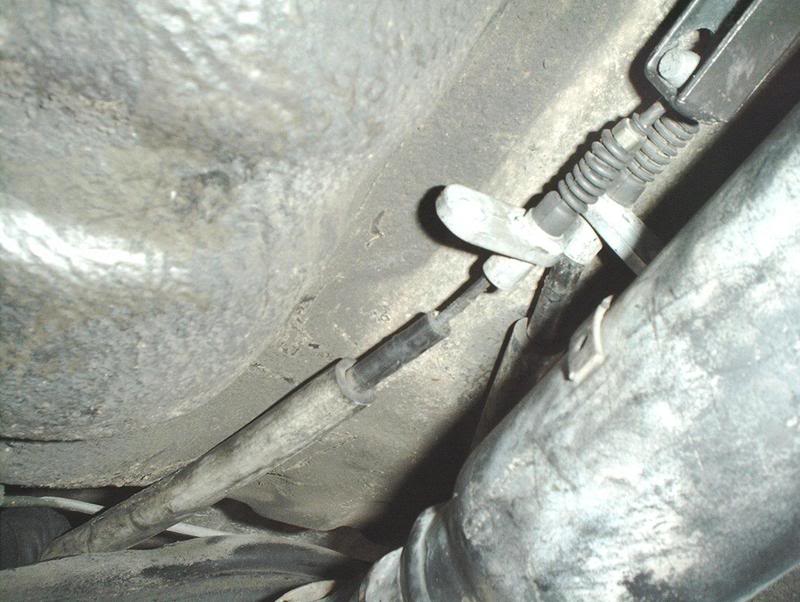
This stopper fits flush here.
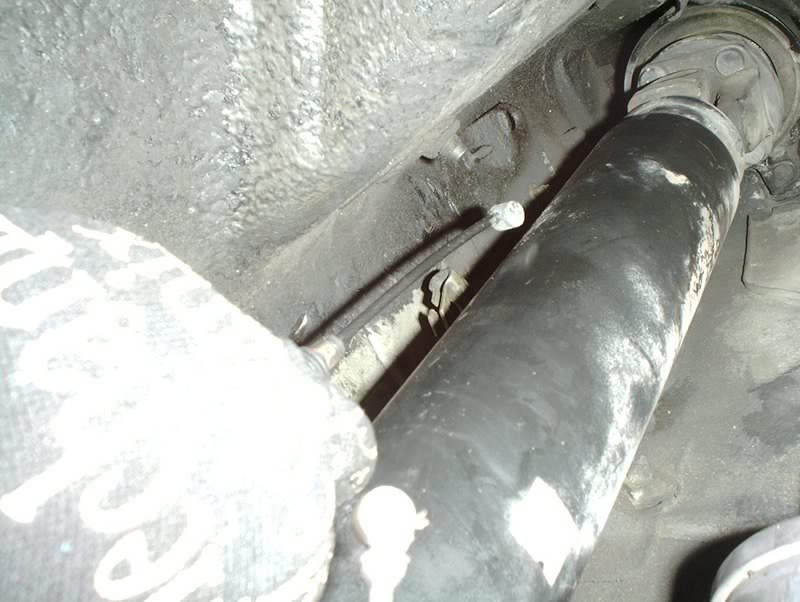
The cable runs right to the t-bracket.
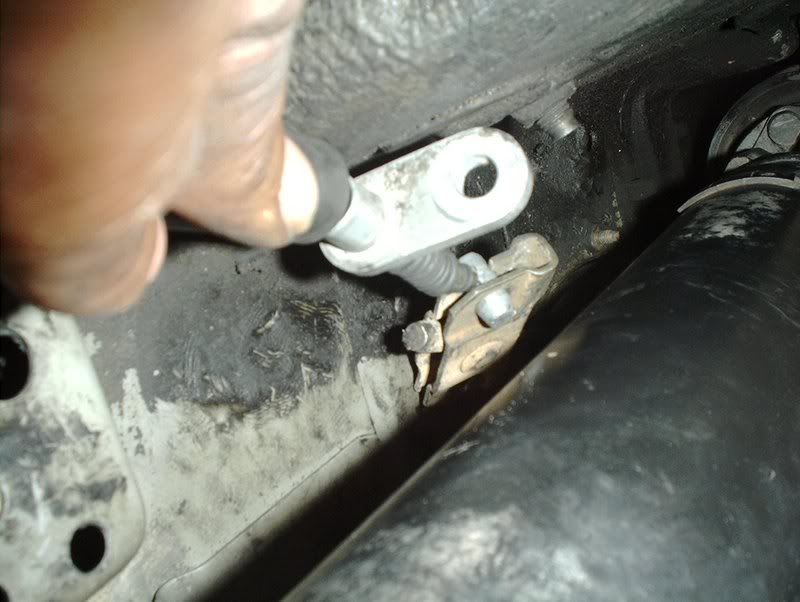
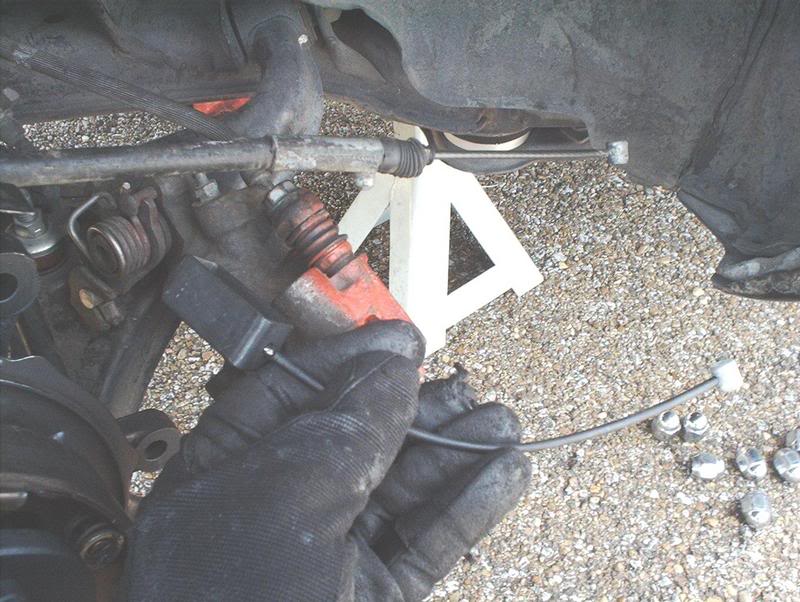
Now you can connect it.
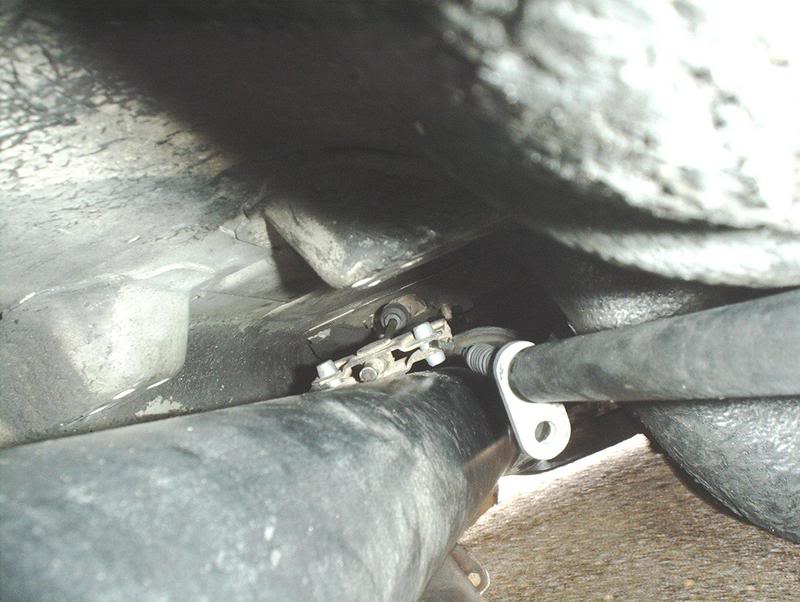
Make sure you have the adjustment nut loose and the ebrake handle down for the slack, also so you can reach the t-bracket with the cables. I also suggest connecting the cable on the exhaust side first because of the limited space.
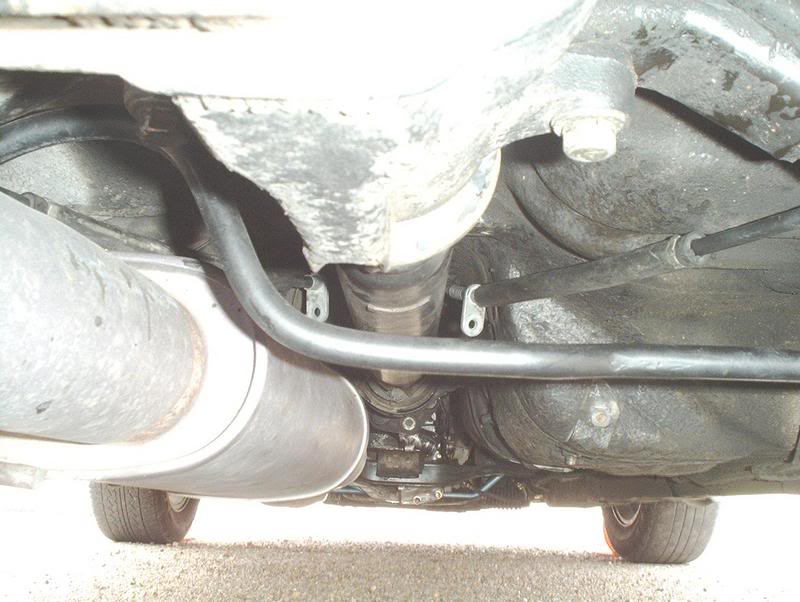
An added bonus, now you can reuse the mounting brackets that you pryed off, just put them back on the cables and you can mount them to the same stock mounting points that the 240SX cables were mounted to flush against the undercarriage of the car.
Tools needed:
10mm socket
12mm socket
Phillipshead screwdriver
Prybar
After removing the console, use a 10mm socket to remove the console bracket.
Take the console bracket off and use a 10mm socket to get the ebrake line off.
Use a 12mm to remove two bolts holding the handle to the chassis, one on each side.
Disconnect the harness from the ebrake, this lights up the "BRAKE" on your gauge cluster.
Now you can slide the cable out from under the copper box and remove it.
Done!
Put the new handle in and reinstall.
Adjustment nut.
For the Z32 ebrake cables I removed the extensions and used a prybar...
to remove the mounting brackets from the cables.
Now I can run the cables throught the stock location on the subframe, this opening here. You wouldn't be able to get them through the hole with the mounting brackets attached.
This stopper fits flush here.
The cable runs right to the t-bracket.
Now you can connect it.
Make sure you have the adjustment nut loose and the ebrake handle down for the slack, also so you can reach the t-bracket with the cables. I also suggest connecting the cable on the exhaust side first because of the limited space.
An added bonus, now you can reuse the mounting brackets that you pryed off, just put them back on the cables and you can mount them to the same stock mounting points that the 240SX cables were mounted to flush against the undercarriage of the car.
Last edited by positron; 10-03-2007 at 02:43 PM.
 10-15-2007, 07:02 AM
#10
Contributing Member
Thread Starter
Join Date: Sep 2002
Location: Starkville, MS.
Posts: 1,192
Courtesy Nissan http://www.courtesyparts.com/betasit...1418_1419.html You can get any part you need for this car on that site...and they have pictures which is very nice. Just make sure you pay attention, I bought a set of pin bolts instead of caliper bolts because I wasn't looking at the right part and where it connects....DOH! Courtesy Nissan is cool, just sent them back and was refunded the money.
Last edited by positron; 10-16-2007 at 09:57 AM.

 11-13-2007, 12:44 PM
#13
Contributing Member
Thread Starter
Join Date: Sep 2002
Location: Starkville, MS.
Posts: 1,192
300ZX rear hubs=$399, sold the spindles for $80 and the 5lug hubs for $160. Could have gotten a better deal on just a set of dust shields if I had been more patient. I came across a set of dust shields for $100 like two weeks later.
The rear calipers powder coated with pads=$169
Brembro rotors=$150
Stainless steel lines=$40
New hardware(bolts, hose clips and washers)=$20
36mm axle nut=$17 and THIS is the part that I complain about WTF!!!
The rear calipers powder coated with pads=$169
Brembro rotors=$150
Stainless steel lines=$40
New hardware(bolts, hose clips and washers)=$20
36mm axle nut=$17 and THIS is the part that I complain about WTF!!!
Last edited by positron; 11-14-2007 at 04:10 PM.
