92 240SX coupe VQ35 swap
 03-12-2011, 02:01 PM
#1
Registered User
Thread Starter
Join Date: Feb 2011
Location: Lakewood New York
Posts: 19
92 240SX coupe VQ35 swap
This is the build thread for a project dreamed up by my oldest son, Allen
I had spent the previous four years building from scratch, a custom two seat aluminum body roadster with a Subaru 2.5 five speed all wheel drive. He got the build bug. He wanted to do an engine swap into a 240SX. We decided to try to find one. After about a year, he located this rust-free original paint coupe in Miami, Fla. We made a road trip all-nighter from Miami about two years ago in February, 2009. While he was searching for the car, he decided on the vq35 engine swap. We went to work locating a donor car for the swap. I found this 2008 350Z on an insurance auction website about 3 months later, in Salem, Mass. My wife and I made the round trip in a day, hauling it back on a rented car hauler trailer, to my shop in Lakewood, N.Y.
After we got it home and looked at it, we decided it had so many things that would work in the 240SX coupe, that we would do a lot more swapping. It has been about two years now and the swapping is done. We ended up using the 350Z engine, tranny (six speed), clutch master cylinder, steering column, entire dash, rear diff and entire wiring harness and emissions system.
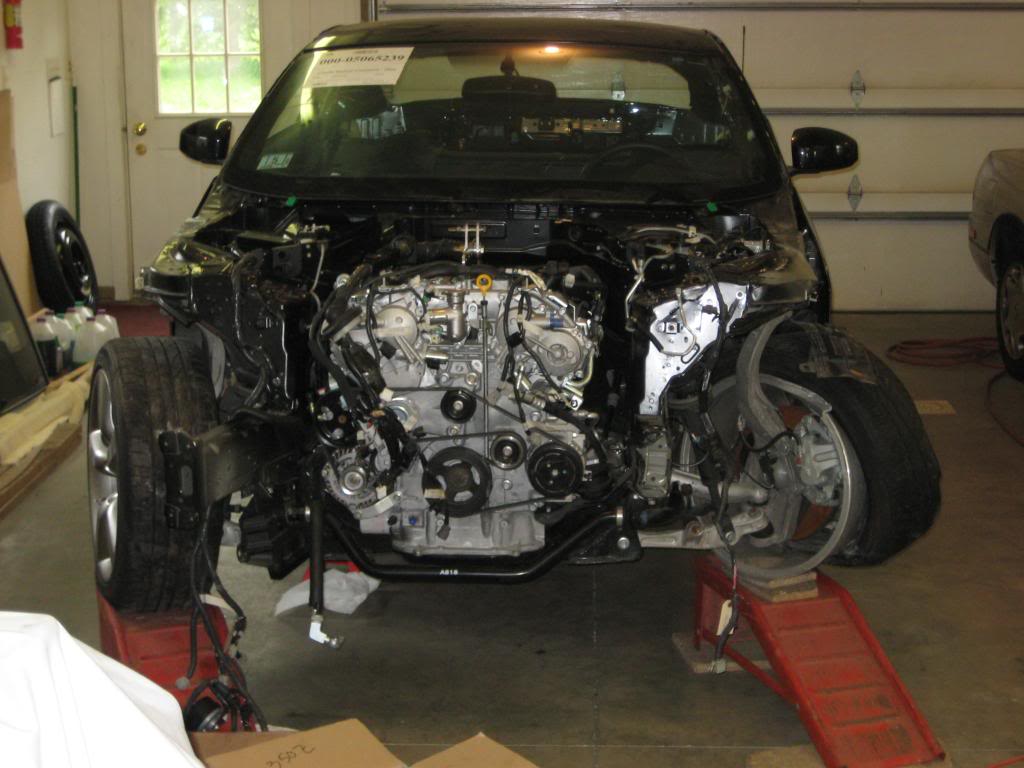
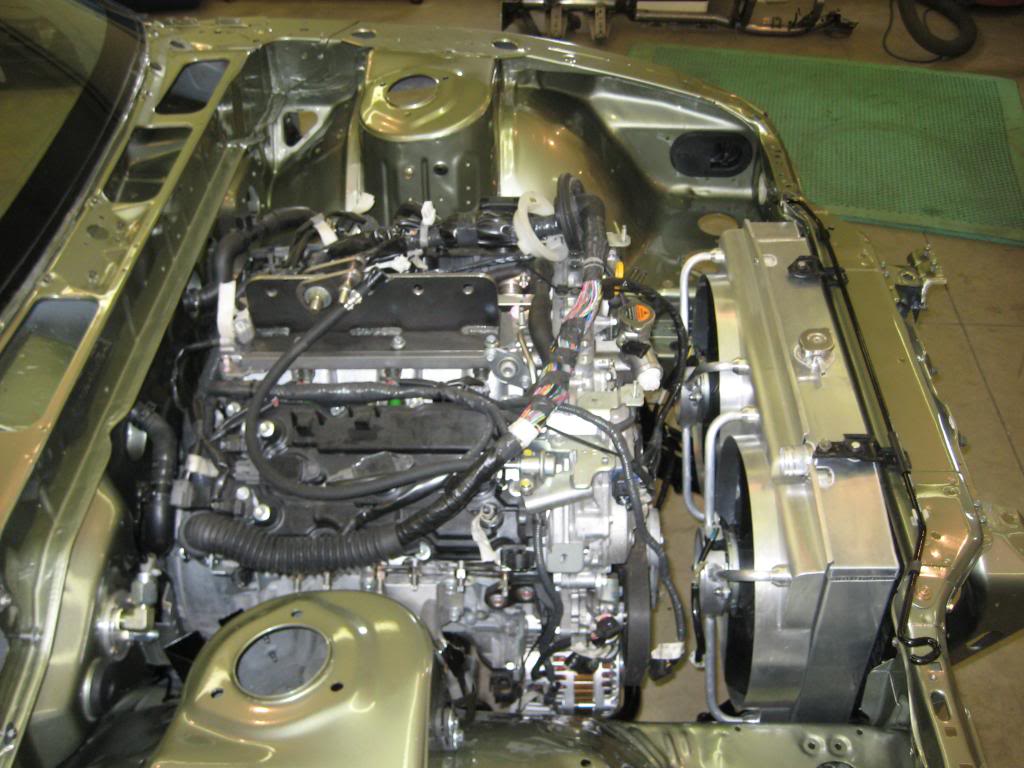
We started by stripping the S13 down to the sheet metal, cataloging all the parts as they came off. Then we started rough fitting components just by eye, to see how things lined up. First was the engine fitting; it was pretty tight, but it fit, we decide early on to remove the top cross-member above the radiator and fabricate bolt flanges to make it easy to get it in and out. The engine mount cross-member needed to be modified by cutting, lowering and re-welding to use the original Z engine mounts. We also fabricated a new tranny mount, and reworked the rear diff sub frame to use the Z limited slip with 95-98 five bolt hubs and custom axles from the Drive Shaft shop. They also supplied a custom driveshaft. We looked at the dash and gauges and, thought about the options, and decided to use the entire dash and wiring harness. We used the 240 gas tank and modified it with a second riser and flange to accept the two sending unit harness. We also used all emissions systems. The dash was just a little too wide to fit but we just cut it short and fabricated. The exhaust didn�t fit but with a little chopping and welding it just clears the firewall. We also kept all of the heat/air controls and slipped them into the dash.
Allen wanted to get 265�s under all four corners, and we soon determined we would need to fab our own strut cartridges and coilovers, and rear coilovers as well. Some research on the web, and my son had the info on what struts, springs, shocks, and wheels and tires would work. We made our own camber plates and strut braces as well. There have been a lot of other little things along the way. One thing that we did come to realize was just how many things were compatible from these two cars built 16 years apart. The wiring harness chassis ground points lined up, the bolt pattern and screws on the sending unit were exactly the same, the steering column splines, the axle splines, just a lot of things worked out nice.
We are finishing up the interior now and will probably drive it for a year or so then get it painted. We already painted the engine compartment Millennium Jade, the color he chose. He has plans for a body kit and some other mods later, but we�ll see.
Now I�ll try and post some pics with explanations
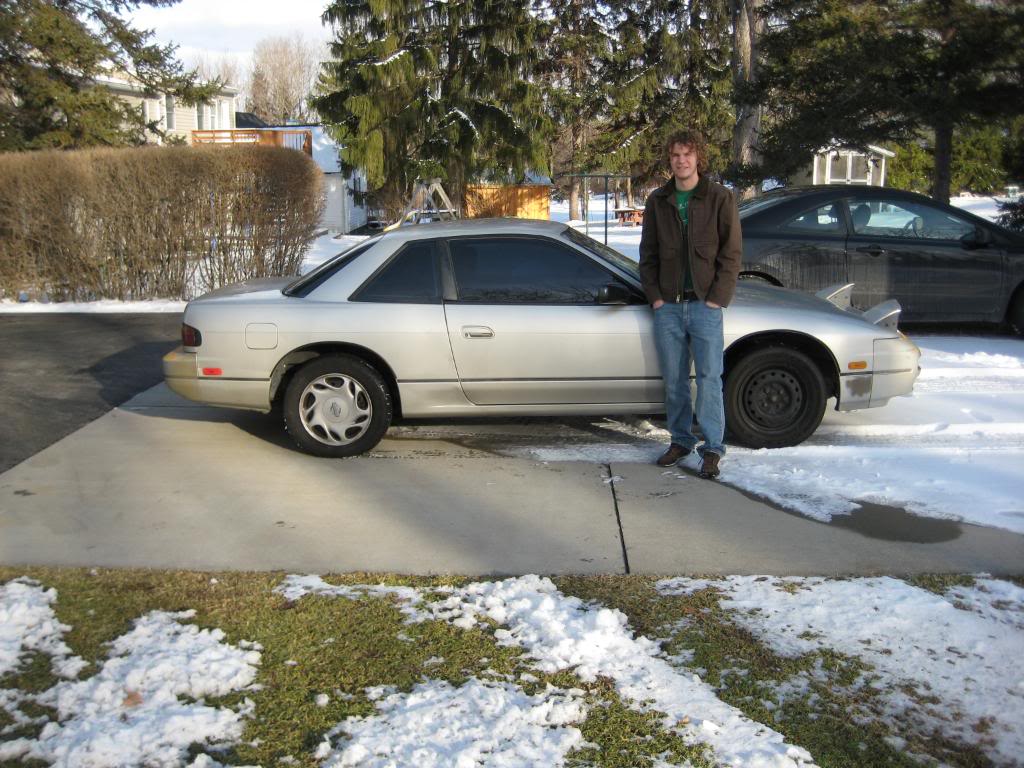
this is the day we brought it home
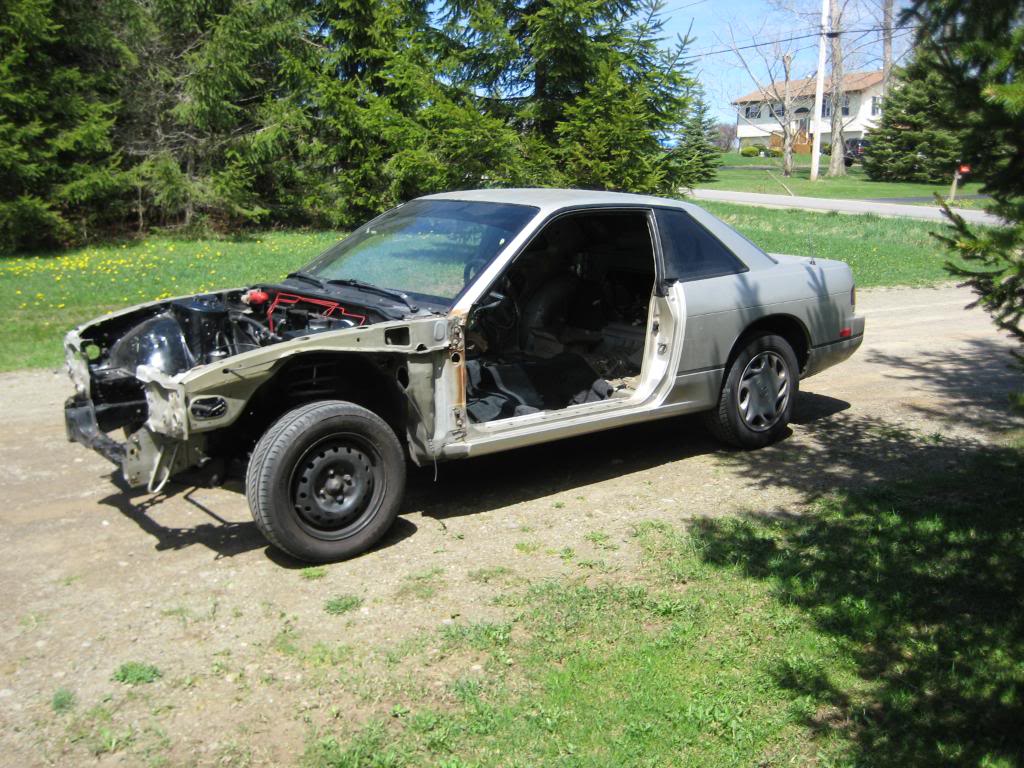
we worked over the winter and pulled everything off
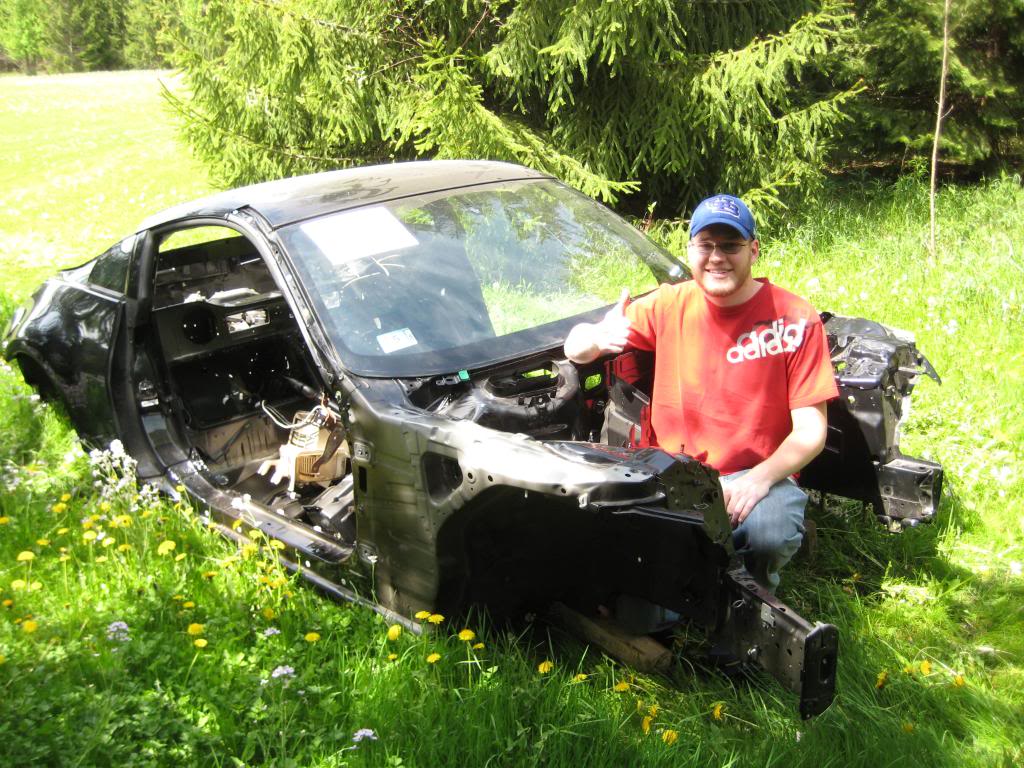
not much left of the Z
the donor car , a 2008 350Z
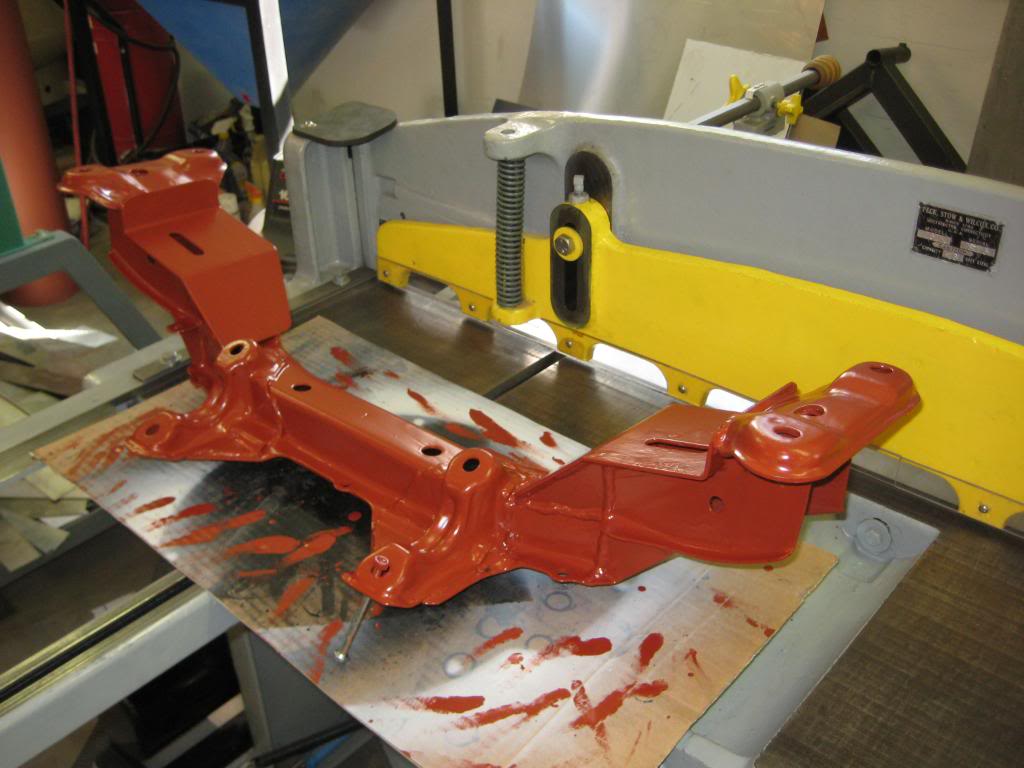
the cross mount was modified, slots are where engine mounts go, here it is primed with brush on enamel

we also fabricated a new tranny mount using original chassis points
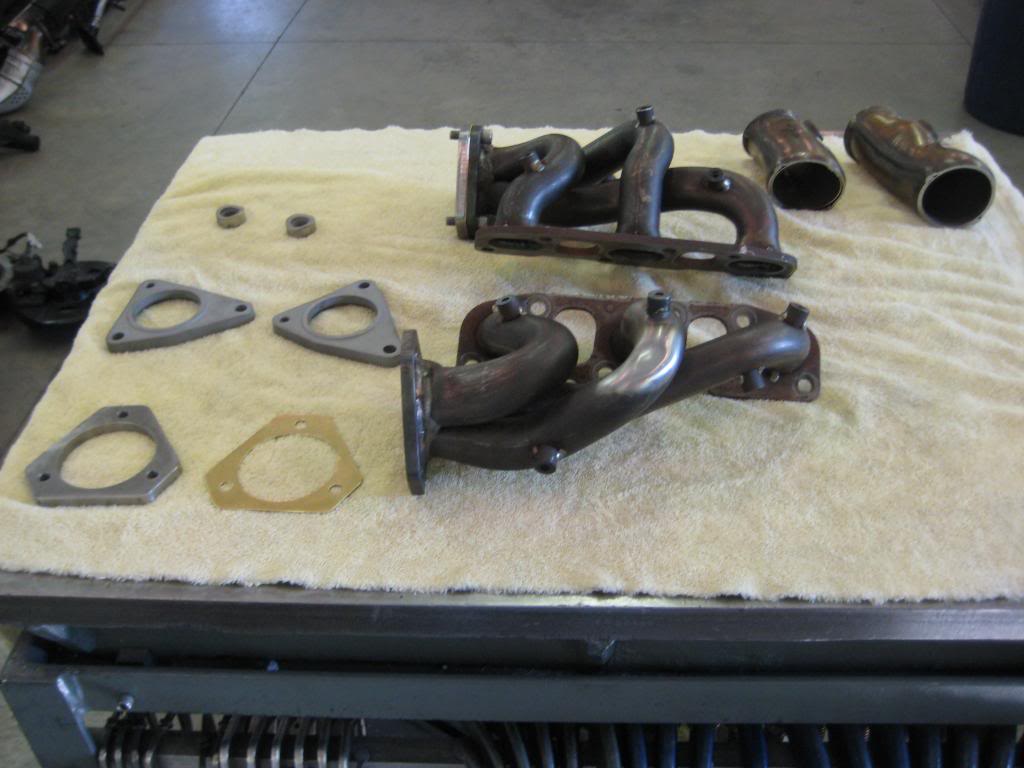
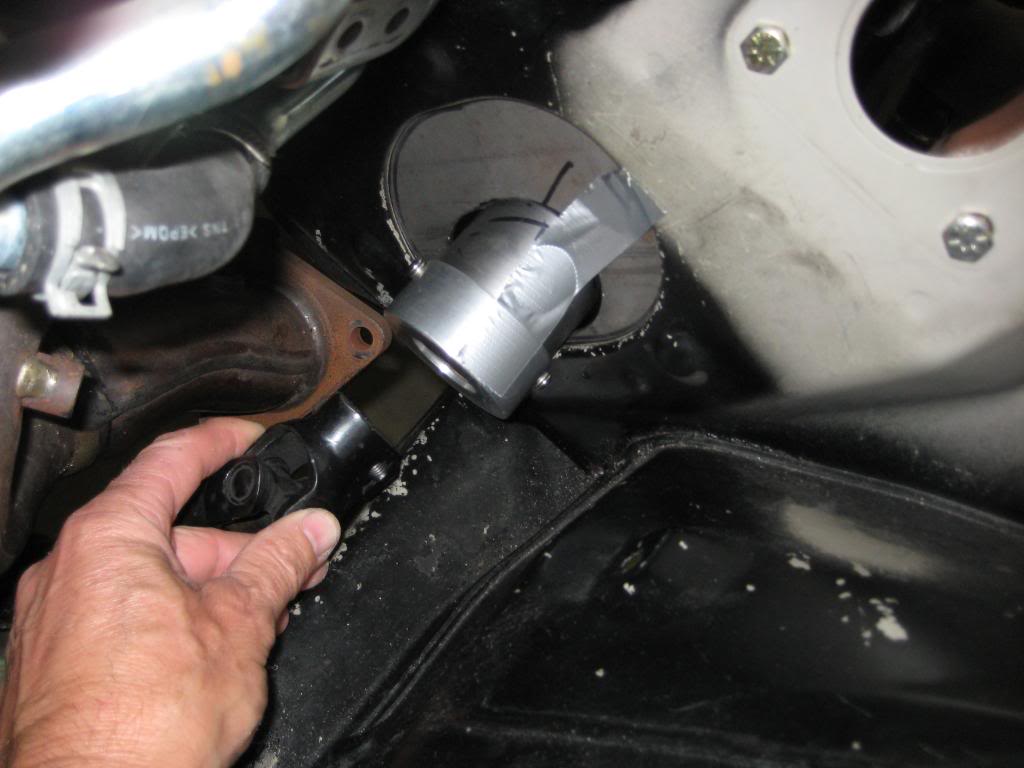
the headers were shortened to clear the firewall

I fabricated this coupler so we could use stock cat converters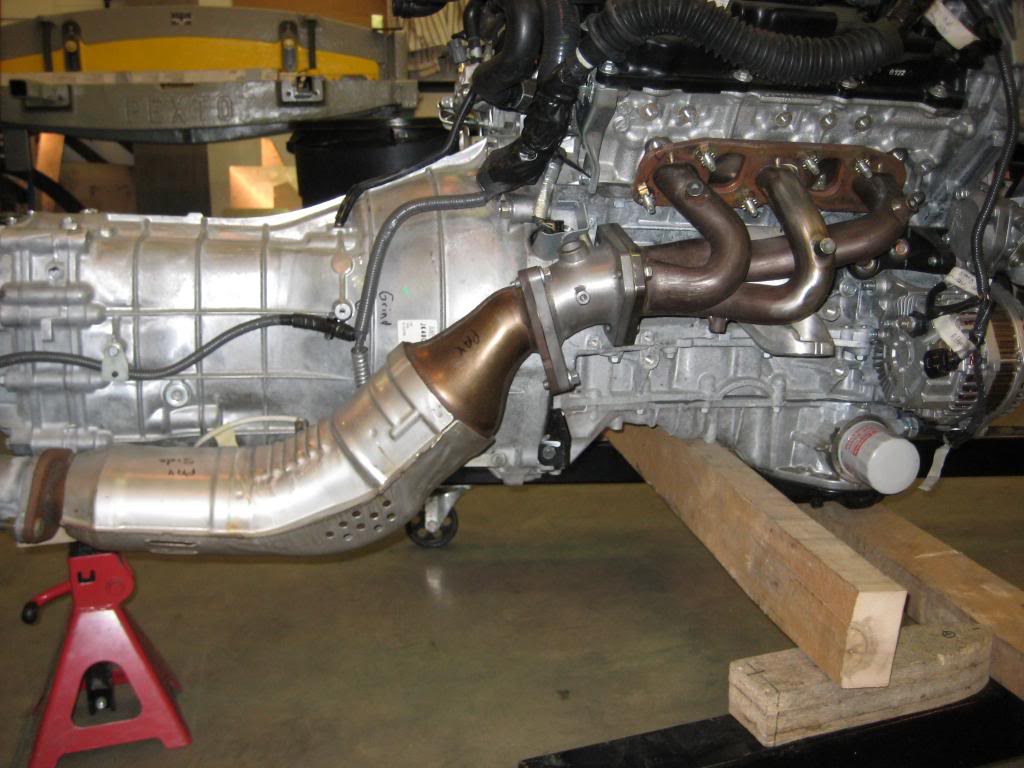
here it is installed on engine, I added extra heat shields on firewall because it's pretty tight
this shows the stock shifter support, and our shortened steel one
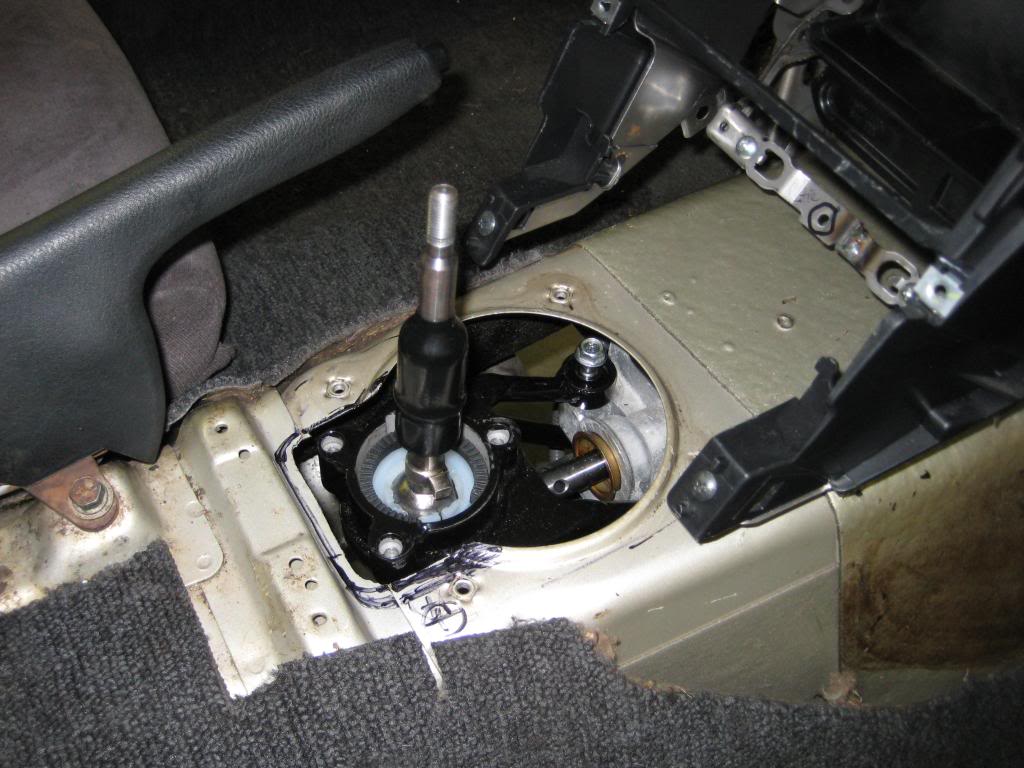
the shifter sits a little farther back

this is the rework of rear subframe to house Z limited slip diff
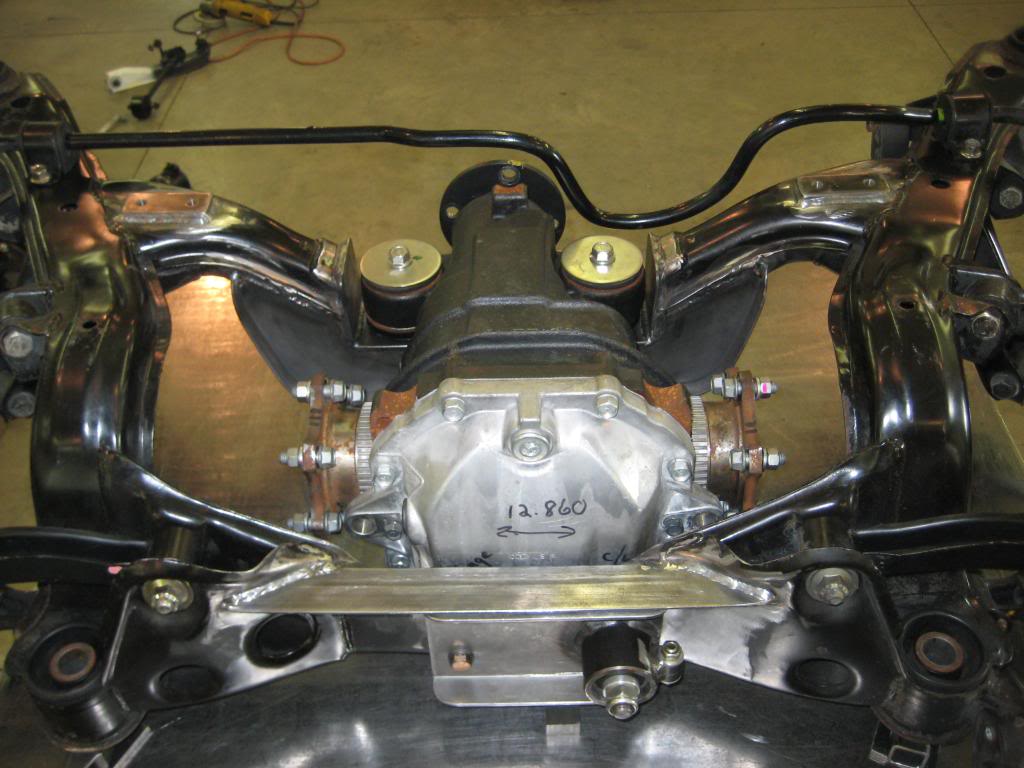
we reused the z rubber mount and added a brace that will also carry exhaust hanger, as shown above. These two
show the bottom side as we worked on it
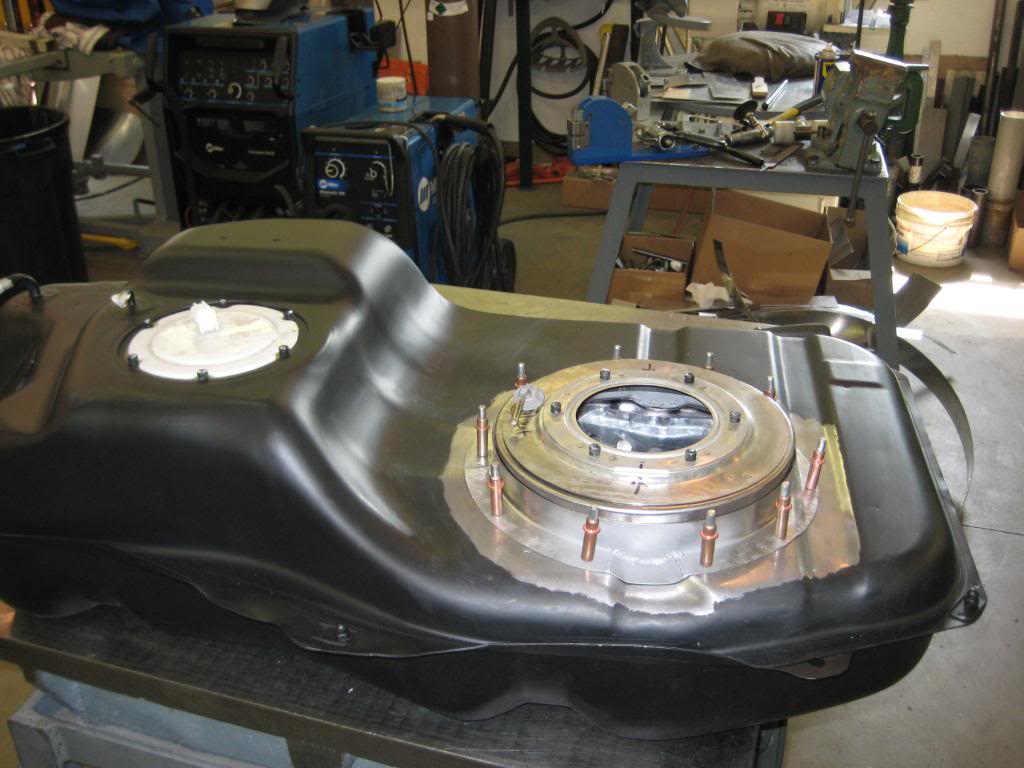
since we are using all of the Z wiring we decided to keep both sending units in the tank
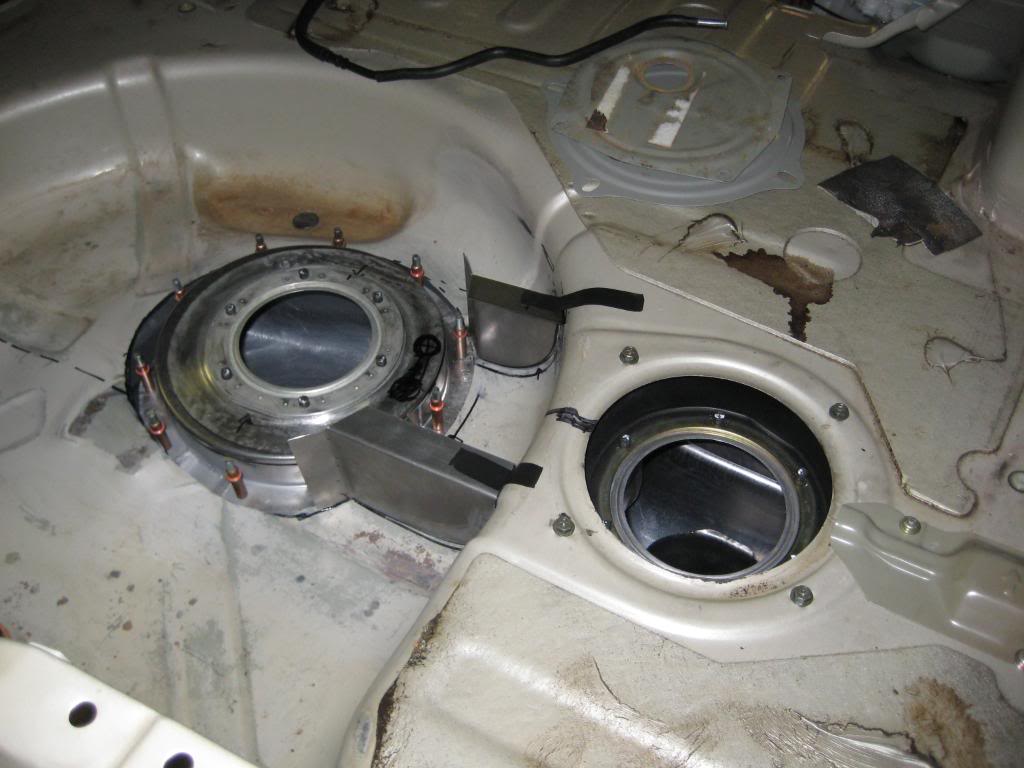
one is also the fuel pump unit, here fitting it to spare tire area, it will be soldered and then sealed
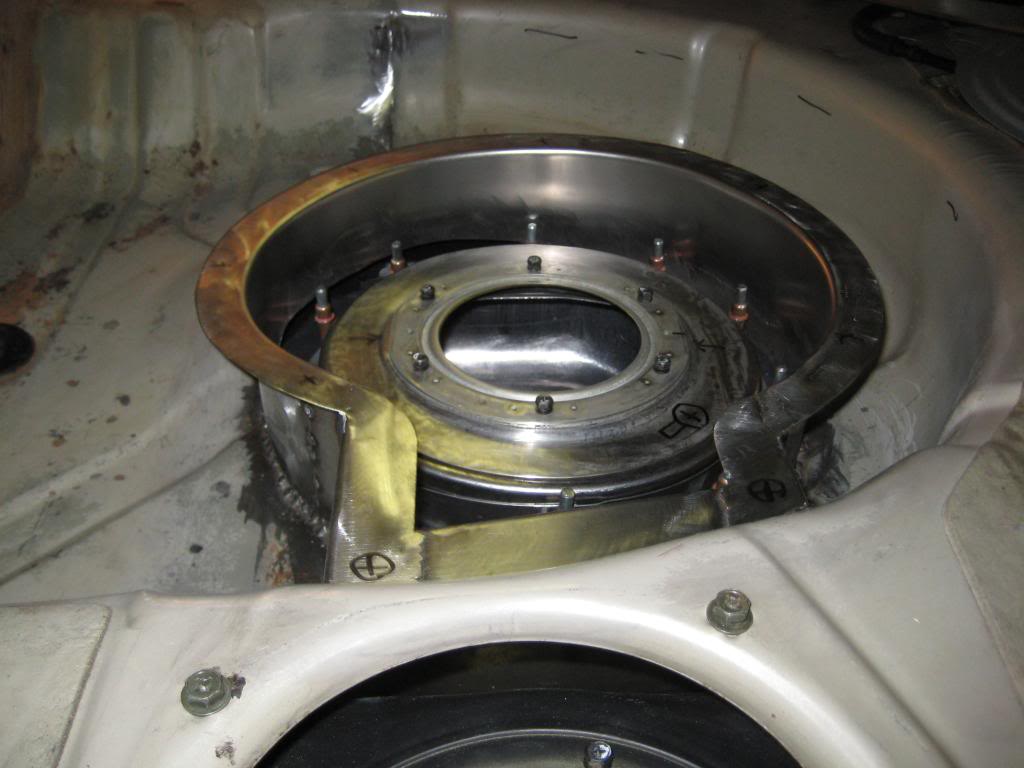
closing off the spare tire area, this top will be bolted together in case of service access, no room for spare,
but we can use it for tools and storage
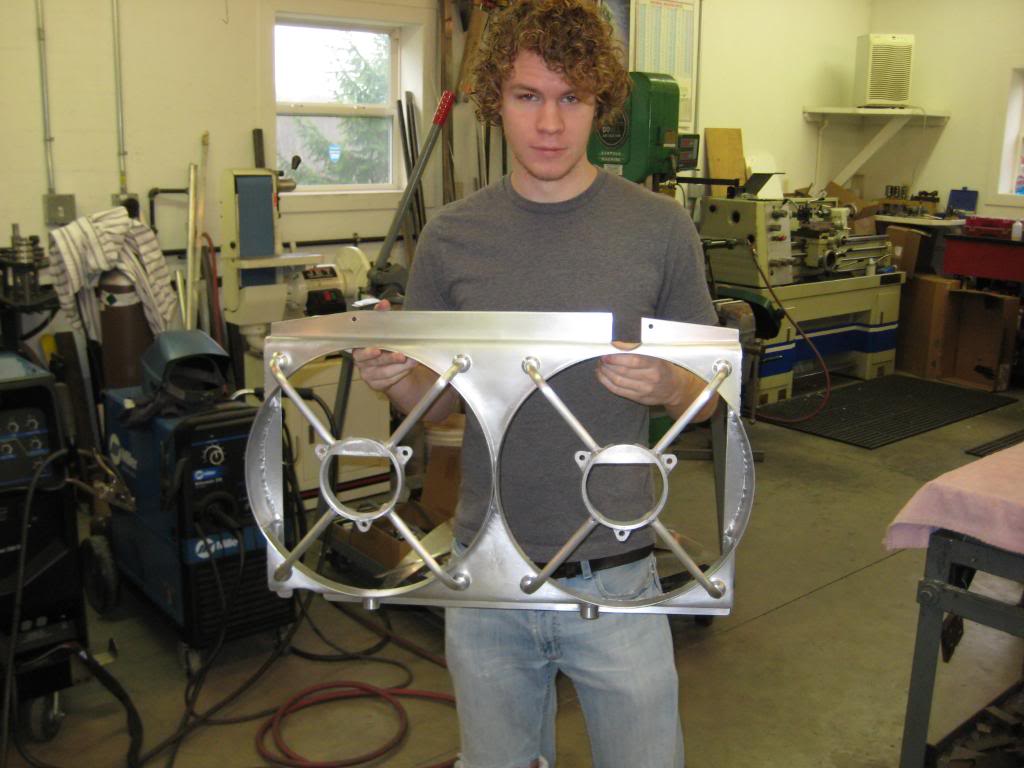
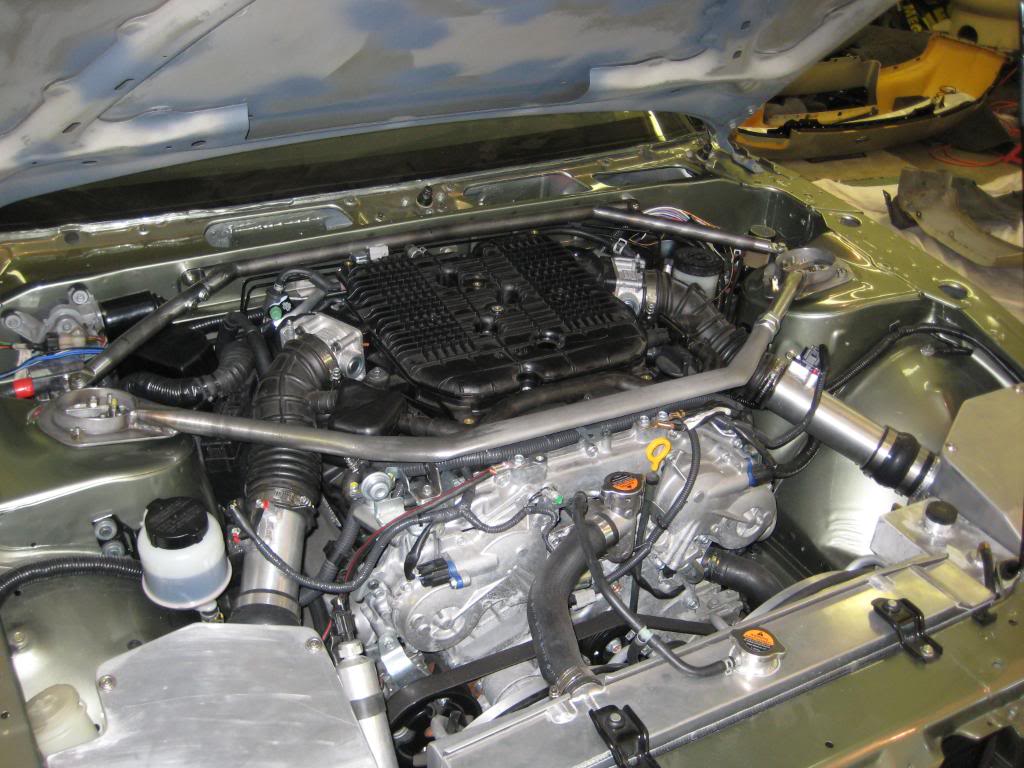
we bought a radiator from Griffen, and built our own shroud from .060 aluminum, used 350Z fans
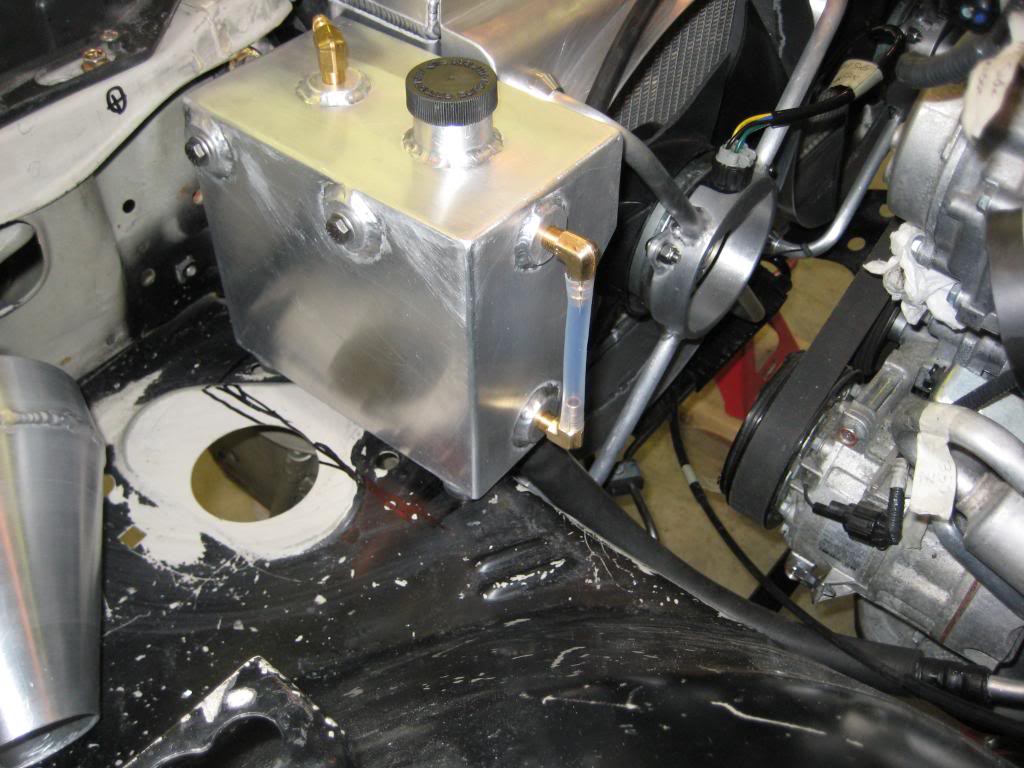
we also built a radiator overflow tank
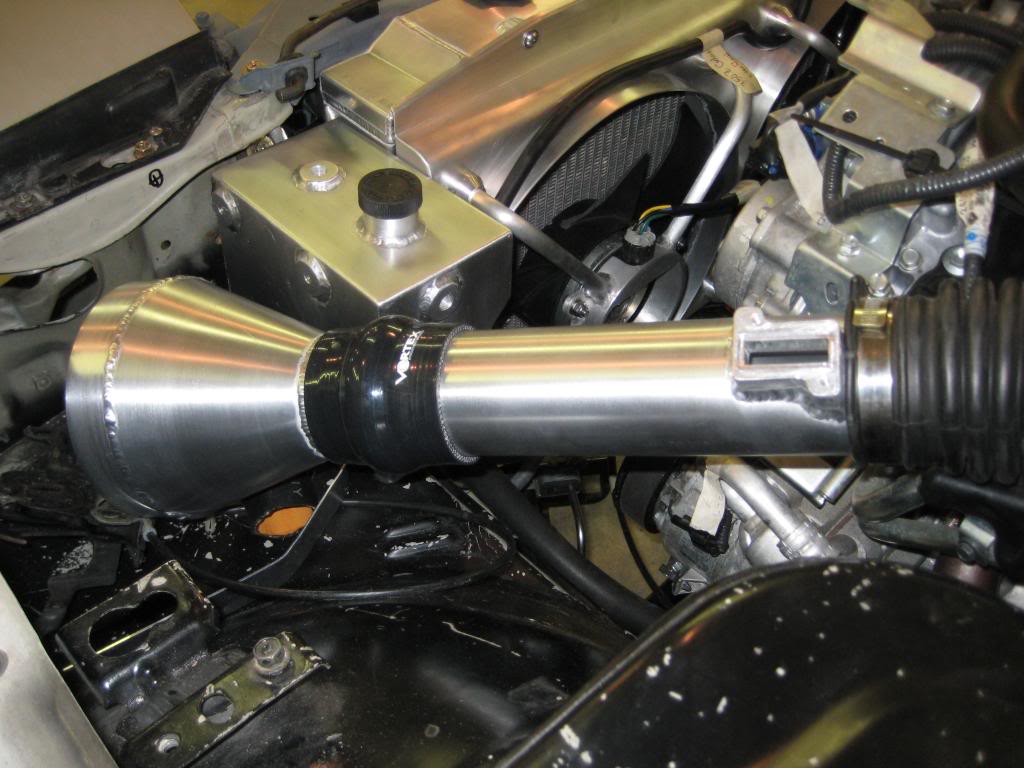
making our cold air intakes
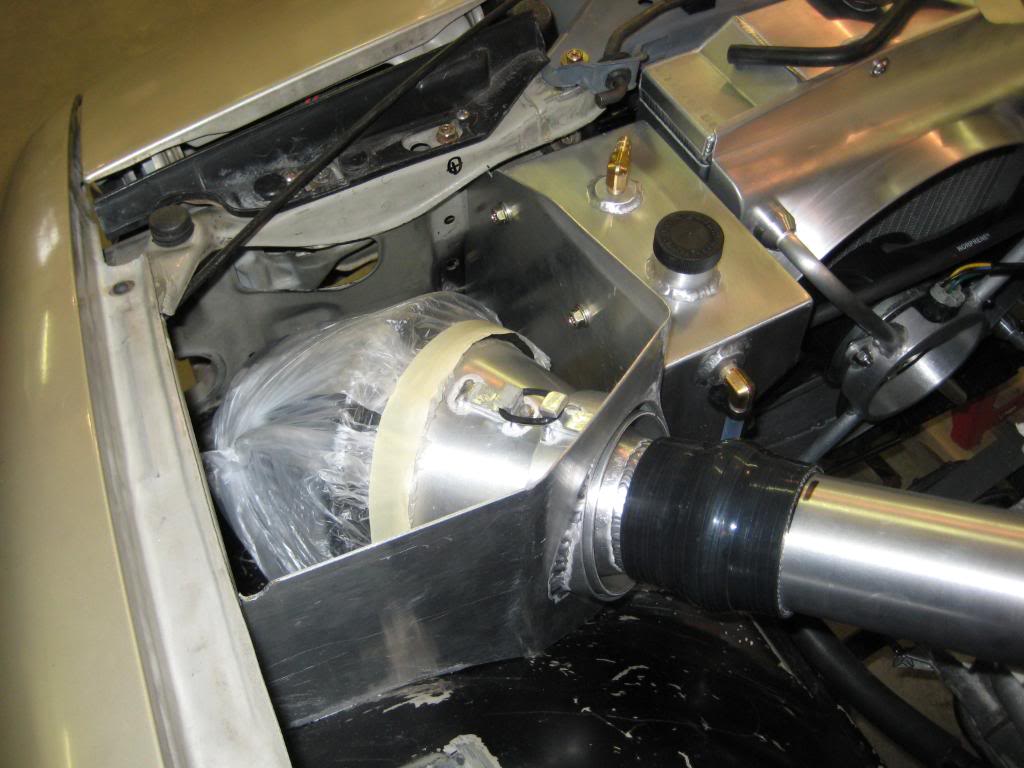
this will be capped off on top, air draws from front, we used dry type cone filters, the box is sealed around
the tube with foam rubber to allow engine shake, air can only enter tube thru filter end,even if foam wears out
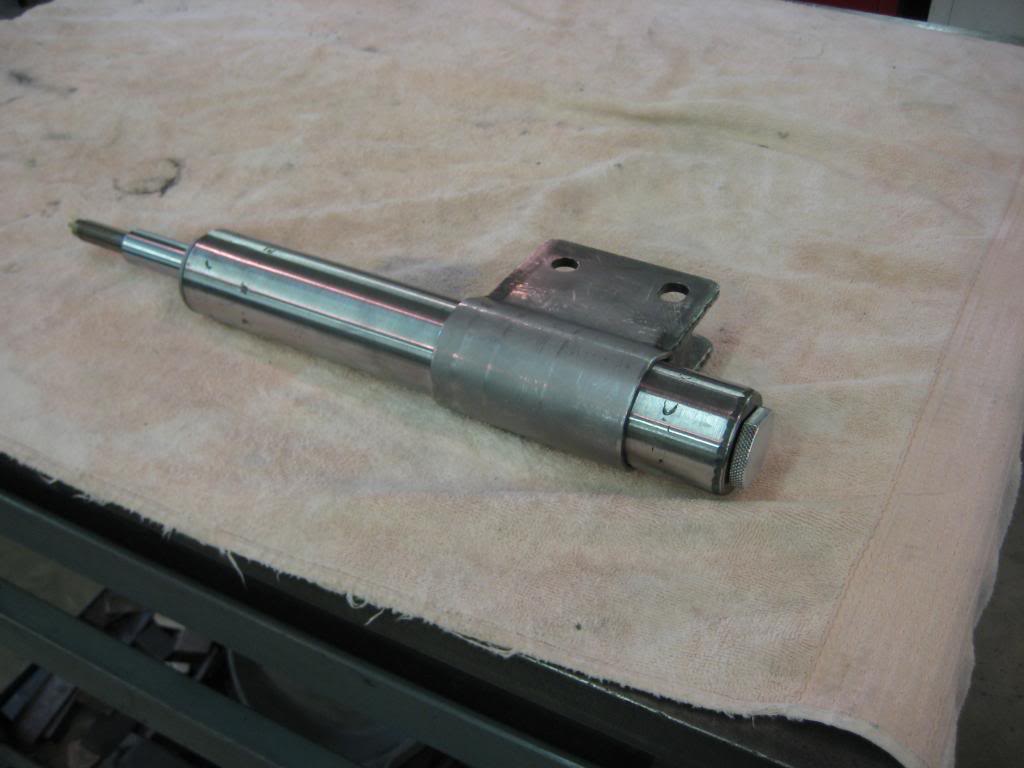
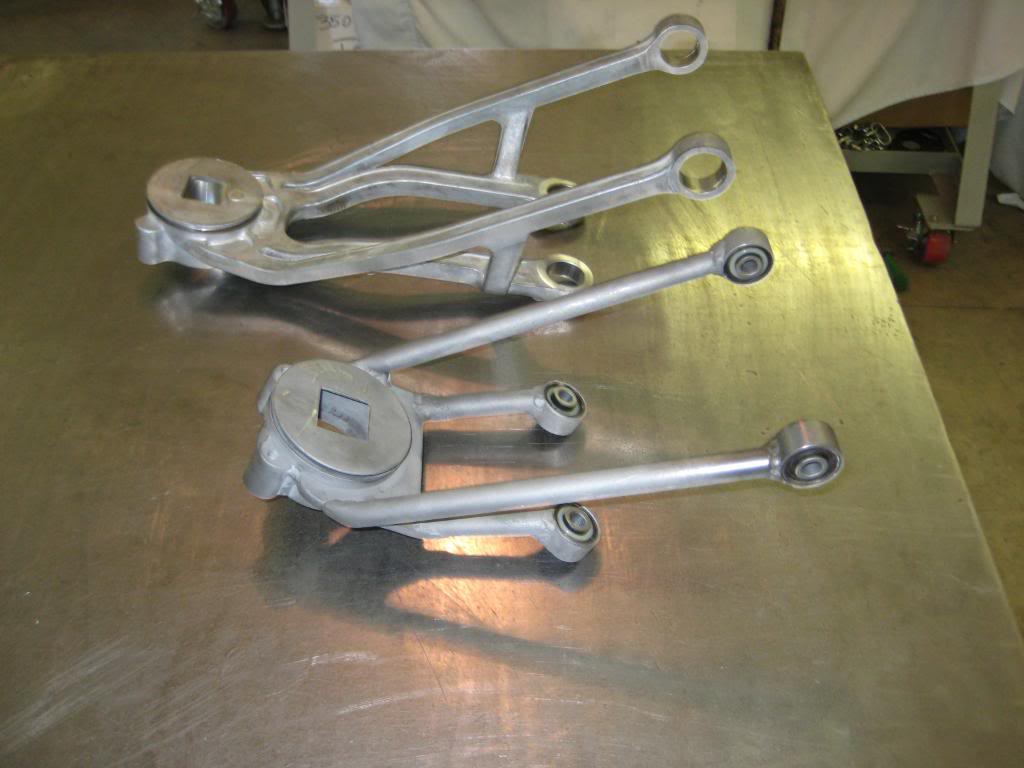
Allen wanted to get 265/40/17s on all four corners, to get enough clearance we fabricated our own strut
housings with about 1 inch more offset at the lower ears
we also made our own threaded coilover converions
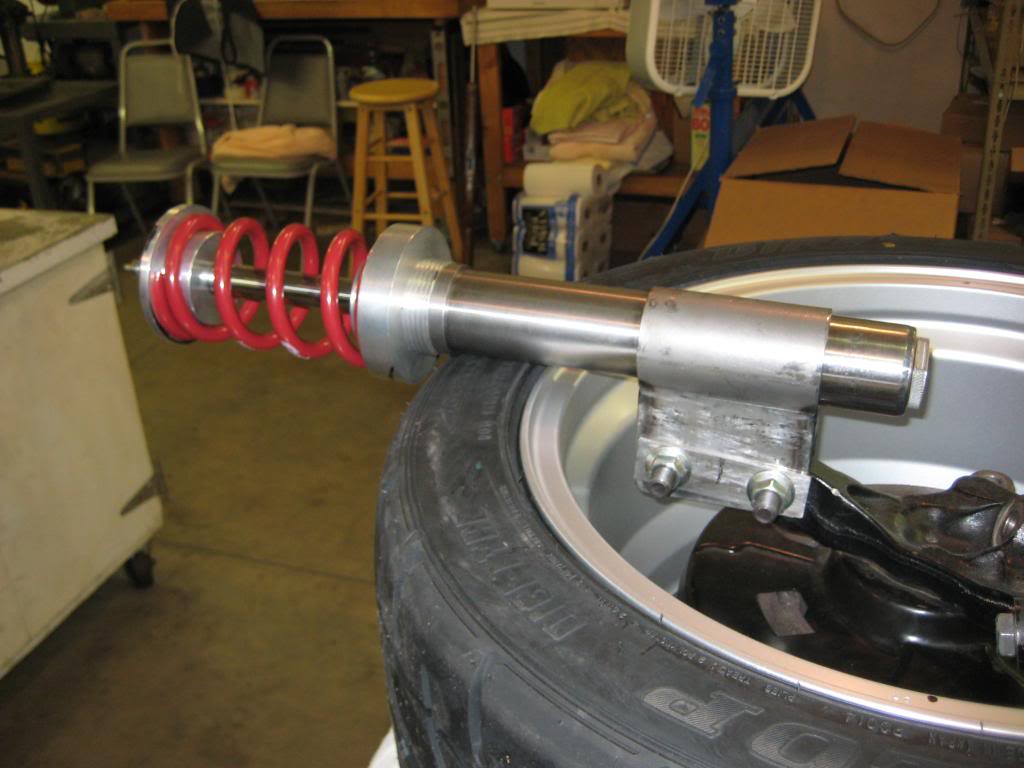
we ended up with about 3/8 " tire clearance
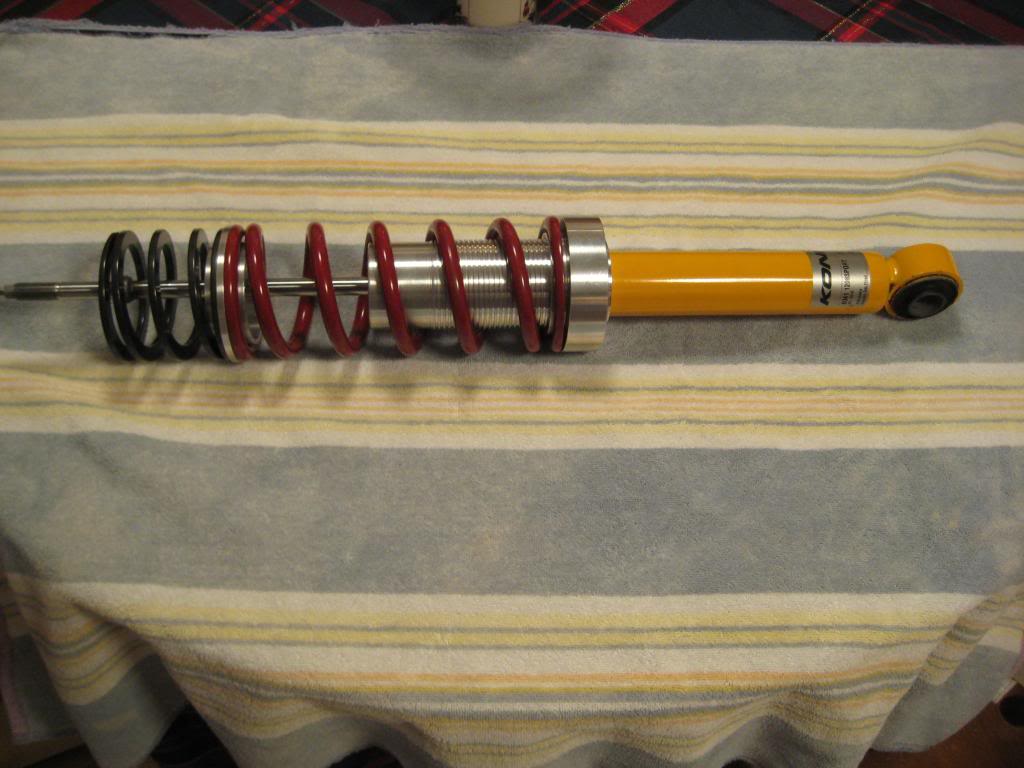
we used koni shocks and struts, the rears are an eclipse model,with adjustment at the top, same as the front
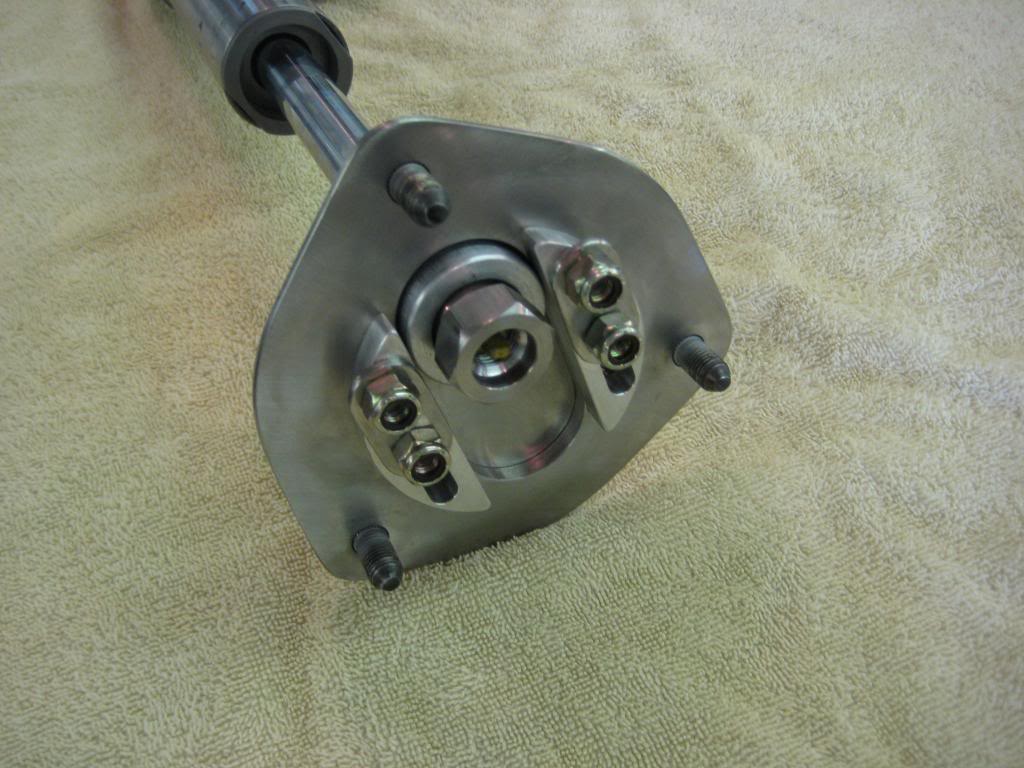
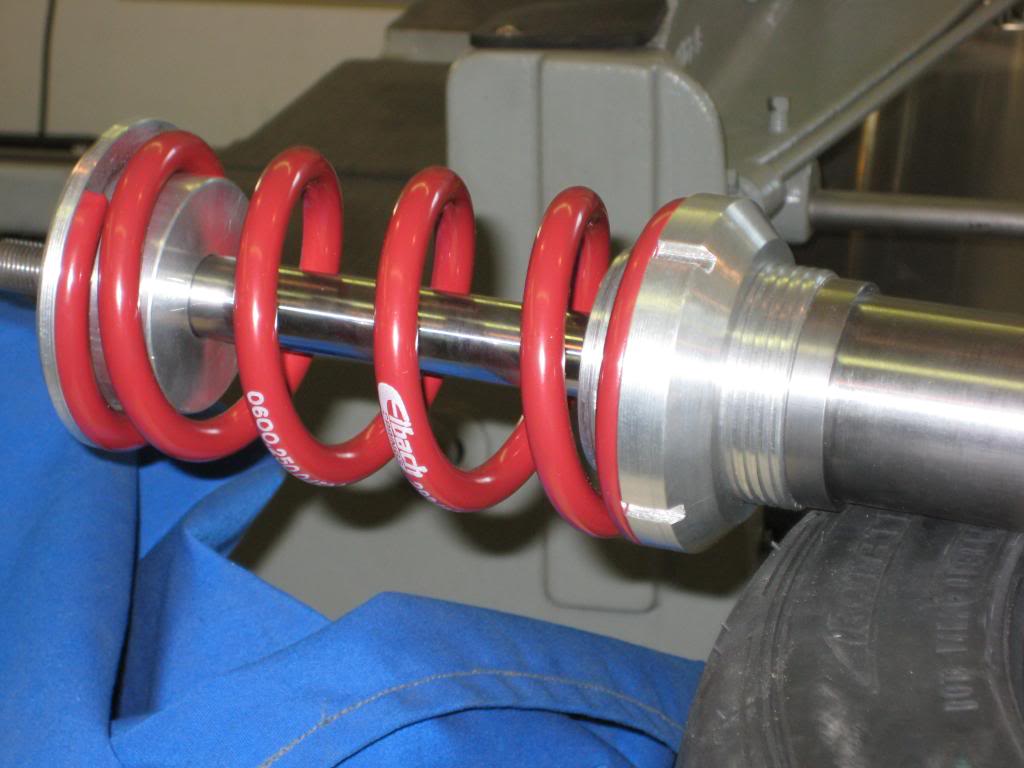
our camber plates, stainless steel with 5/8 spherical bearing and a 1 and 15/16" thrust bearing. with our custom
spring top hat , we tucked the spring in above the tire
no room for the battery
here you can see the strut tower braces.....
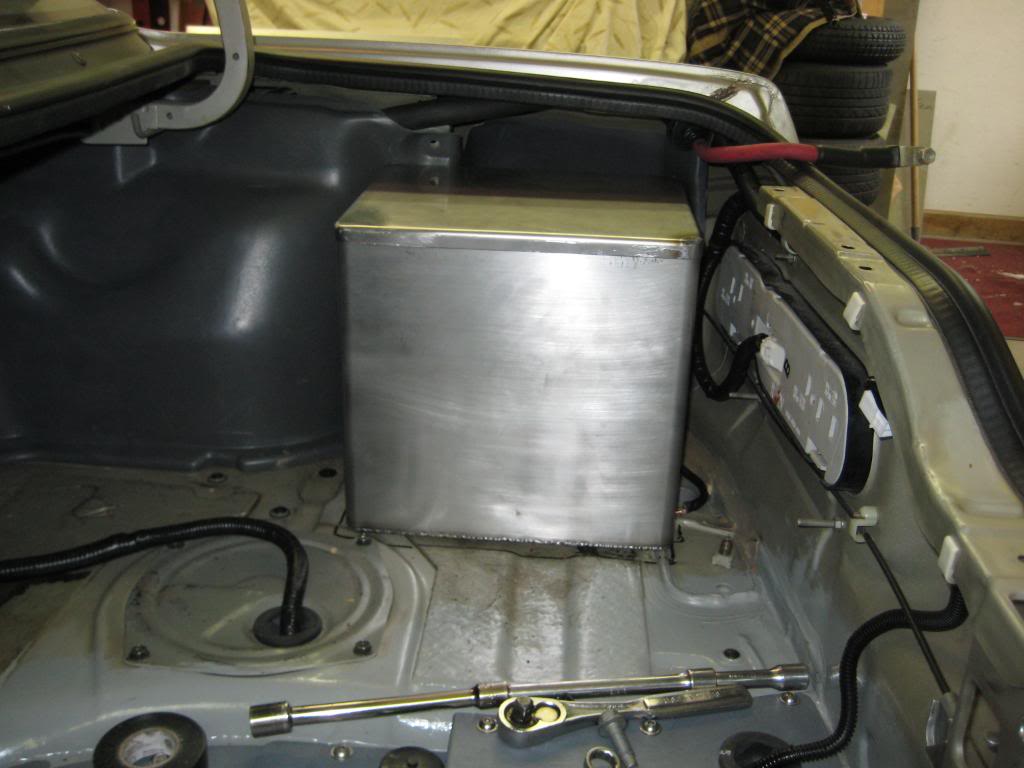
so it went in the trunk in this sealed and vented stainless battery box we made. the vent goes out the cabin vent
panel in the rear wheel well area of the trunk
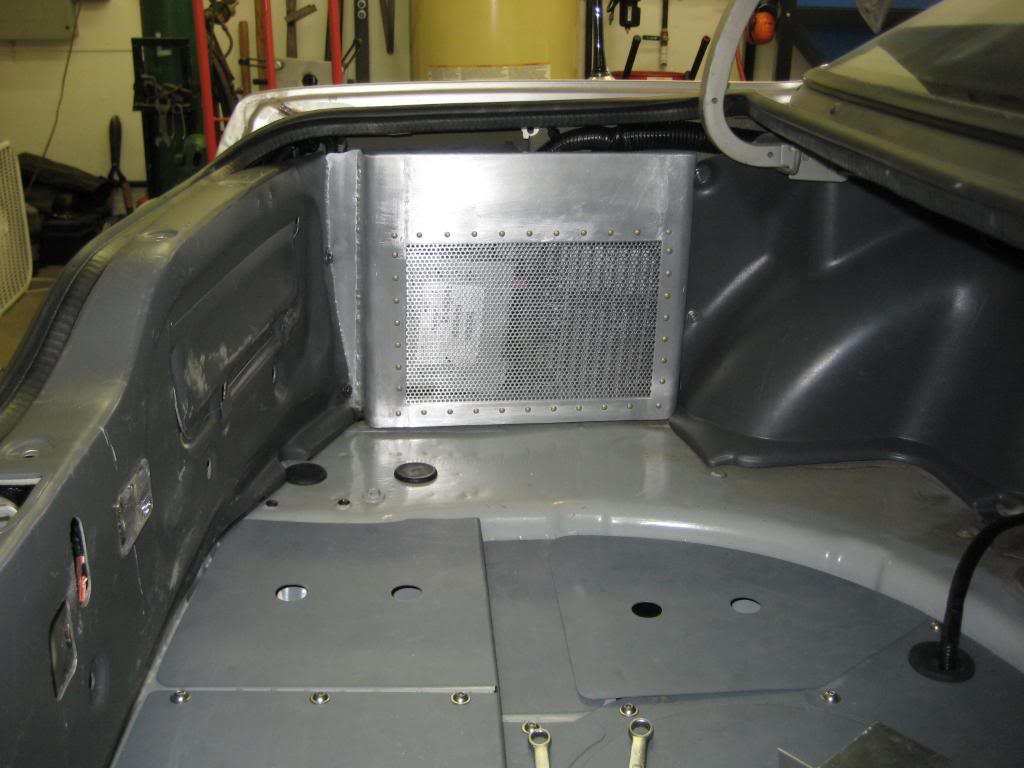
the other side of the trunk, this protects the stereo amp and radio/phone/antennae components
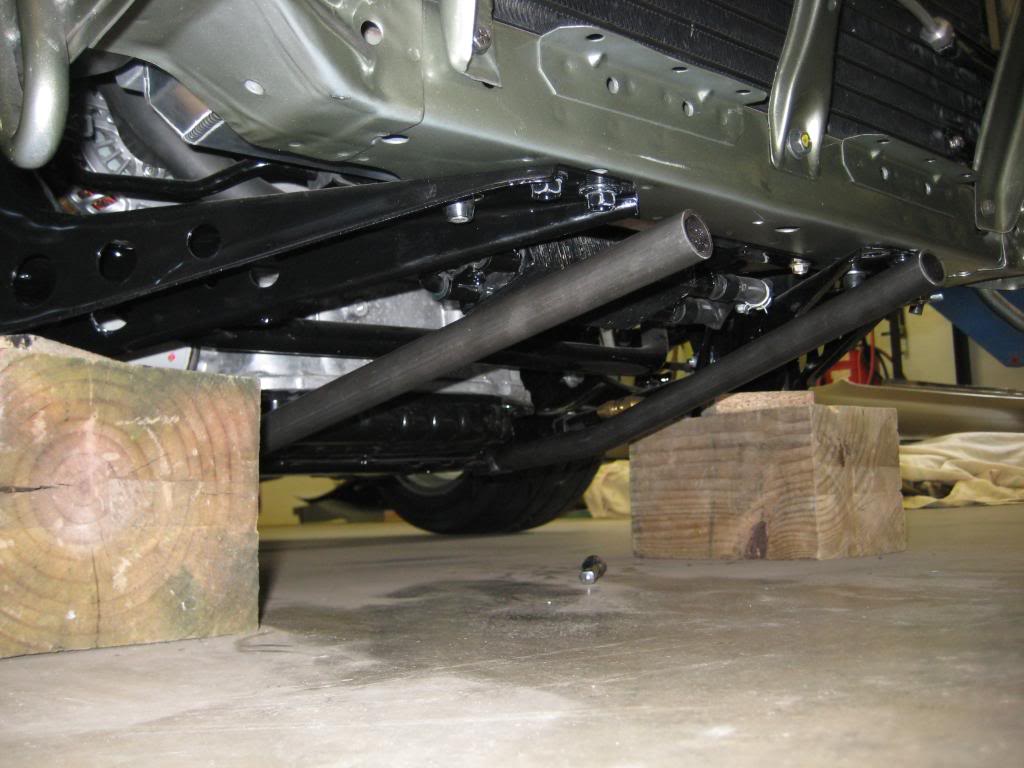
we needed to protect that low sitting aluminum oil pan
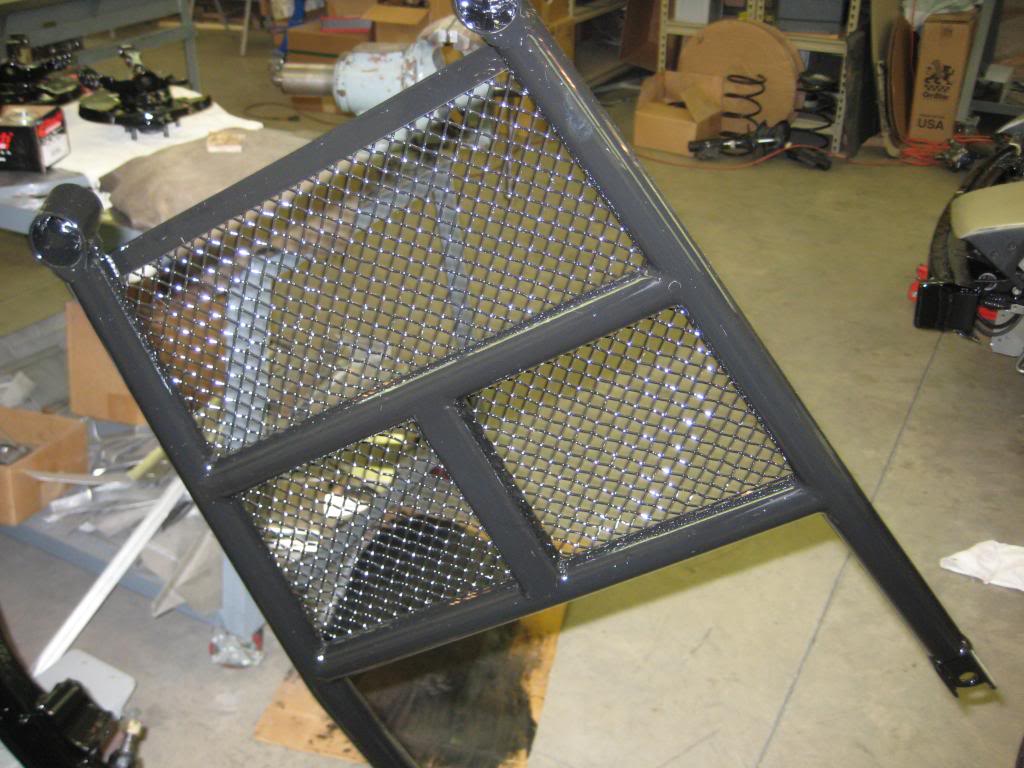
so we built this skid plate, the mesh is painted stainless steel
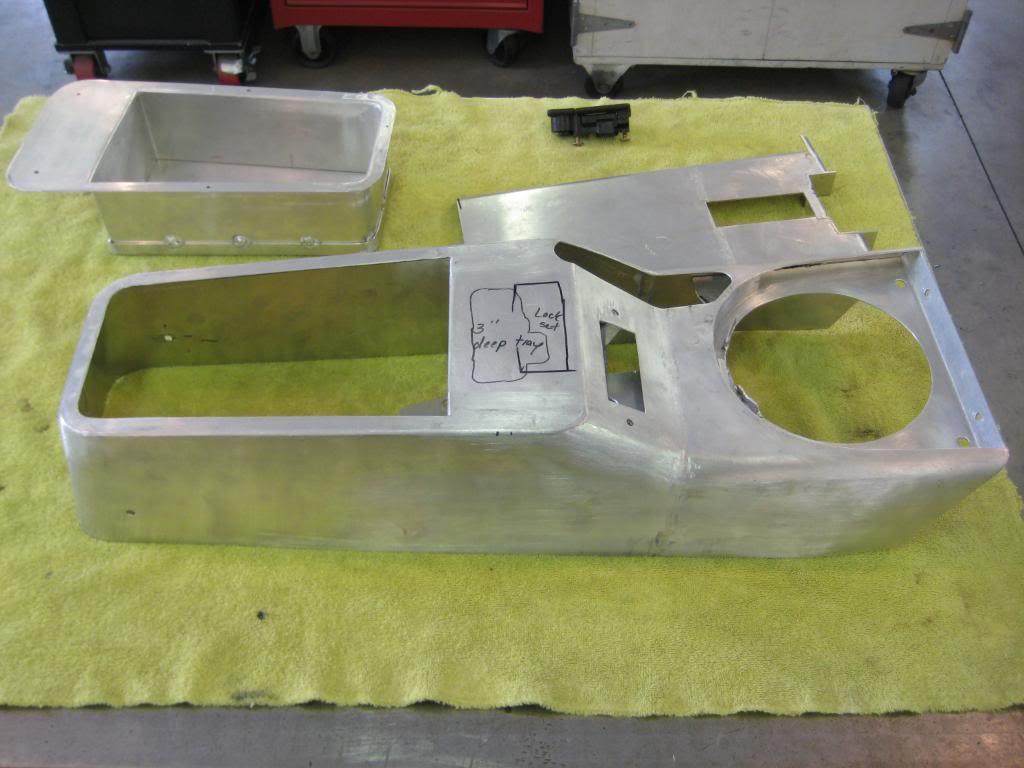
some work on the interior, I am building the center console
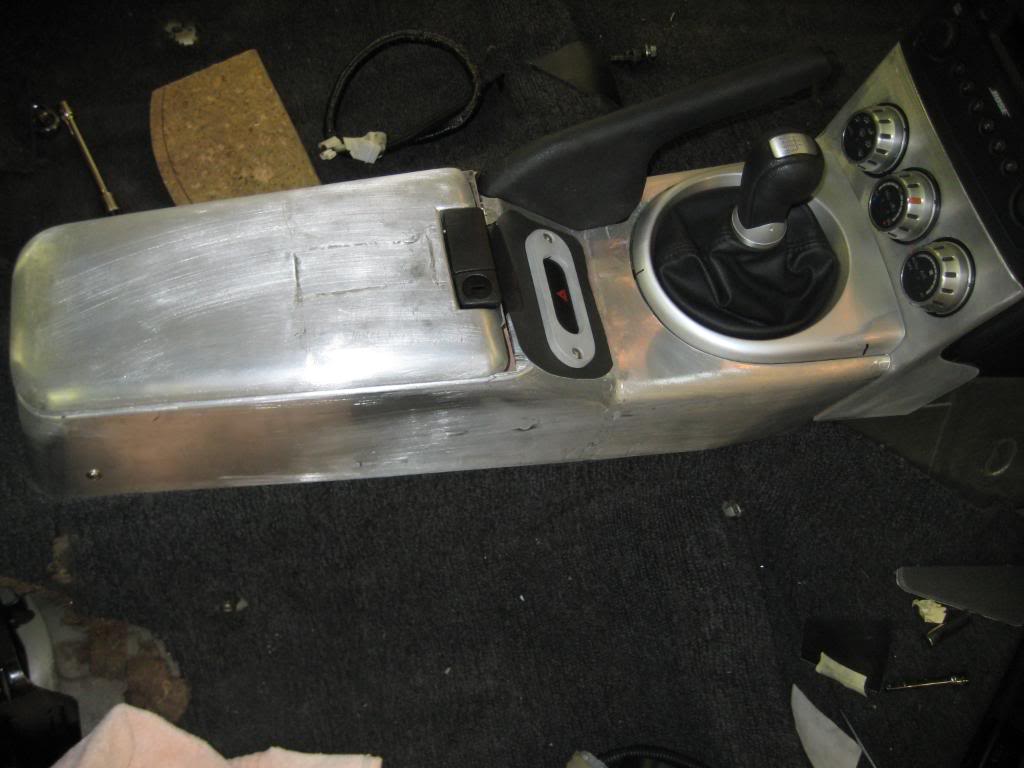
fitting it to the Z dash
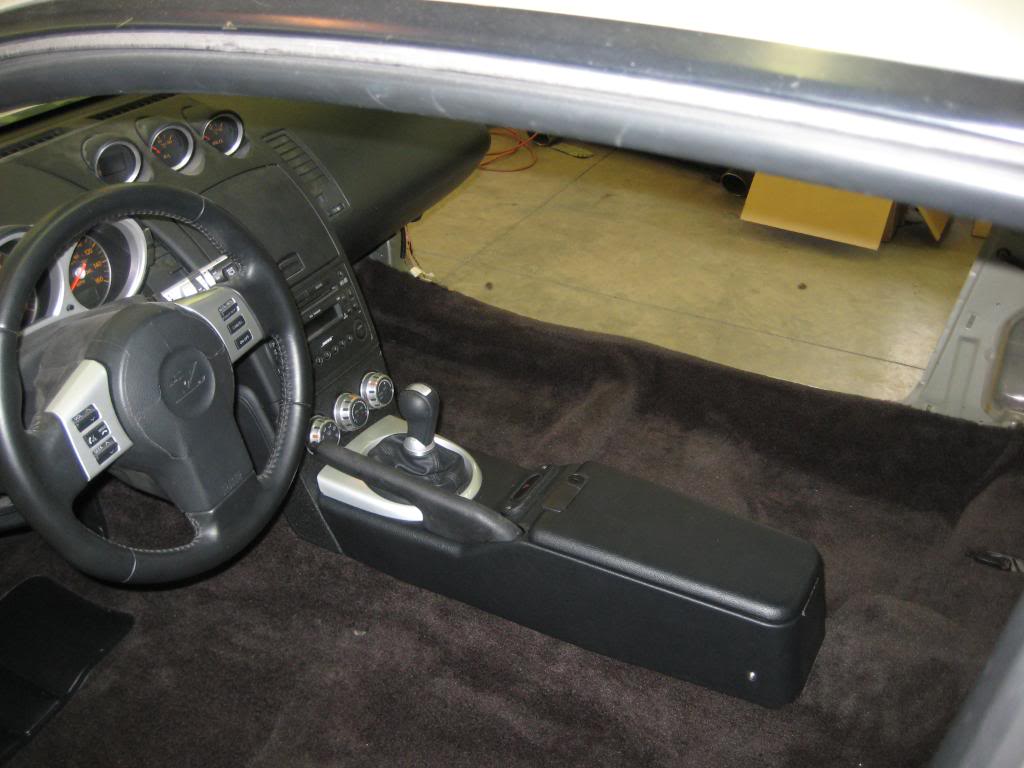
after I covered it in black vinyl
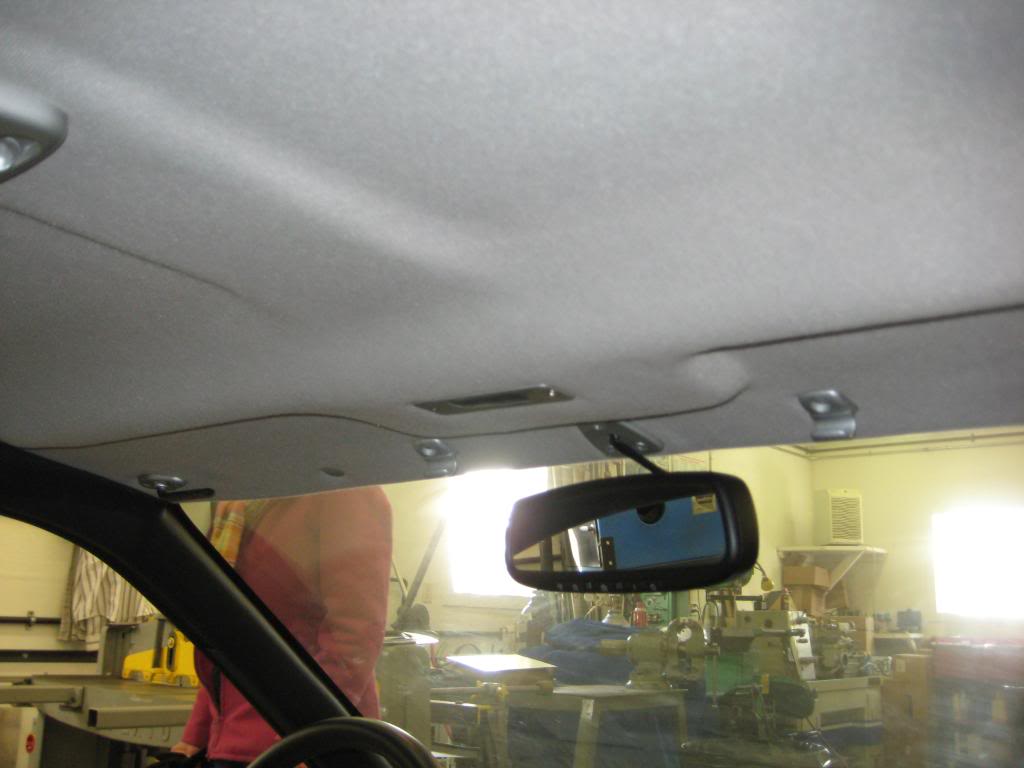
here is the headliner, I recovered it with headliner material that had a foam backing, that is the Z mirror
This just about brings it up to date...the carpet is in and I am installing the seat belts...two side panels of the
dash need to be fabricated and covered in vinyl...package tray needs to be covered...I'll post more pics shortly
I have hundreds of photos so if something strikes your interest and you want more details on something,
let me know
Thanks
I had spent the previous four years building from scratch, a custom two seat aluminum body roadster with a Subaru 2.5 five speed all wheel drive. He got the build bug. He wanted to do an engine swap into a 240SX. We decided to try to find one. After about a year, he located this rust-free original paint coupe in Miami, Fla. We made a road trip all-nighter from Miami about two years ago in February, 2009. While he was searching for the car, he decided on the vq35 engine swap. We went to work locating a donor car for the swap. I found this 2008 350Z on an insurance auction website about 3 months later, in Salem, Mass. My wife and I made the round trip in a day, hauling it back on a rented car hauler trailer, to my shop in Lakewood, N.Y.
After we got it home and looked at it, we decided it had so many things that would work in the 240SX coupe, that we would do a lot more swapping. It has been about two years now and the swapping is done. We ended up using the 350Z engine, tranny (six speed), clutch master cylinder, steering column, entire dash, rear diff and entire wiring harness and emissions system.
We started by stripping the S13 down to the sheet metal, cataloging all the parts as they came off. Then we started rough fitting components just by eye, to see how things lined up. First was the engine fitting; it was pretty tight, but it fit, we decide early on to remove the top cross-member above the radiator and fabricate bolt flanges to make it easy to get it in and out. The engine mount cross-member needed to be modified by cutting, lowering and re-welding to use the original Z engine mounts. We also fabricated a new tranny mount, and reworked the rear diff sub frame to use the Z limited slip with 95-98 five bolt hubs and custom axles from the Drive Shaft shop. They also supplied a custom driveshaft. We looked at the dash and gauges and, thought about the options, and decided to use the entire dash and wiring harness. We used the 240 gas tank and modified it with a second riser and flange to accept the two sending unit harness. We also used all emissions systems. The dash was just a little too wide to fit but we just cut it short and fabricated. The exhaust didn�t fit but with a little chopping and welding it just clears the firewall. We also kept all of the heat/air controls and slipped them into the dash.
Allen wanted to get 265�s under all four corners, and we soon determined we would need to fab our own strut cartridges and coilovers, and rear coilovers as well. Some research on the web, and my son had the info on what struts, springs, shocks, and wheels and tires would work. We made our own camber plates and strut braces as well. There have been a lot of other little things along the way. One thing that we did come to realize was just how many things were compatible from these two cars built 16 years apart. The wiring harness chassis ground points lined up, the bolt pattern and screws on the sending unit were exactly the same, the steering column splines, the axle splines, just a lot of things worked out nice.
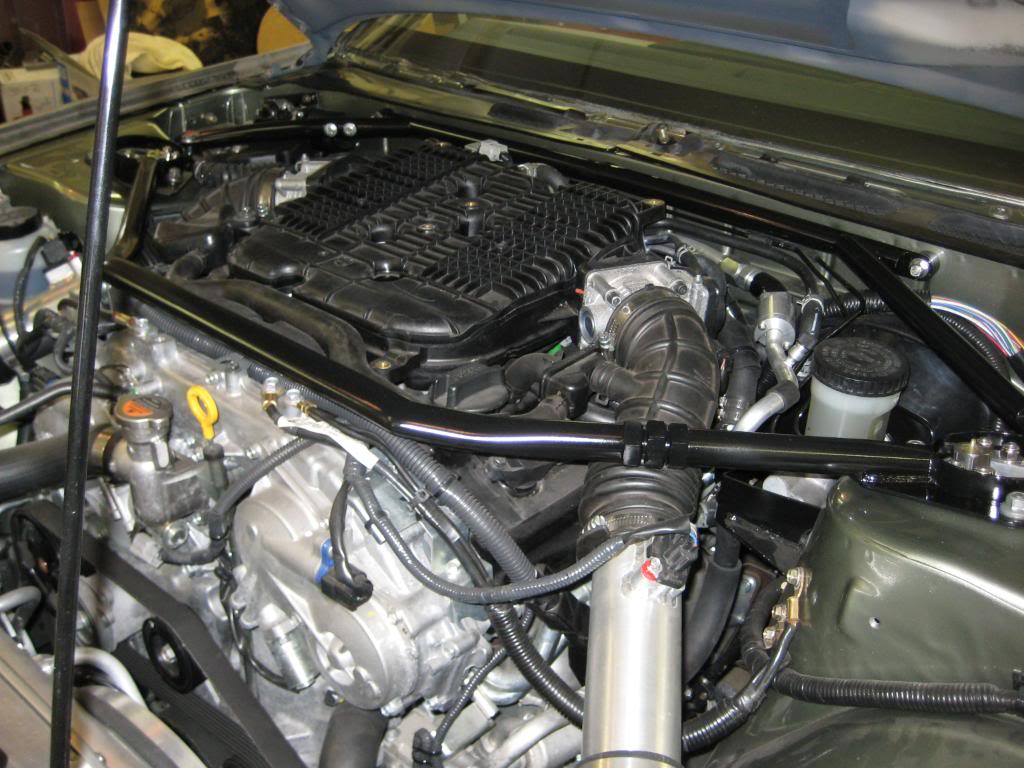
We are finishing up the interior now and will probably drive it for a year or so then get it painted. We already painted the engine compartment Millennium Jade, the color he chose. He has plans for a body kit and some other mods later, but we�ll see.
Now I�ll try and post some pics with explanations
this is the day we brought it home
we worked over the winter and pulled everything off
not much left of the Z
the donor car , a 2008 350Z
the cross mount was modified, slots are where engine mounts go, here it is primed with brush on enamel
we also fabricated a new tranny mount using original chassis points
the headers were shortened to clear the firewall
I fabricated this coupler so we could use stock cat converters
here it is installed on engine, I added extra heat shields on firewall because it's pretty tight
this shows the stock shifter support, and our shortened steel one
the shifter sits a little farther back
this is the rework of rear subframe to house Z limited slip diff
we reused the z rubber mount and added a brace that will also carry exhaust hanger, as shown above. These two
show the bottom side as we worked on it
since we are using all of the Z wiring we decided to keep both sending units in the tank
one is also the fuel pump unit, here fitting it to spare tire area, it will be soldered and then sealed
closing off the spare tire area, this top will be bolted together in case of service access, no room for spare,
but we can use it for tools and storage
we bought a radiator from Griffen, and built our own shroud from .060 aluminum, used 350Z fans
we also built a radiator overflow tank
making our cold air intakes
this will be capped off on top, air draws from front, we used dry type cone filters, the box is sealed around
the tube with foam rubber to allow engine shake, air can only enter tube thru filter end,even if foam wears out
Allen wanted to get 265/40/17s on all four corners, to get enough clearance we fabricated our own strut
housings with about 1 inch more offset at the lower ears
we also made our own threaded coilover converions
we ended up with about 3/8 " tire clearance
we used koni shocks and struts, the rears are an eclipse model,with adjustment at the top, same as the front
our camber plates, stainless steel with 5/8 spherical bearing and a 1 and 15/16" thrust bearing. with our custom
spring top hat , we tucked the spring in above the tire
no room for the battery
here you can see the strut tower braces.....
so it went in the trunk in this sealed and vented stainless battery box we made. the vent goes out the cabin vent
panel in the rear wheel well area of the trunk
the other side of the trunk, this protects the stereo amp and radio/phone/antennae components
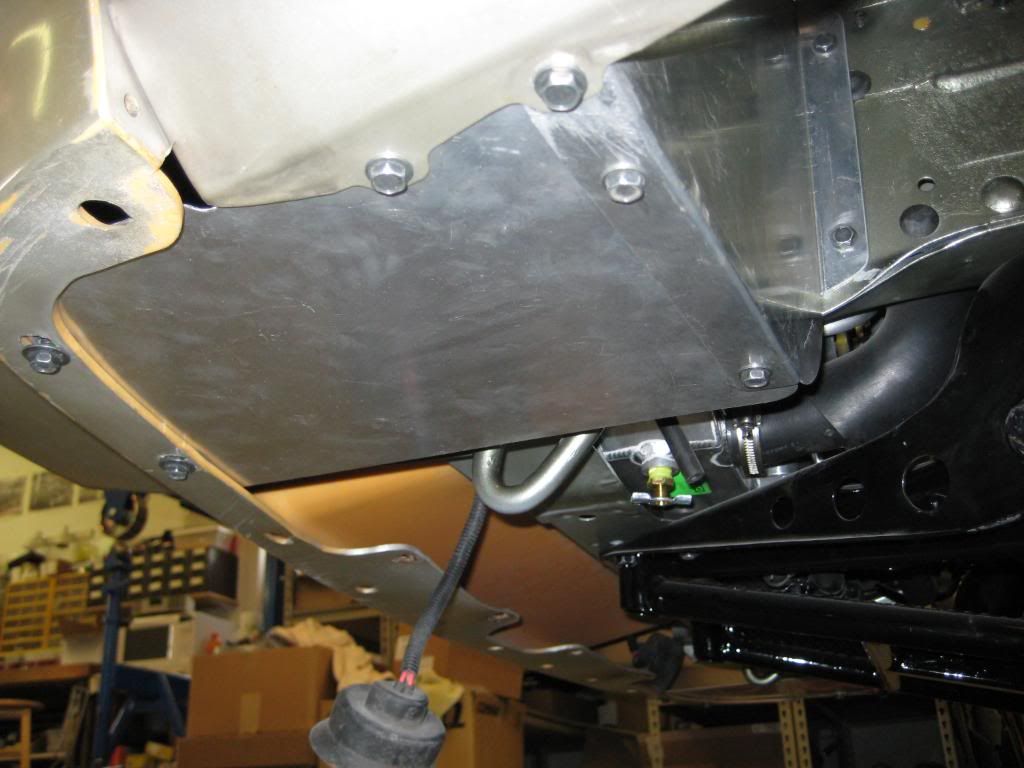
we needed to protect that low sitting aluminum oil pan
so we built this skid plate, the mesh is painted stainless steel
some work on the interior, I am building the center console
fitting it to the Z dash
after I covered it in black vinyl
here is the headliner, I recovered it with headliner material that had a foam backing, that is the Z mirror
This just about brings it up to date...the carpet is in and I am installing the seat belts...two side panels of the
dash need to be fabricated and covered in vinyl...package tray needs to be covered...I'll post more pics shortly
I have hundreds of photos so if something strikes your interest and you want more details on something,
let me know
Thanks


 03-14-2011, 04:08 PM
#4
Registered User
Thread Starter
Join Date: Feb 2011
Location: Lakewood New York
Posts: 19
I haven't driven it much, but it sounds nice
When I drove it with the old small 240SX tires, it just spun the tires
The Z had a 2.25 exhaust after the Y pipe
We bumped up to 2.5 and used a 50 Series Flowmaster
Can't drive it too much until we roll the fenders a bit
I am building a fender roller today
Will post some pics later
When I drove it with the old small 240SX tires, it just spun the tires
The Z had a 2.25 exhaust after the Y pipe
We bumped up to 2.5 and used a 50 Series Flowmaster
Can't drive it too much until we roll the fenders a bit
I am building a fender roller today
Will post some pics later


 05-19-2011, 02:01 PM
#10
Registered User
Thread Starter
Join Date: Feb 2011
Location: Lakewood New York
Posts: 19
I've been down to Florida working on my son's other car
with him and haven't updated this lately...
We've finished up some custom inner fenders and some
other stuff. I am on the road now flying to Portland Oregon,
so a little busy. I should post some pics and update maybe
Saturday or Sunday....
thanks
with him and haven't updated this lately...
We've finished up some custom inner fenders and some
other stuff. I am on the road now flying to Portland Oregon,
so a little busy. I should post some pics and update maybe
Saturday or Sunday....
thanks
05-21-2011, 12:48 PM
#11
Registered User
Thread Starter
Join Date: Feb 2011
Location: Lakewood New York
Posts: 19
Here�s an update on the build�.
These are .042� thick aluminum inner fenders. They tuck behind the lip of the fender and eliminate the need for the factory fender braces as well. The compound curves were made with the English wheel. The factory plastic liners rubbed the tires.
[IMG]http://i1218.photobucket.com/albums/dd418/homebuilt1/fenderroll005.jpg[/IMG
more inner fenders

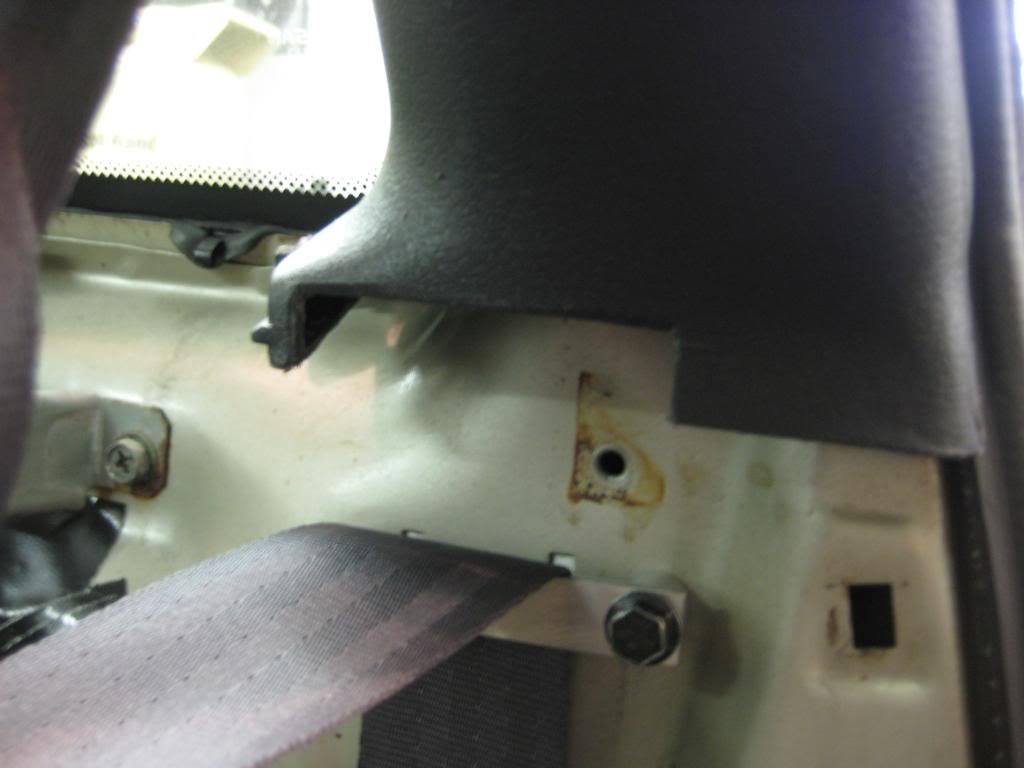
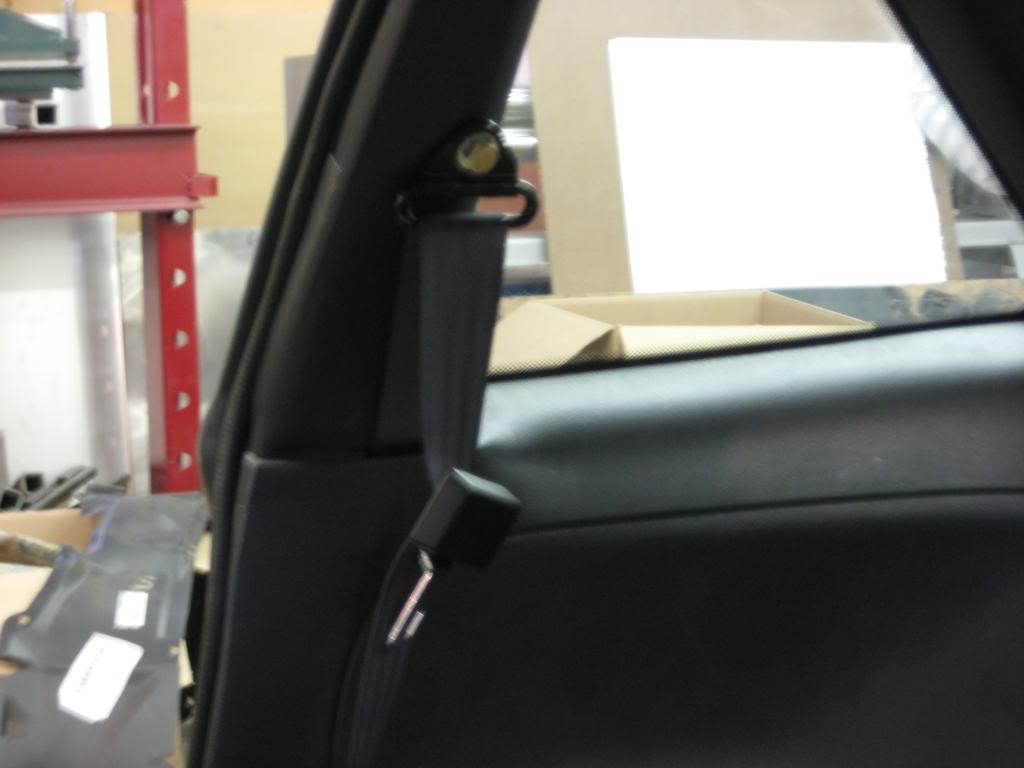
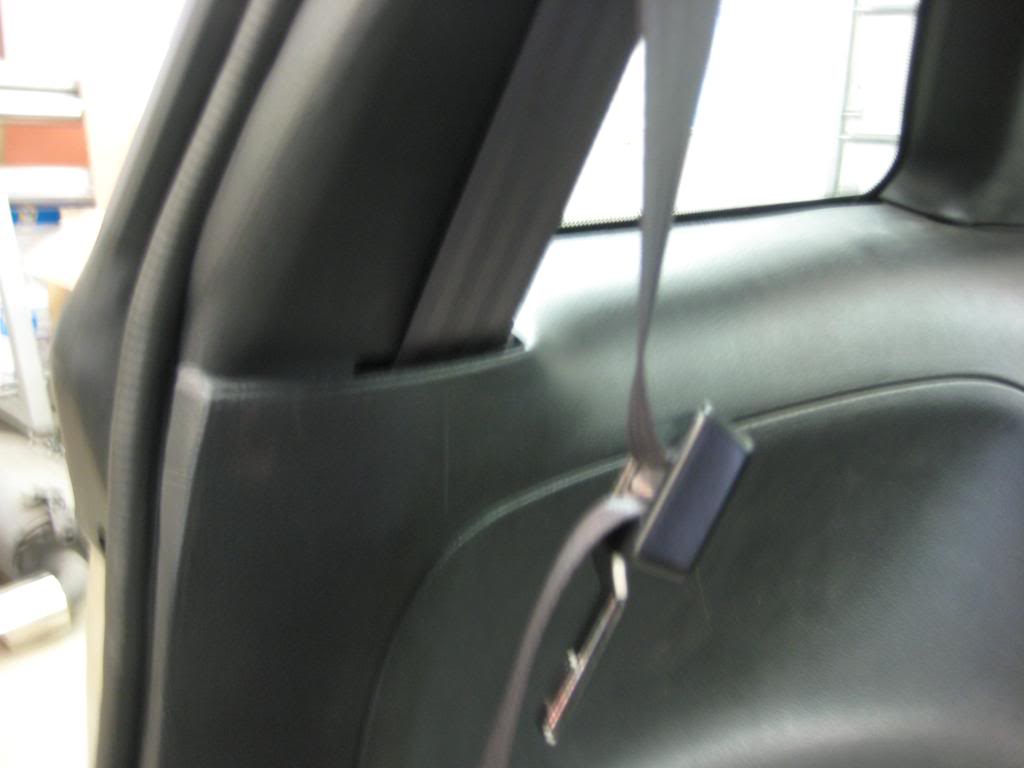
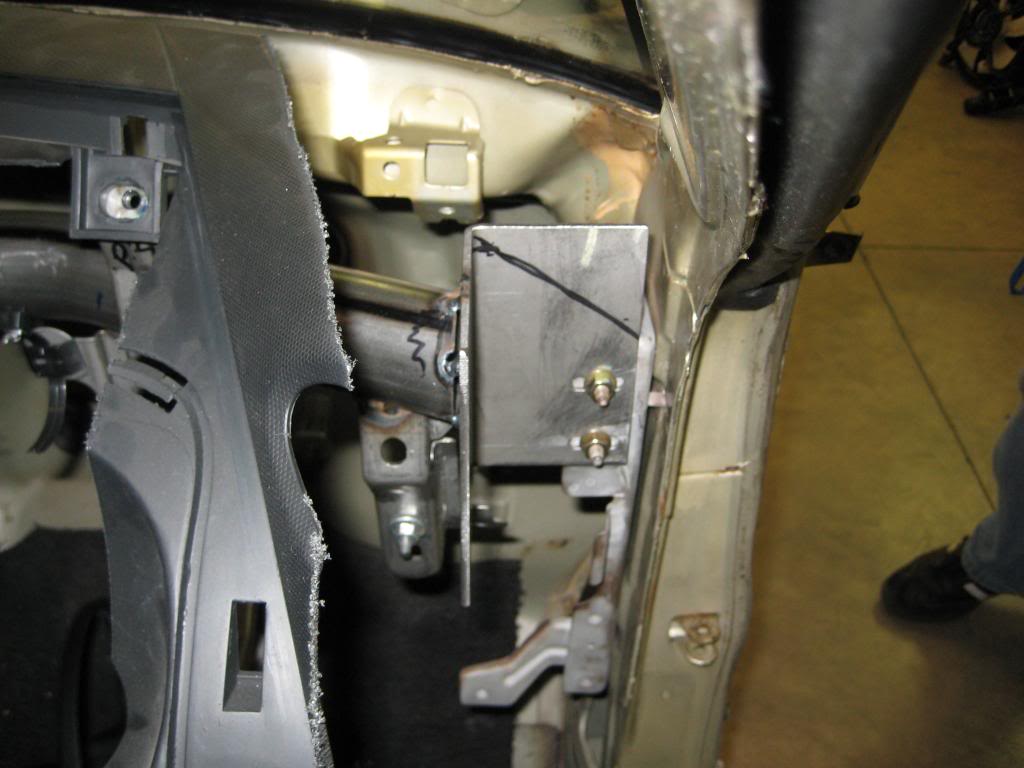
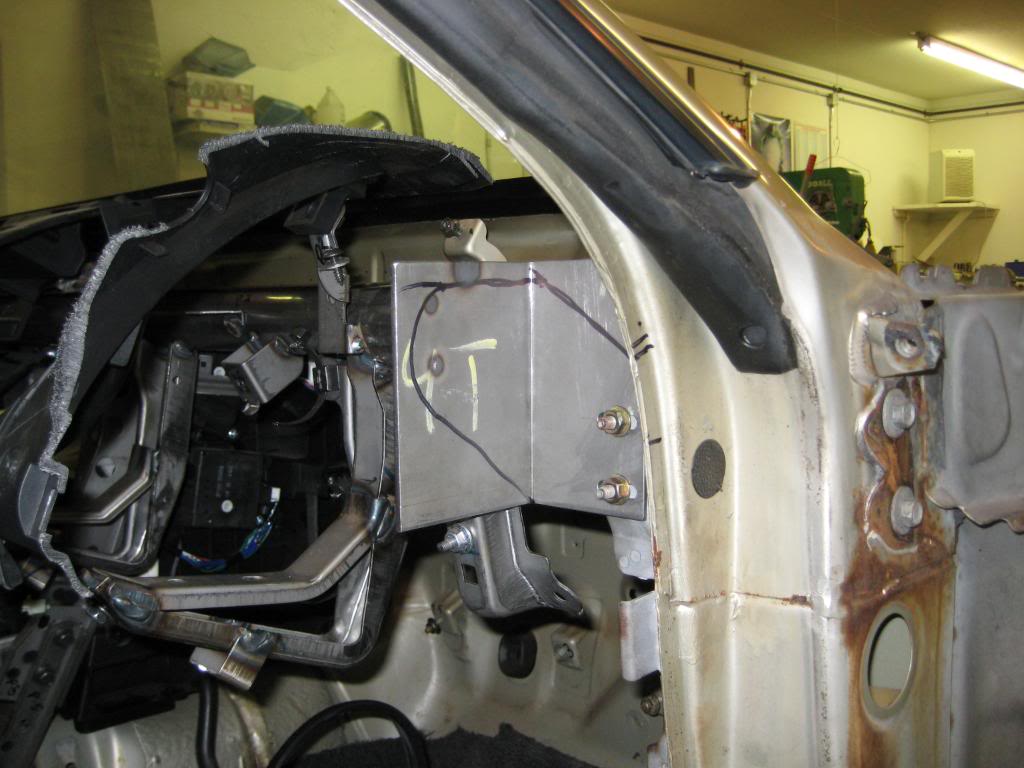
We also did the conversion to three point belts with winders. This bracket is stainless steel polished smooth where the belt rubs. Behind the pillar is a steel plate with nuts welded in place. The notch was made for the seat belt to run thru.
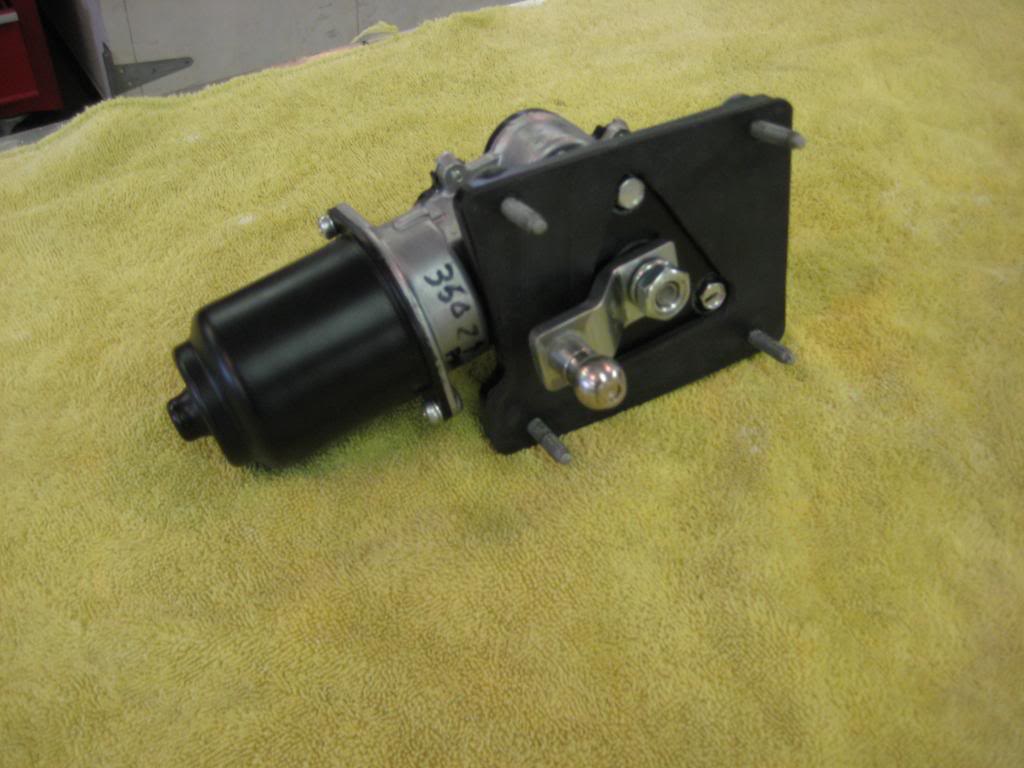
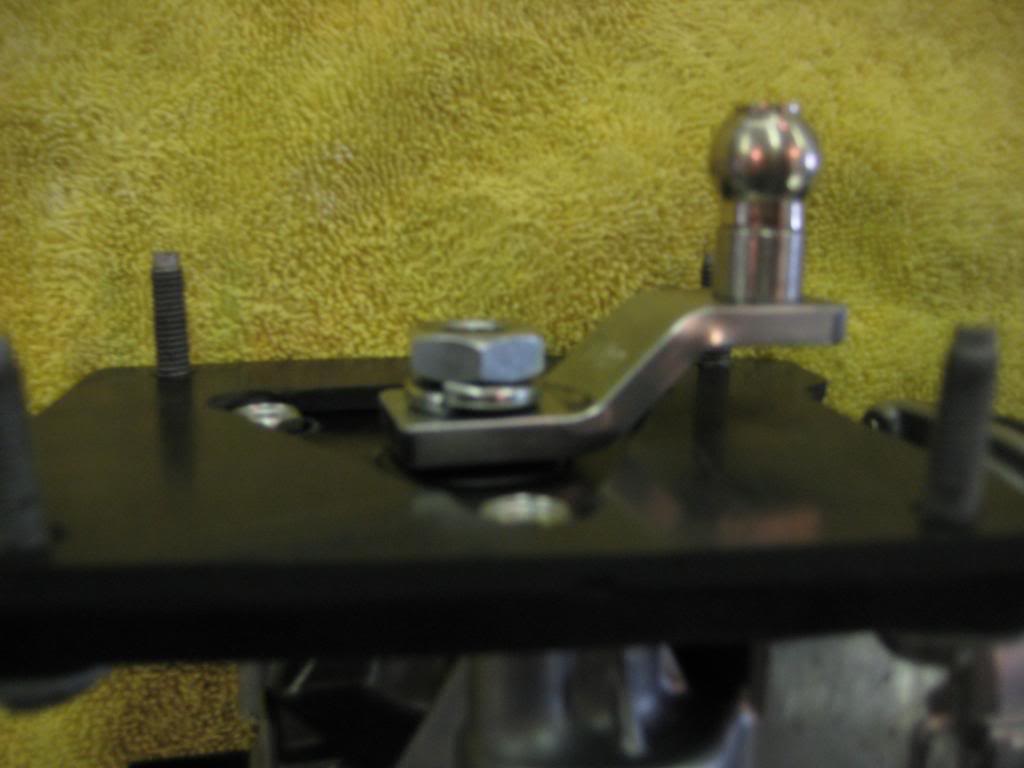
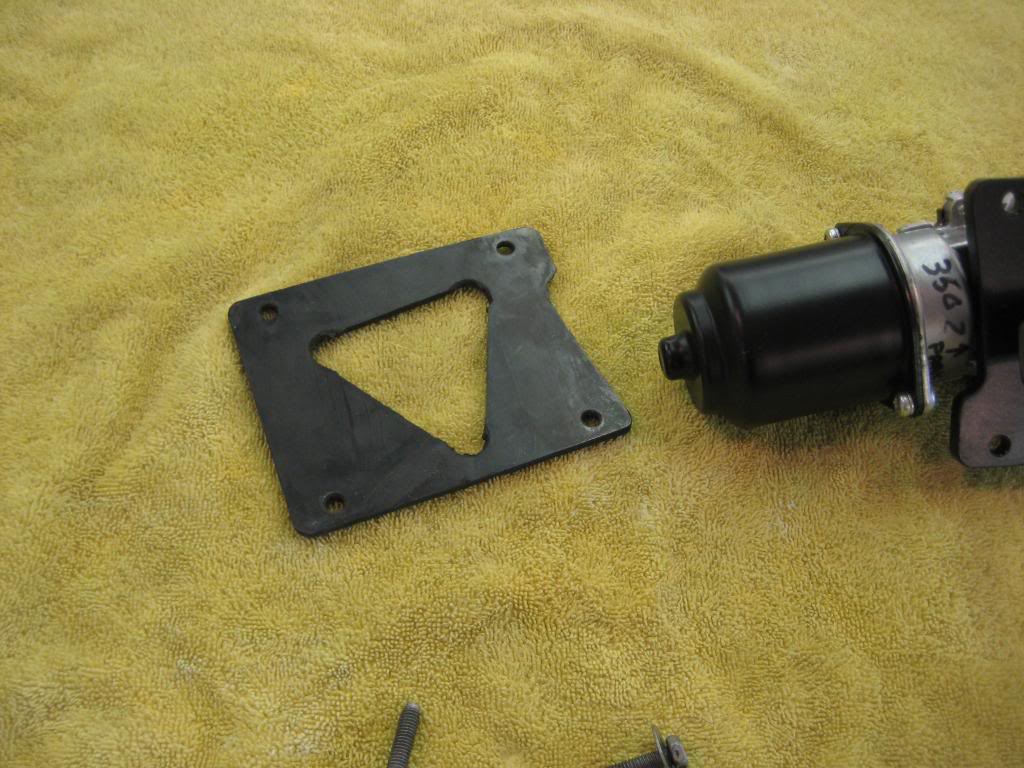
Making the wiring adapt to the wipers looked more difficult than making an adaptor plate and using the 350Z wiper motor. The actuator arm had to be modified with a new arm and socket ball from the SX, and a rubber gasket/pad against the firewall, but it wasn�t too difficult. It also was a little smaller and fits well.

More to follow�..
These are .042� thick aluminum inner fenders. They tuck behind the lip of the fender and eliminate the need for the factory fender braces as well. The compound curves were made with the English wheel. The factory plastic liners rubbed the tires.
[IMG]http://i1218.photobucket.com/albums/dd418/homebuilt1/fenderroll005.jpg[/IMG
more inner fenders
We also did the conversion to three point belts with winders. This bracket is stainless steel polished smooth where the belt rubs. Behind the pillar is a steel plate with nuts welded in place. The notch was made for the seat belt to run thru.
Making the wiring adapt to the wipers looked more difficult than making an adaptor plate and using the 350Z wiper motor. The actuator arm had to be modified with a new arm and socket ball from the SX, and a rubber gasket/pad against the firewall, but it wasn�t too difficult. It also was a little smaller and fits well.
More to follow�..
05-21-2011, 12:53 PM
#12
Registered User
Thread Starter
Join Date: Feb 2011
Location: Lakewood New York
Posts: 19
Ok,
Here is the next update… this is the interior progress.
The dash from the Z was disassembled and the two bigger pieces of the dash were loosely mocked up over the 240SX steering column and old steel dash support.
It looked like everything would fit with a little trimming. We could use a “cut” line in the dash at each side and would end up with a clean look…perhaps. The steel sub-frame for the dash was mocked up and it looked good as well. At the proper distance for the steering column used from the Z, there would be a gap at the front of the panel at the windshield, but the curves looked natural and we could fabricate an aluminum filler strip and cover it with black vinyl. We will also fabricate two end fillers that transition to the door panels for a clean look.
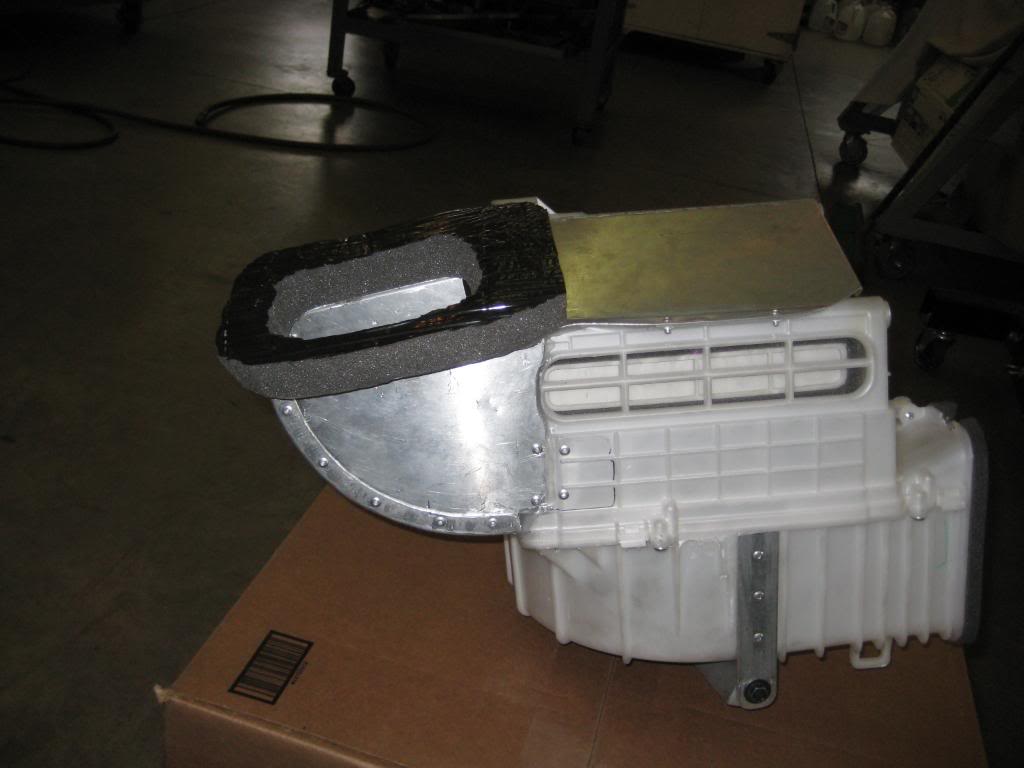
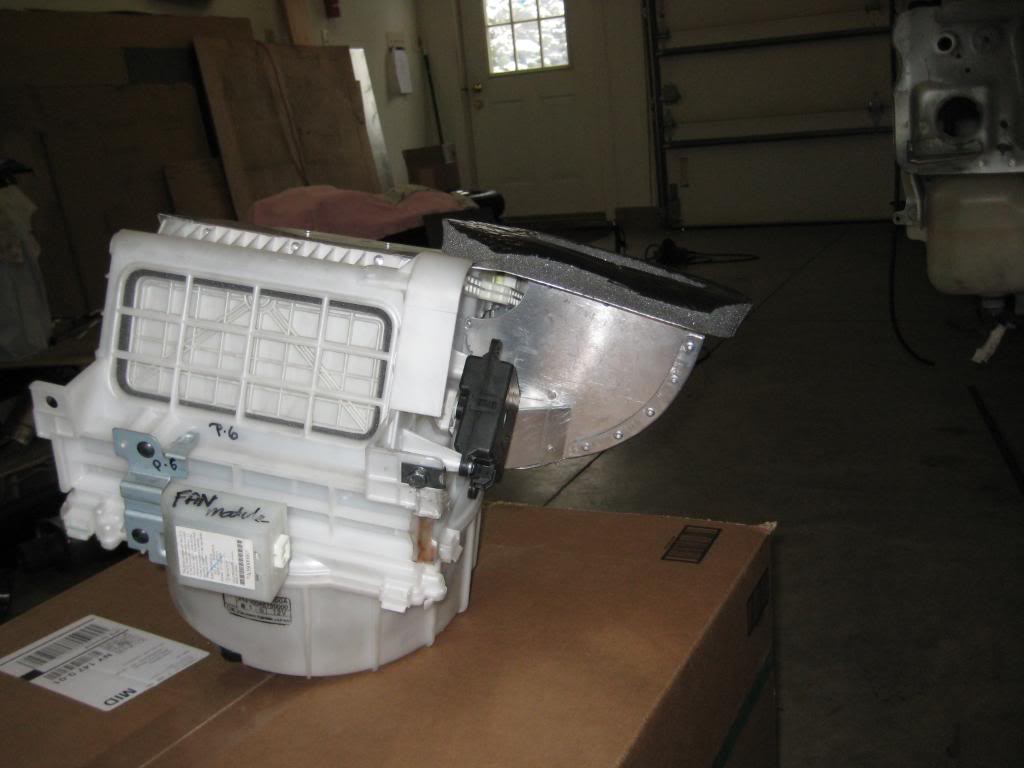
Next we looked at all of the dash components for air and heat and checked their fit also. It was very tight but would work with some modification. The heater core was located more near the middle. The A/C would work also if we added some clearance and modified the air intake plenum.
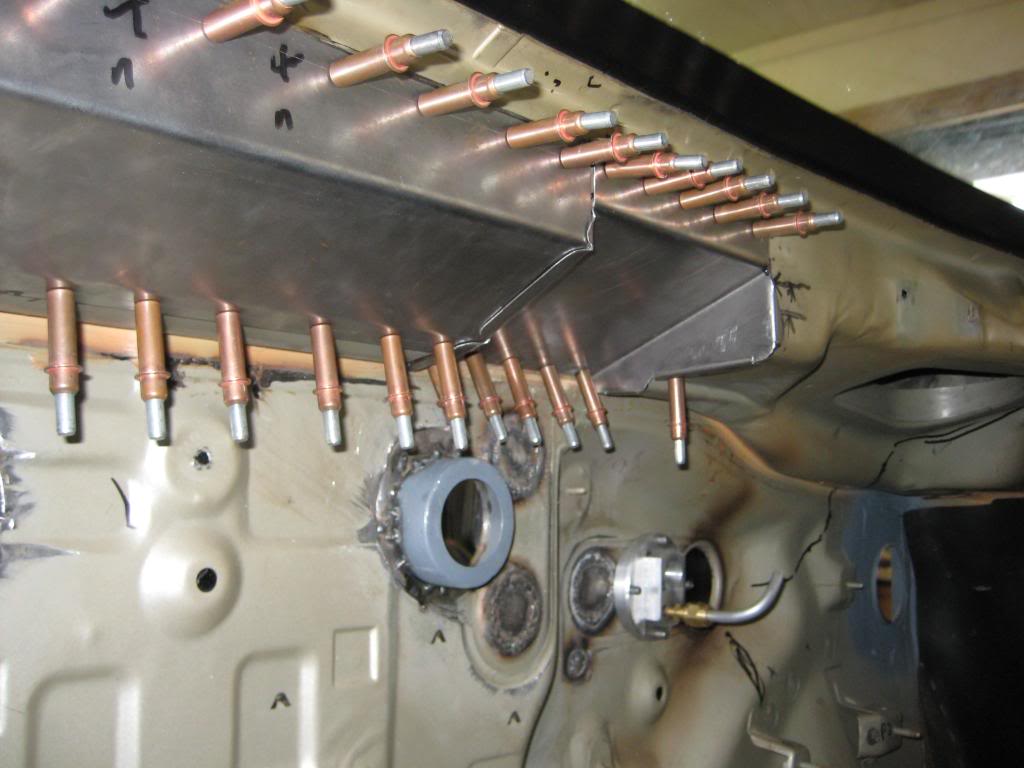
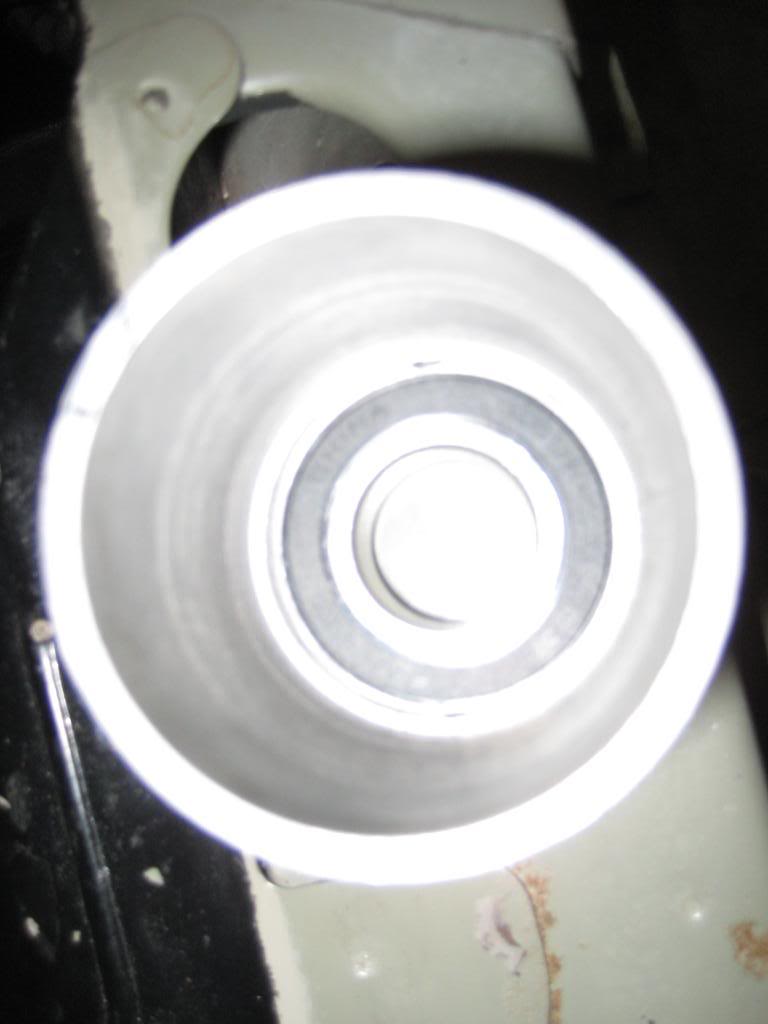
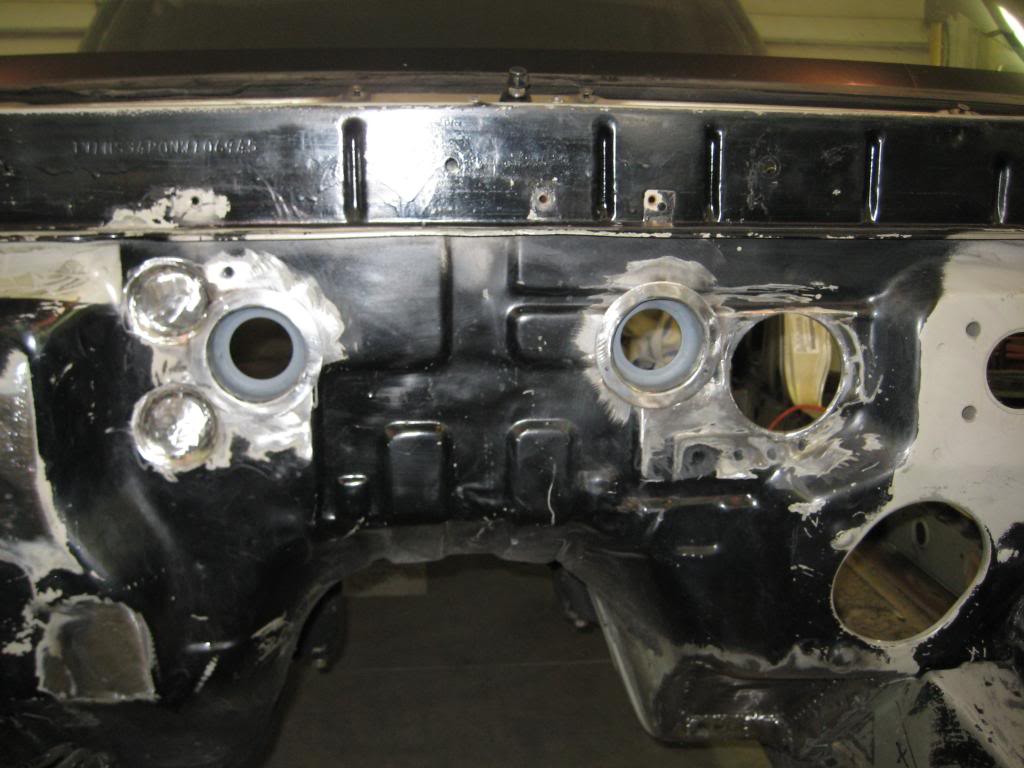
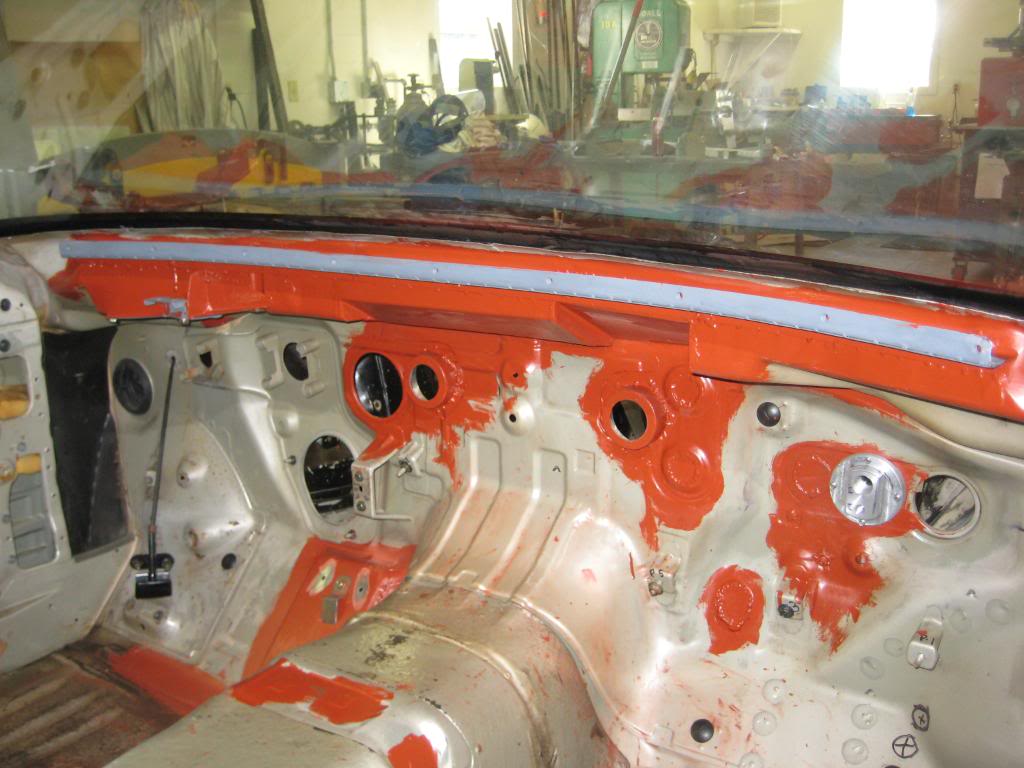
We made these collars to fit the firewall and allow the heater hoses to pass thru. They are recessed to allow more clearance between the engine and firewall.
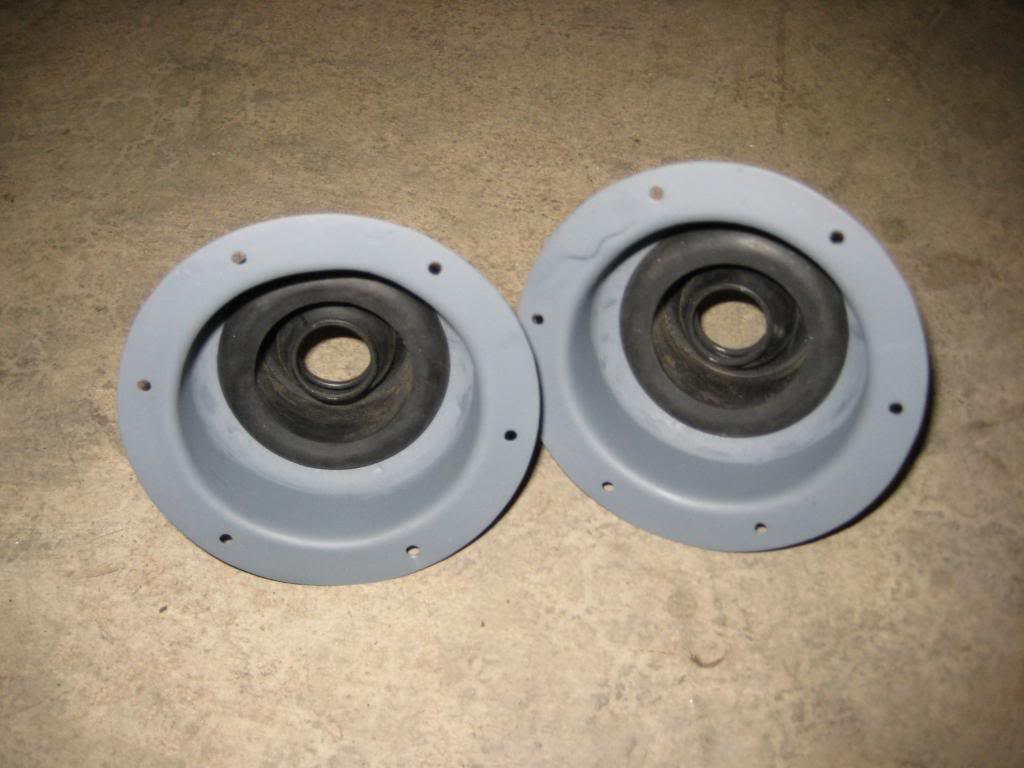
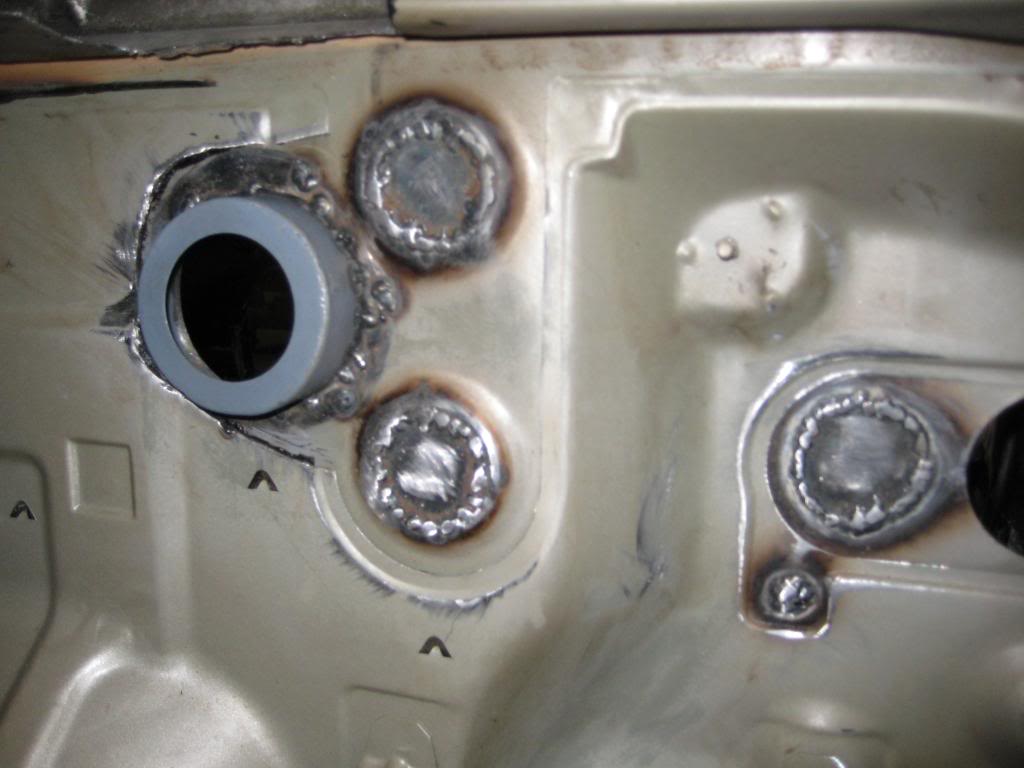
This is what they look like installed. The big hole next to this collar was added for one of the main harnesses from the Z that goes to the gas pedal and steering column.
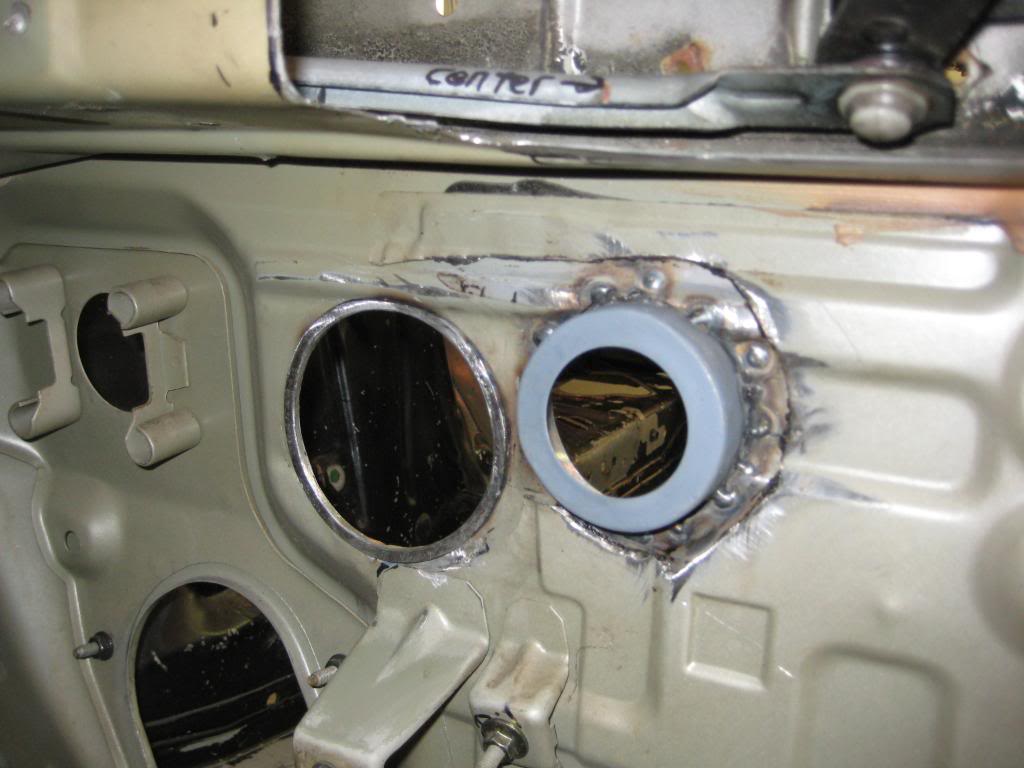
The other holes that weren’t needed were welded up.
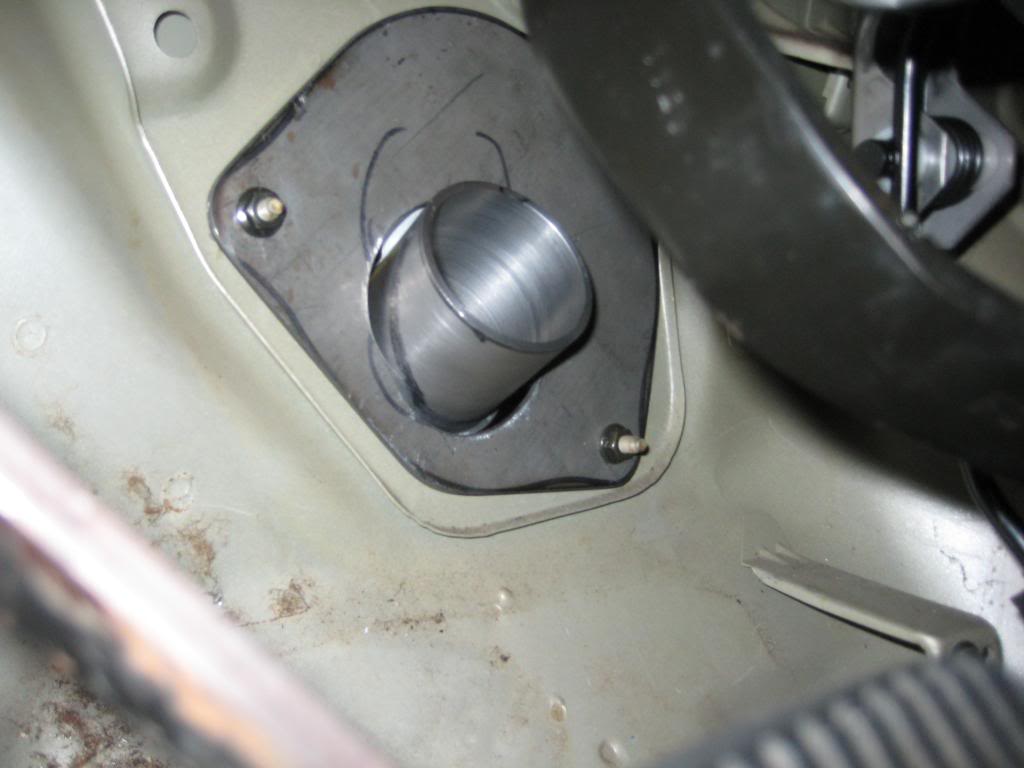
The steering column was also moved toward the frame rail to give extra clearance at the starter. This collar and bearing piece was made, and uses the original studs in the firewall.
Everything fit pretty well, so we fabricated the 350Z steel dash support into the 240. The center support lined right up with the tunnel as well. Once the steel support was in, everything else just snapped into place.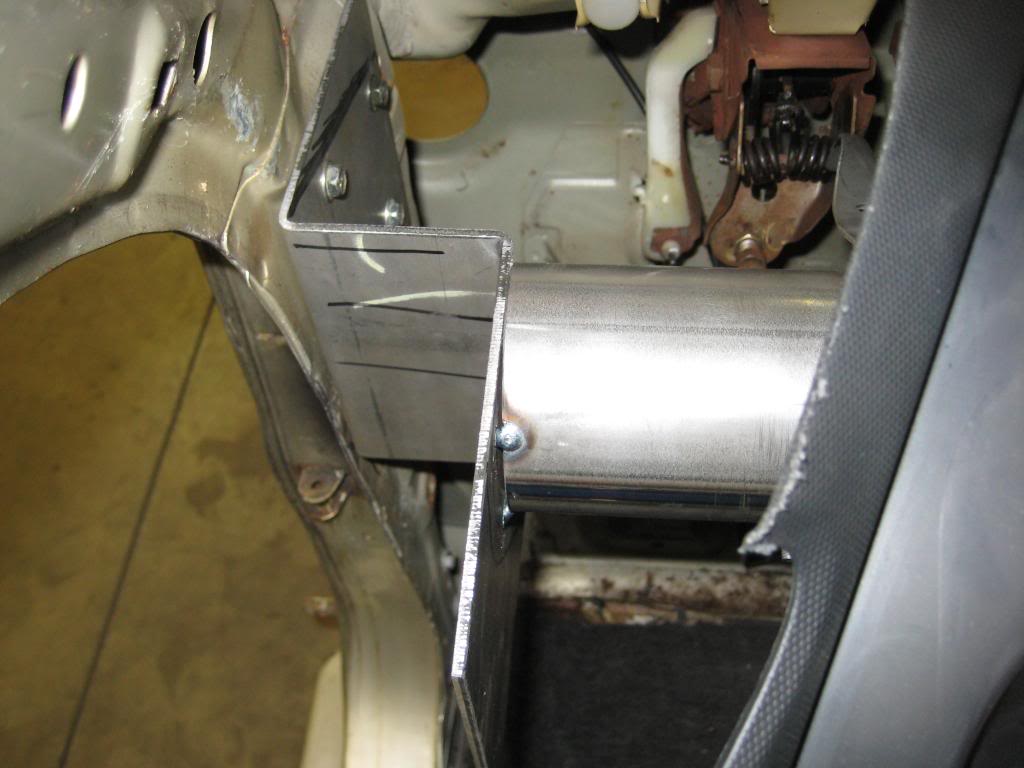
The inside primed… the flanged grey bracket will hold the front of the dash and trim strip
Primed with epoxy
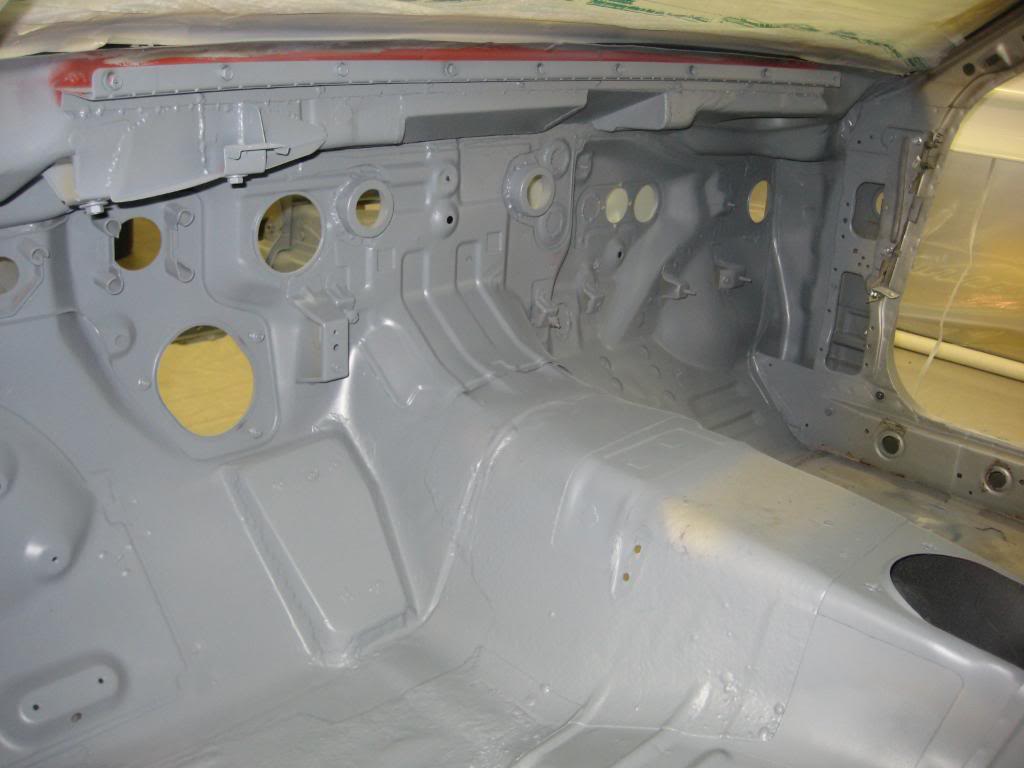
These brackets are gusseted at both ends. When it’s all bolted up and bolted to the tunnel it’s quite sturdy.
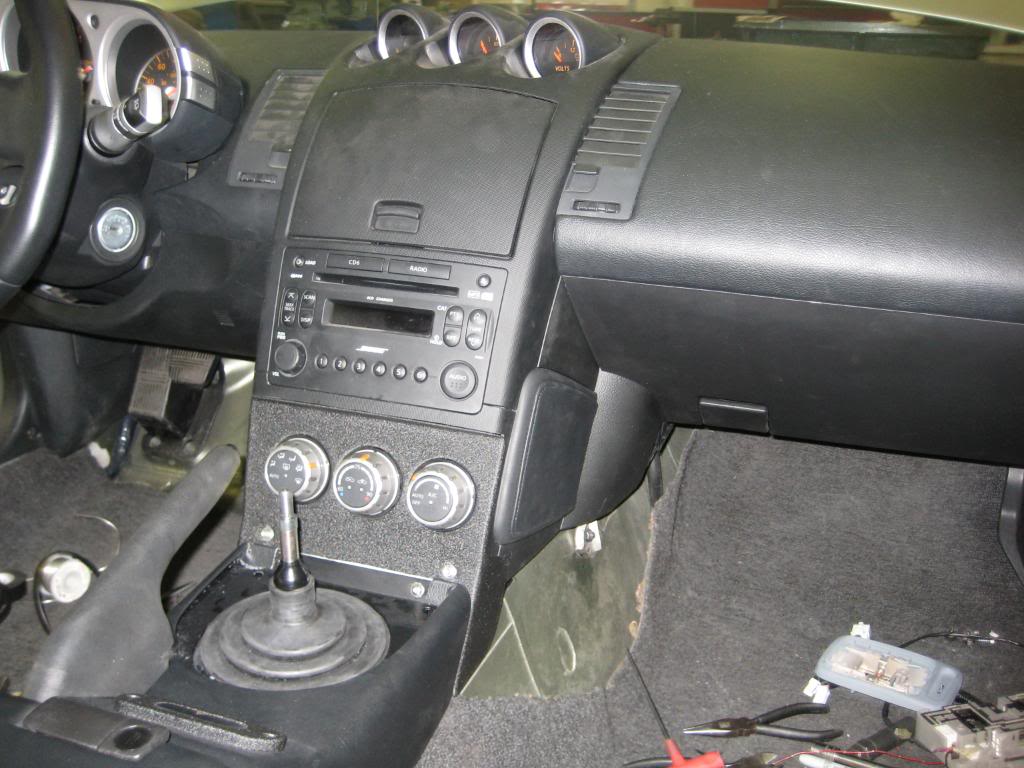
The center fit nicely. We built a custom lower dash panel that transitions to the center console and everything fits…. more of that later.
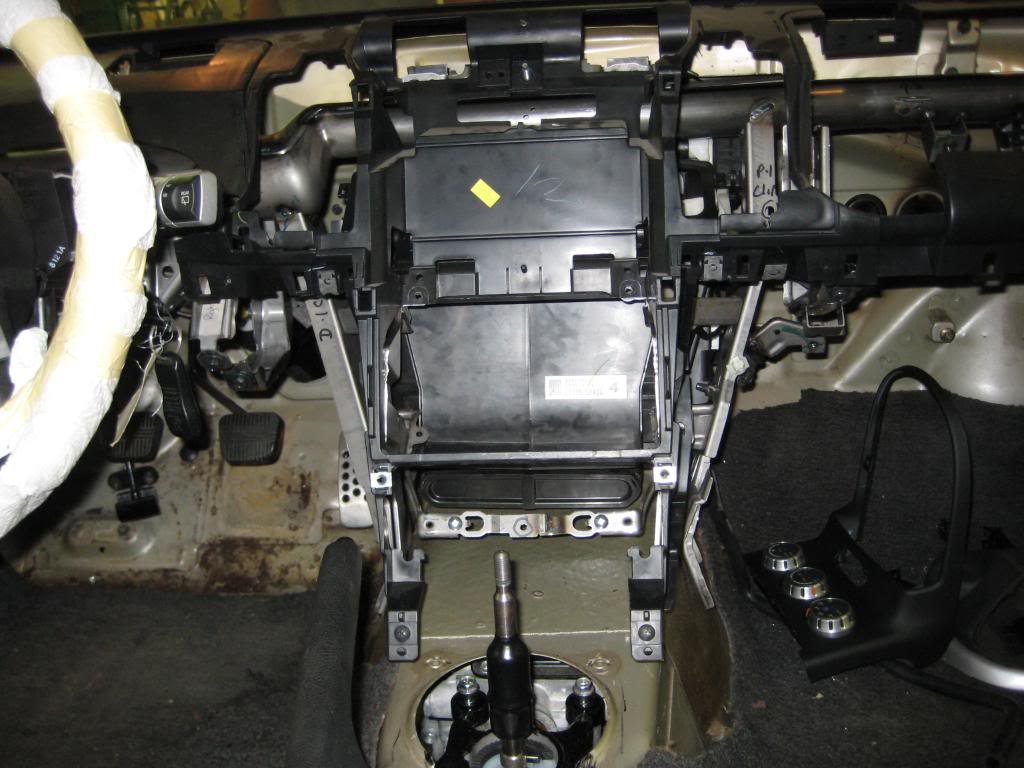
The dash support is in and stuff is going back into place. There are a lot of wires!
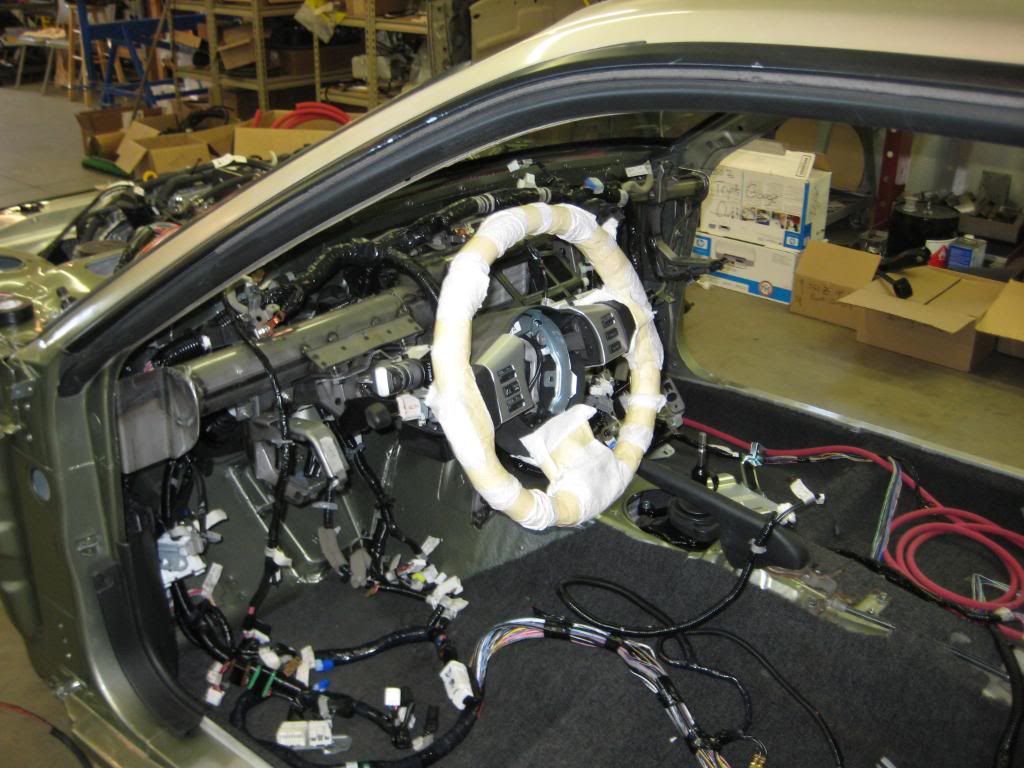
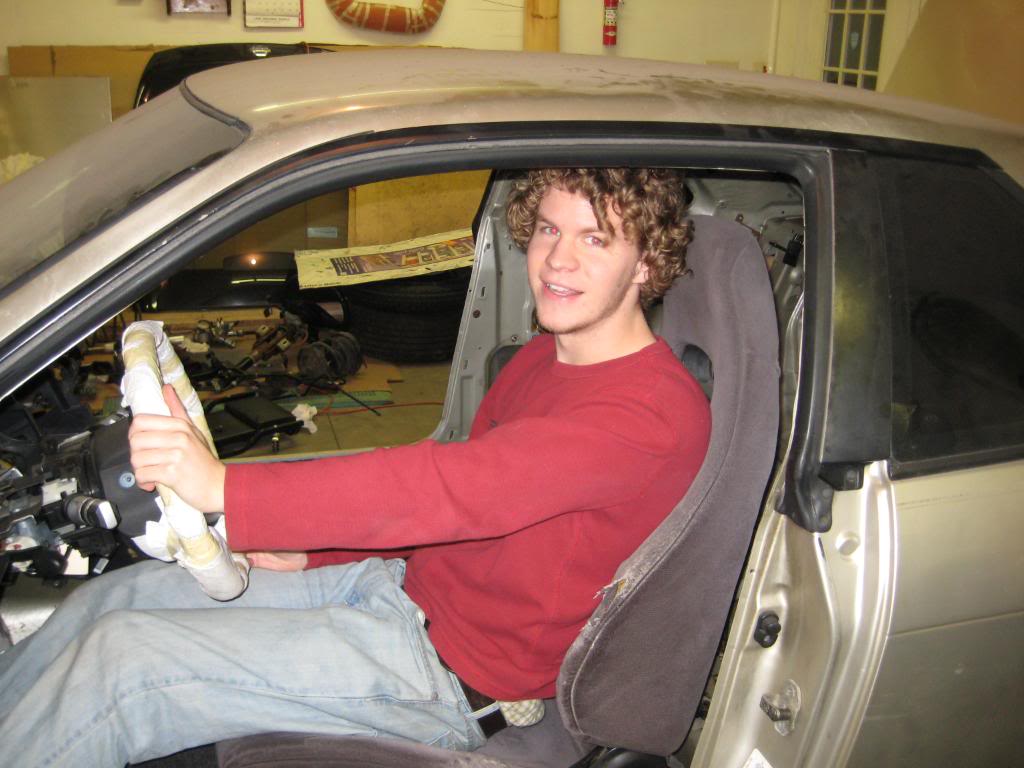
Here’s Allen, checking out the steering wheel position.
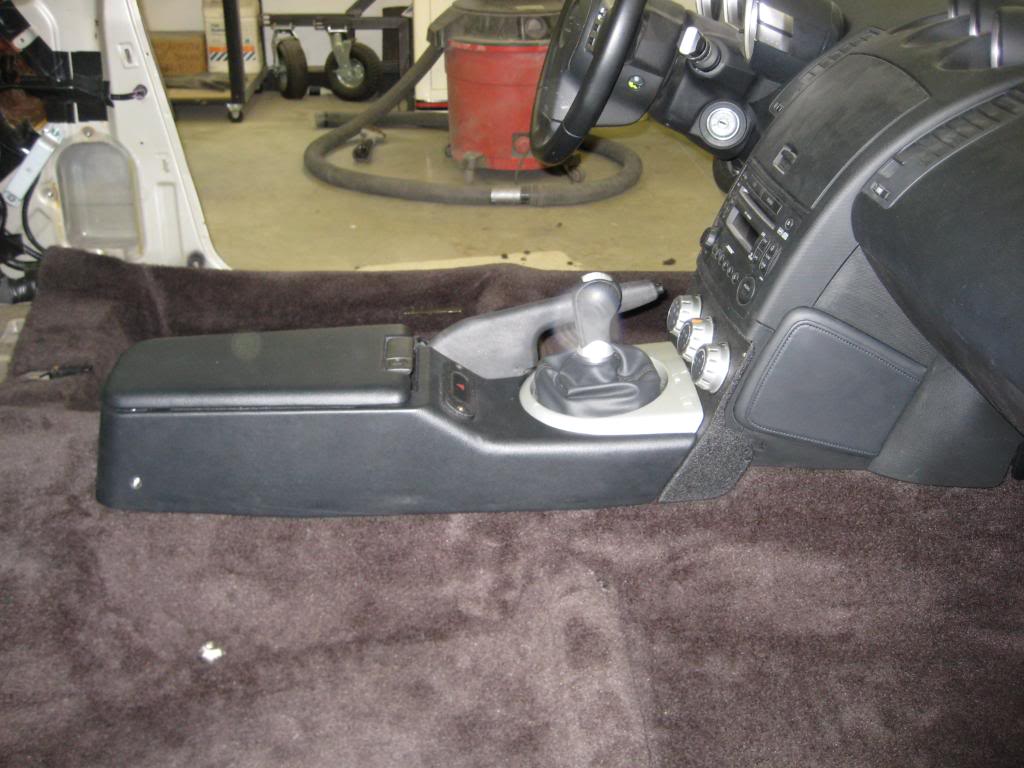
The 240 center console didn’t line up with the new Z dash, so we built a center console from .060 aluminum. The three hole A/C control cluster bracket is made from .080 aluminum.
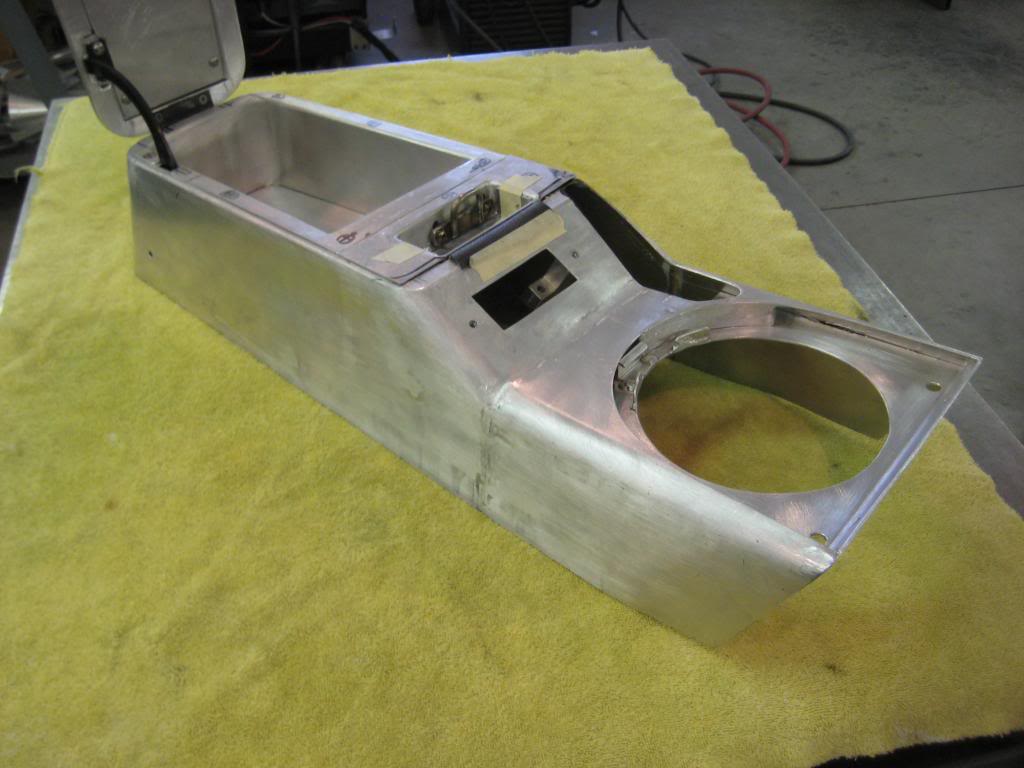

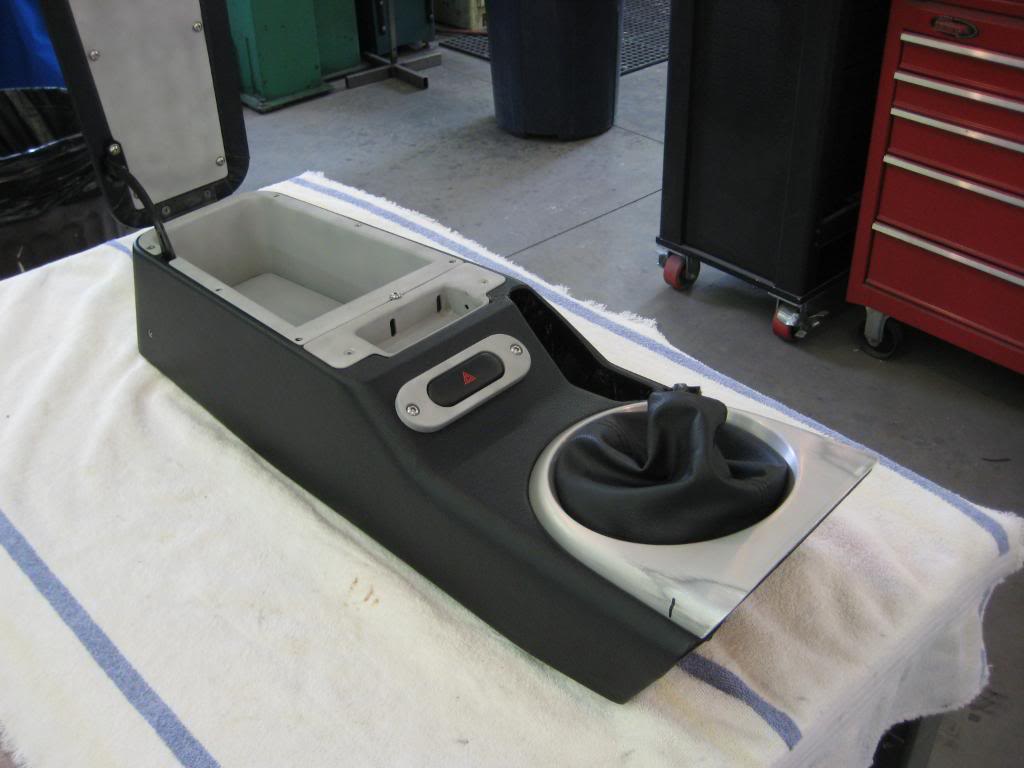
The hardware from both the Z and 240 were used.
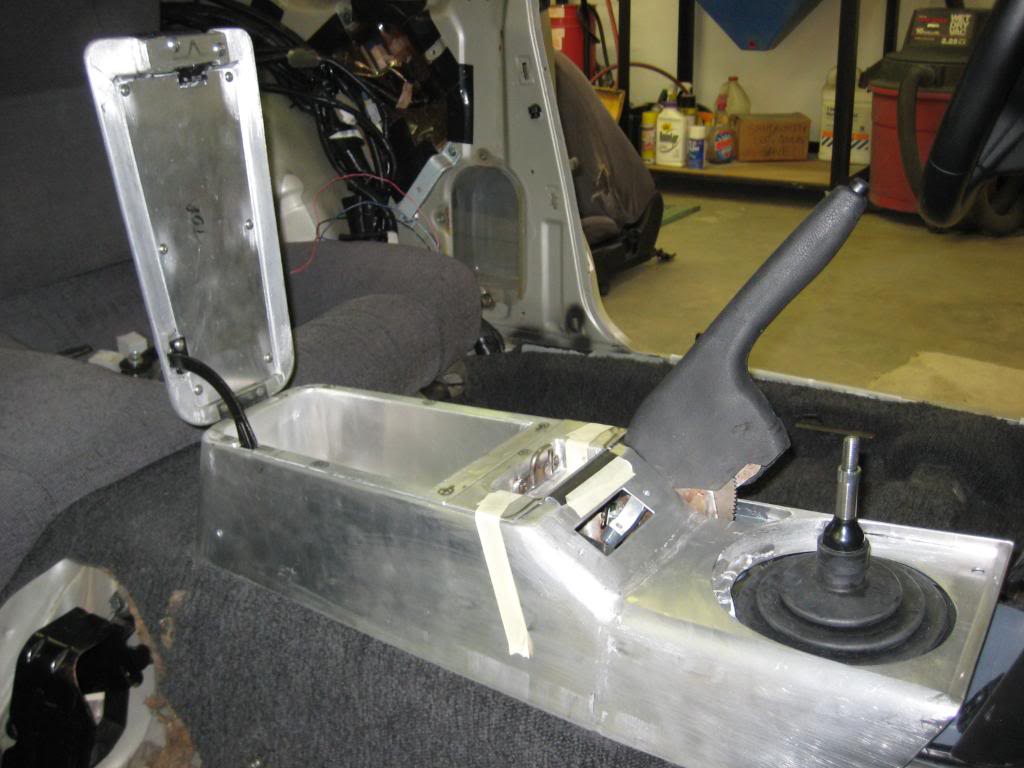
The grey pieces have been black wrinkle powder coated. The trim ring and shifter boot are from the Z .
This panel had the airbag. We made a plate to cover the big hole where it was,and skimmed it with bondo and recovered it in black vinyl
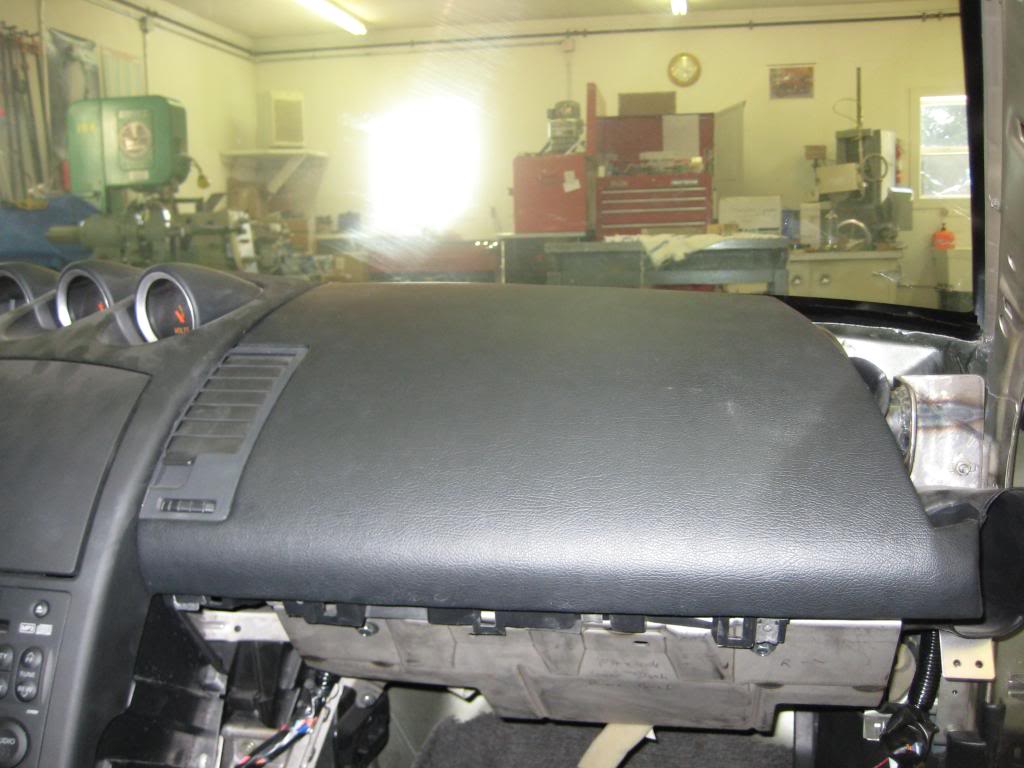
That’s about it for the front part of the interior.
More to come ….
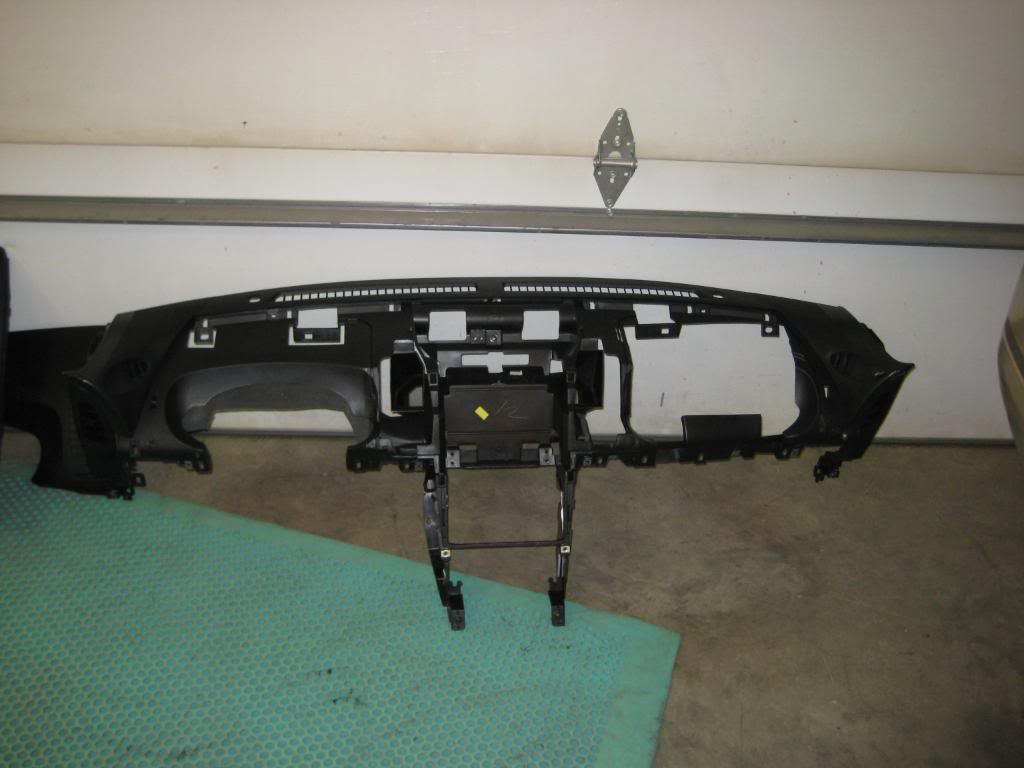
Here is the next update… this is the interior progress.
The dash from the Z was disassembled and the two bigger pieces of the dash were loosely mocked up over the 240SX steering column and old steel dash support.
It looked like everything would fit with a little trimming. We could use a “cut” line in the dash at each side and would end up with a clean look…perhaps. The steel sub-frame for the dash was mocked up and it looked good as well. At the proper distance for the steering column used from the Z, there would be a gap at the front of the panel at the windshield, but the curves looked natural and we could fabricate an aluminum filler strip and cover it with black vinyl. We will also fabricate two end fillers that transition to the door panels for a clean look.
Next we looked at all of the dash components for air and heat and checked their fit also. It was very tight but would work with some modification. The heater core was located more near the middle. The A/C would work also if we added some clearance and modified the air intake plenum.
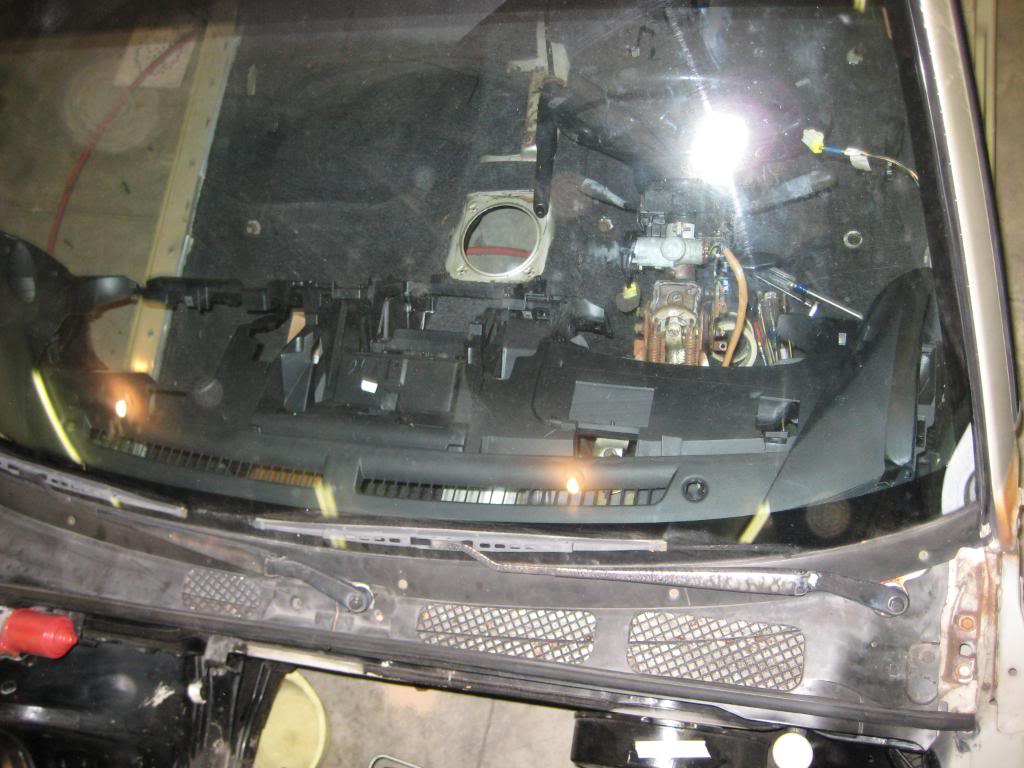
We made these collars to fit the firewall and allow the heater hoses to pass thru. They are recessed to allow more clearance between the engine and firewall.
This is what they look like installed. The big hole next to this collar was added for one of the main harnesses from the Z that goes to the gas pedal and steering column.
The other holes that weren’t needed were welded up.
The steering column was also moved toward the frame rail to give extra clearance at the starter. This collar and bearing piece was made, and uses the original studs in the firewall.
Everything fit pretty well, so we fabricated the 350Z steel dash support into the 240. The center support lined right up with the tunnel as well. Once the steel support was in, everything else just snapped into place.
The inside primed… the flanged grey bracket will hold the front of the dash and trim strip
Primed with epoxy
These brackets are gusseted at both ends. When it’s all bolted up and bolted to the tunnel it’s quite sturdy.
The center fit nicely. We built a custom lower dash panel that transitions to the center console and everything fits…. more of that later.
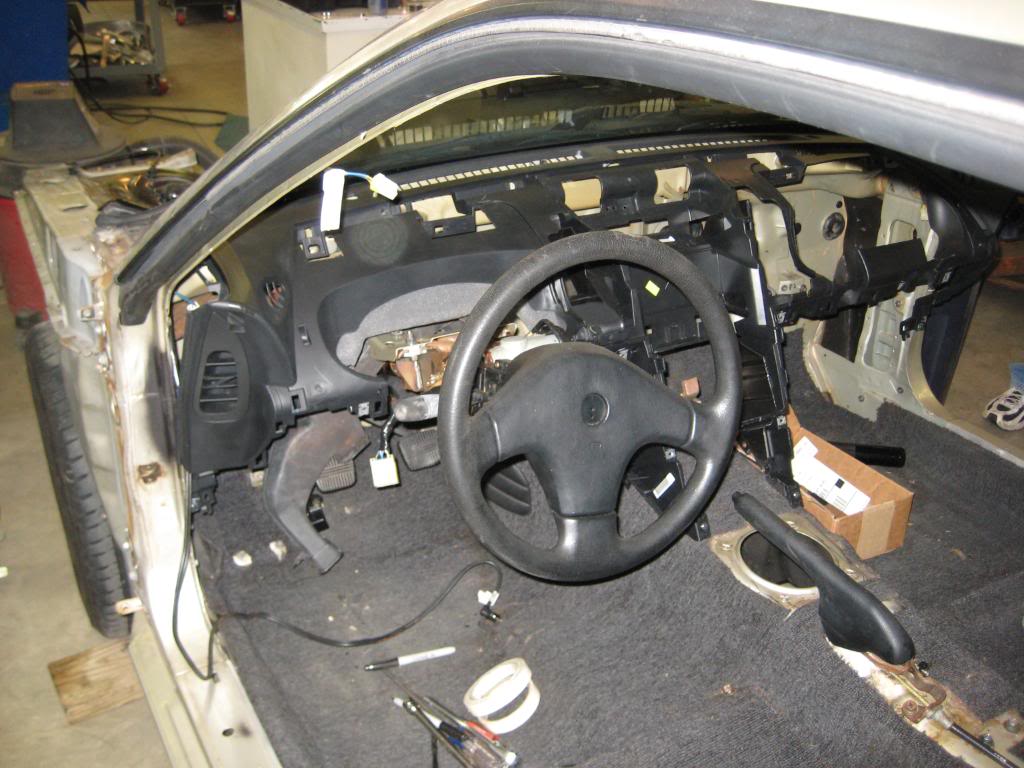
The dash support is in and stuff is going back into place. There are a lot of wires!
Here’s Allen, checking out the steering wheel position.
The 240 center console didn’t line up with the new Z dash, so we built a center console from .060 aluminum. The three hole A/C control cluster bracket is made from .080 aluminum.
The hardware from both the Z and 240 were used.
The grey pieces have been black wrinkle powder coated. The trim ring and shifter boot are from the Z .
This panel had the airbag. We made a plate to cover the big hole where it was,and skimmed it with bondo and recovered it in black vinyl
That’s about it for the front part of the interior.
More to come ….
Last edited by don; 05-21-2011 at 01:04 PM. Reason: dropped two pics
05-21-2011, 01:08 PM
#13
Registered User
Thread Starter
Join Date: Feb 2011
Location: Lakewood New York
Posts: 19
Here is the latest update,
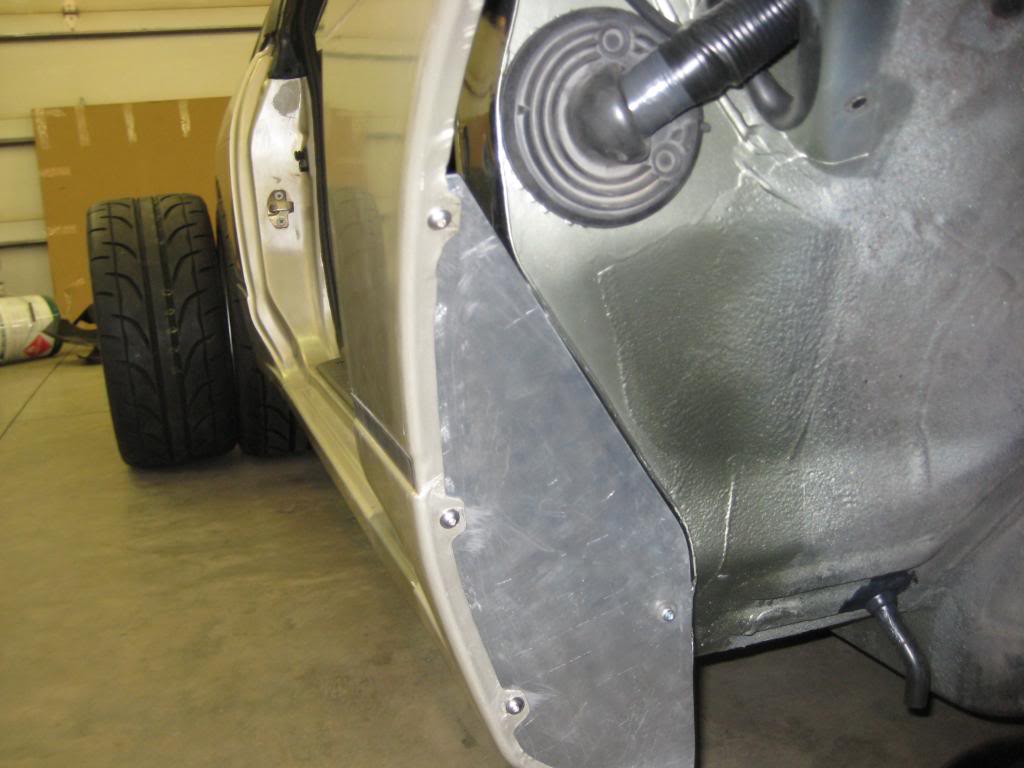
I realized on the last update of the fender liners that there wasn�t much info, and the pics didn�t really show very well what was what. The inner fender liners were made from .042 thick aluminum. It�s pretty light and easy to work. In order to get them in, they needed to be made in pieces.
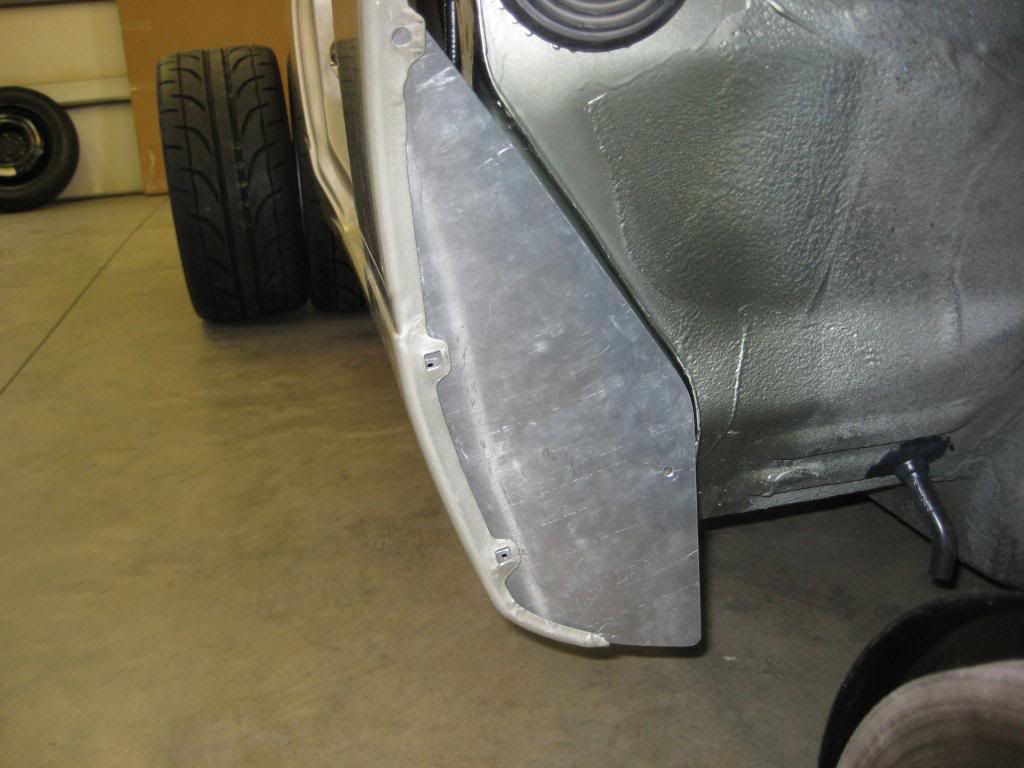
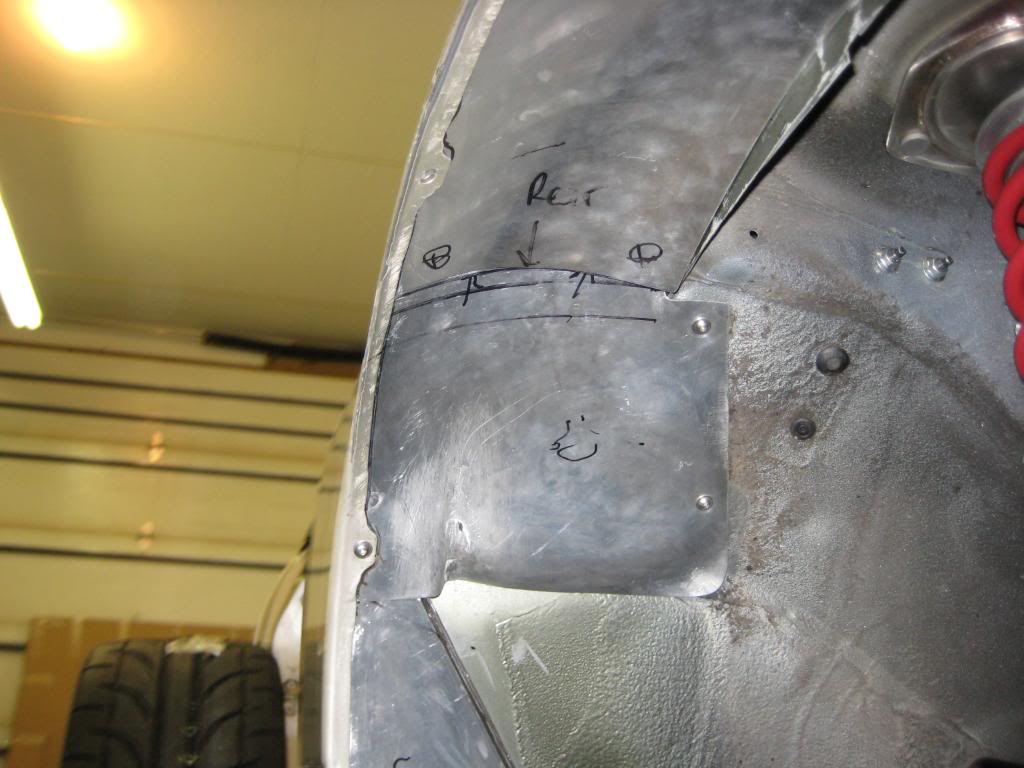
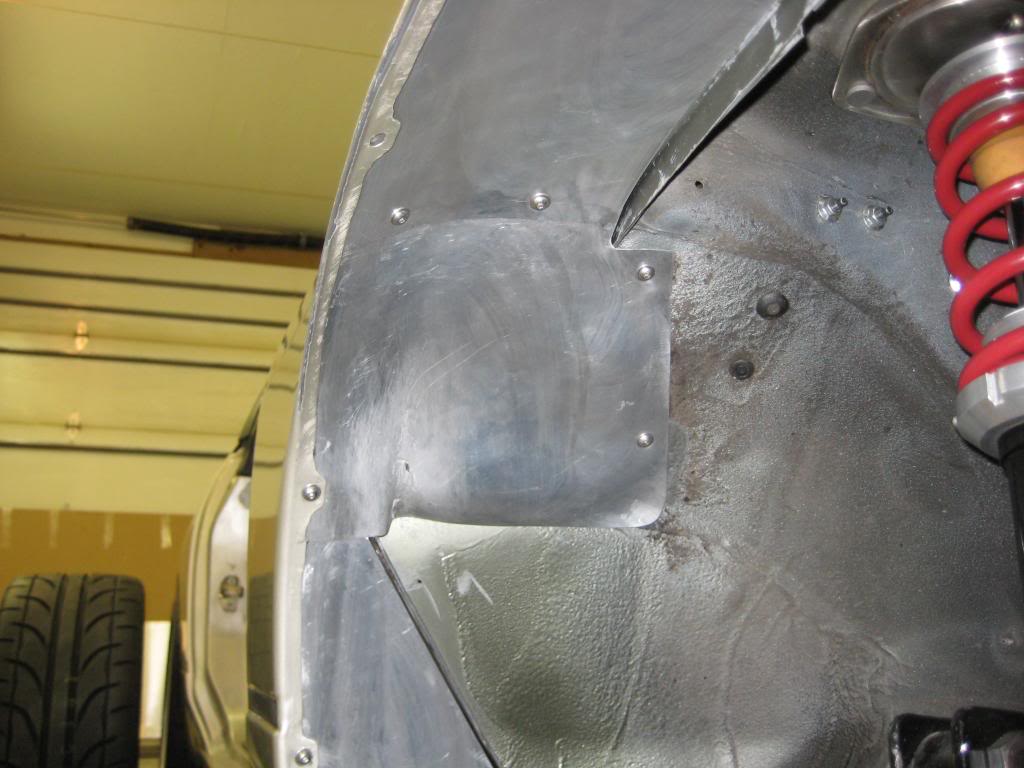
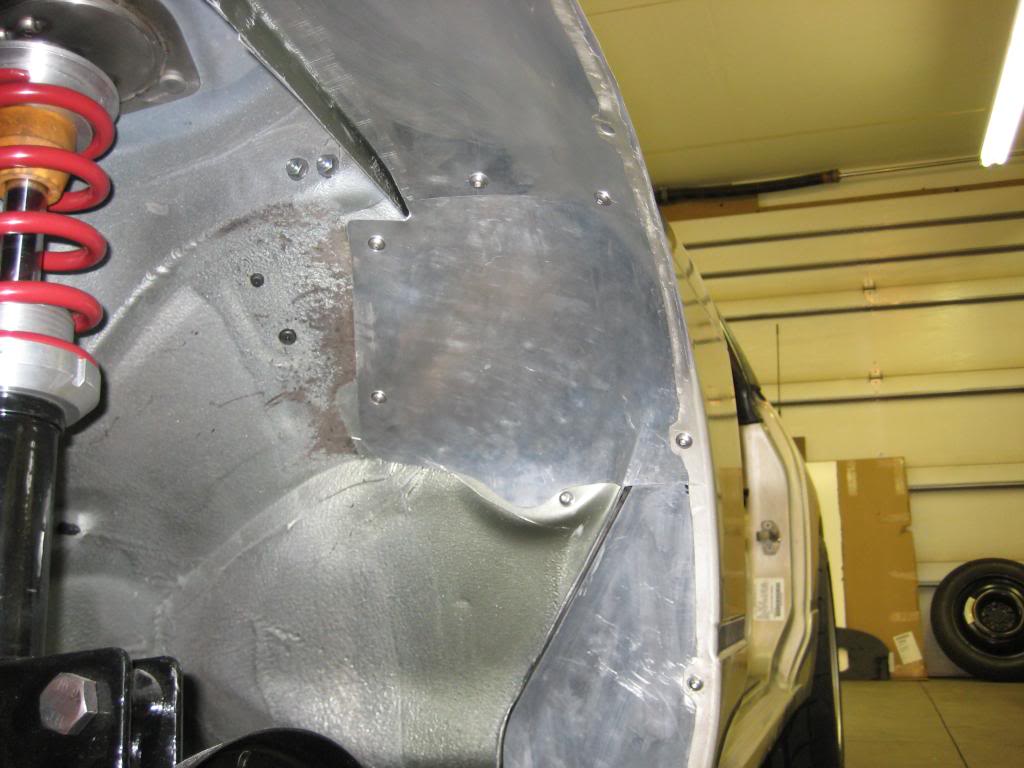
The rear pieces have aluminum threaded bungs welded to the back of the panel and the screws are stainless steel. We also made these two pieces (one on each side of car) out of thicker .062 aluminum because it is right where the stones will hit.
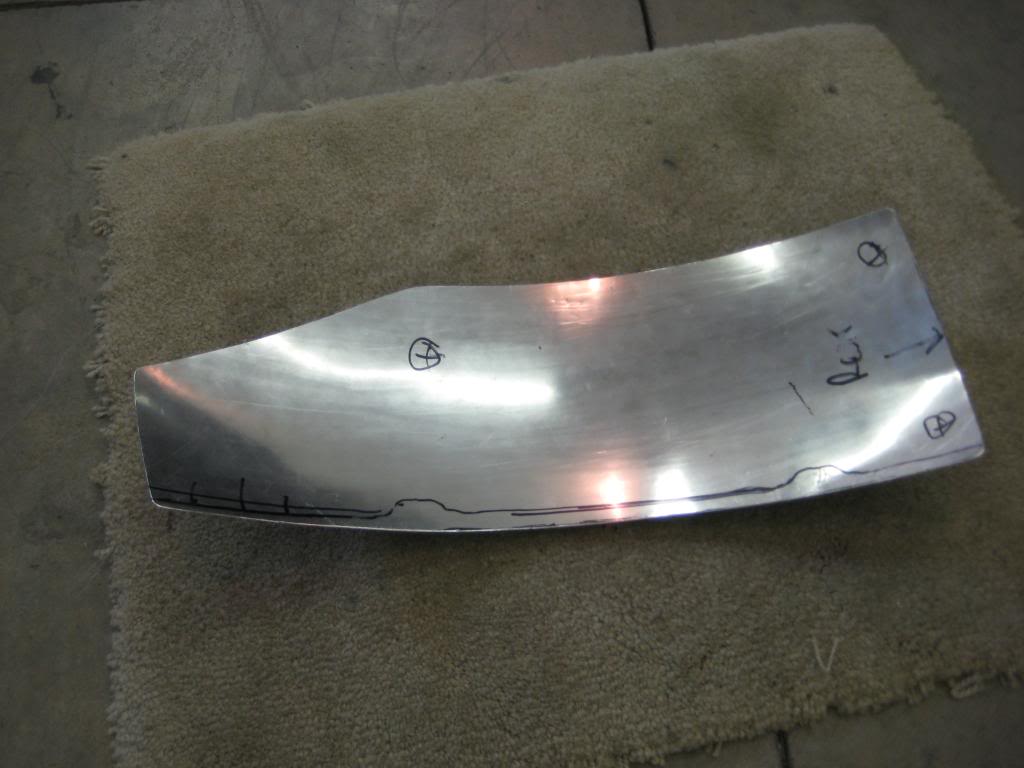
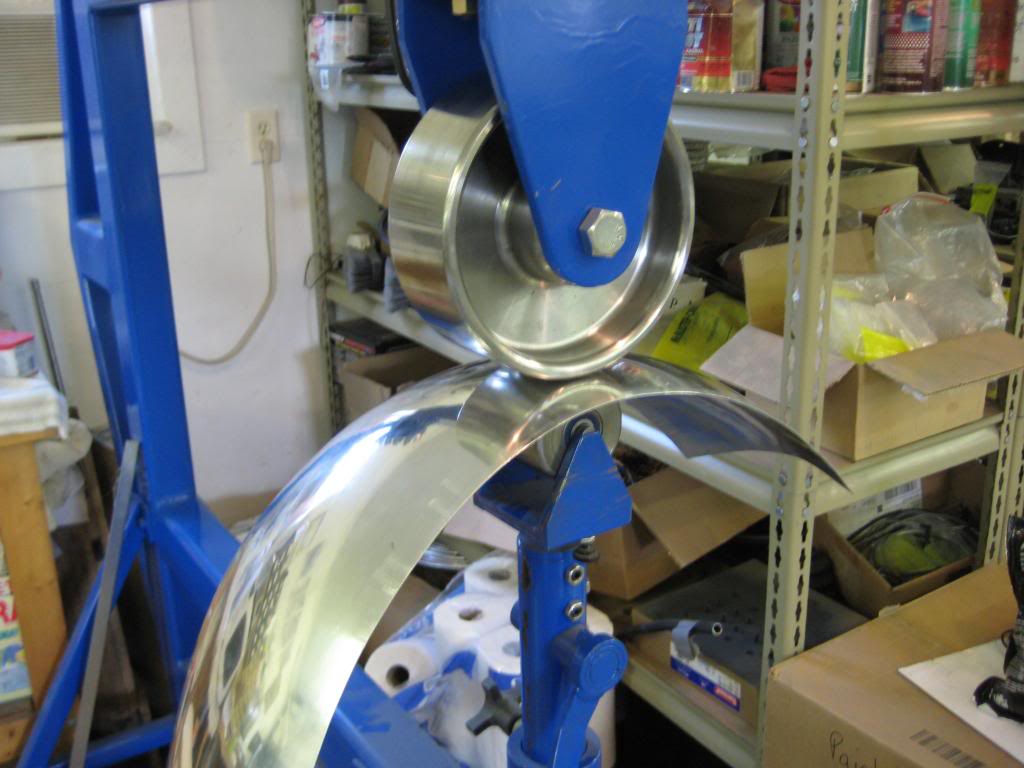
This is one of the upper pieces. It was formed on the English wheel
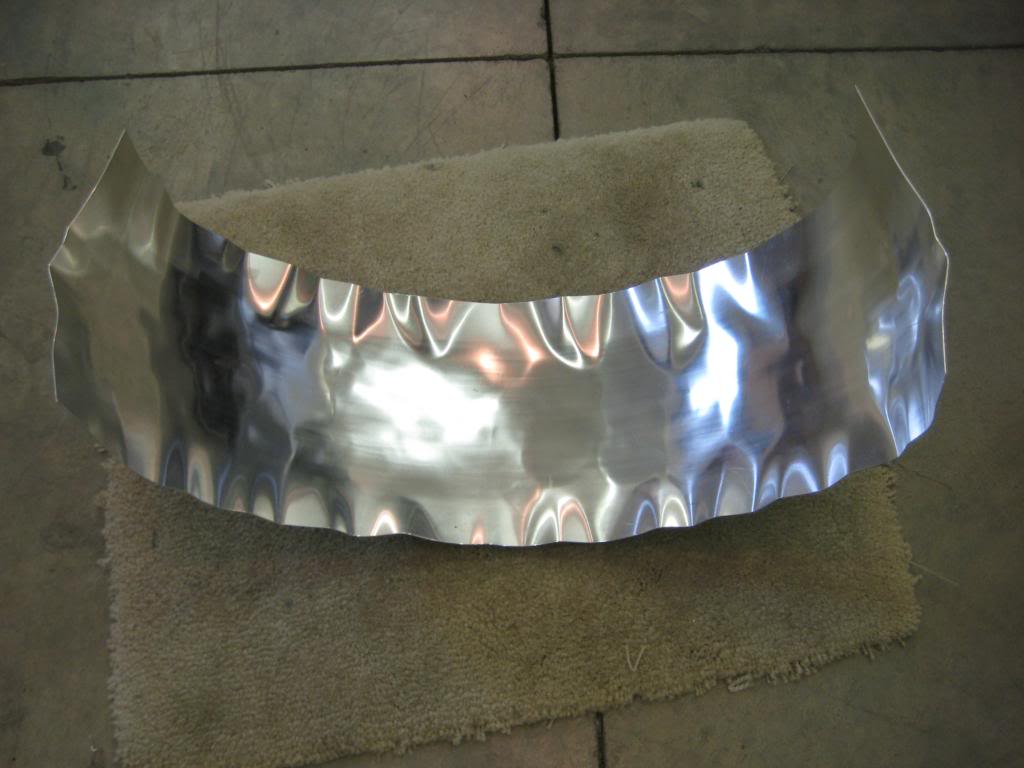
They start out looking pretty bad after I beat them on the sand bag
But just a few minutes later they look more like this
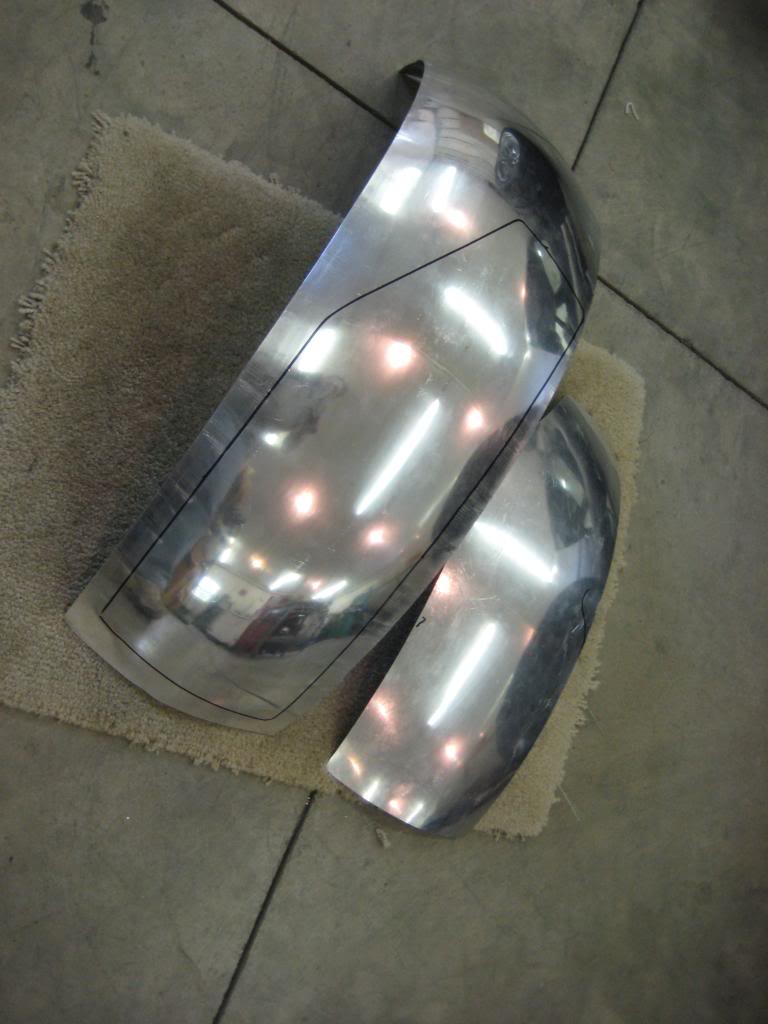
This piece is a little different side to side, because the wiring harness goes thru the passenger side.
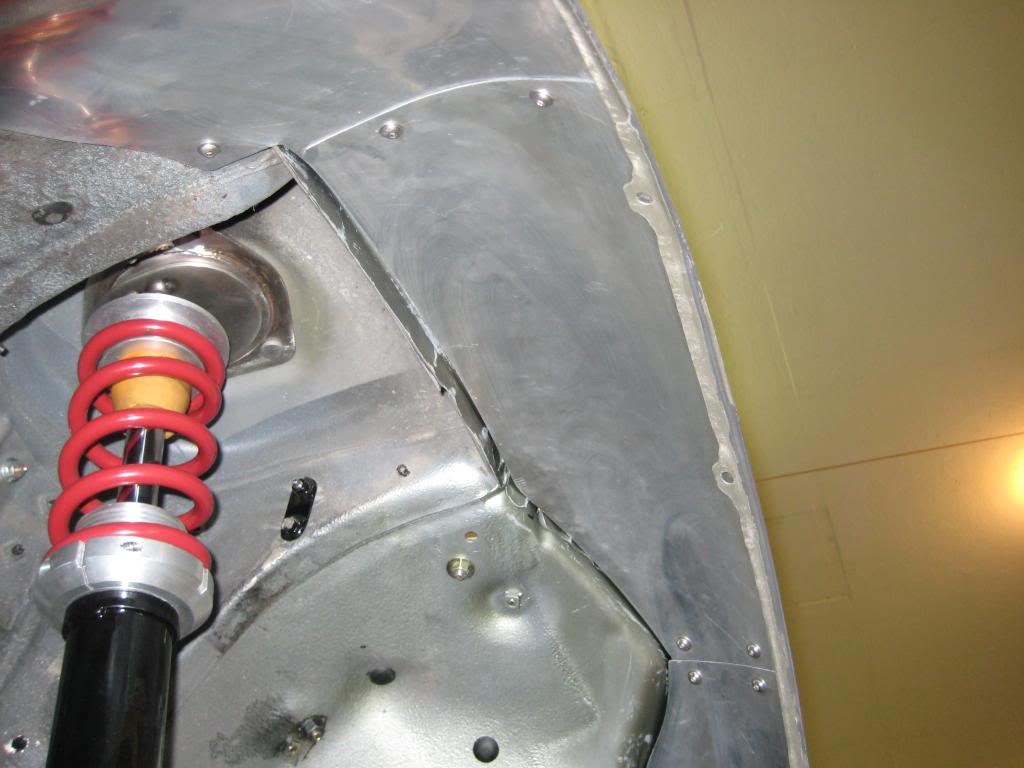
This is the passenger side front� the extra bump is lined up with a cutout in the body tin�just behind the windshield washer reservoir and allows a little more air to the air filter box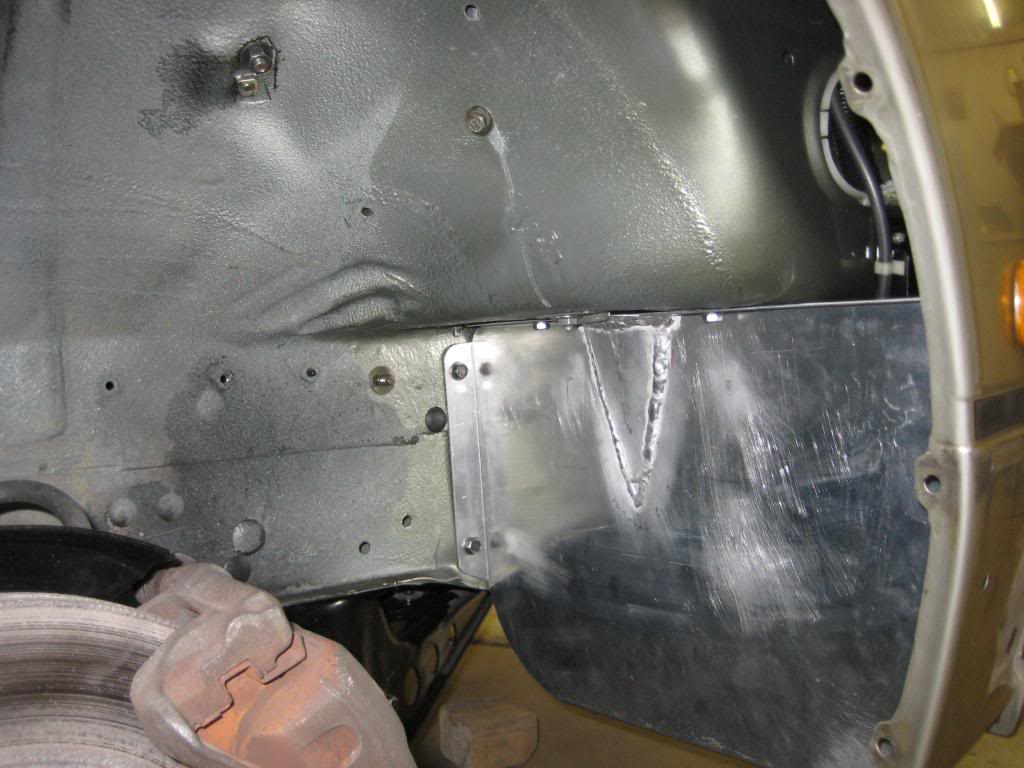
These are some pictures after they were installed
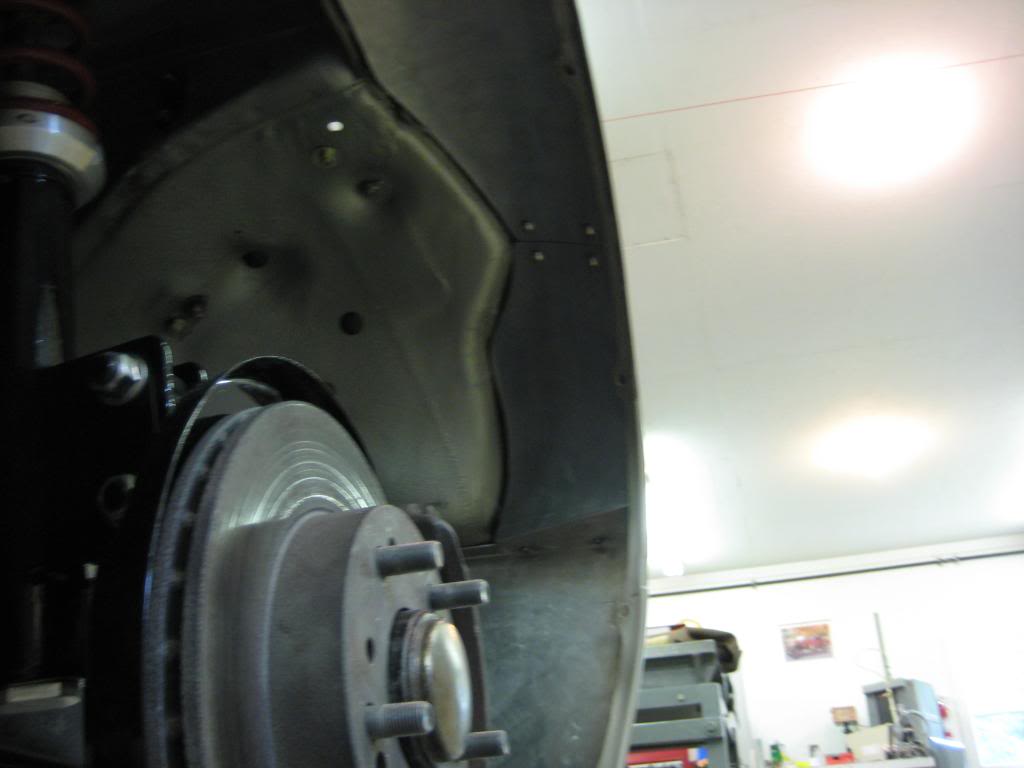
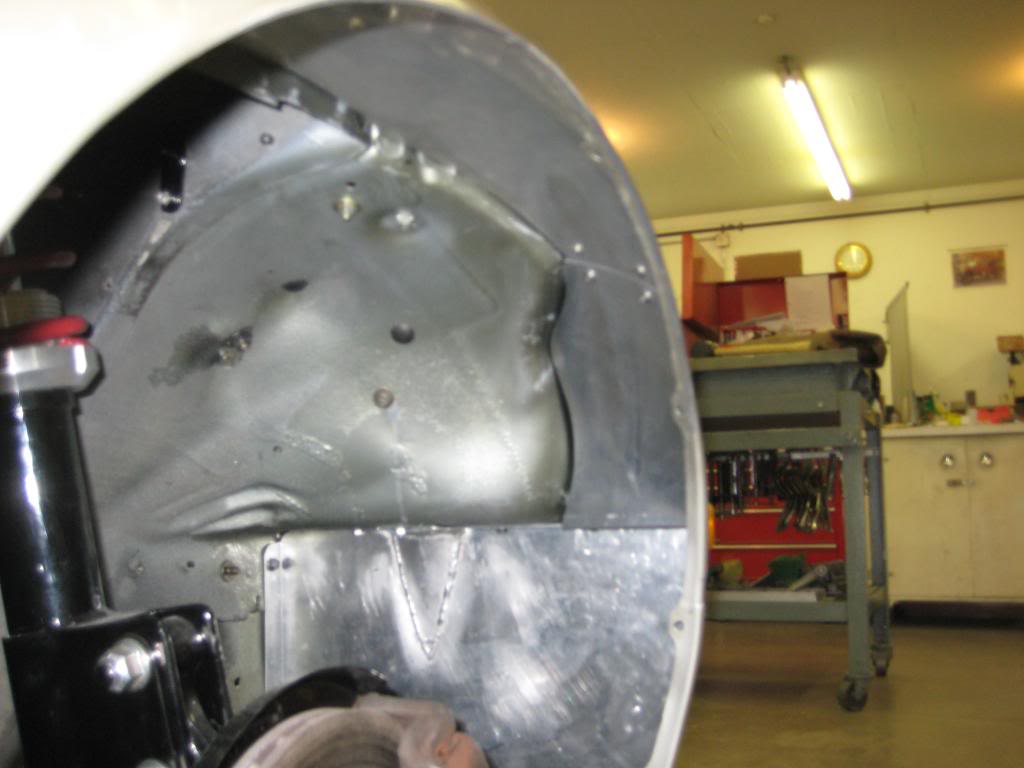
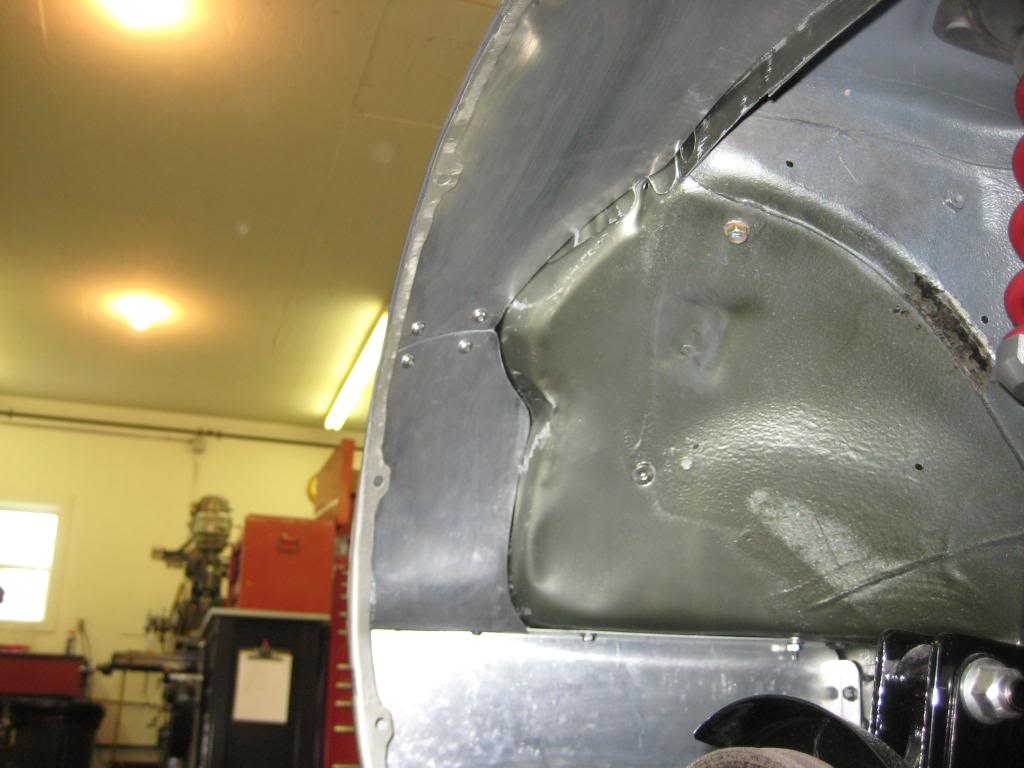
We are going to spray this all with undercoat or truck bed liner eventually.
I realized on the last update of the fender liners that there wasn�t much info, and the pics didn�t really show very well what was what. The inner fender liners were made from .042 thick aluminum. It�s pretty light and easy to work. In order to get them in, they needed to be made in pieces.
The rear pieces have aluminum threaded bungs welded to the back of the panel and the screws are stainless steel. We also made these two pieces (one on each side of car) out of thicker .062 aluminum because it is right where the stones will hit.
This is one of the upper pieces. It was formed on the English wheel
They start out looking pretty bad after I beat them on the sand bag
But just a few minutes later they look more like this
This piece is a little different side to side, because the wiring harness goes thru the passenger side.
This is the passenger side front� the extra bump is lined up with a cutout in the body tin�just behind the windshield washer reservoir and allows a little more air to the air filter box
These are some pictures after they were installed
We are going to spray this all with undercoat or truck bed liner eventually.

