My S13 SR20DET Prep


 02-26-2008, 10:57 PM
#52
Contributing Member
Thread Starter
Join Date: Sep 2002
Location: Starkville, MS.
Posts: 1,192
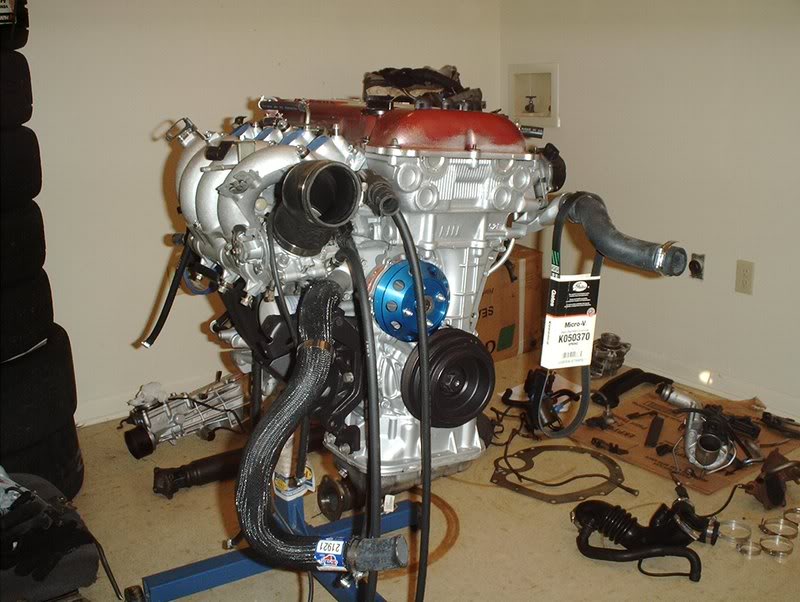
WaterPump Installation
I put the waterpump in a while back. It's a straightforward easy install.
Tools needed:
Socket wrench
12mm socket
Rubber mallet
Liquid gasket
Razorblade
If you haven't done so already then remove the waterpump pulley to gain access to the pump bolts.
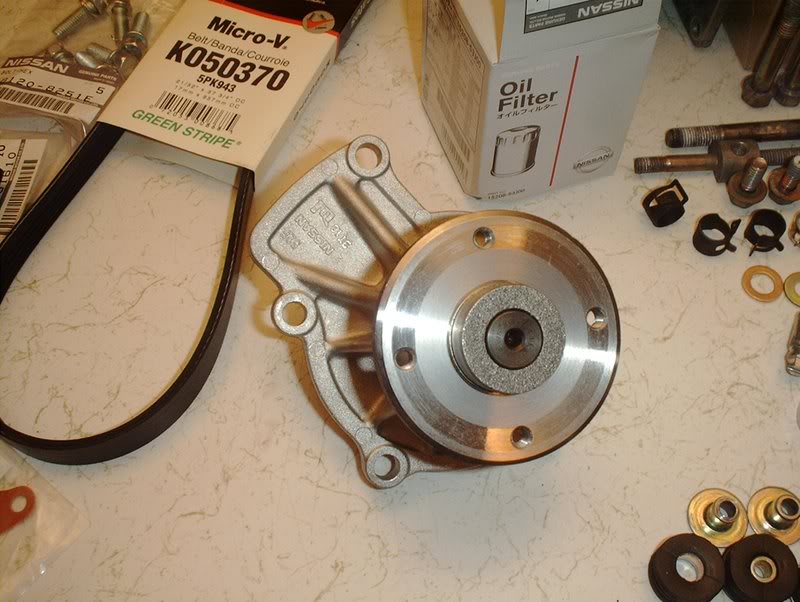
Probably nothing wrong with the old pump but I wanted to replace it with a new one for piece of mind.
Part number#: 21010-52F01
I got some new hardware as well.
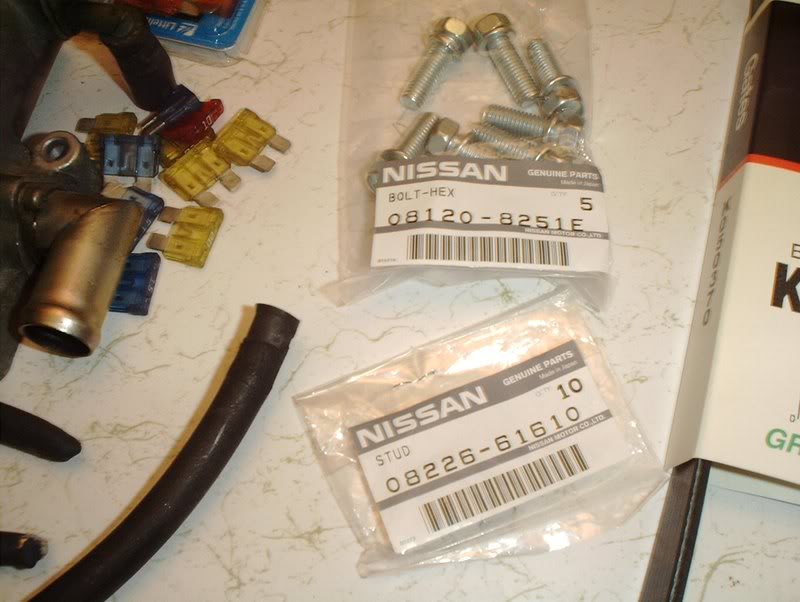
Waterpump studs Part#: 08226-61610
Waterpump bolts Part#: 08120-8251E
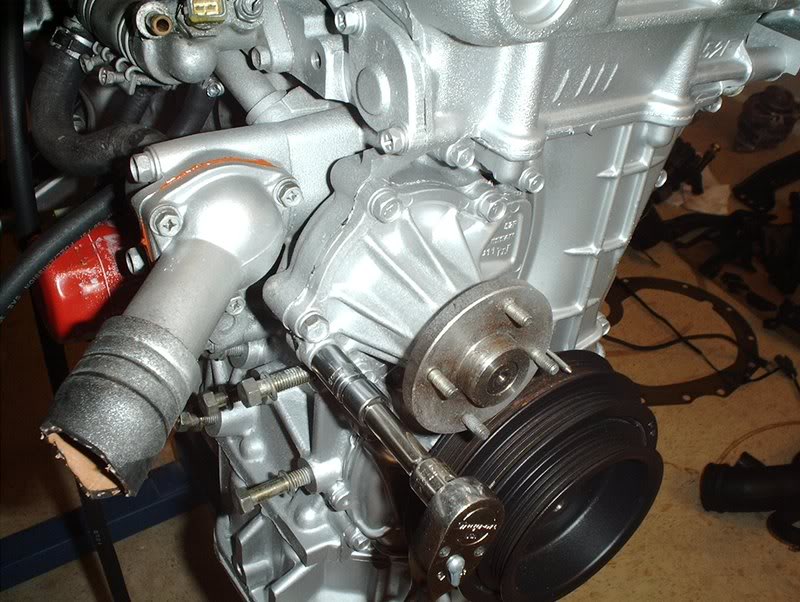
Use a 12mm socket to remove the seven waterpump bolts.
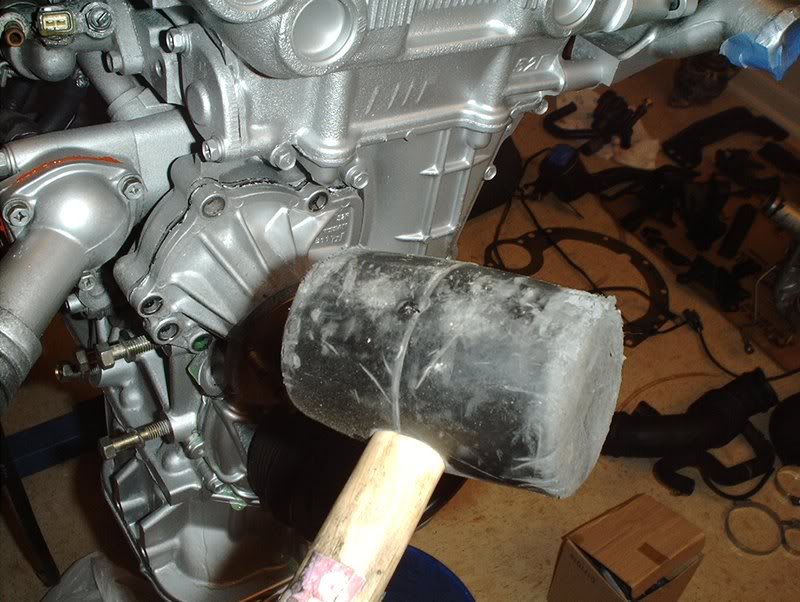
The old gasket is holding steady so use a mallet or just man up and bust the waterpump loose.
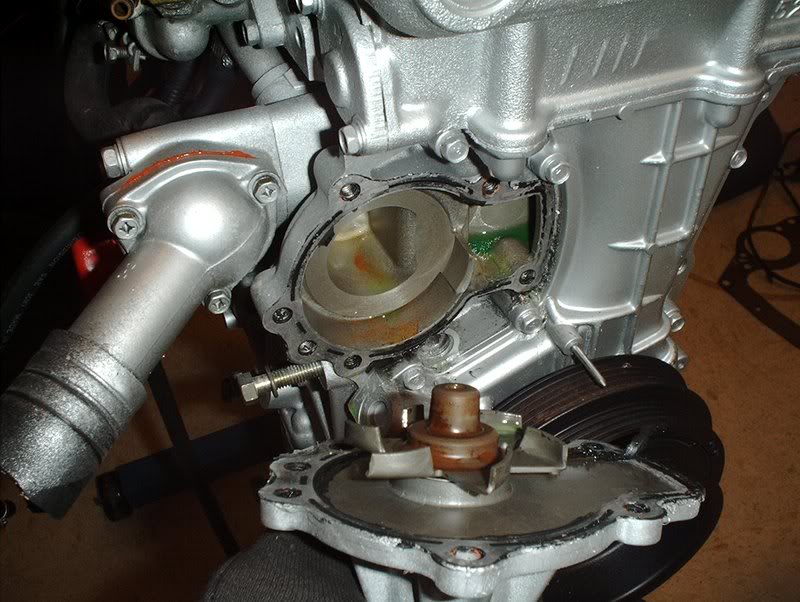
Got it!
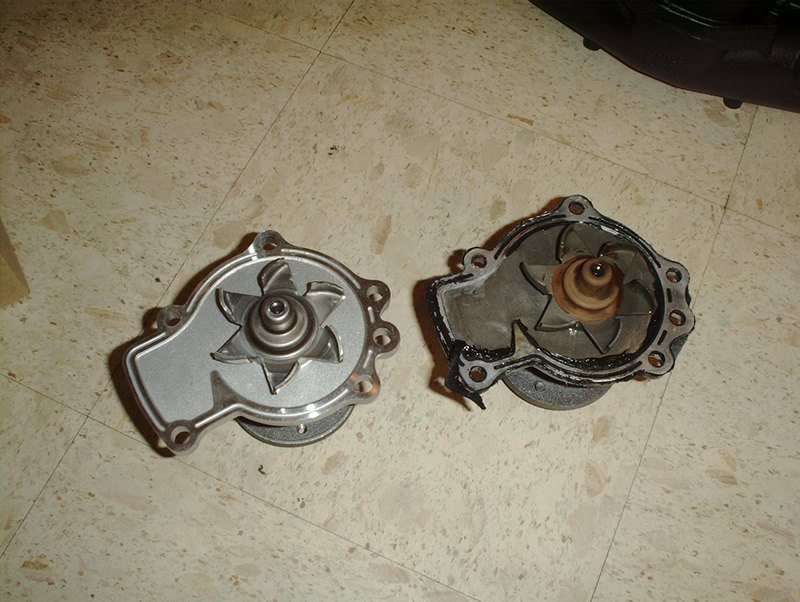
Old pump vs. new pump.
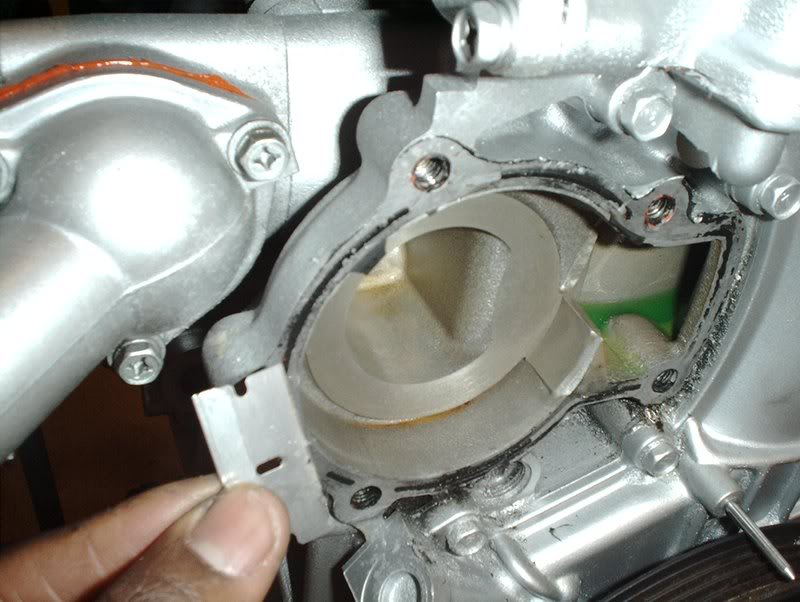
Take a razorblade and remove the old gasket.
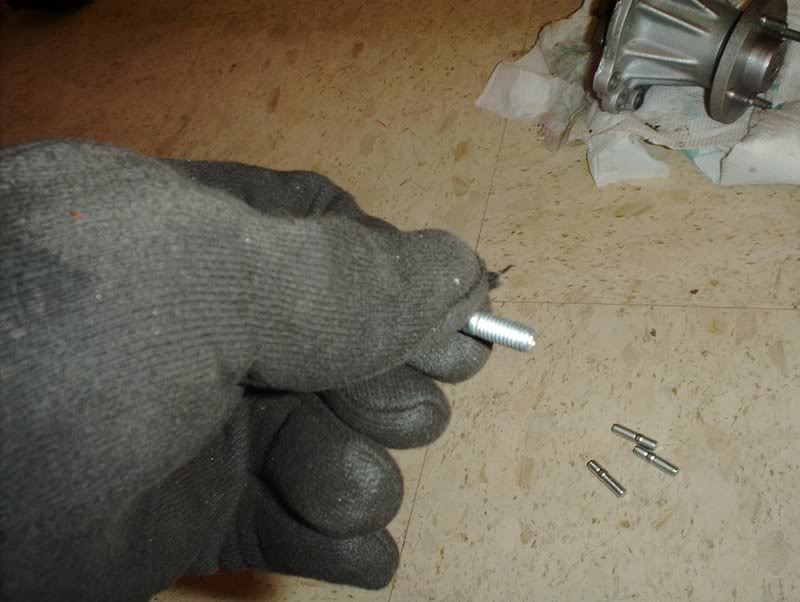
Put the new waterpump studs in the pump, they just screw right on.

It's ready for the install now.
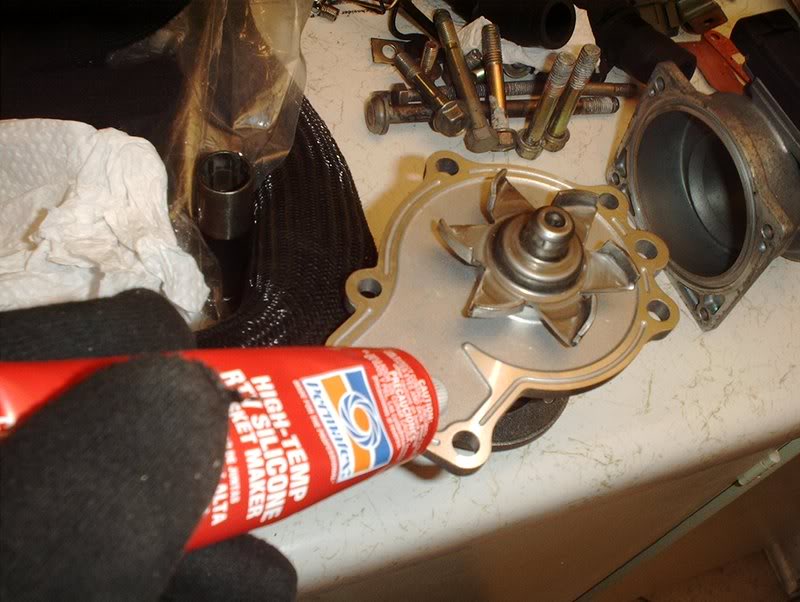
Put a continous bead of liquid gasket around the waterpump and insert it back into the block.
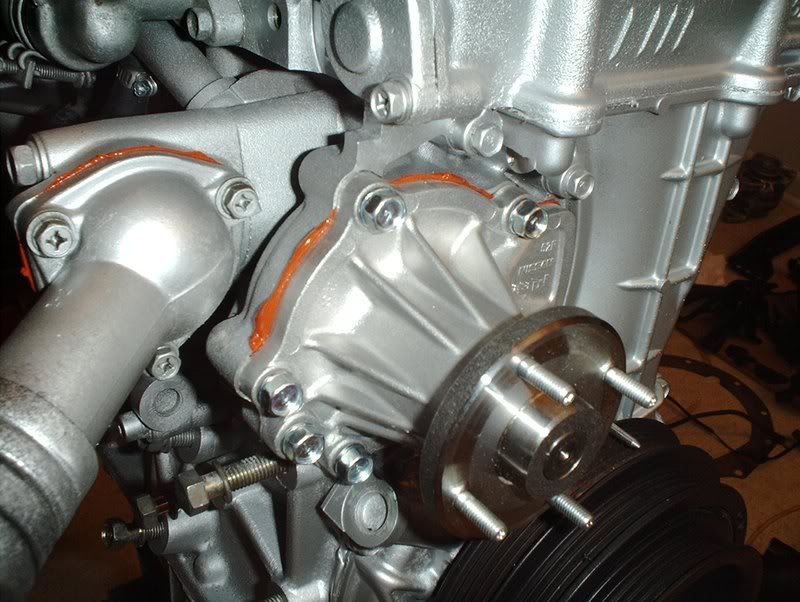
Put your waterpump bolts back in and torque them to 12-15ft.lbs.
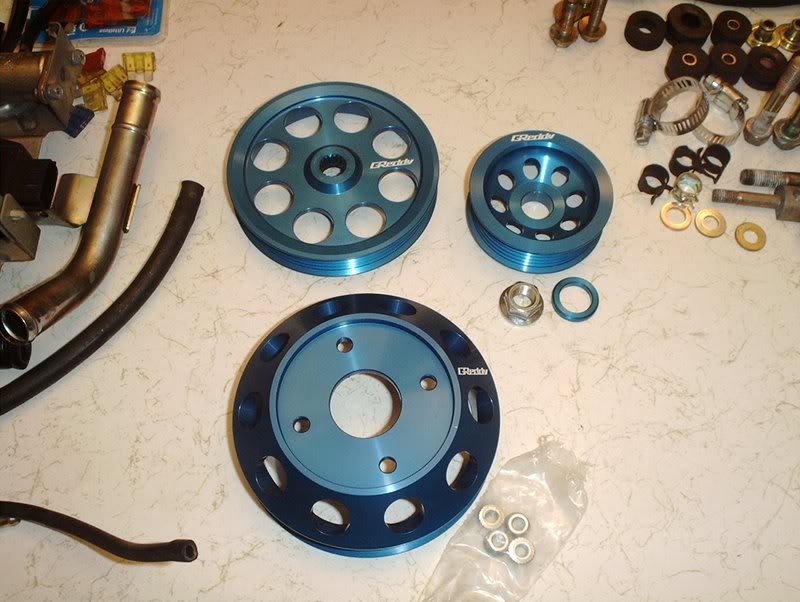
I got a aftermarket waterpump pulley. Torque the pulley nuts to 4.6-6.1ft.lbs.
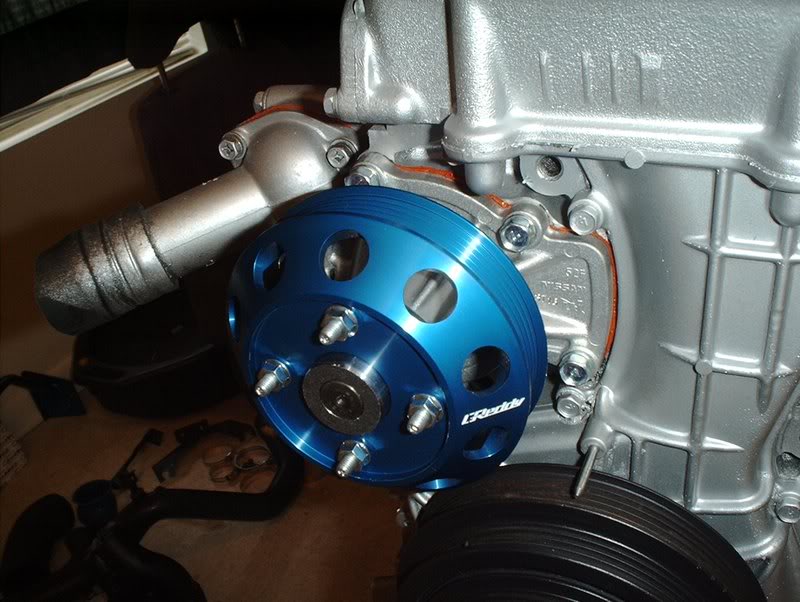
And you are finished.
Tools needed:
Socket wrench
12mm socket
Rubber mallet
Liquid gasket
Razorblade
If you haven't done so already then remove the waterpump pulley to gain access to the pump bolts.
Probably nothing wrong with the old pump but I wanted to replace it with a new one for piece of mind.
Part number#: 21010-52F01
I got some new hardware as well.
Waterpump studs Part#: 08226-61610
Waterpump bolts Part#: 08120-8251E
Use a 12mm socket to remove the seven waterpump bolts.
The old gasket is holding steady so use a mallet or just man up and bust the waterpump loose.
Got it!
Old pump vs. new pump.
Take a razorblade and remove the old gasket.
Put the new waterpump studs in the pump, they just screw right on.
It's ready for the install now.
Put a continous bead of liquid gasket around the waterpump and insert it back into the block.
Put your waterpump bolts back in and torque them to 12-15ft.lbs.
I got a aftermarket waterpump pulley. Torque the pulley nuts to 4.6-6.1ft.lbs.
And you are finished.
02-26-2008, 11:01 PM
#53
Contributing Member
Join Date: Feb 2005
Location: 神奈川県,日本
Posts: 2,586
god ur engine is so clean...makes me want to build one and never even run it...just like display it in a glass case as a decoration (damn i just realized thats a pretty badass idea for when i get older..)
02-26-2008, 11:26 PM
#54
Contributing Member
Thread Starter
Join Date: Sep 2002
Location: Starkville, MS.
Posts: 1,192
Radiator Hoses
Tools needed:
Screwdriver...duh!!!!
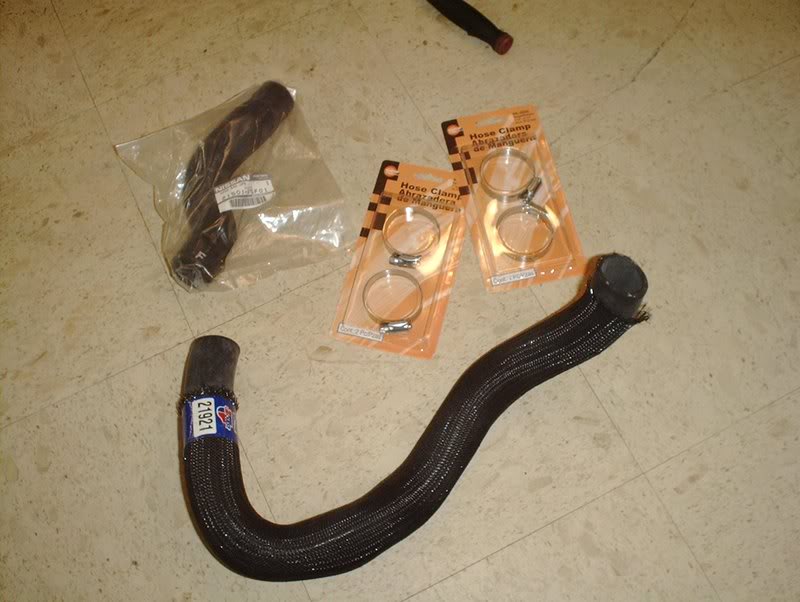
Lower radiator hose...forgot the part#?????
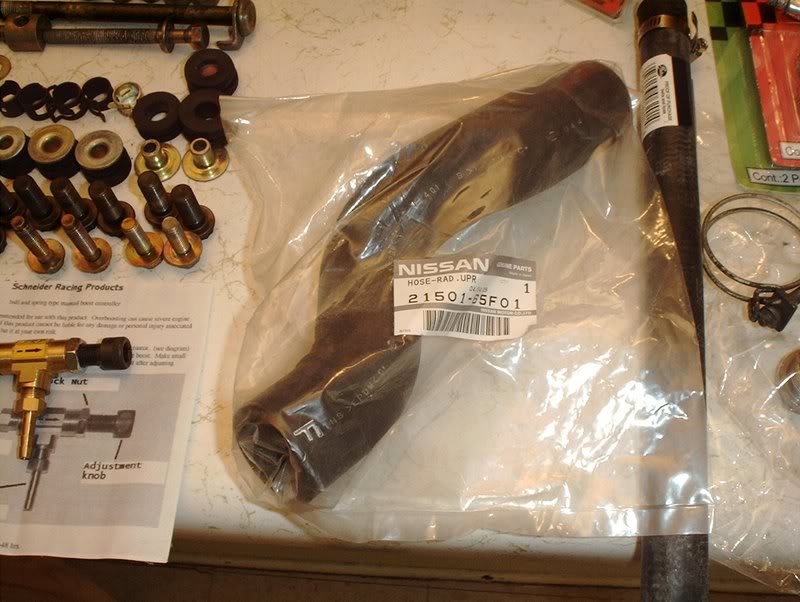
Upper radiator hose. Part#: 21501-85F01
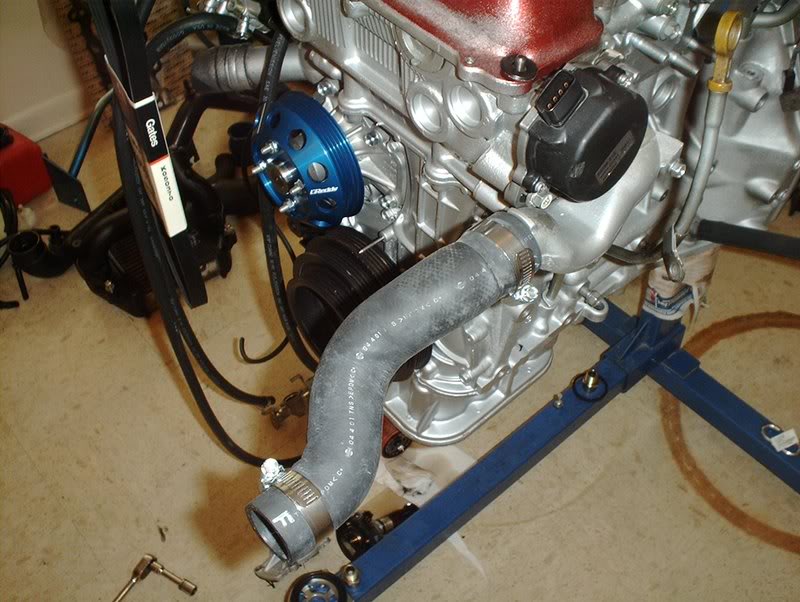
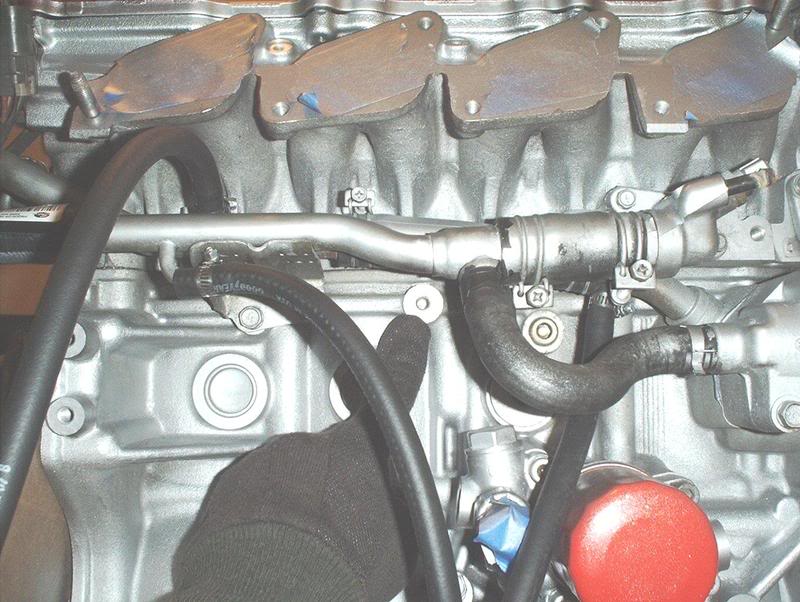
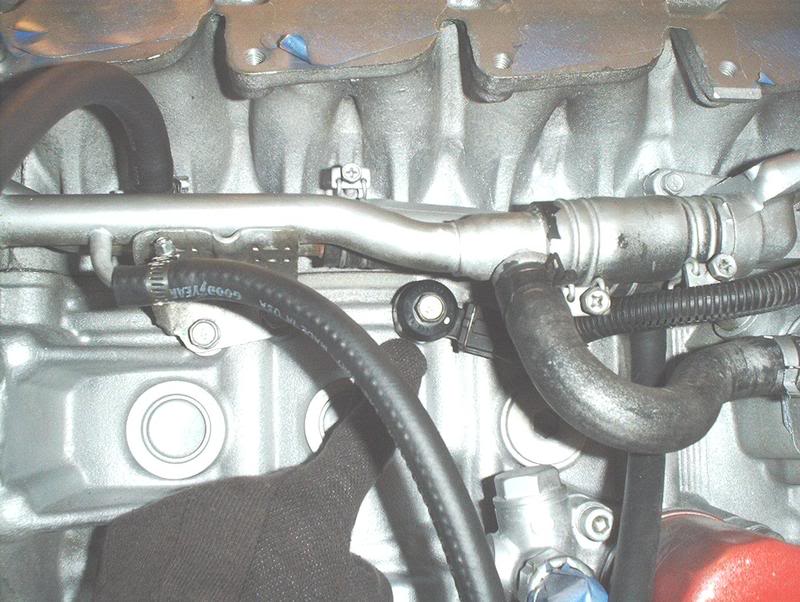
Upper radiator hose goes on the water outlet here, don't forget your hose clamps.
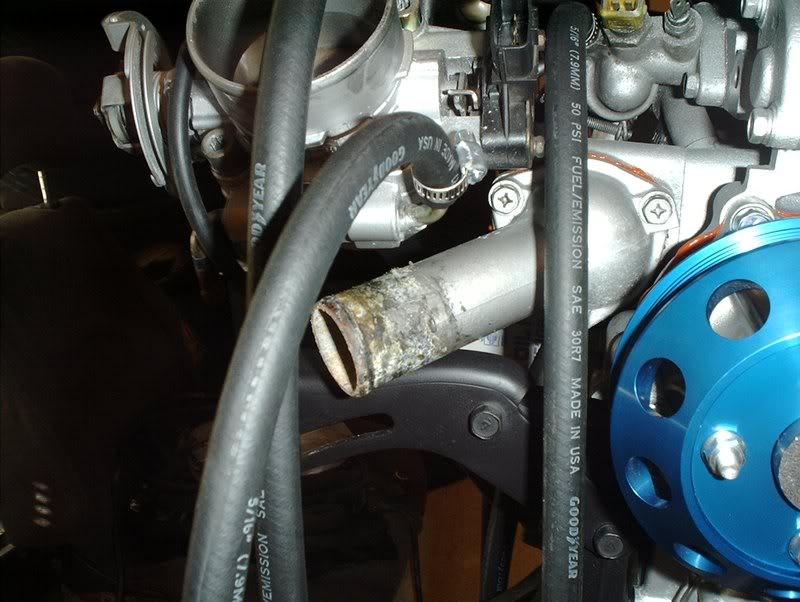
Remove the old cut up hoses...
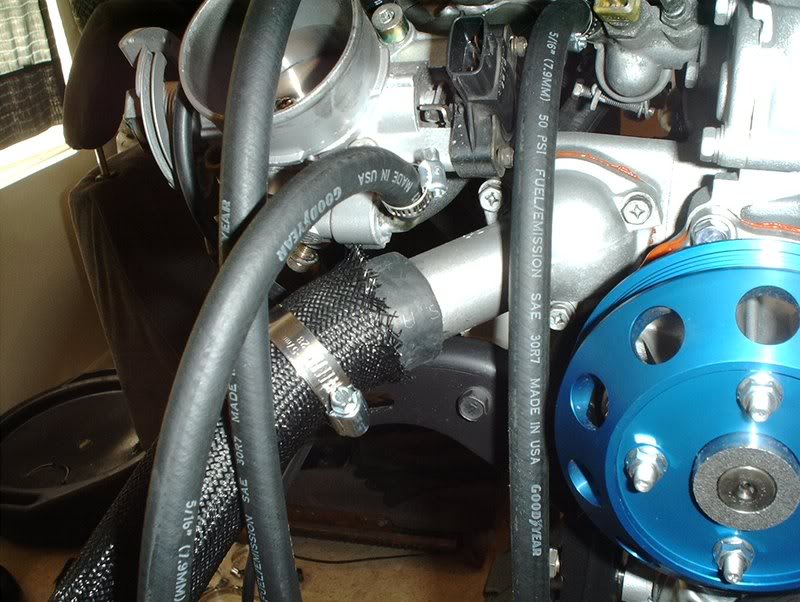
...and the lower radiator hose goes on the water outlet.
Finished.
Screwdriver...duh!!!!
Lower radiator hose...forgot the part#?????
Upper radiator hose. Part#: 21501-85F01
Upper radiator hose goes on the water outlet here, don't forget your hose clamps.
Remove the old cut up hoses...
...and the lower radiator hose goes on the water outlet.
Finished.
02-26-2008, 11:42 PM
#55
Contributing Member
Thread Starter
Join Date: Sep 2002
Location: Starkville, MS.
Posts: 1,192
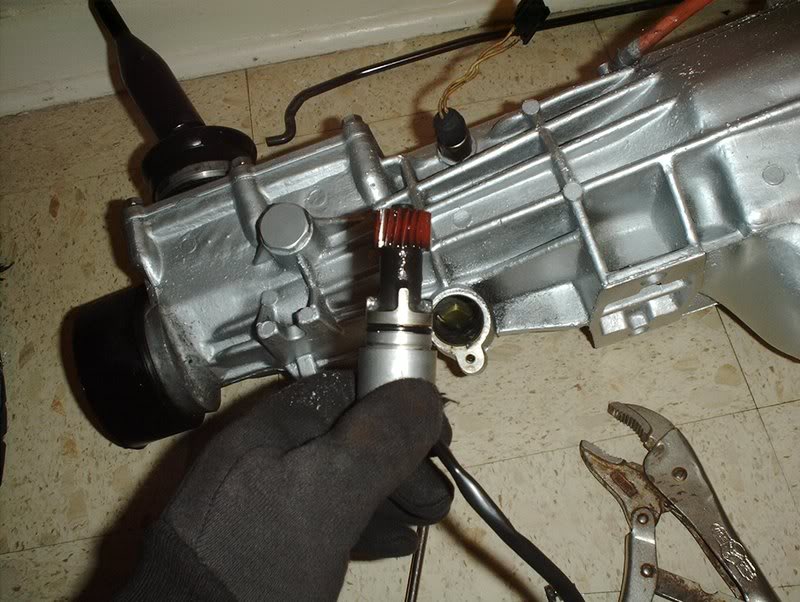
Speed Sensor
I replaced the speed sensor today.
Tools needed:
Screwdriver
10mm small head wrench...you need a small headed wrench to get to the bolt head over the hump of the speed sensor.
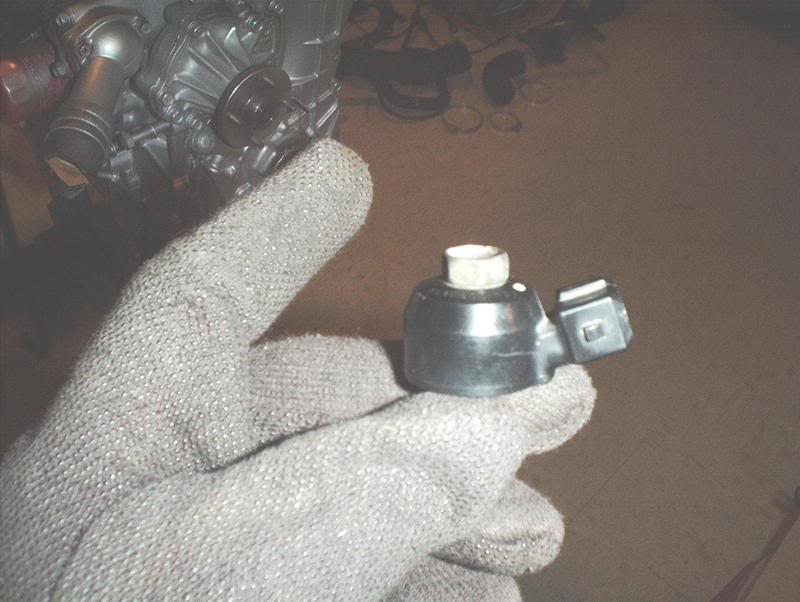
When you do the swap you have to swap the speed sensors out. If I'm not mistaken the US sensor reads mph while the JDM unit reads kph or m or somethin'!
Just bust the screw on the speed sensor loose with a wrench and remove it.
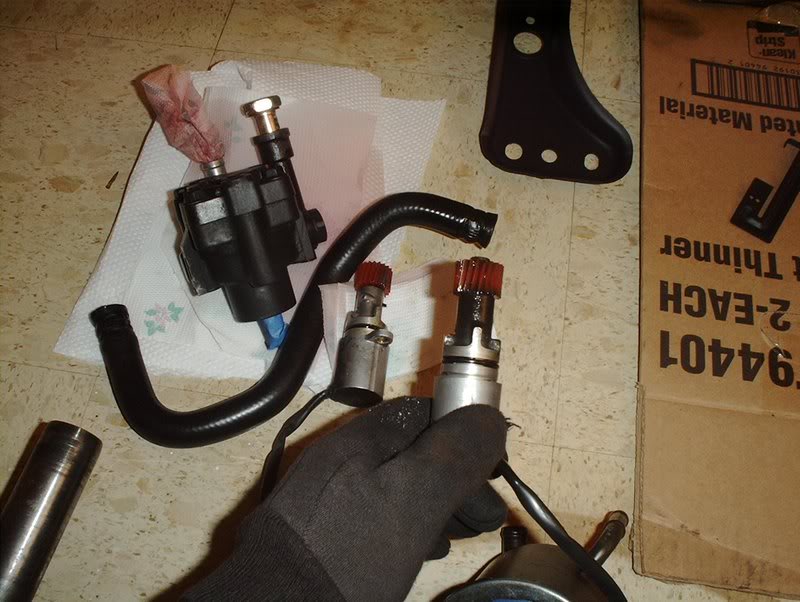
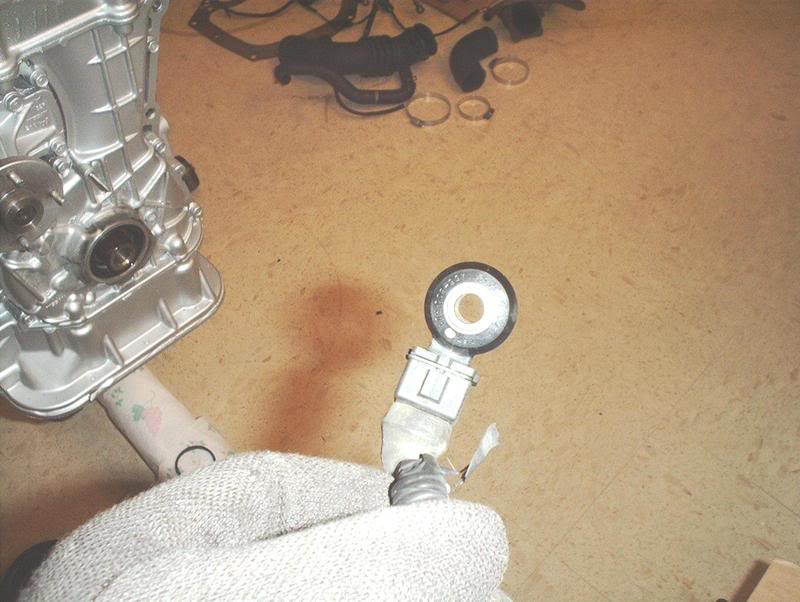
The KA speed sensor vs. the SR speed sensor...they look identical.
Insert the KA speed sensor, insert the bolt, screw it in and you're done!
Tools needed:
Screwdriver
10mm small head wrench...you need a small headed wrench to get to the bolt head over the hump of the speed sensor.
When you do the swap you have to swap the speed sensors out. If I'm not mistaken the US sensor reads mph while the JDM unit reads kph or m or somethin'!
Just bust the screw on the speed sensor loose with a wrench and remove it.
The KA speed sensor vs. the SR speed sensor...they look identical.
Insert the KA speed sensor, insert the bolt, screw it in and you're done!
Last edited by positron; 02-27-2008 at 02:13 AM.
02-26-2008, 11:59 PM
#56
Contributing Member
Thread Starter
Join Date: Sep 2002
Location: Starkville, MS.
Posts: 1,192
Knock Sensor
I was going to replace the knock sensor with a new one but I decided to just stick with the old one.
If you took everything loose like I did then put the knock sensor and harness back together and mount it back on the block.
Put the harness back on...
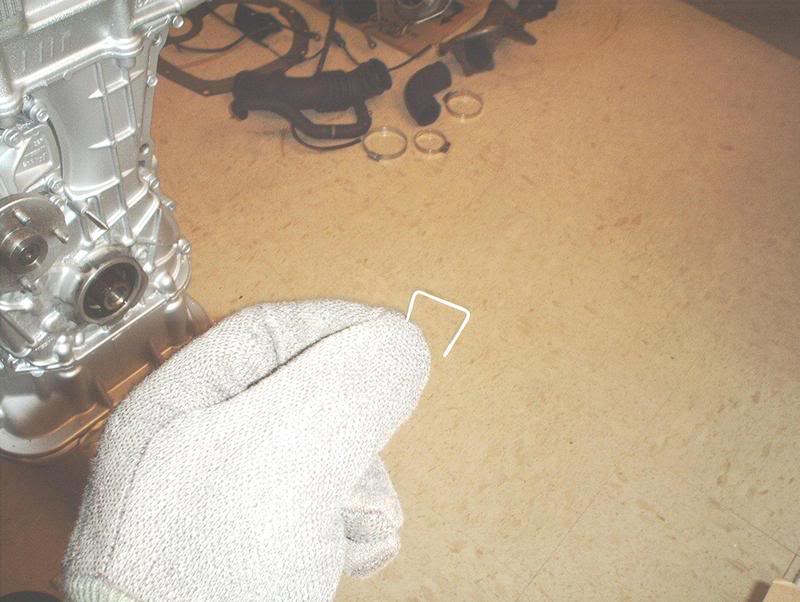
and don't forget about the little clip.
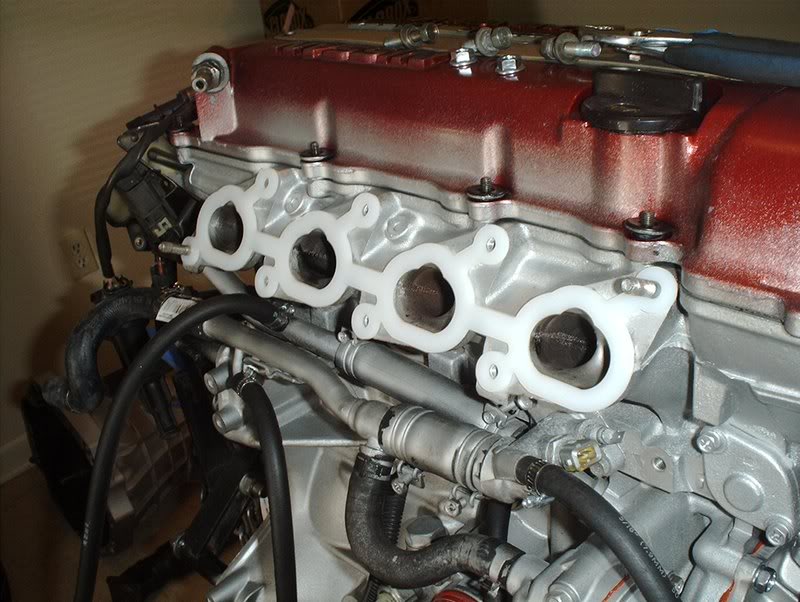
The knock sensor mounts here under the intake manifold.
Done.
If you took everything loose like I did then put the knock sensor and harness back together and mount it back on the block.
Put the harness back on...
and don't forget about the little clip.
The knock sensor mounts here under the intake manifold.
Done.
02-27-2008, 12:29 AM
#57
Contributing Member
Thread Starter
Join Date: Sep 2002
Location: Starkville, MS.
Posts: 1,192
Intake Manifold
I finally got the IACV gasket in so I could put my intake manifold back together and mount it.
Tools needed:
Socket wrench
Socket wrench extension
10mm socket
14mm socket
Torque wrench
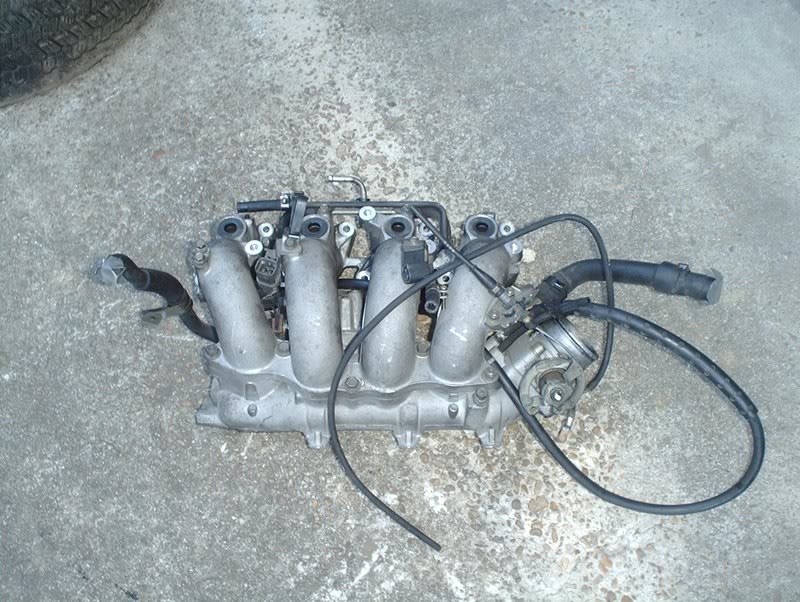
When I striped the block down I also broke the intake manifold down into it's separate pieces so I could replace all the gaskets.
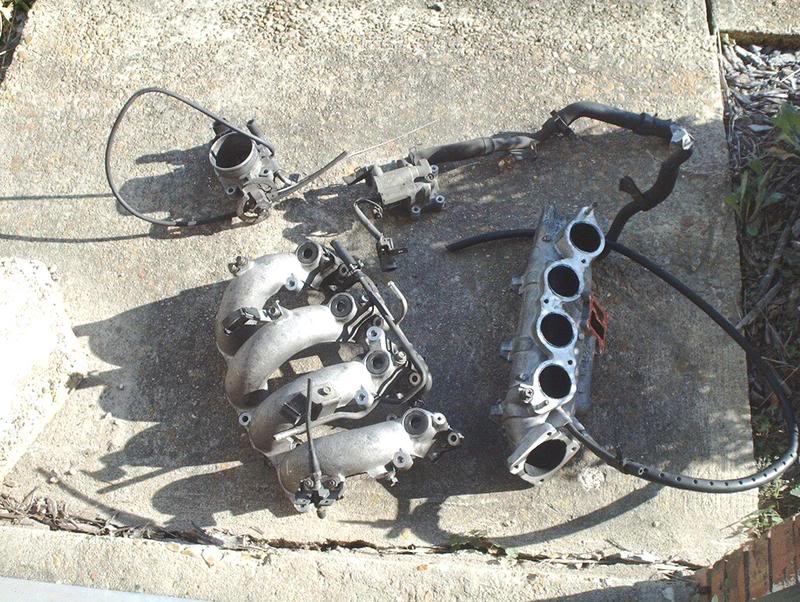
First off, I lost the pics I took when I put the throttlebody gasket back on but the part number for the throttlebody gasket is 16175-53J00.
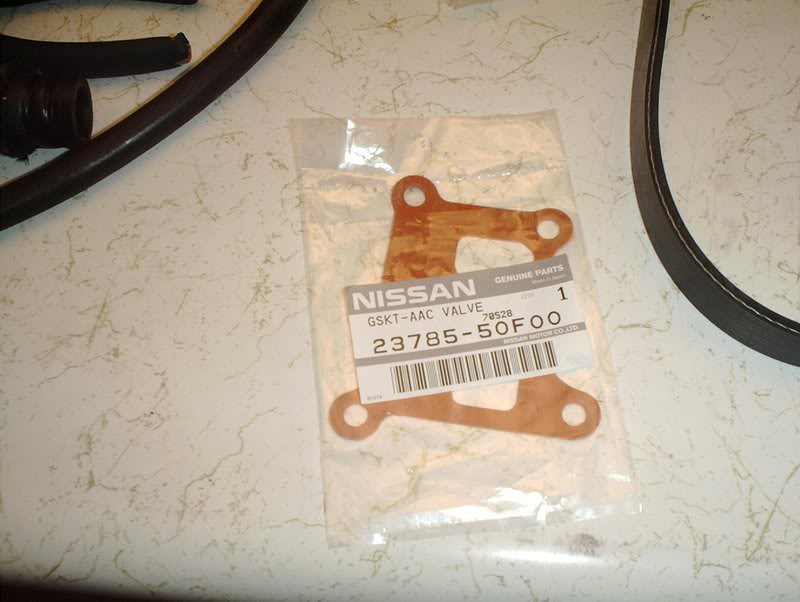
Next, I replaced the IACV gasket.
Part#: 23785-50F00
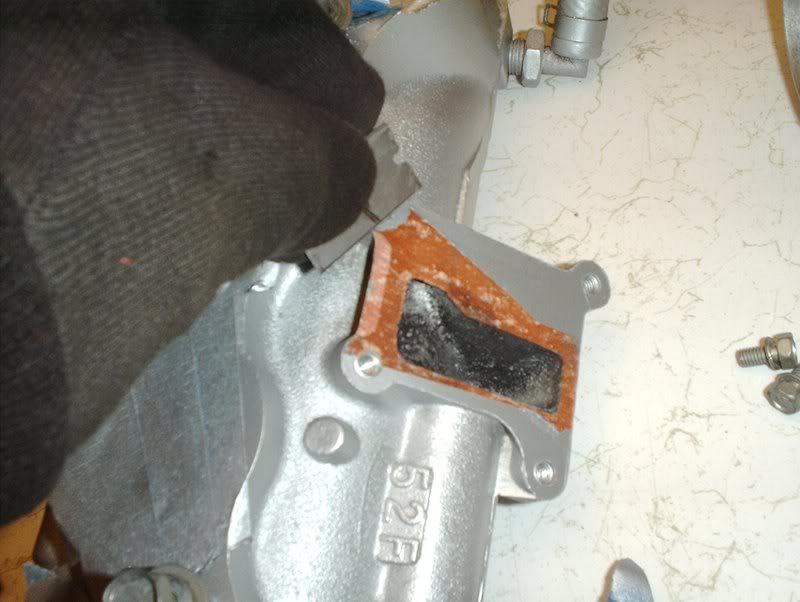
Use a razorblade to remove the old gasket.
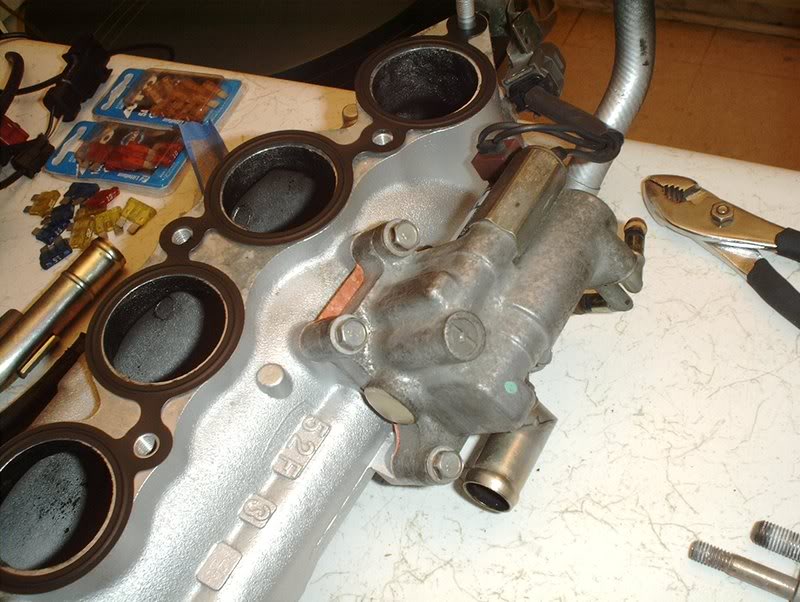
Mount the IACV onto the intake collector and torque the bolts to 6.2-8ft.lbs.
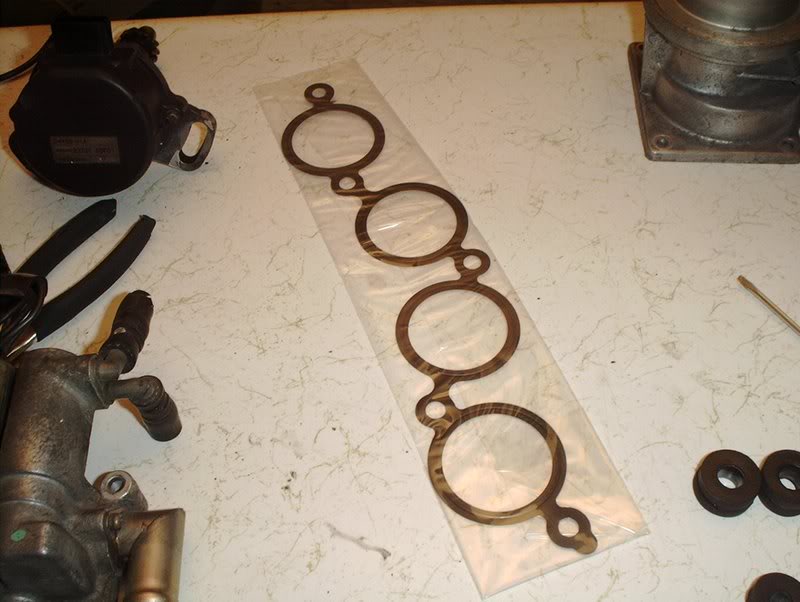
Intake collector gasket.
Part#: 14032-52F00
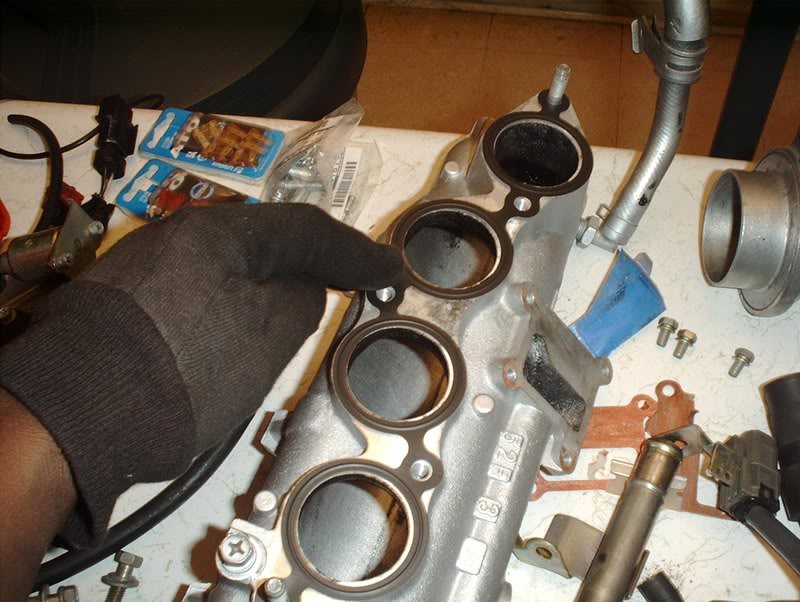
Place the intake collector gasket on the intake collector...
and then mount the intake runner and the intake collector together. Torque the intake bolts to 13-15ft.lbs. Also take the IACV hose and reconnect it while you're at it.
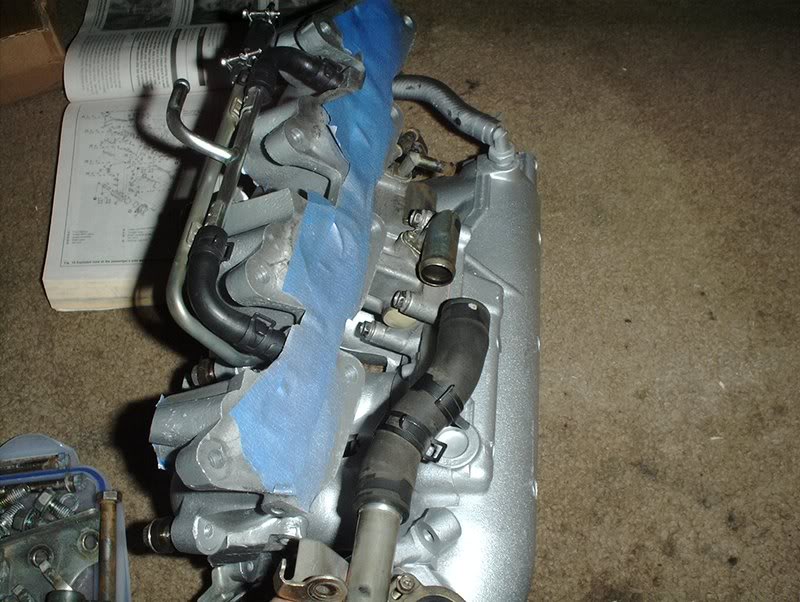
Put a new intake manifold gasket on and then mount the intake manifold back on.
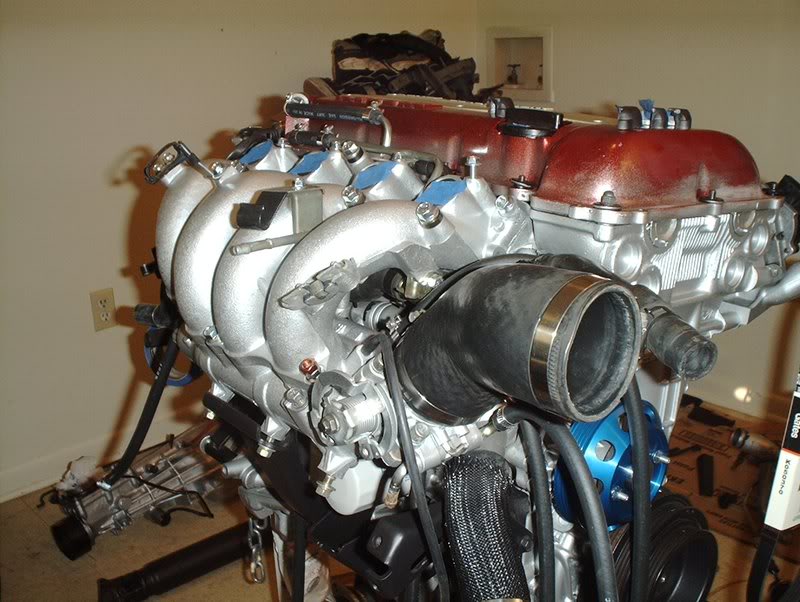
Torque the manifold bolts to 13-15ft.lbs. and another one bites the dust.
Tools needed:
Socket wrench
Socket wrench extension
10mm socket
14mm socket
Torque wrench
When I striped the block down I also broke the intake manifold down into it's separate pieces so I could replace all the gaskets.
First off, I lost the pics I took when I put the throttlebody gasket back on but the part number for the throttlebody gasket is 16175-53J00.
Next, I replaced the IACV gasket.
Part#: 23785-50F00
Use a razorblade to remove the old gasket.
Mount the IACV onto the intake collector and torque the bolts to 6.2-8ft.lbs.
Intake collector gasket.
Part#: 14032-52F00
Place the intake collector gasket on the intake collector...
and then mount the intake runner and the intake collector together. Torque the intake bolts to 13-15ft.lbs. Also take the IACV hose and reconnect it while you're at it.
Put a new intake manifold gasket on and then mount the intake manifold back on.
Torque the manifold bolts to 13-15ft.lbs. and another one bites the dust.
Last edited by positron; 02-27-2008 at 12:33 AM.
 02-27-2008, 07:00 AM
#59
Registered User
Join Date: Dec 2006
Location: VA
Posts: 434
great stuff.
when installing that plastic gasket for the intake manifold. how much space did you have to torque down the nuts/bolts? last time i did this swap I wound up ordering up new longer studs to have extra clearance.
when i did the greddy pully i used regular bolts instead of the studs since i wasn't going to be mounting up a mechanical fan.
a lot of the times on these gaskets i use liquid gasket maker. works great. cheaper than the oem pieces too.
02-27-2008, 08:13 AM
#60
Contributing Member
Thread Starter
Join Date: Sep 2002
Location: Starkville, MS.
Posts: 1,192
great stuff.
when installing that plastic gasket for the intake manifold. how much space did you have to torque down the nuts/bolts? last time i did this swap I wound up ordering up new longer studs to have extra clearance.
when i did the greddy pully i used regular bolts instead of the studs since i wasn't going to be mounting up a mechanical fan.
a lot of the times on these gaskets i use liquid gasket maker. works great. cheaper than the oem pieces too.
when installing that plastic gasket for the intake manifold. how much space did you have to torque down the nuts/bolts? last time i did this swap I wound up ordering up new longer studs to have extra clearance.
when i did the greddy pully i used regular bolts instead of the studs since i wasn't going to be mounting up a mechanical fan.
a lot of the times on these gaskets i use liquid gasket maker. works great. cheaper than the oem pieces too.