Throttle Body Spring Assembly
 01-09-2010, 12:06 PM
#1
Registered User
Thread Starter
Join Date: Feb 2005
Location: Binghamton, NY
Posts: 232
Throttle Body Spring Assembly
So you've taken it apart and can't remember how to reassemble it, well here's your guide.
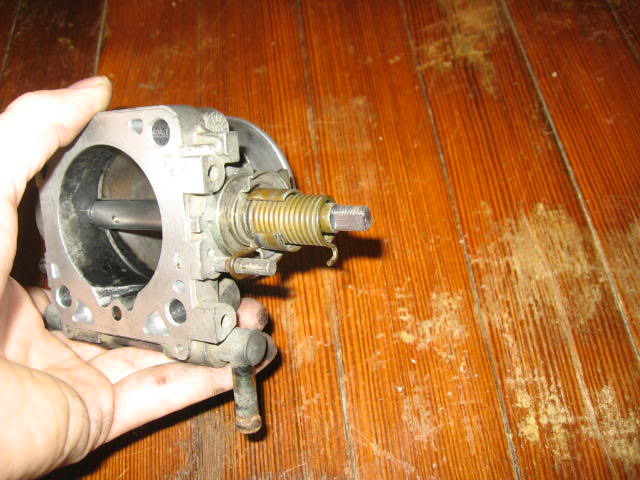
Here is the order of installation from left to right.
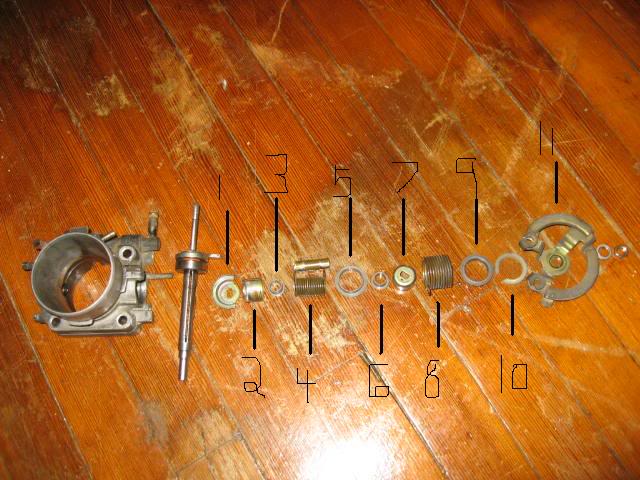
Just to get this out of the way, I'm going to say "slide down the shaft".... alot
So grab piece 1, slide it down the shaft with the flat side towards to back of the tb when shaft is in the closed position.
Piece 2 and 7 are similar, but 2 has a larger area cut out where 7 just has a slot on it. So with piece 2, slide it down the shaft with the cut out area towards the back of the throttle body.
Then, take piece 3 and slide it down the shaft
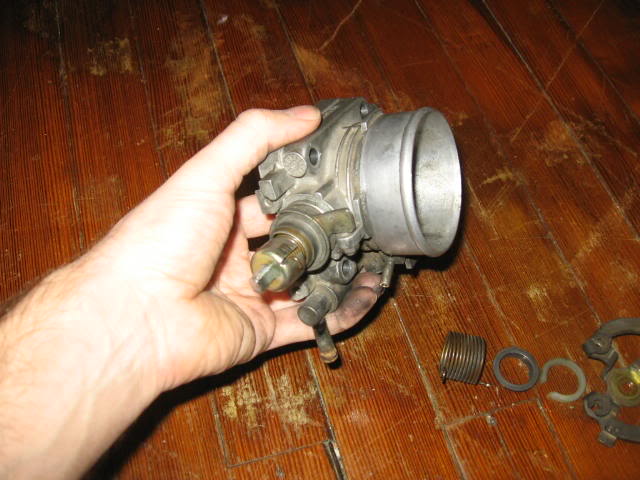
There are two parts for piece four, first slide the cylinder on, then the spring over that and position the spring as shown in the picture below
Now, I just realized I forgot to take a picture for pieces 5 and 6. Piece 5 slide over everything and position it has low as it will go, with the collar facing away from the body assembly. Piece 6 is the cap for the top of the spring. You can see how piece 5 is position in the next picture.
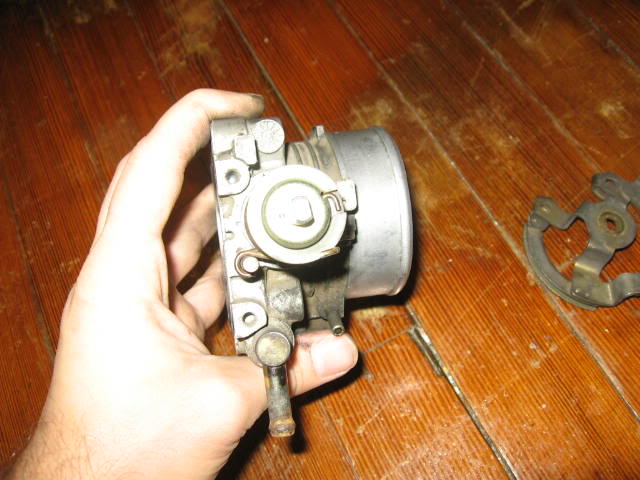
Piece 7 is where you are going to start to load the springs. As shown in the picture below, you want to first position the spring into the slot on piece 7
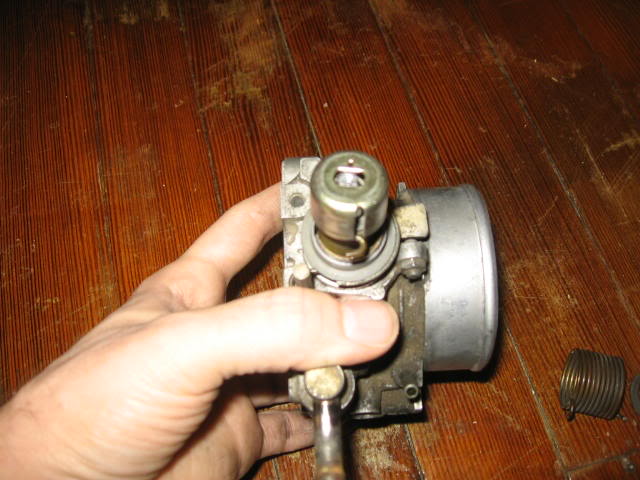
Once you have the spring in the slot, you need to turn piece 6 counter clockwise till you can slide it down the shaft. This will give you resistance since you are loading the spring. If you do this correctly your throttle body should have resistance when you open the throttle plate and the spring should close it.
Next grab piece 8, the larger spring... slide it down the shaft, and then position piece 9 over it like this
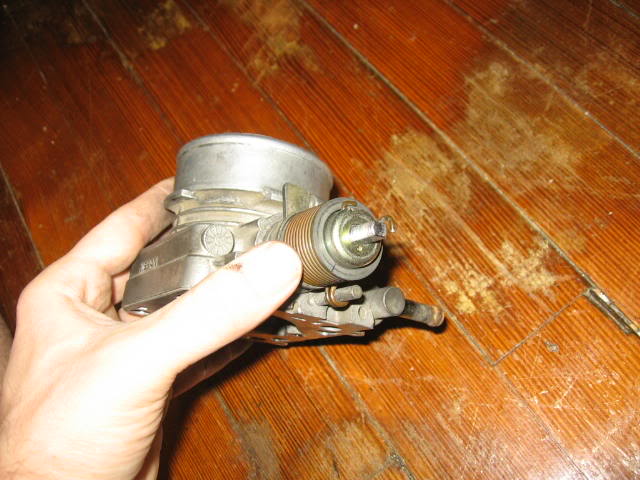
Piece 10 is a locking washer, position it as shown in the pic below.
Then push down on the washer and you should be able to rotate in a way to lock everything together

Now this is the hardest step of all, you have to get tension on the larger outter spring by moving this
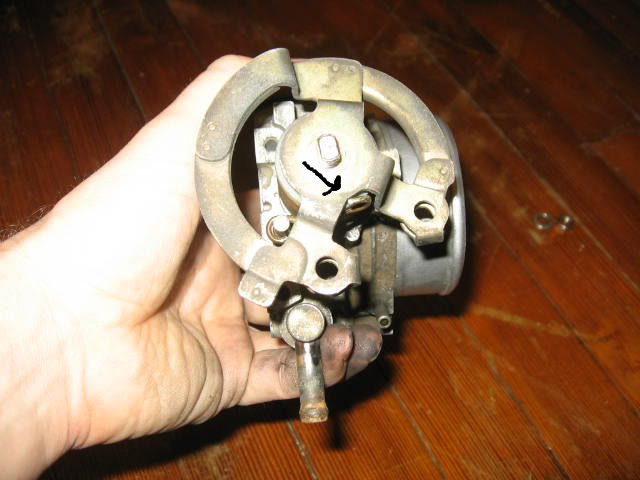
You need to move that tab back so it sits on the pulley with resistance. I found it easiest to use a piece of string to pull it back to where it needs to be and hook it on the pulley. Sorry for not having a pic showing how to do this step. Below is what you will have when you are done
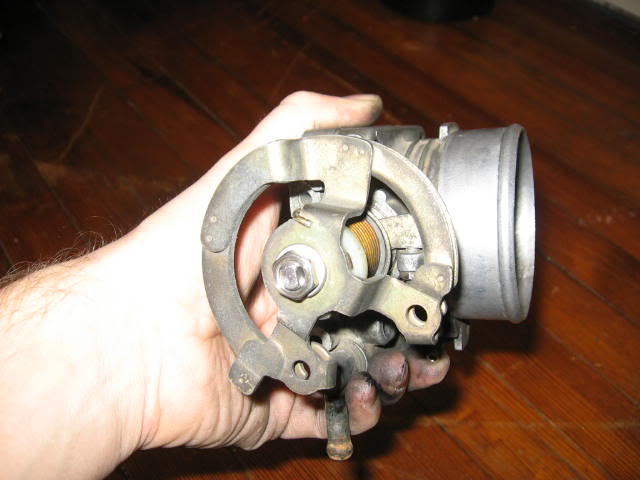
Once its on and snaps close with some force, you can finish with the washer and locked nut.
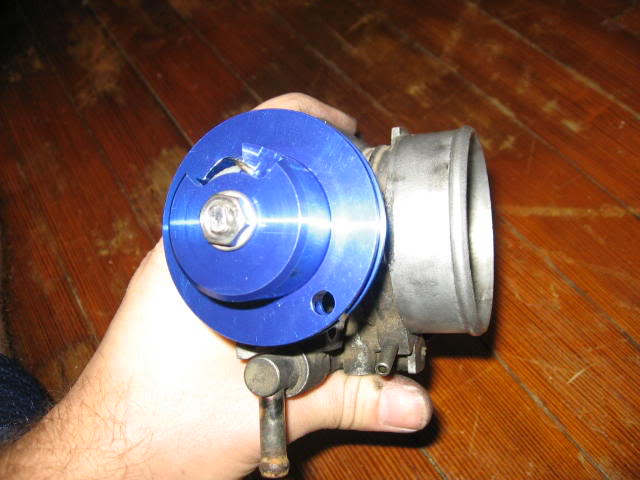
Here's what mine looks like with the hi-throttle pulley
Here is the order of installation from left to right.
Just to get this out of the way, I'm going to say "slide down the shaft".... alot
So grab piece 1, slide it down the shaft with the flat side towards to back of the tb when shaft is in the closed position.
Piece 2 and 7 are similar, but 2 has a larger area cut out where 7 just has a slot on it. So with piece 2, slide it down the shaft with the cut out area towards the back of the throttle body.
Then, take piece 3 and slide it down the shaft
There are two parts for piece four, first slide the cylinder on, then the spring over that and position the spring as shown in the picture below
Now, I just realized I forgot to take a picture for pieces 5 and 6. Piece 5 slide over everything and position it has low as it will go, with the collar facing away from the body assembly. Piece 6 is the cap for the top of the spring. You can see how piece 5 is position in the next picture.
Piece 7 is where you are going to start to load the springs. As shown in the picture below, you want to first position the spring into the slot on piece 7
Once you have the spring in the slot, you need to turn piece 6 counter clockwise till you can slide it down the shaft. This will give you resistance since you are loading the spring. If you do this correctly your throttle body should have resistance when you open the throttle plate and the spring should close it.
Next grab piece 8, the larger spring... slide it down the shaft, and then position piece 9 over it like this
Piece 10 is a locking washer, position it as shown in the pic below.
Then push down on the washer and you should be able to rotate in a way to lock everything together
Now this is the hardest step of all, you have to get tension on the larger outter spring by moving this
You need to move that tab back so it sits on the pulley with resistance. I found it easiest to use a piece of string to pull it back to where it needs to be and hook it on the pulley. Sorry for not having a pic showing how to do this step. Below is what you will have when you are done
Once its on and snaps close with some force, you can finish with the washer and locked nut.
Here's what mine looks like with the hi-throttle pulley
Last edited by trevr; 01-09-2010 at 12:09 PM.


Thread
Thread Starter
Forum
Replies
Last Post
swiftstyles
Suspension, Chassis, and Brakes
3
04-17-2005 03:24 PM
ryan15
Suspension, Chassis, and Brakes
1
03-07-2004 11:18 PM