DIY Polishing Metal
 08-27-2009, 09:08 PM
#1
Contributing Member
Thread Starter
Join Date: Jul 2008
Location: Cleveland Ohio
Posts: 1,152
DIY Polishing Metal
I dont know if there is a thread about this already. I figured since so many people ask me the steps, that I would just polish a random wheel that I had and make a thread. Well here you go.
Polishing 101
---------------------------------
This can be applied to any metal. I am polishing an SE rim for an example.
Items needed
---------------------
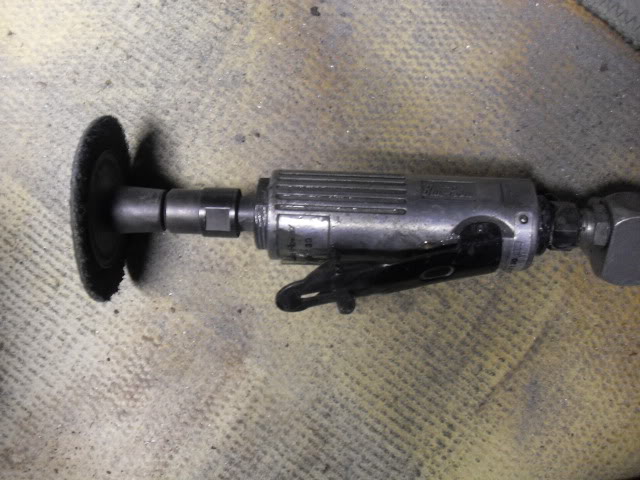
Die grinder
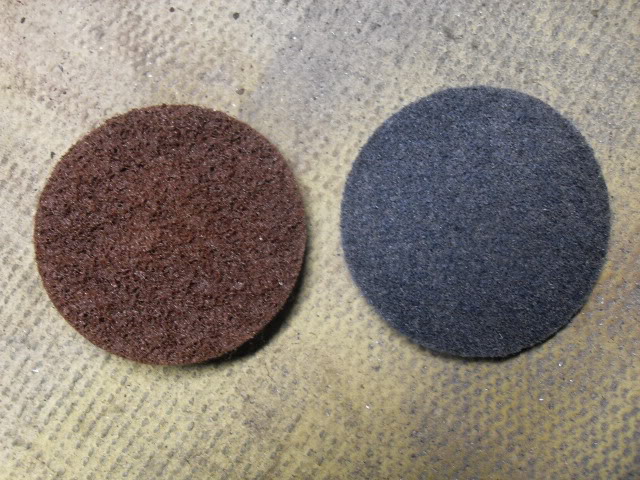
Roloc Discs (rough and polishing)
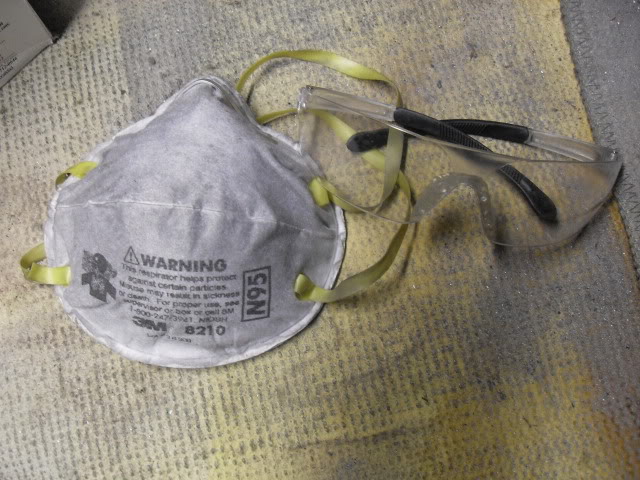
Safety glasses and dusk mask
Sandpaper (220-400-800-1K-1500-2K)
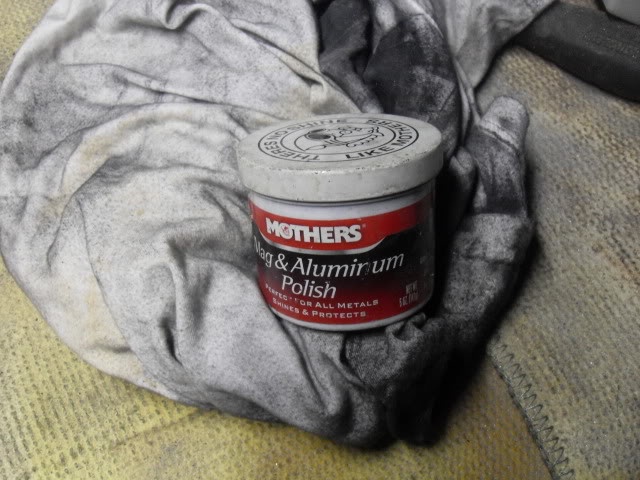
Mothers Polish
Cotton Cloth
1 SE rim
Die Grinder
Roloc discs for die grinder. Rough on the left and polishing disc on right.
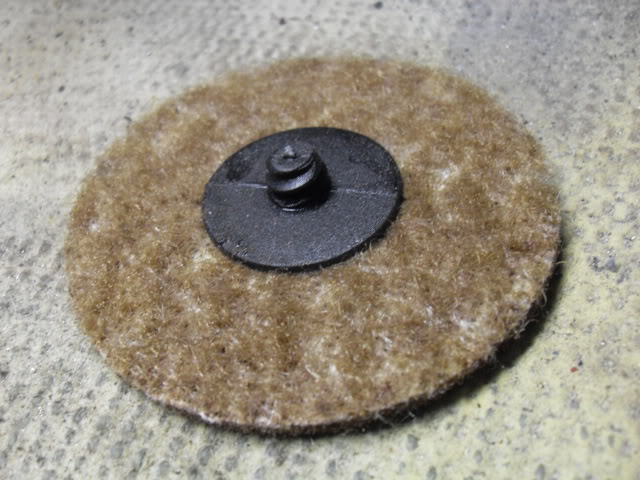
This is a shot of the back side. they just twist on and off quickly
Mothers polish and cotton cloth. I used a hanes cotton shirt.
Safety glasses and dusk mask. Eye lashes only work so good.
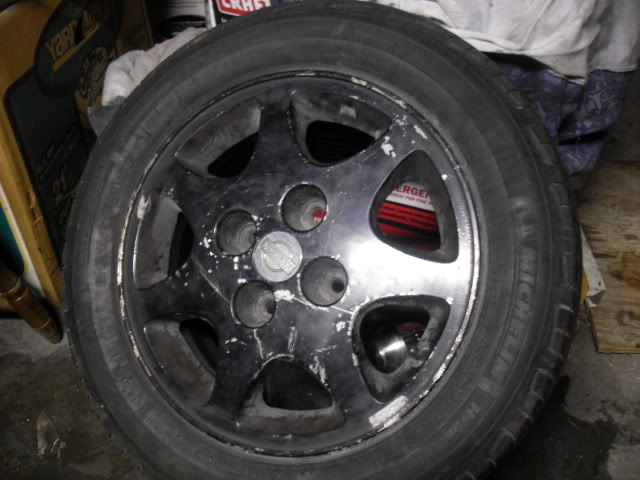
And one ugly *** SE rim
To get started, clean the rim well with some stripper. I actually just left the paint on the rim and used the discs to remove it. These rims are gonna be for drifting so I am not going to be that **** about it.
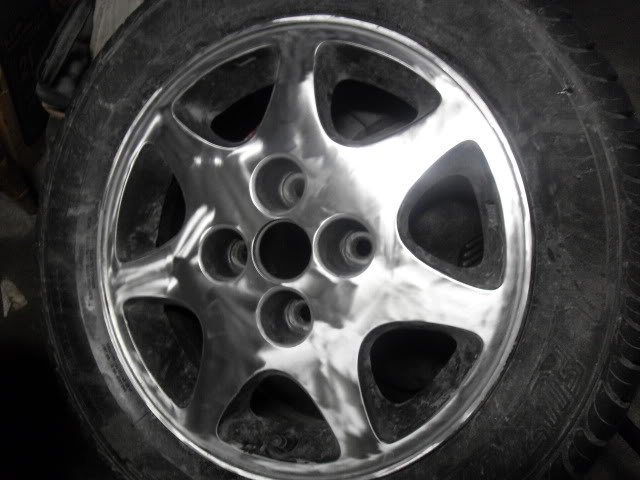
This is what the wheel should look like after you went over it with the course then the polishing pads. Notice the swirl marks.
Next step is to start wet sanding. I start with 220 grit. This is working back from the polishing pad but in the end you will have a better product. I didnt take a picture of the 220. Make sure you keep your sandpaper wet. I use a bucket and dip the paper into it every so often. If the sandpaper starts to fall apart, you will feel the grits between the paper and the rim, stop sanding right away and dip your paper into the bucket again. the grits will scratch deep into the metal and will take extra effort to sand them out.
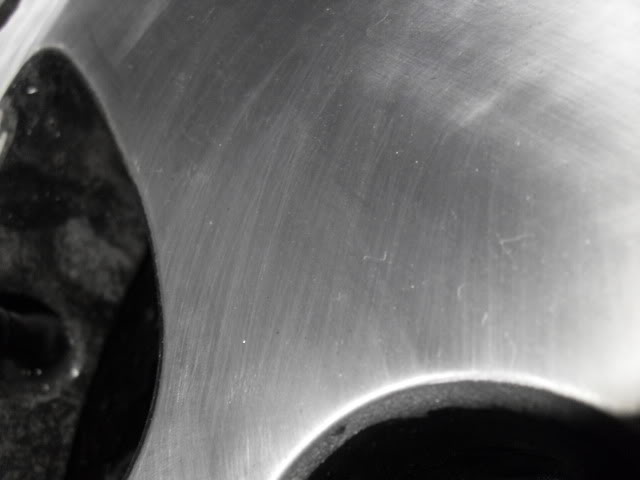
This is 400 grit wet sanded.
Notice the scratches, this is normal. Dont panic, you didnt ruin your rims.
This is 800 grit.
Scratches are getting a little smaller.
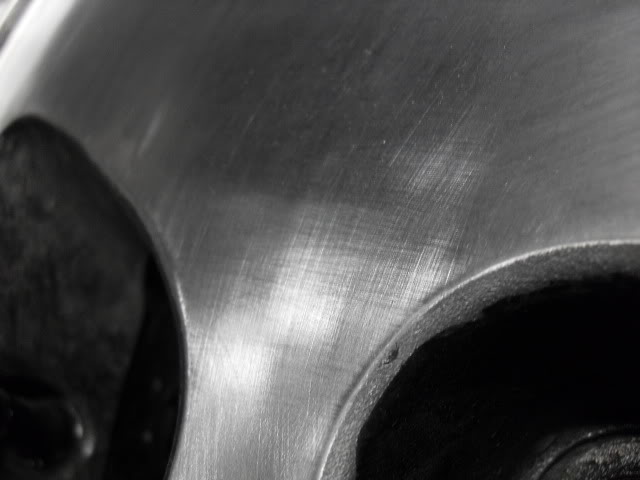
1,000 grit
1,500 grit
2,000 grit

Now clean the rim off really good with some soapy water and dry thoroughly.
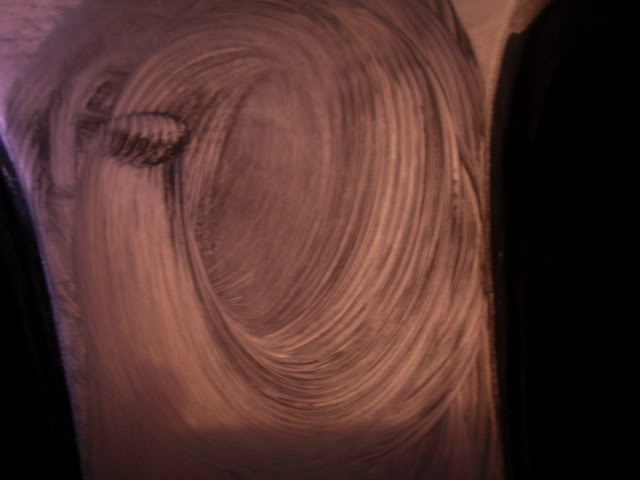
Take your polish and cotton cloth and put a little bit on the cloth and start working the polish into the metal. you should have black swirl marks like this.
The longer you work at it, the better the shine is gonna be.
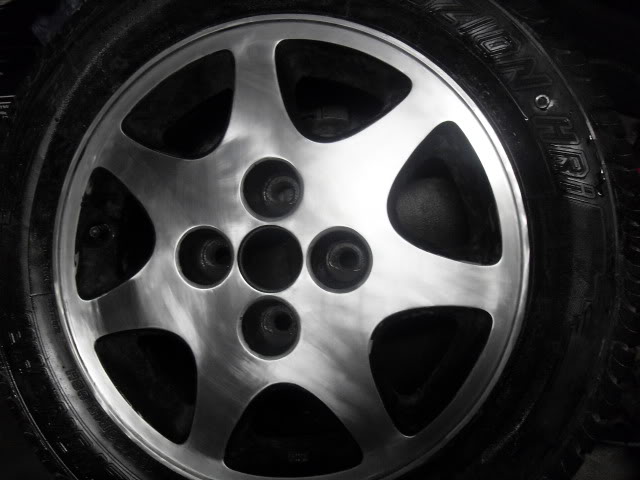
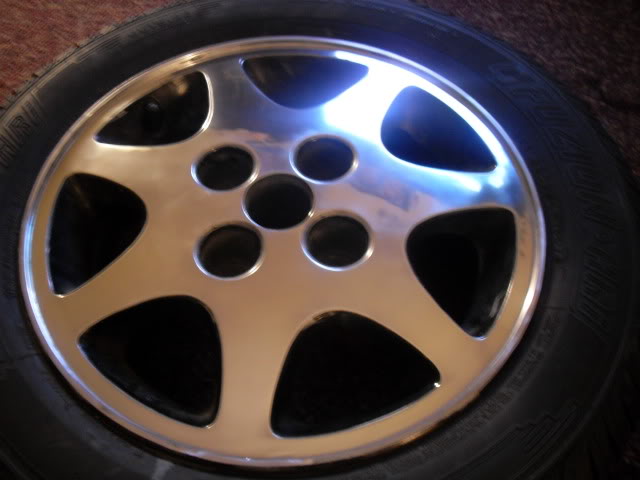
Wipe the polish off with a clean part of the rag and this should be the result.
Make sure you do a small section at a time. Dont let the polish fully dry on the rim. This step should take you at least 15 minutes.
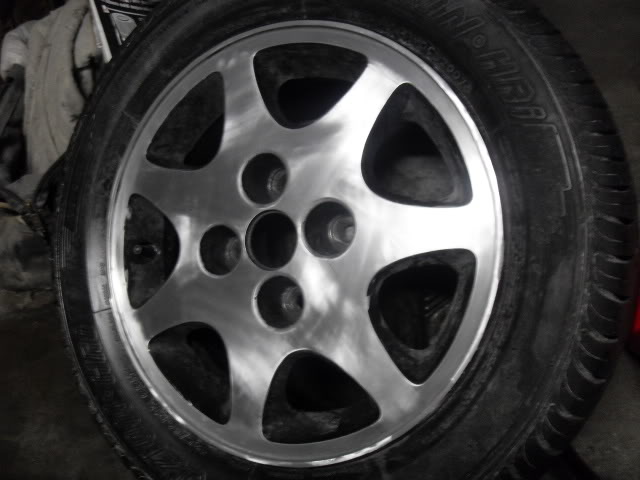
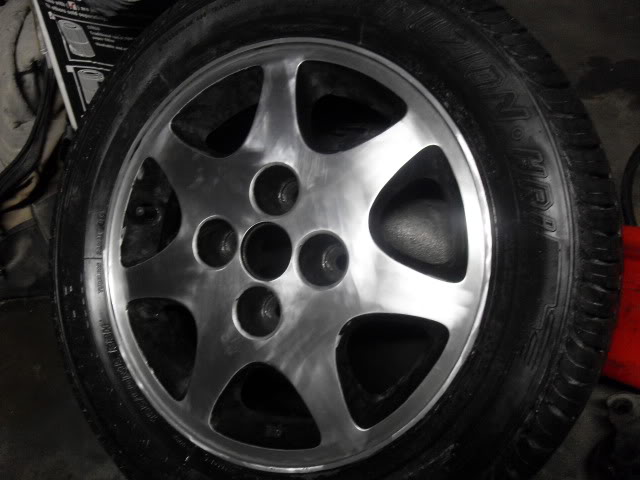
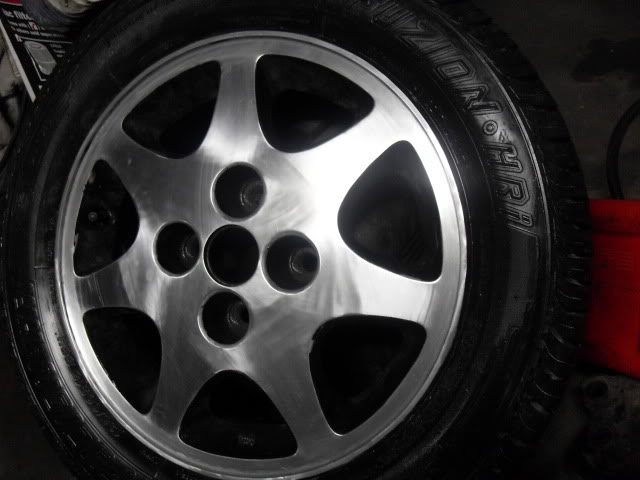
This should be your end result. Took me about 3 hours total.
Polishing 101
---------------------------------
This can be applied to any metal. I am polishing an SE rim for an example.
Items needed
---------------------
Die grinder
Roloc Discs (rough and polishing)
Safety glasses and dusk mask
Sandpaper (220-400-800-1K-1500-2K)
Mothers Polish
Cotton Cloth
1 SE rim
Die Grinder
Roloc discs for die grinder. Rough on the left and polishing disc on right.
This is a shot of the back side. they just twist on and off quickly
Mothers polish and cotton cloth. I used a hanes cotton shirt.
Safety glasses and dusk mask. Eye lashes only work so good.
And one ugly *** SE rim
To get started, clean the rim well with some stripper. I actually just left the paint on the rim and used the discs to remove it. These rims are gonna be for drifting so I am not going to be that **** about it.
This is what the wheel should look like after you went over it with the course then the polishing pads. Notice the swirl marks.
Next step is to start wet sanding. I start with 220 grit. This is working back from the polishing pad but in the end you will have a better product. I didnt take a picture of the 220. Make sure you keep your sandpaper wet. I use a bucket and dip the paper into it every so often. If the sandpaper starts to fall apart, you will feel the grits between the paper and the rim, stop sanding right away and dip your paper into the bucket again. the grits will scratch deep into the metal and will take extra effort to sand them out.
This is 400 grit wet sanded.
Notice the scratches, this is normal. Dont panic, you didnt ruin your rims.
This is 800 grit.
Scratches are getting a little smaller.
1,000 grit
1,500 grit
2,000 grit
Now clean the rim off really good with some soapy water and dry thoroughly.
Take your polish and cotton cloth and put a little bit on the cloth and start working the polish into the metal. you should have black swirl marks like this.
The longer you work at it, the better the shine is gonna be.
Wipe the polish off with a clean part of the rag and this should be the result.
Make sure you do a small section at a time. Dont let the polish fully dry on the rim. This step should take you at least 15 minutes.
This should be your end result. Took me about 3 hours total.

 08-27-2009, 09:38 PM
#3
Contributing Member
Thread Starter
Join Date: Jul 2008
Location: Cleveland Ohio
Posts: 1,152
well with the kits, you dont need to sand to 2K grit. you sand to like 800 then use the different compounds in a certain order to obtain the same result. I just like to do it this way. It takes about the same ammount of time and I think the results are slightly better.


 08-29-2009, 01:54 PM
#13
Registered User

Join Date: Mar 2007
Location: Fairmont, West Virginia
Posts: 100
wow 23 hours worth dang man that alot of elbow grease... im just curious i've actually polished up my valve cover and i want it to stay shiny sooo would i be ahead to clear coat it once im done so that way the aluminum doesnt corrode to where i have to polish it up again??? or do u just use that polish and let it go with that?? thanx
Eric
Eric