HOW TO: S13 Alumnium "GTO" steering column bushing install
#1
HOW TO: S13 Alumnium "GTO" steering column bushing install
Alright I decided to install my generic aluminum ďGTOĒ steering column bushing. Figured I may as well do a write up.
Searching around the web I found an old post detailing the install. It helped me out, but I personally think it is incorrect. The information I found on the web said I should remove the whole column. I donít think it is necessary. If you were to disconnect the column from the rack, moved it aside you could undo 2 nuts and separate the lower shaft. Replace your bushing and reinstall. I donít have a motor in my engine bay so perhaps I have more clearance to do it without pulling the column. My install will detail what I did to install the bushing. Again, you may not have to remove the column to install the bushing (youíll see what I mean). If you do it without pulling the column post in here let us know if itís possible or not.
Alright tools needed:
Ratchet (air seriously makes it much better)
12 mm deep socket shallow wonít hurt either
10 mm deep socket shallow wonít hurt either
Philips head screw driver
Flat head screw driver (not needed but helpful)
PB Blaster for the girly men out there (myself included).
First things first: Remove Negative battery connection. Next I locked my steering column in place.
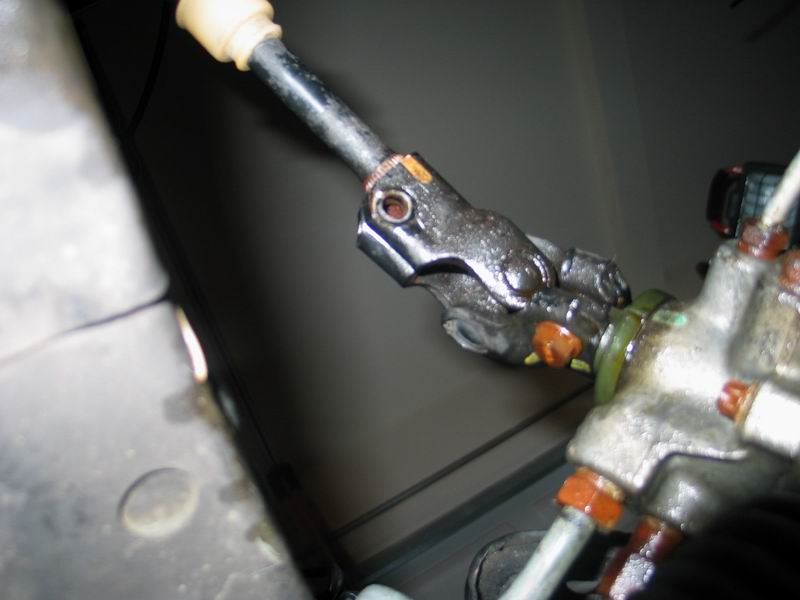
Start: spray some PB blaster on the knuckle where the column meets the rack. I personally removed both bolts. 12mm bolts, you may need a breaker bar to break them loose. You donít need to remove both, but I did incase one would separate more easily than the other. I took some white out and put a mark showing where the knuckle meets the rack. I then took a flat head screw driver and a hammer to hammer it up to loosen up the connection. Itís been on there for 14 years. I wouldnít worry about getting it off completely just hammer it up to break it free. If you canít get these bolts loose itís pointless to go on.
In the cabin you have to remove the lower dash cover and the cover behind the steering wheel
To remove the lower dash cover, remove several Philips head screws: There are 3 to the left of the cover as well as the 2 pictured. There are 2 more near the bottom on either side (sorry didnít take pictures of that side). There 7 screws for the lower dash. I removed the kick panel on the left to make it easier for myself.
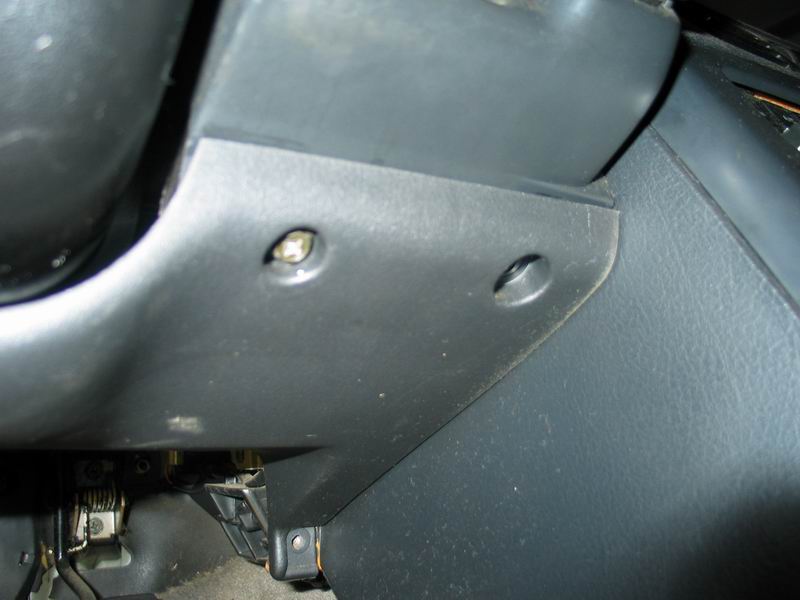
The hood latch is connected to the lower cover as well. There are two bolts holding that. You can easily wiggle it free once the bolts out. The guy who owned it before me took the lower panel off and didnít have enough brain power to figure out how to put it back together. So I had like 2 bolts total. Hood latch was just chilliní. Here is a picture showing what it looks like behind the panel.

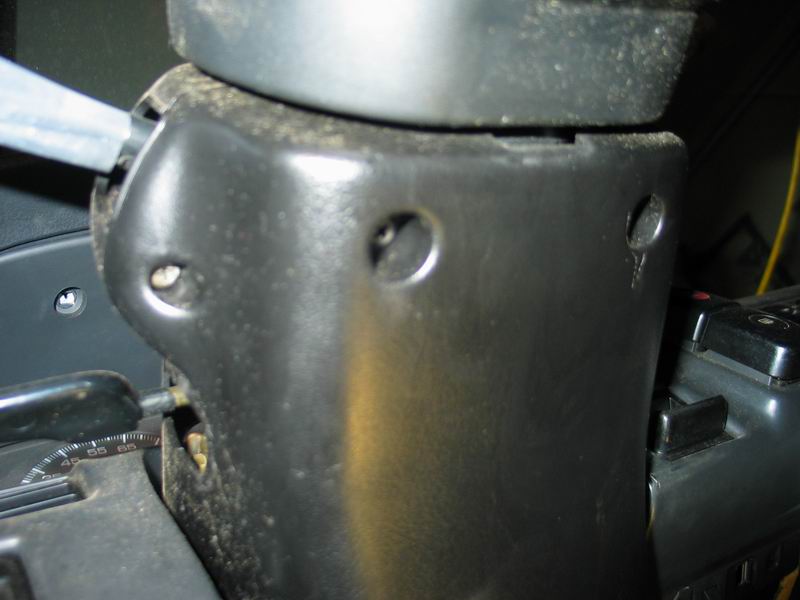
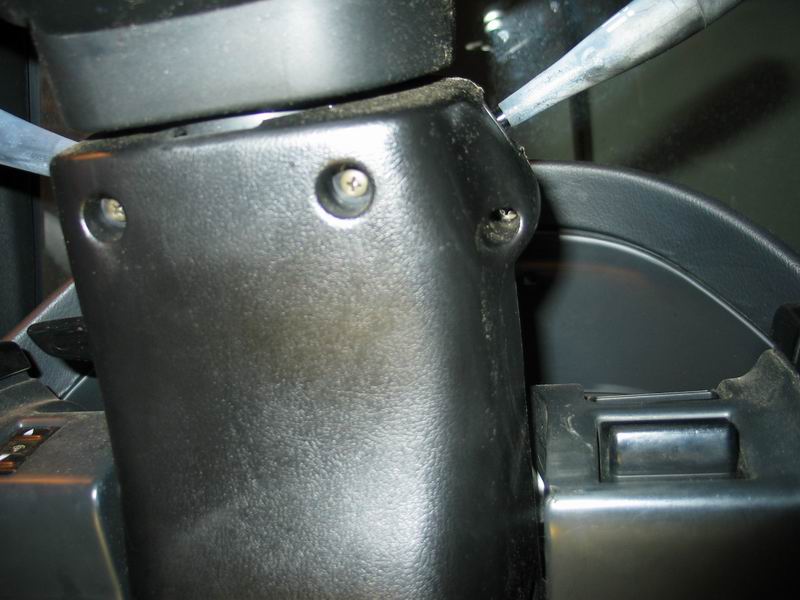
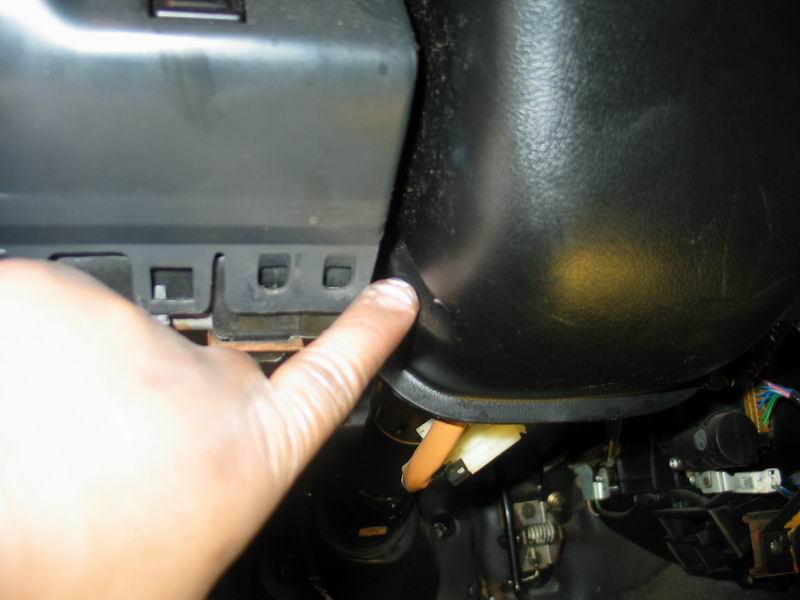
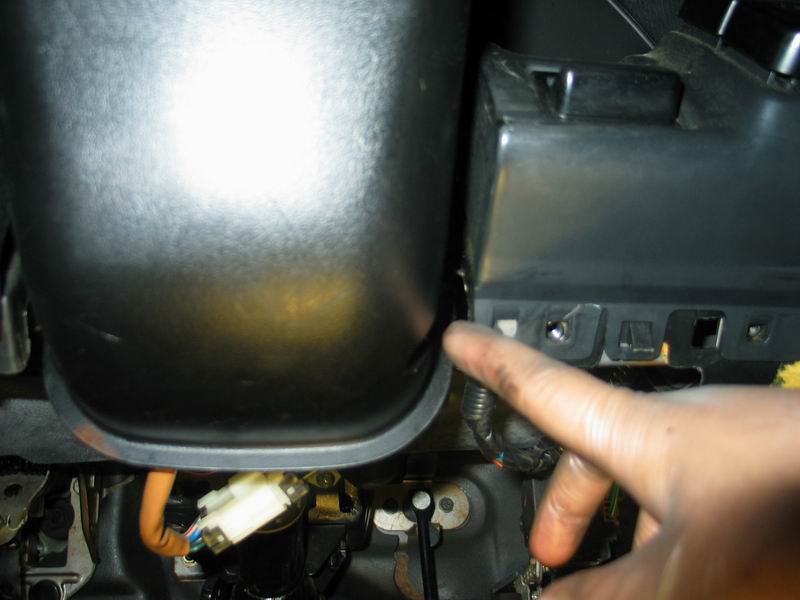
Now that you have the lower dash cover off, head north for the covers around the steering wheel. 6 screws in total hold that together. The pictures should show where all 6 are located (I got Ďem all!). Once the screws are out, squeeze from the sides of the covers to help separate the top and bottom halves. Donít rush it and break the tabs, like the previously owner of my car did.
Now you can tackle the actual removal of the column.
Break loose the following 3 nuts (10 mm I think*)

Next break loose these two nuts (12 mm I think*)


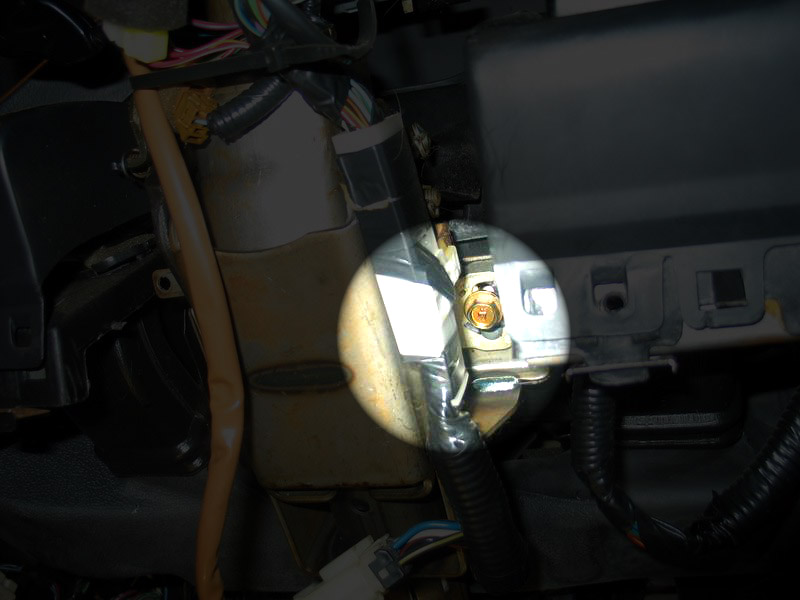
Last but not least; 2 bolts more holding the column on. I took a marker and circled where the bolts were located originally. Since the collar they go through is slotted, I figure itís some sort of adjustment (anyone know?) To be sure I circled it so I could put it back exactly as before. Break loose the following 2 bolts (12 mm too I believe).

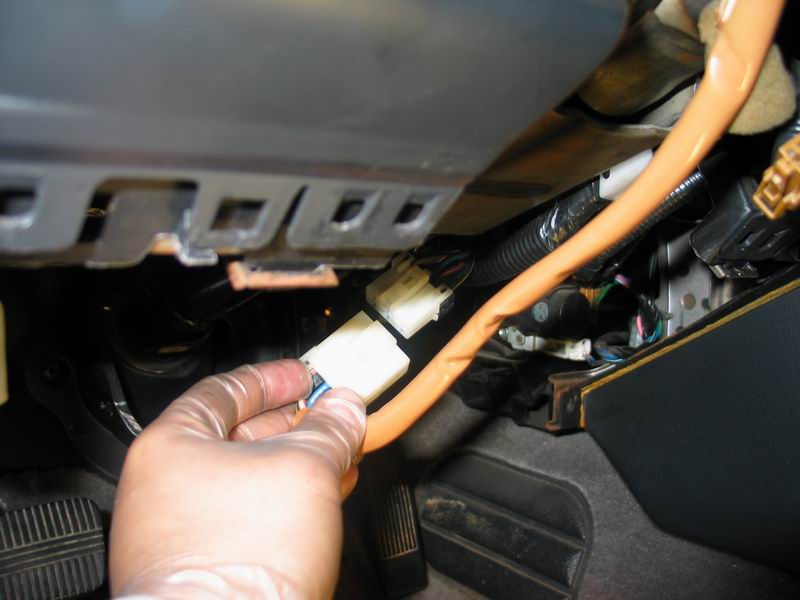
Okay onto the harnesses, 6 in total. All of them are unique, pretty easy to figure out which one goes where.
Harness # 01:
Harness # 02

Harness # 03

Harness # 04

Harness # 05

Harness # 06
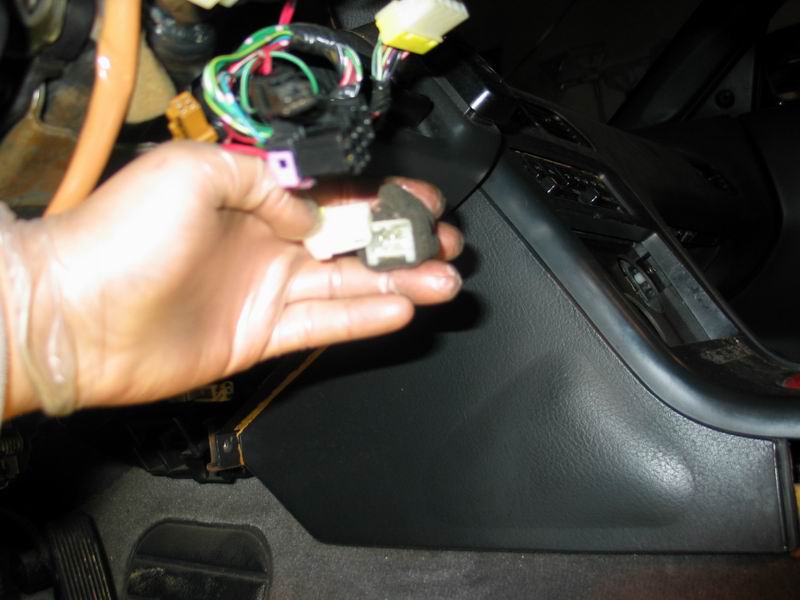
I then went back to the engine bay where the column meets the rack and hammered the knuckle up and got a good bit of movement. Doing this ensured it would come loose when I tugged on the column to separate it from the rack.
Back in the cabin:
Remove the 3 bolts by the firewall (image: 7845.jpg).
Now get a good hold of the column.
Remove the 2 BOLTS (images: 7855.jpg & 7857.jpg) Iíd start holding the steering wheel now.
Remove the last 2 nuts in the middle. (images: 7846.jpg & 7847.jpg).
The reason I said to do the 2 nuts in the middle last is because my column gave me a little trouble getting free from the studs right there. Make sure you get the column out nicely without damaging the threads on those studs. Once you clear those studs. It should come easily.
End result:
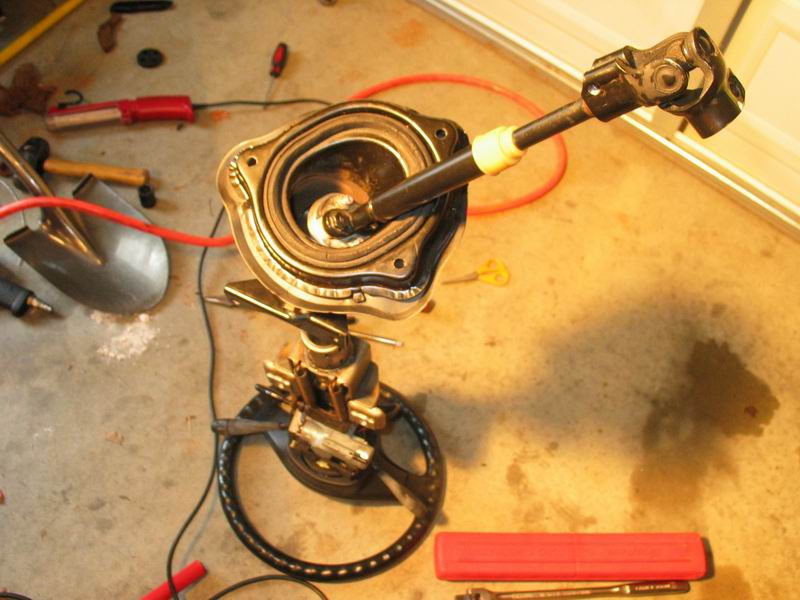
The rest of the stuff I didnít take pictures of because A.) I got lazy. B.) I forgot. C.) Itís pretty simple.
Now: look at the piece that is normally by the firewall. And youíll see 2 nuts holding the rubber bushing of doom in place. Remove those 2 nuts (12mm). Once you remove those nuts you can separate the two halves of the steering shaft.
Look over the bushing note where the plastic rings are, and how the metal plates are sitting and where. On the opposite side of the bushing youíll see 2 more nuts. Remove those nuts. Once those nuts are loose the bushing can be replaced.
Next transfer the metal sleeves from the rubber bushing to the metal ďGTOĒ bushing. Mine didnít fit and kept sliding out you just need to hold them there until you bolt it all back together. Transfer the plastic pieces as well. Next put it back together like before. The metal plates should sit between the plastic collars and line up with the holes for the other 2 studs to go through.
If you looked over the bushing before you separated everything, itís easy to put back together. Even if you didnít pay attention you can figure out in a few minutes. I donít know the torque specs I just used my air ratchet, which is around 20 ft lbs.
I didnít put it back together yet because Iím swapping my steering rack out for a Hicas front steering rack for a better ratio. Itís easy to put back together. Just mind the studs in the middle of the column and not to damage them. Line it back up and bolt it up. Plug in all the harnesses, and put on the plastic trim.
What it should look like:
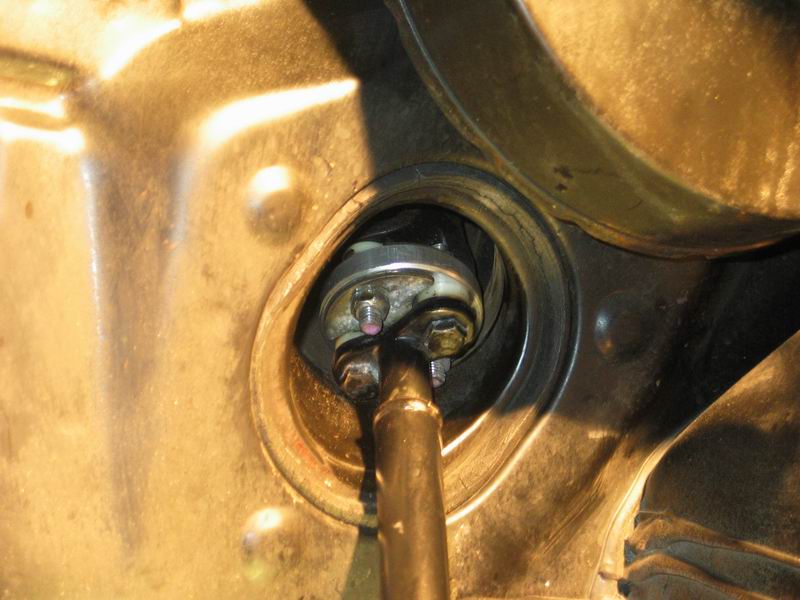
Go for a drive and enjoy the non sloppy steering feel. It may need an alignment, but I doubt it. My column didnít turn at all during the whole install.
All pictures can be found here:
http://www.bumnah.com/gto
Not responsible if you F this up and render your car useless.
Searching around the web I found an old post detailing the install. It helped me out, but I personally think it is incorrect. The information I found on the web said I should remove the whole column. I donít think it is necessary. If you were to disconnect the column from the rack, moved it aside you could undo 2 nuts and separate the lower shaft. Replace your bushing and reinstall. I donít have a motor in my engine bay so perhaps I have more clearance to do it without pulling the column. My install will detail what I did to install the bushing. Again, you may not have to remove the column to install the bushing (youíll see what I mean). If you do it without pulling the column post in here let us know if itís possible or not.
Alright tools needed:
Ratchet (air seriously makes it much better)
12 mm deep socket shallow wonít hurt either
10 mm deep socket shallow wonít hurt either
Philips head screw driver
Flat head screw driver (not needed but helpful)
PB Blaster for the girly men out there (myself included).
First things first: Remove Negative battery connection. Next I locked my steering column in place.
Start: spray some PB blaster on the knuckle where the column meets the rack. I personally removed both bolts. 12mm bolts, you may need a breaker bar to break them loose. You donít need to remove both, but I did incase one would separate more easily than the other. I took some white out and put a mark showing where the knuckle meets the rack. I then took a flat head screw driver and a hammer to hammer it up to loosen up the connection. Itís been on there for 14 years. I wouldnít worry about getting it off completely just hammer it up to break it free. If you canít get these bolts loose itís pointless to go on.
In the cabin you have to remove the lower dash cover and the cover behind the steering wheel
To remove the lower dash cover, remove several Philips head screws: There are 3 to the left of the cover as well as the 2 pictured. There are 2 more near the bottom on either side (sorry didnít take pictures of that side). There 7 screws for the lower dash. I removed the kick panel on the left to make it easier for myself.
The hood latch is connected to the lower cover as well. There are two bolts holding that. You can easily wiggle it free once the bolts out. The guy who owned it before me took the lower panel off and didnít have enough brain power to figure out how to put it back together. So I had like 2 bolts total. Hood latch was just chilliní. Here is a picture showing what it looks like behind the panel.
Now that you have the lower dash cover off, head north for the covers around the steering wheel. 6 screws in total hold that together. The pictures should show where all 6 are located (I got Ďem all!). Once the screws are out, squeeze from the sides of the covers to help separate the top and bottom halves. Donít rush it and break the tabs, like the previously owner of my car did.
Now you can tackle the actual removal of the column.
Break loose the following 3 nuts (10 mm I think*)
Next break loose these two nuts (12 mm I think*)
Last but not least; 2 bolts more holding the column on. I took a marker and circled where the bolts were located originally. Since the collar they go through is slotted, I figure itís some sort of adjustment (anyone know?) To be sure I circled it so I could put it back exactly as before. Break loose the following 2 bolts (12 mm too I believe).
Okay onto the harnesses, 6 in total. All of them are unique, pretty easy to figure out which one goes where.
Harness # 01:
Harness # 02
Harness # 03
Harness # 04
Harness # 05
Harness # 06
I then went back to the engine bay where the column meets the rack and hammered the knuckle up and got a good bit of movement. Doing this ensured it would come loose when I tugged on the column to separate it from the rack.
Back in the cabin:
Remove the 3 bolts by the firewall (image: 7845.jpg).
Now get a good hold of the column.
Remove the 2 BOLTS (images: 7855.jpg & 7857.jpg) Iíd start holding the steering wheel now.
Remove the last 2 nuts in the middle. (images: 7846.jpg & 7847.jpg).
The reason I said to do the 2 nuts in the middle last is because my column gave me a little trouble getting free from the studs right there. Make sure you get the column out nicely without damaging the threads on those studs. Once you clear those studs. It should come easily.
End result:
The rest of the stuff I didnít take pictures of because A.) I got lazy. B.) I forgot. C.) Itís pretty simple.
Now: look at the piece that is normally by the firewall. And youíll see 2 nuts holding the rubber bushing of doom in place. Remove those 2 nuts (12mm). Once you remove those nuts you can separate the two halves of the steering shaft.
Look over the bushing note where the plastic rings are, and how the metal plates are sitting and where. On the opposite side of the bushing youíll see 2 more nuts. Remove those nuts. Once those nuts are loose the bushing can be replaced.
Next transfer the metal sleeves from the rubber bushing to the metal ďGTOĒ bushing. Mine didnít fit and kept sliding out you just need to hold them there until you bolt it all back together. Transfer the plastic pieces as well. Next put it back together like before. The metal plates should sit between the plastic collars and line up with the holes for the other 2 studs to go through.
If you looked over the bushing before you separated everything, itís easy to put back together. Even if you didnít pay attention you can figure out in a few minutes. I donít know the torque specs I just used my air ratchet, which is around 20 ft lbs.
I didnít put it back together yet because Iím swapping my steering rack out for a Hicas front steering rack for a better ratio. Itís easy to put back together. Just mind the studs in the middle of the column and not to damage them. Line it back up and bolt it up. Plug in all the harnesses, and put on the plastic trim.
What it should look like:
Go for a drive and enjoy the non sloppy steering feel. It may need an alignment, but I doubt it. My column didnít turn at all during the whole install.
All pictures can be found here:
http://www.bumnah.com/gto
Not responsible if you F this up and render your car useless.
#3
As stated at the beginning of my how to. It can probably be done without removing the whole damn column.
Here's a link posted elsewhere. Shows how to do it without pulling the whole column.
http://www.driftworks.com/index.php?...&resourceId=15
I don't follow it well, but I've done mine the hard way so I don't care. Plus I have more hair on my chest for doing the column pull.
Here's a link posted elsewhere. Shows how to do it without pulling the whole column.
http://www.driftworks.com/index.php?...&resourceId=15
I don't follow it well, but I've done mine the hard way so I don't care.
 Plus I have more hair on my chest for doing the column pull.
#7
#11
some peepz say NO to power steering while other feel it really makes driving more enjoyable.....I dont know which side I take.
I think on lightweight cars you can do without it, but on heavyboyz it prob is painfull
I think on lightweight cars you can do without it, but on heavyboyz it prob is painfull
#12
best thing to do is drive a buddies car without p/s i never push it on anyone, but i love the direct feeling.
i just don't like all the play involved with ps also to much left and right on a failing pump will expload lines. one less leak LOL.
i just don't like all the play involved with ps also to much left and right on a failing pump will expload lines. one less leak LOL.
#13
p/s is not really needed as long as the car is in motion. once you come to a stop turning the wheels is not only harder but more harmful to you steering column.
a friend of mine got rid of the p/s and ended up braking his steering column because of the additional force needed to turn.
i've tried driving without p/s and didn't like it but to each his own i guess
a friend of mine got rid of the p/s and ended up braking his steering column because of the additional force needed to turn.
i've tried driving without p/s and didn't like it but to each his own i guess
#14
the biggest problem with guys who get rid of PS is. they don't leave fluid in the rack. I have been driving/drifting for 4 years no issues at all
sorry for thread heist original poster
sorry for thread heist original poster


