
Short and Sweet updates: Enrique's 92 Coupe SR

For the last few days of june and the first few days of July, I was busy fixing a bathroom from my new house. Yeah, we just bought a house.
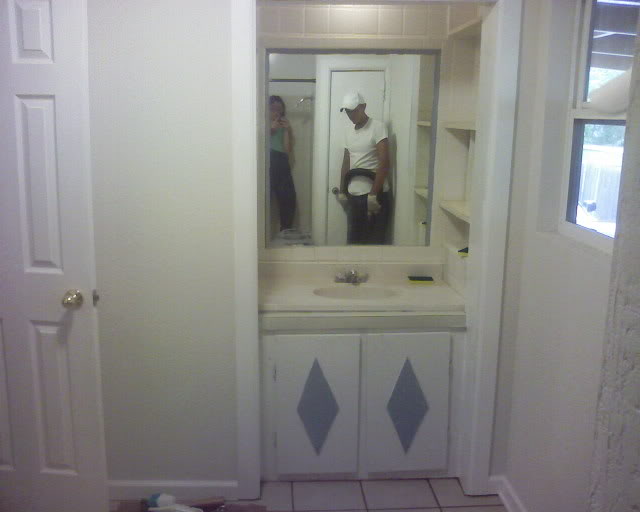
This is what it looked like before we started:
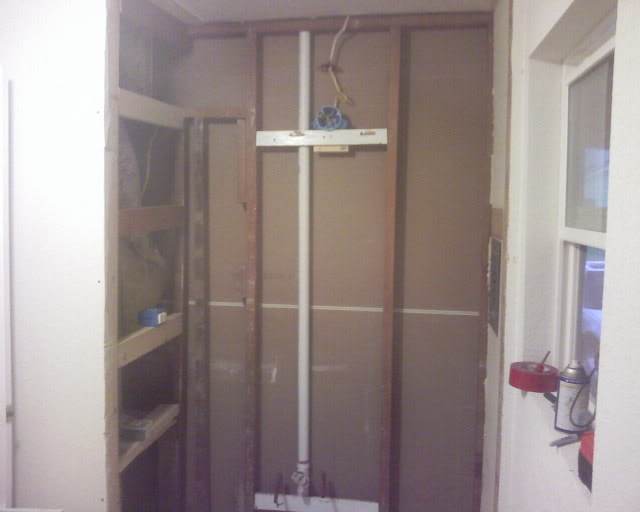
Then this is what it looked like after the tear down:
Then this is the almost finished product:
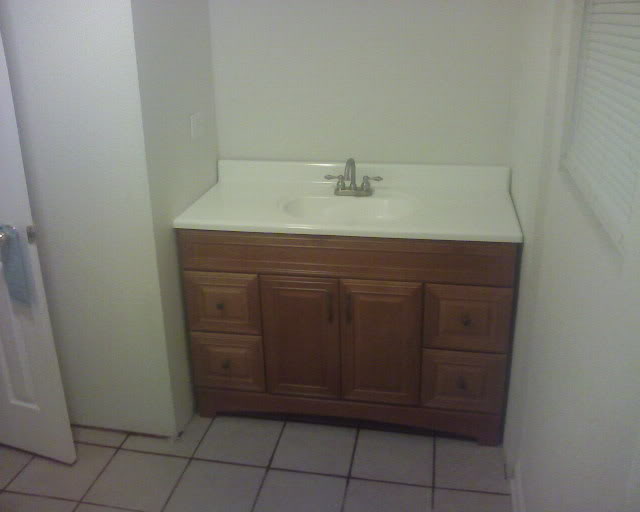
It just needs some minor touches that my lady will finish. (decoration).
After my lady and I got that out of the way,
We traveled to Mexico to visit our relatives and relax for a week and a half.
I am currently on my way back home from this long trip.
In Mexico.
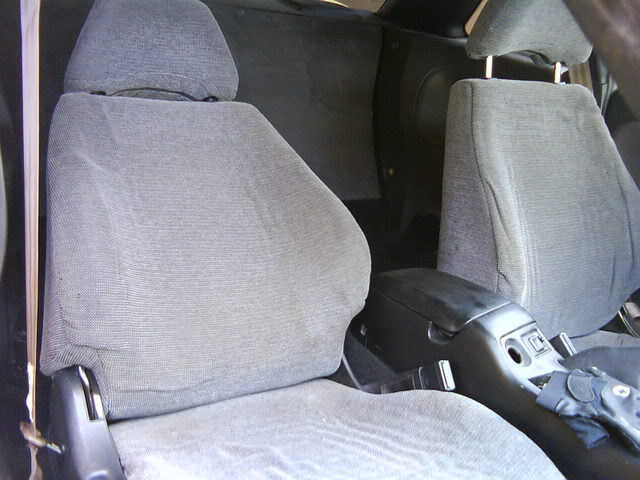
I paid 125dlls to reupholster all the seats for the red coupe.
************************************************** ***************************
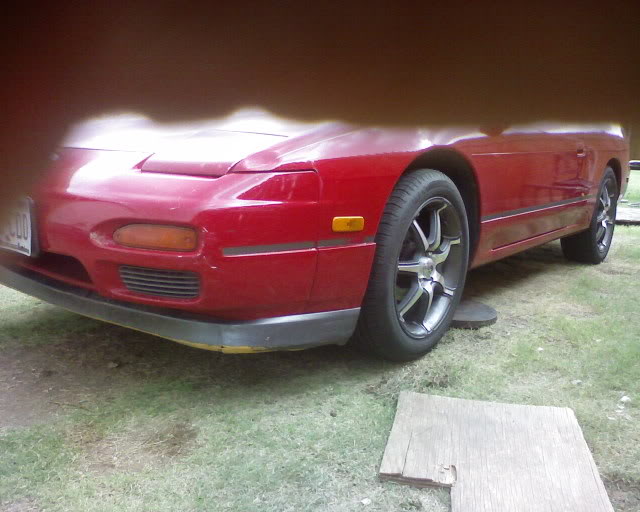
Before we left I changed the front lip to my red car, because I was sick and tired of dragging it everywhere, and since I was going to be driving the car
about 1500 miles I didn't want to have to worry about it falling off.
From this car to
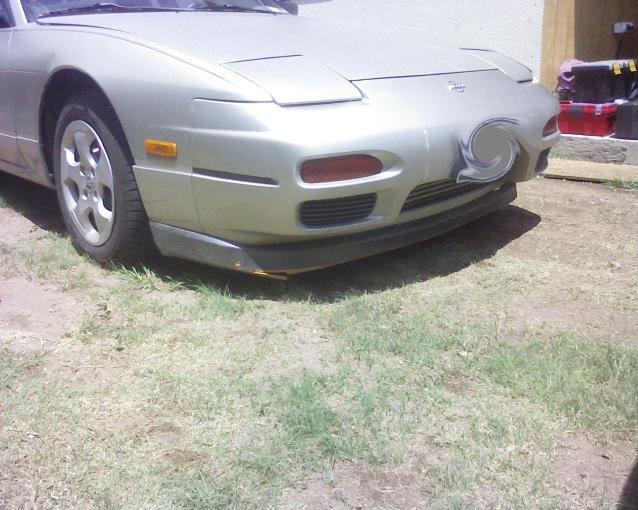
To this car:
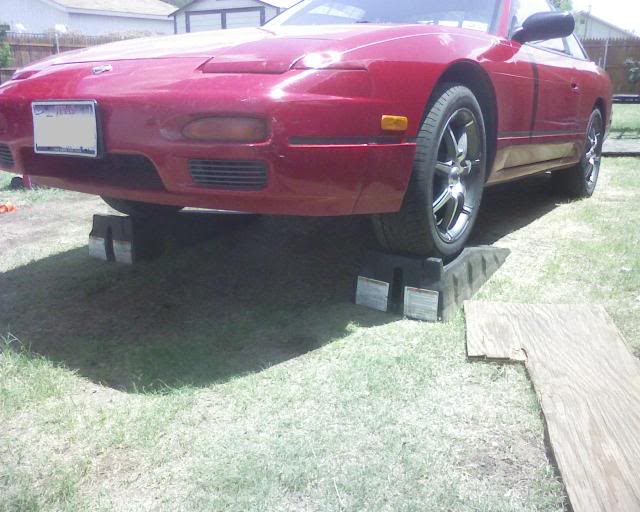
like this:
************************************************** ***************************
This is some of the stuff that I did on this trip:
************************************************** ***************************
Installed the Energy Suspension Polyurethane Bushings Kit:
This are some of the BEFORE shots:
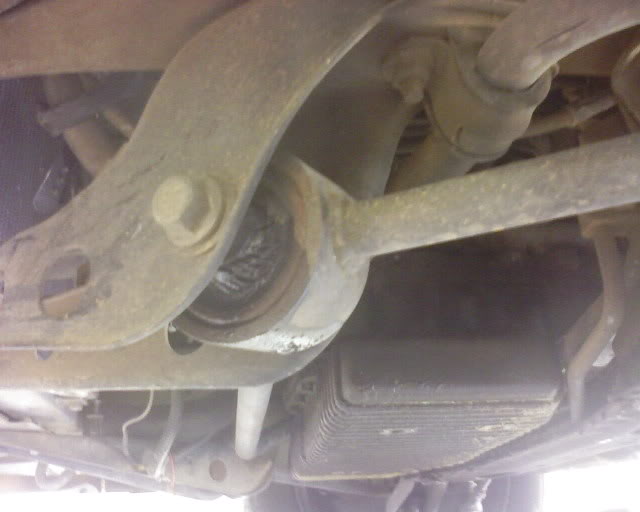
pretty worn.
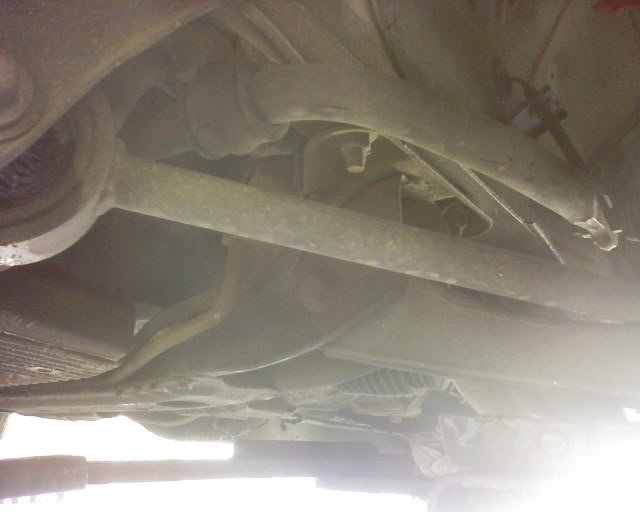
Some of the AFTER pictures:

Rear:
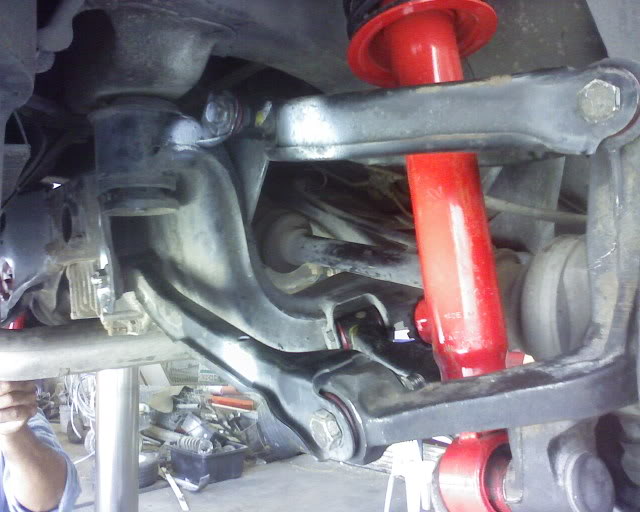
That was 2-3 days of work.
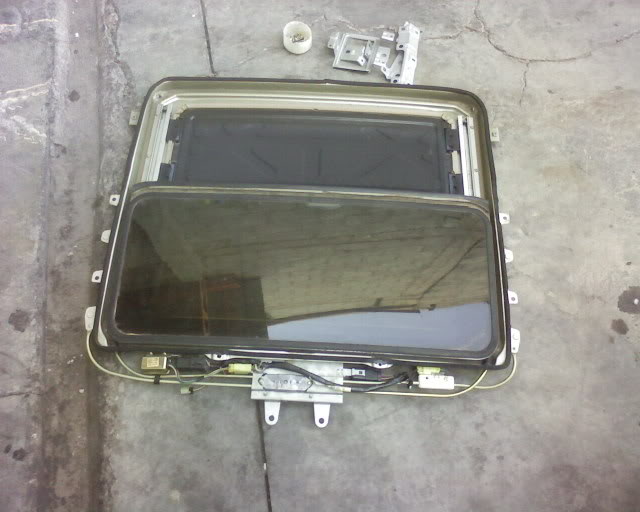
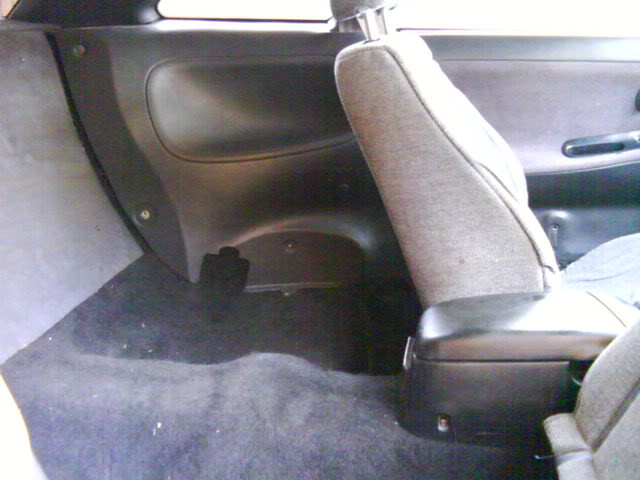
Before installing the bushings, I took it to my friend who re upholsters my cars.
I wanted a carpet installed and
I wanted the ceiling changed from tan to gray.
he said he would do it but would take longer to finish the sunroof becuase he would have to drop
the whole assembly.
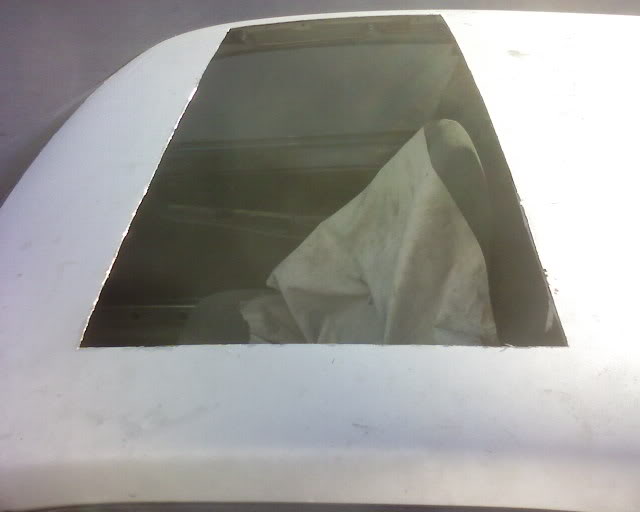
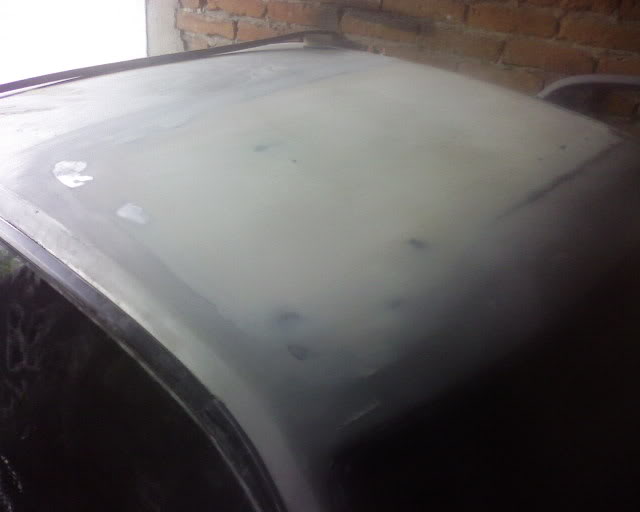
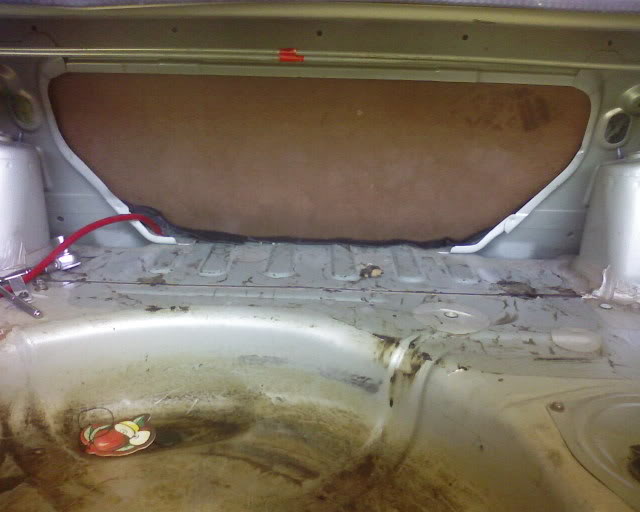
The next day I found some one to eliminate the whole sunroof assembly and paint the roof of the car.
After the bushings were installed we got to work on the sunroof removal:

Its heavy!
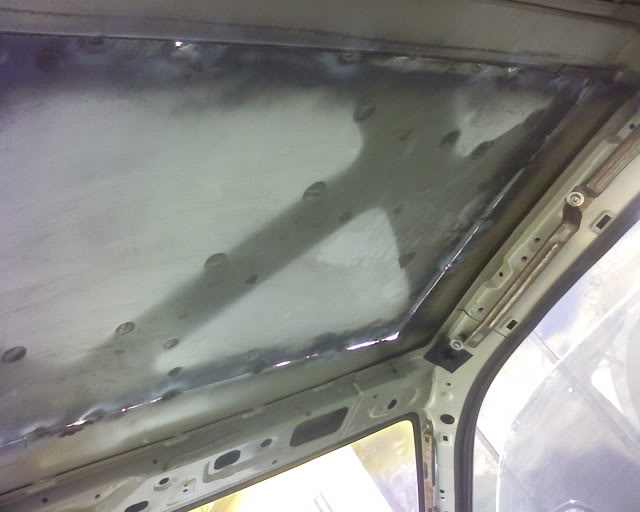
At the same time I decided to eliminate the reading lights that go on the ceiling.
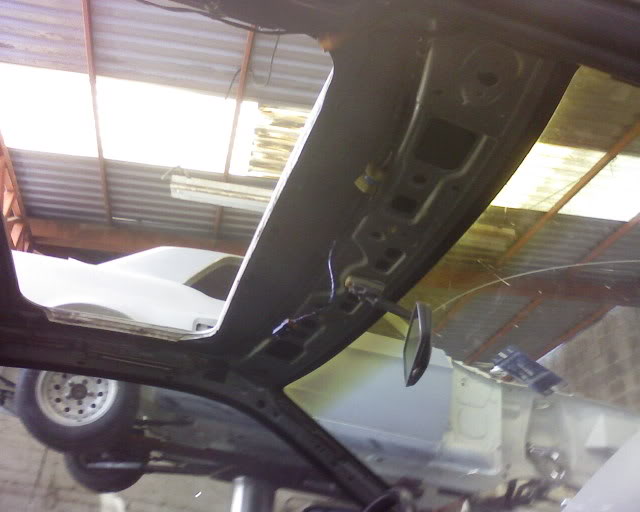
After some cutting.
After some welding:
outside:
inside:
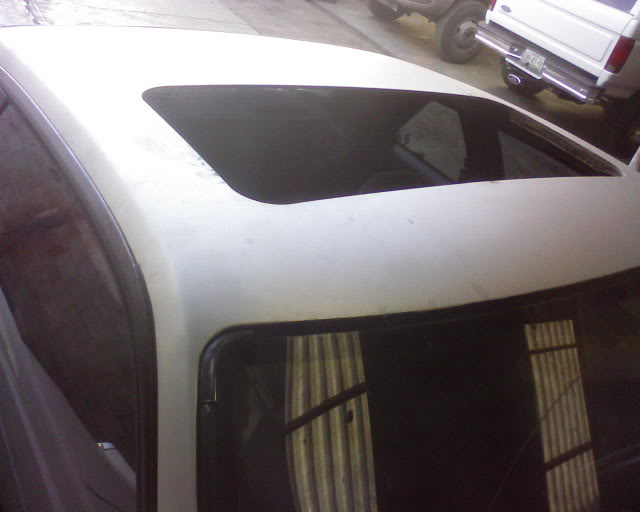
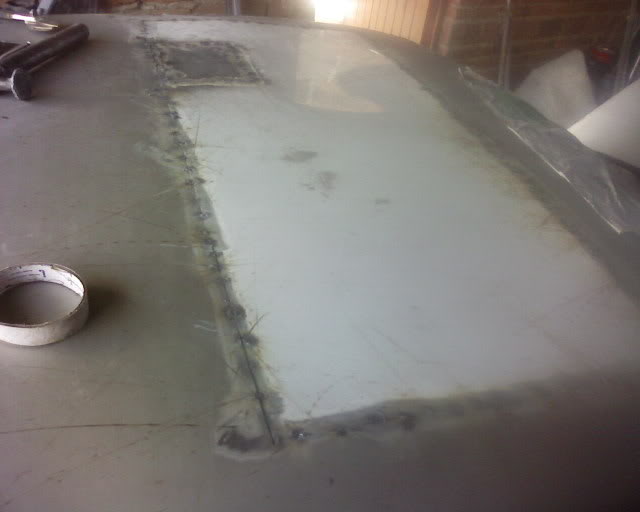
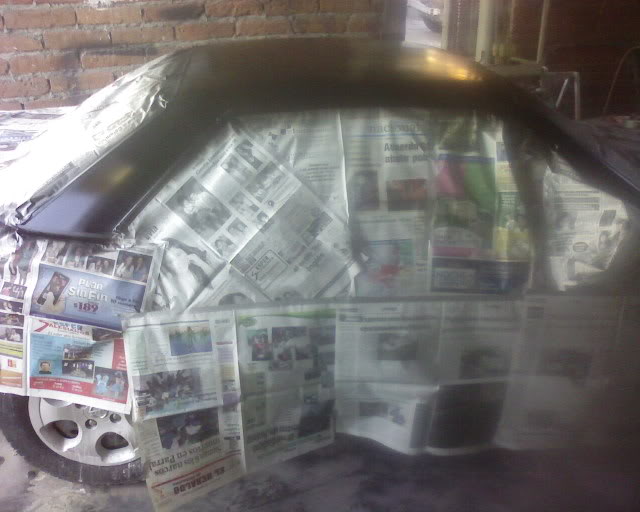
Some preping:
more preping:
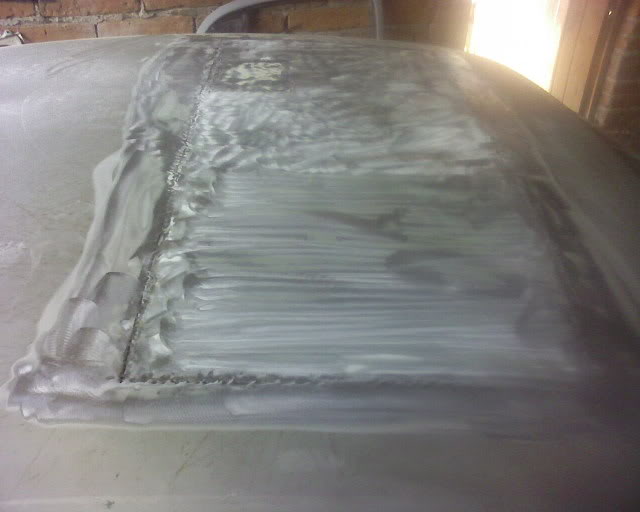
Then it was primed and painted Black:
and Clear coated:

FINISHED PRODUCT:

************************************************** ***************************
************************************************** ***************************
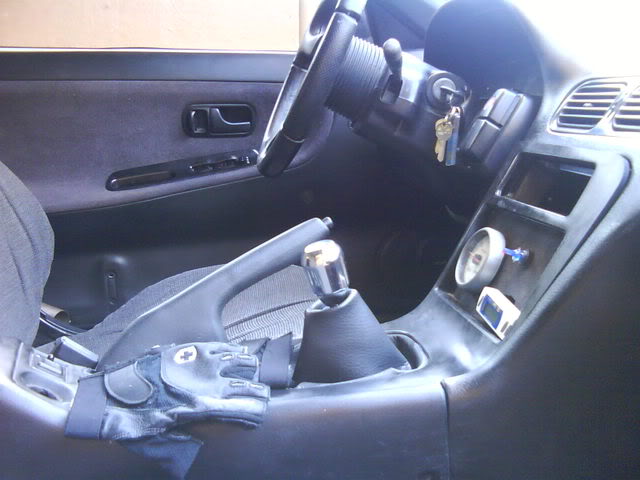
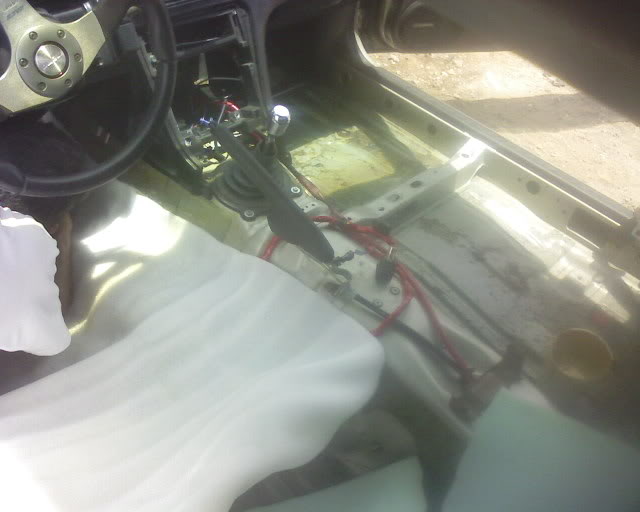
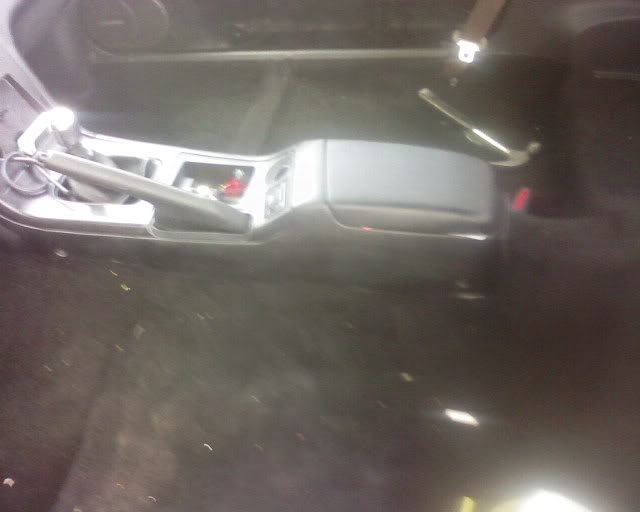
Another thing that was done at the same time was shorten the shifter by about an inch and a quarter.
************************************************** ***************************
I don't have before and after pictures
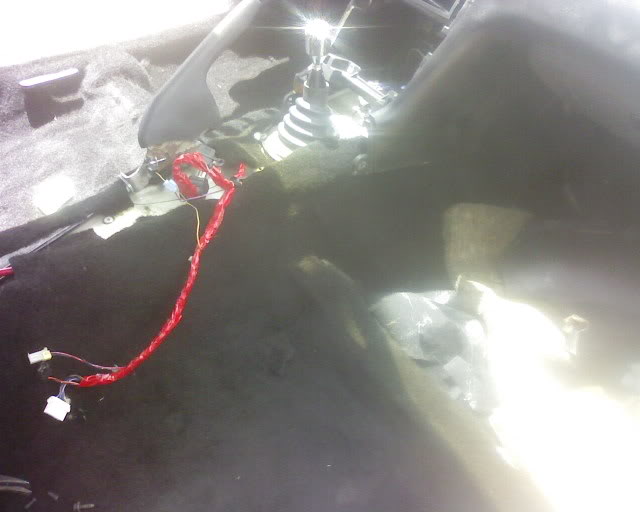
Here is one before the carpet:
Here is newer picture:
************************************************** ***************************
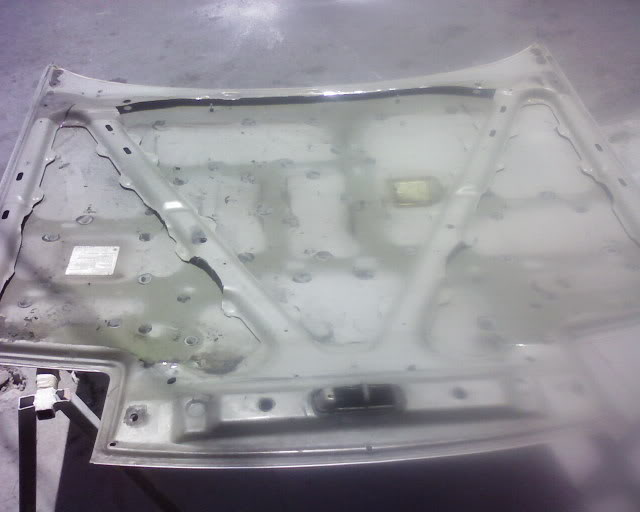
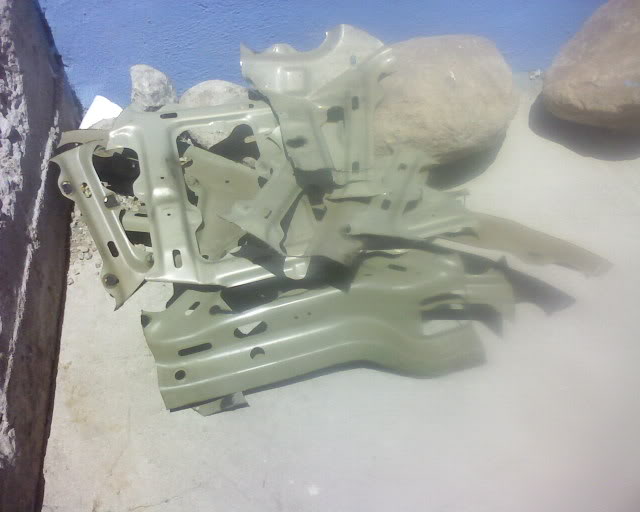
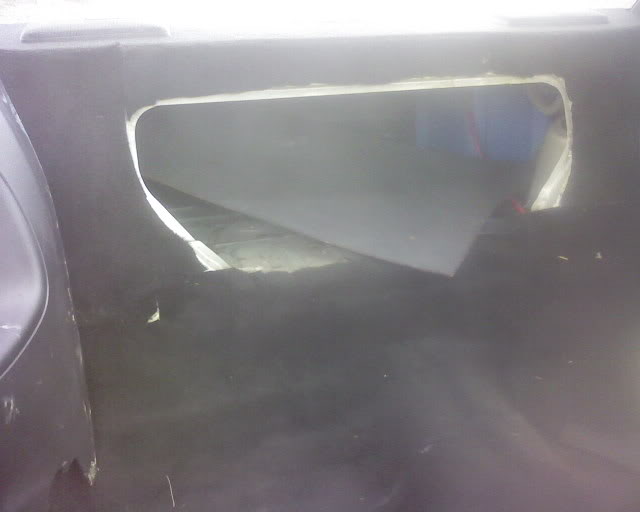
I also removed some weight from the trunk and hood.
I don't know what that thing is called but it looks like a web underneath. I know it for support but I wanted
it out.
This is the HOOD BEFORE:
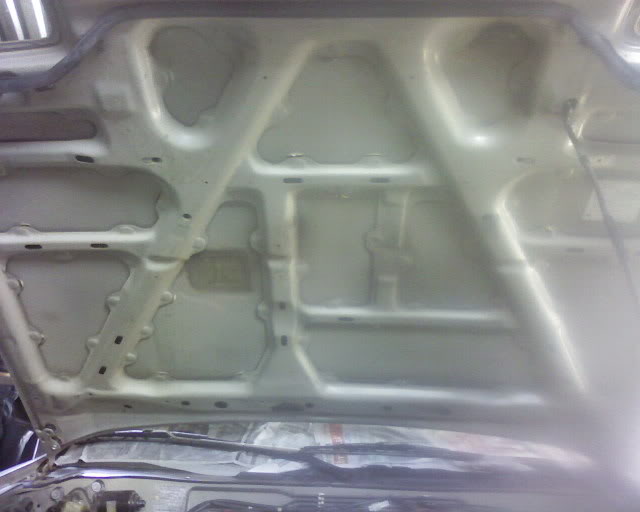
and AFTER:
Notice i left a V for support.
The trunk
No BEFORE picture
here is an AFTER picture:
I left the center support bracket for the latch.
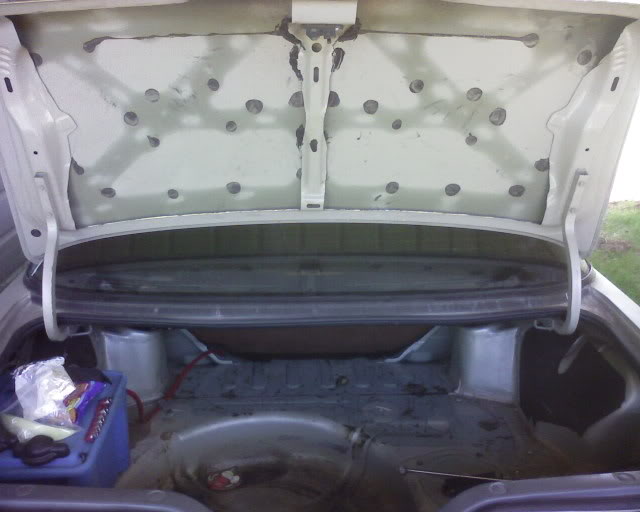
ALL THAT WAS REMOVED:
We weighted it at 4 kilograms which is about 8.4 lbs.
************************************************** ***************************
************************************************** ***************************
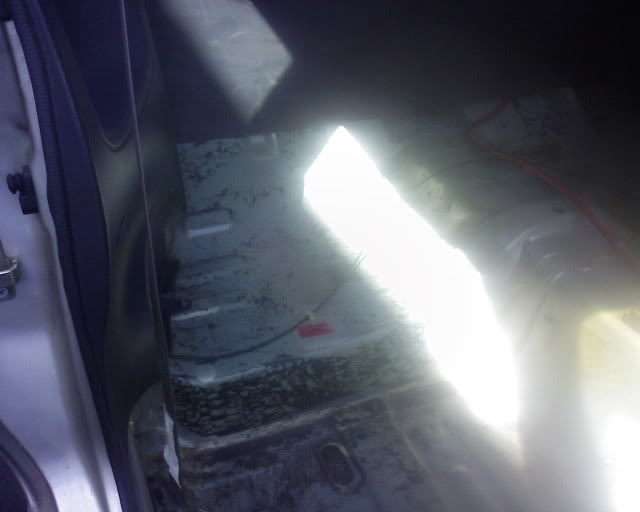
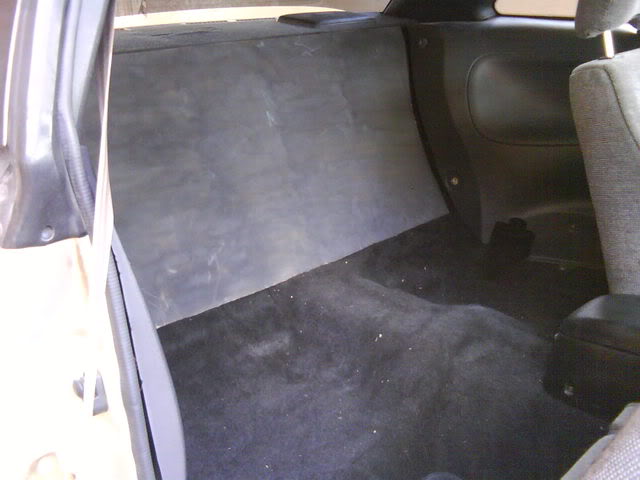
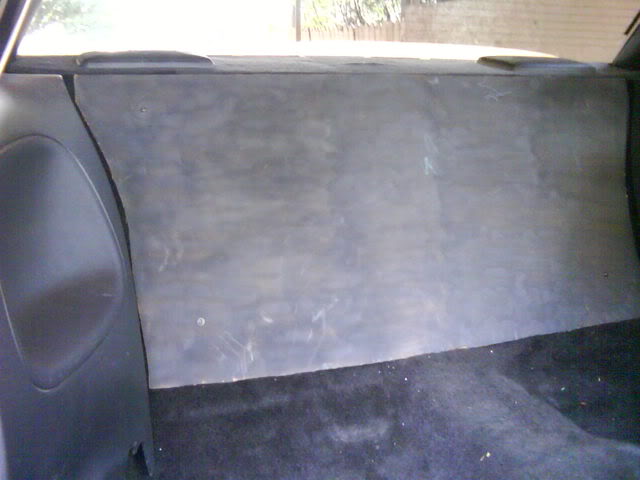
Carpet installation
************************************************** ***************************
Before:

ALMOST DONE:
The back:
More progress: (SORRY FOR THE CELL PHONE PICTURES)
from the outside:
************************************************** ***************************
I WILL EVENTUALLY POST MORE PICTURES! ! !
of the finished interior.
(CHECK BELOW)
This is what it looked like before we started:
Then this is what it looked like after the tear down:
Then this is the almost finished product:
It just needs some minor touches that my lady will finish. (decoration).
After my lady and I got that out of the way,
We traveled to Mexico to visit our relatives and relax for a week and a half.
I am currently on my way back home from this long trip.
Wow...sweet upgrades ....I was just wondering ,how did you get your stock seats re-upholstered because when i went to one of the better upholstery shops here in Bloomington
,Mn ,they said they couldn't do it because the seats were foam and would turn out bad . And how much did it cost ?
keep the build up too!!!!!
,Mn ,they said they couldn't do it because the seats were foam and would turn out bad . And how much did it cost ?
keep the build up too!!!!!
I paid 125dlls to reupholster all the seats for the red coupe.
************************************************** ***************************
Before we left I changed the front lip to my red car, because I was sick and tired of dragging it everywhere, and since I was going to be driving the car
about 1500 miles I didn't want to have to worry about it falling off.
From this car to
To this car:
like this:
************************************************** ***************************
This is some of the stuff that I did on this trip:
************************************************** ***************************
Installed the Energy Suspension Polyurethane Bushings Kit:
This are some of the BEFORE shots:
pretty worn.
Some of the AFTER pictures:
Rear:
That was 2-3 days of work.
Before installing the bushings, I took it to my friend who re upholsters my cars.
I wanted a carpet installed and
I wanted the ceiling changed from tan to gray.
he said he would do it but would take longer to finish the sunroof becuase he would have to drop
the whole assembly.
The next day I found some one to eliminate the whole sunroof assembly and paint the roof of the car.
After the bushings were installed we got to work on the sunroof removal:
Its heavy!
At the same time I decided to eliminate the reading lights that go on the ceiling.
After some cutting.
After some welding:
outside:
inside:
Some preping:
more preping:
Then it was primed and painted Black:
and Clear coated:
FINISHED PRODUCT:
************************************************** ***************************
************************************************** ***************************
Another thing that was done at the same time was shorten the shifter by about an inch and a quarter.
************************************************** ***************************
I don't have before and after pictures
Here is one before the carpet:
Here is newer picture:
************************************************** ***************************
I also removed some weight from the trunk and hood.
I don't know what that thing is called but it looks like a web underneath. I know it for support but I wanted
it out.
This is the HOOD BEFORE:
and AFTER:
Notice i left a V for support.
The trunk
No BEFORE picture
here is an AFTER picture:
I left the center support bracket for the latch.
ALL THAT WAS REMOVED:
We weighted it at 4 kilograms which is about 8.4 lbs.
************************************************** ***************************
************************************************** ***************************
Carpet installation
************************************************** ***************************
Before:
ALMOST DONE:
The back:
More progress: (SORRY FOR THE CELL PHONE PICTURES)
from the outside:
************************************************** ***************************
I WILL EVENTUALLY POST MORE PICTURES! ! !
of the finished interior.
(CHECK BELOW)
Last edited by FuriousZ; Aug 13, 2008 at 10:33 AM.
nice man you did all in mexico or in the US?
also not sure but ive heard of people eliminating the sunroof and it sagging later on most people weld braces on the inside to prevent that.
also not sure but ive heard of people eliminating the sunroof and it sagging later on most people weld braces on the inside to prevent that.

I forgot to take more pictures but I'll post them sometime this weekend.
I did most of the costly stuff in Mexico.
I hope this doesnt happen to me.
I don't know anyone who has done it.
But I am pretty sure people have done it.
************************************************** ***************************
I got a cheap set of strut bars.
This is the rear before installing them:
This is the rear after installing it:
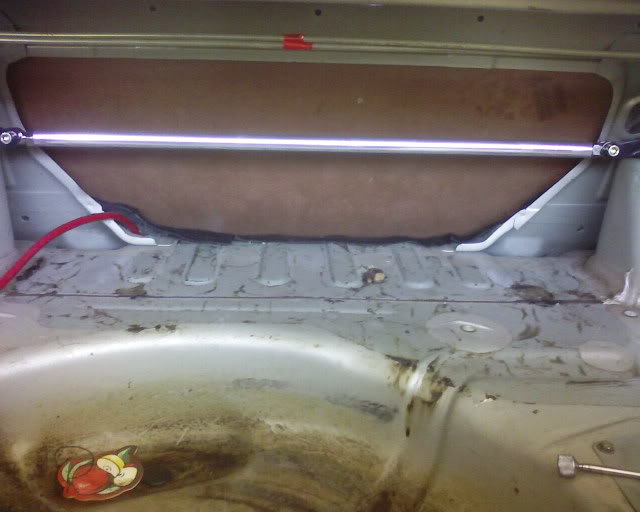
The front strut tower bar:
Engine bay is EXTREMELY dirty (sorry dudes)

I shoulda just wiped it down a lil bit!
************************************************** ***************************
.
I did most of the costly stuff in Mexico.
I don't know anyone who has done it.
But I am pretty sure people have done it.
************************************************** ***************************
I got a cheap set of strut bars.
This is the rear before installing them:
This is the rear after installing it:
The front strut tower bar:
Engine bay is EXTREMELY dirty (sorry dudes)
I shoulda just wiped it down a lil bit!
************************************************** ***************************
.
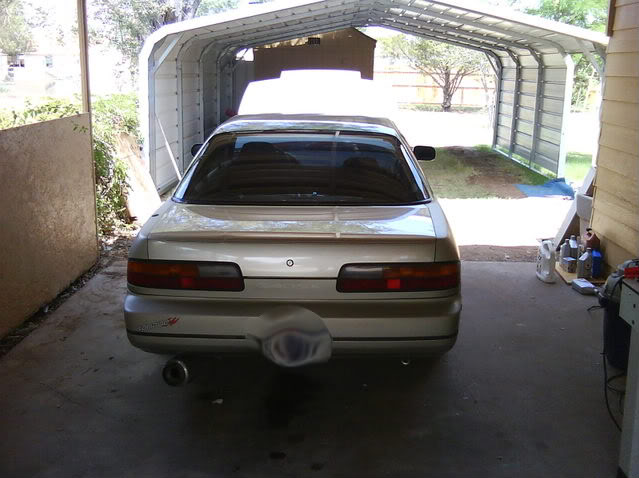
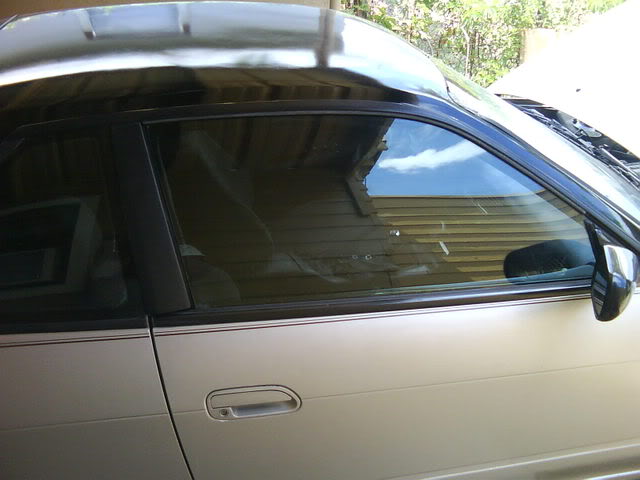
I am posting some pictures that I took this past weekend while I was changing the oil of my cars.
These are EXTERIOR PICTURES:

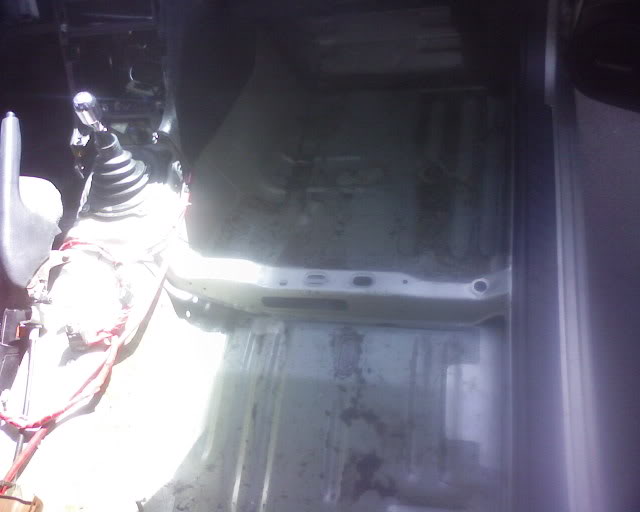
These are some INTERIOR pictures:
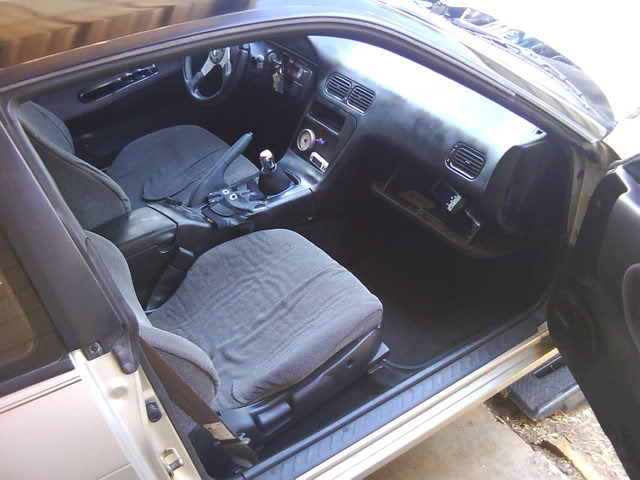

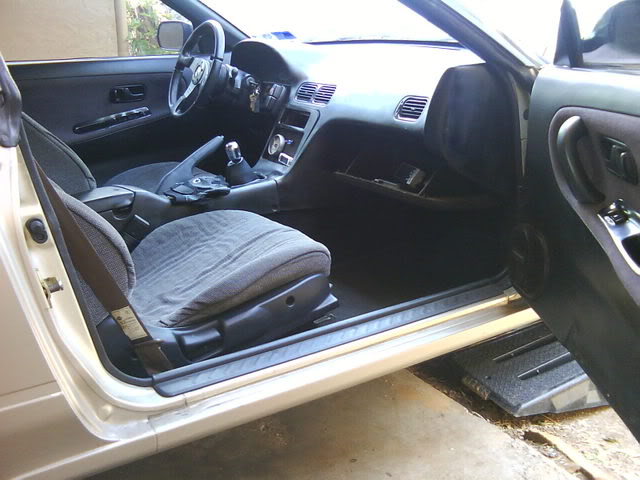

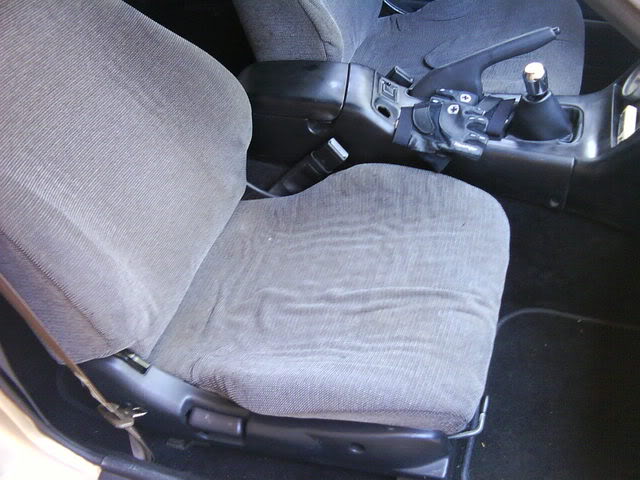
The interior is ALL black except for the seat belts. They are still brown.
and the ceiling is grey. Forgot to take pictures. man.
But in the pictures above they look more grey because the camera adjusts the light automatically,
you know...
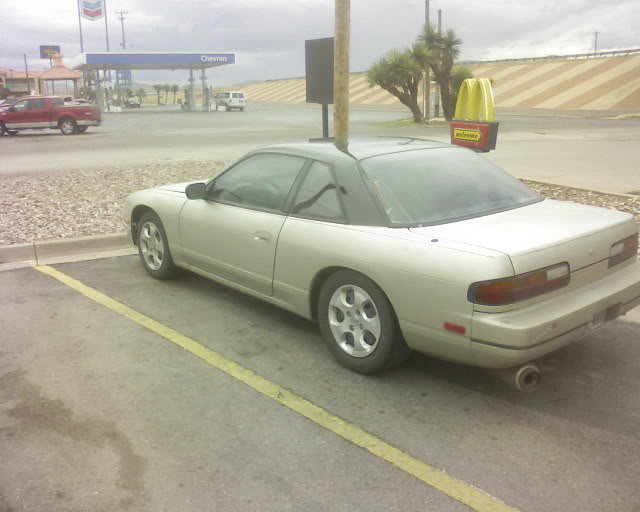
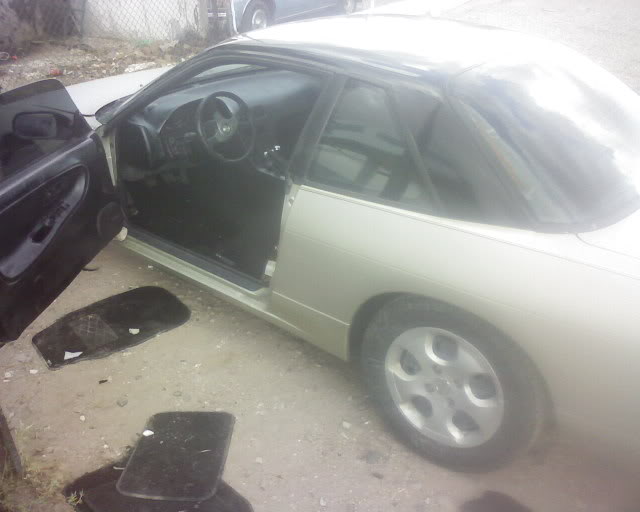
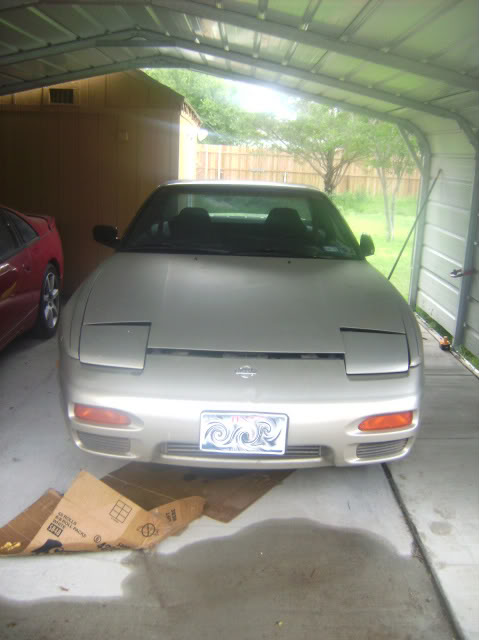
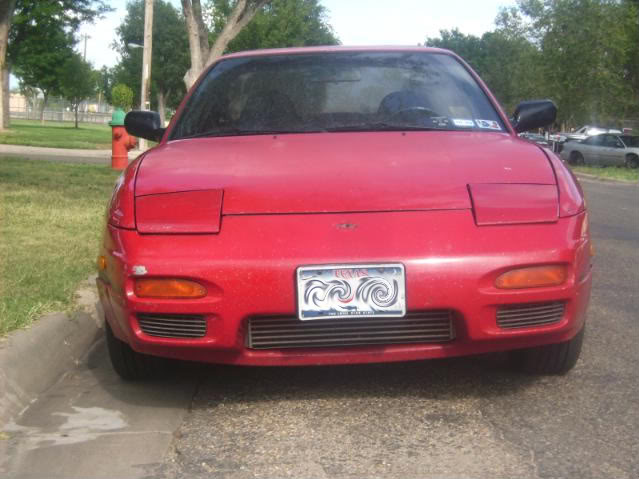
And a random picture of my Red Coupe DD:

I wont be posting much more after this, as I start school next week
I should be getting an LSD in the mail this week though.
These are EXTERIOR PICTURES:
These are some INTERIOR pictures:
The interior is ALL black except for the seat belts. They are still brown.
and the ceiling is grey. Forgot to take pictures. man.
But in the pictures above they look more grey because the camera adjusts the light automatically,
you know...
And a random picture of my Red Coupe DD:
I wont be posting much more after this, as I start school next week
I should be getting an LSD in the mail this week though.
Registered User
Joined: Feb 2008
Posts: 456
From: Phoenix, Arizona
thread revived!  so how hard was the sunroof to remove? I have been wanting to do this to my '95 SE for awhile (get get rid off all that weight, which is in like the worst place possible), but would like to have the option of having the roof opening if i still can, so i was trying ot think of something that i could make and paint and maybe put weather stripping around, and then somemore "clip it in" the sunroof opening or something. i can use some ABS or really light aluminum sheeting for the piece to put in, but any ideas on how to "seat" it or "clip" it in there?
so how hard was the sunroof to remove? I have been wanting to do this to my '95 SE for awhile (get get rid off all that weight, which is in like the worst place possible), but would like to have the option of having the roof opening if i still can, so i was trying ot think of something that i could make and paint and maybe put weather stripping around, and then somemore "clip it in" the sunroof opening or something. i can use some ABS or really light aluminum sheeting for the piece to put in, but any ideas on how to "seat" it or "clip" it in there?

Long school year, and short summer.
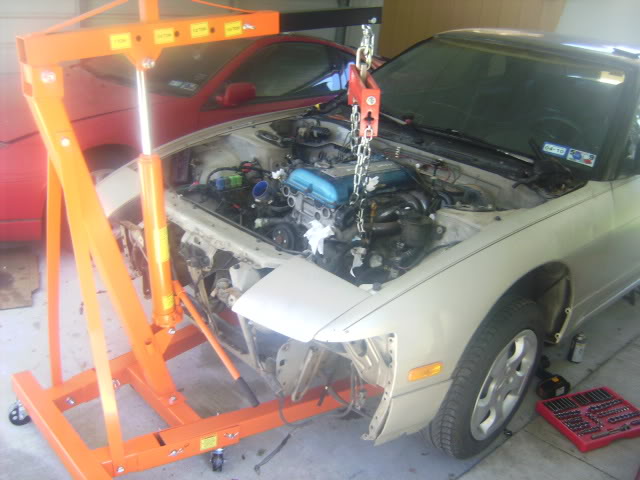
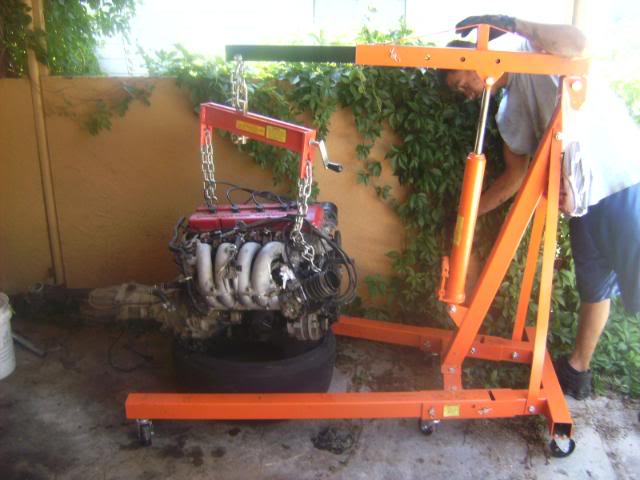
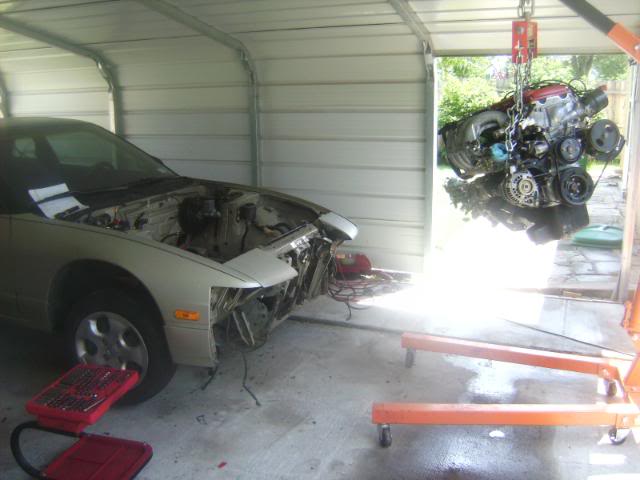
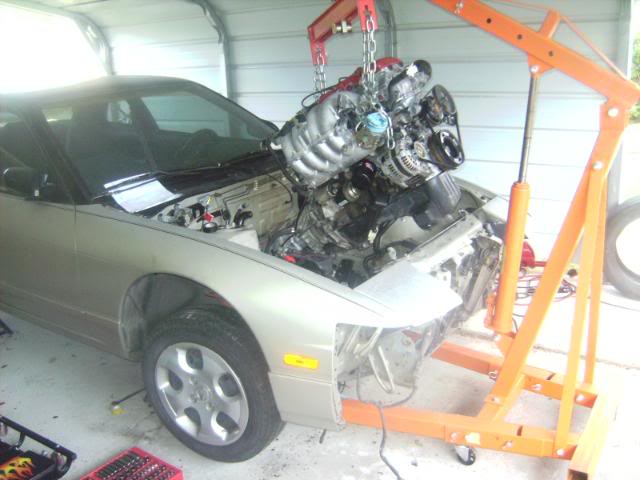
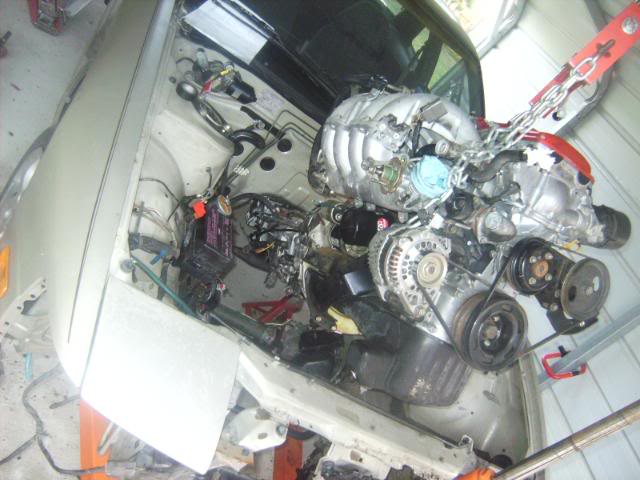
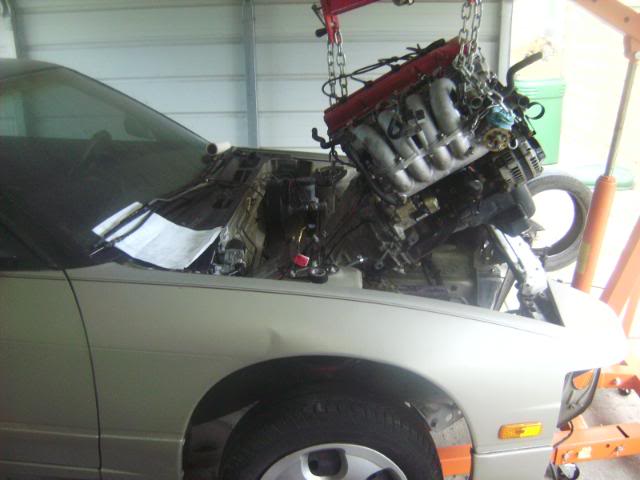
This summer I decided to "down grade" my car. I removed the SR and swapped in a KA.
Then I upgraded my daily driver! Put that SR in my RED 240, and keeping all the good GOODIES (comfort, A/C, heater, Stereo, cruise control, LSD, etc).
The pictures show 2 weeks of work, mostly by myself, but my brother in law helped me pull engines and clutches and other stuff.
This was the first time I ever pull an engine, no experience what so ever. It was easier than I expected.
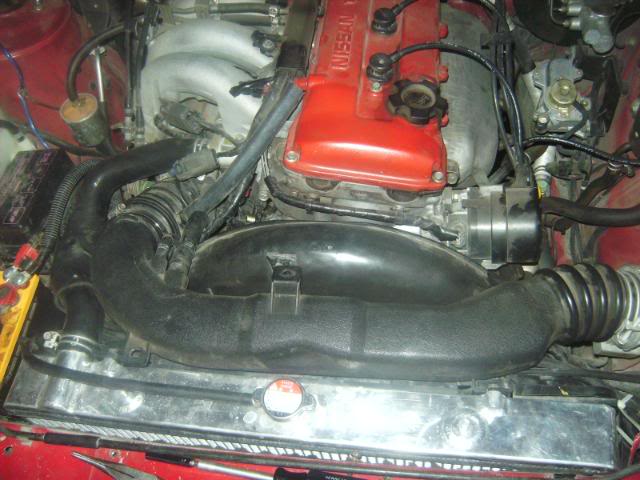
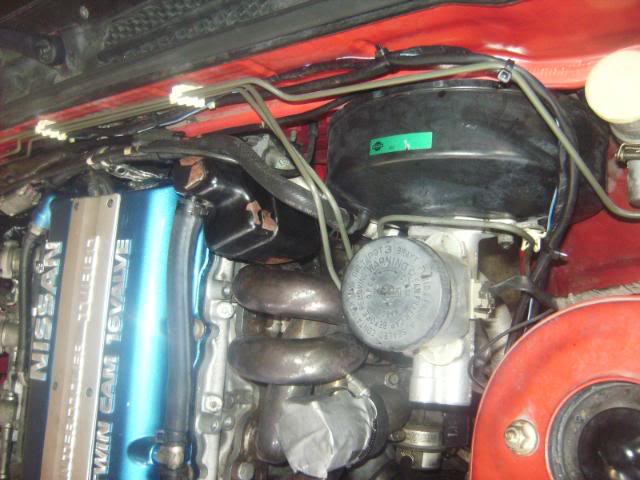
I spent a lot of time on little details that previous owners didn't do, or just to make the engine bay look more clean.
Here are some pictures. . .
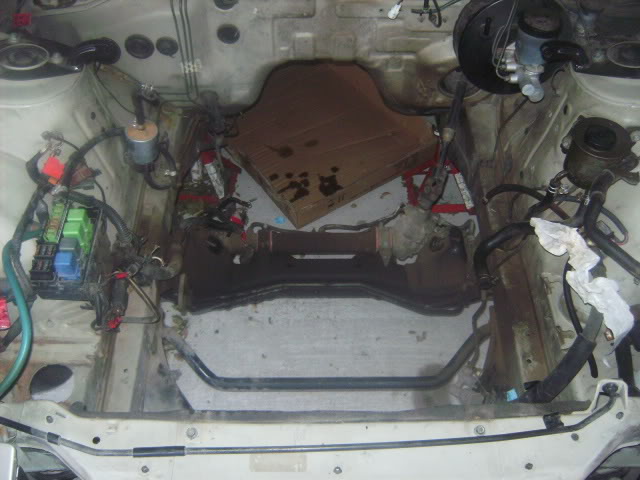
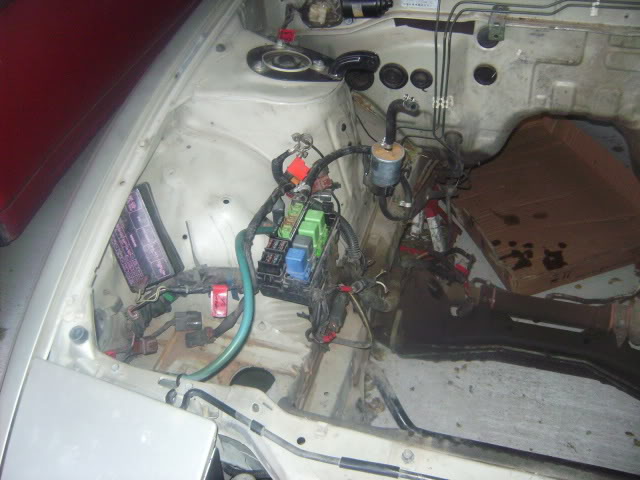
Before:
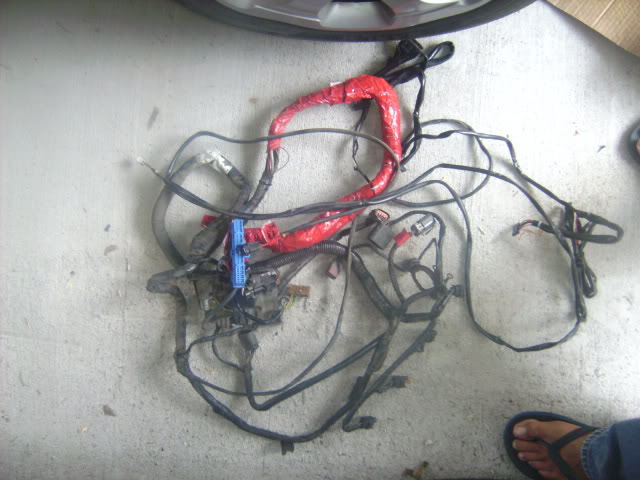
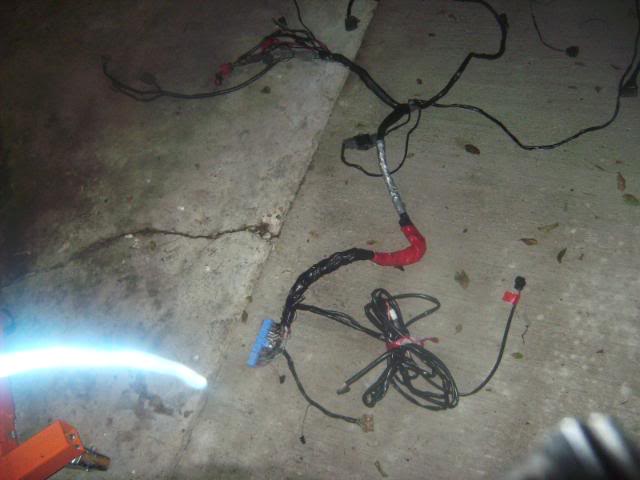
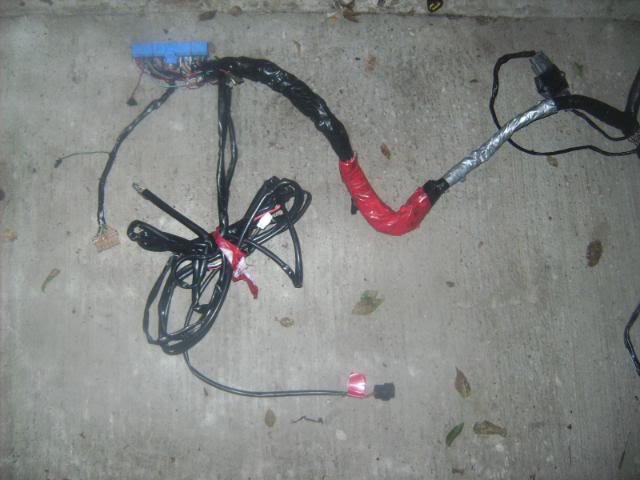
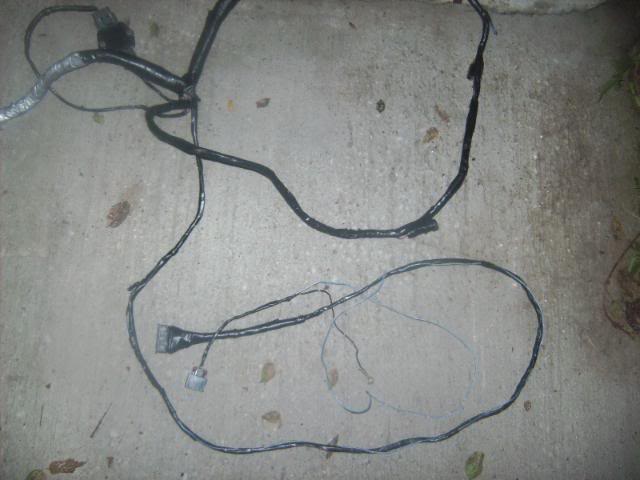
The ugly RHD wiring harness loop.


The Wiring harness:
The wireless engine:
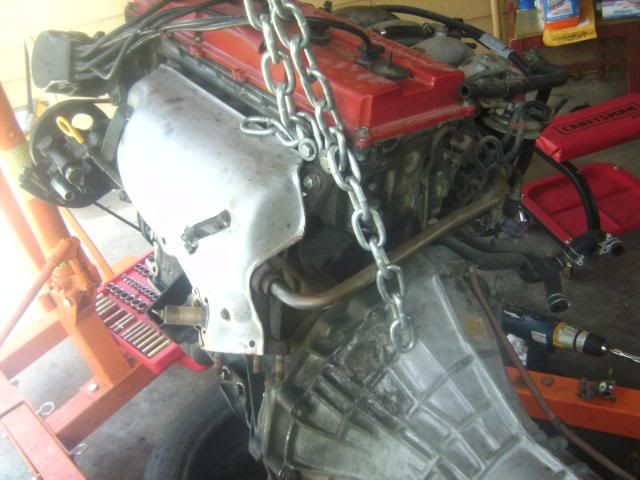
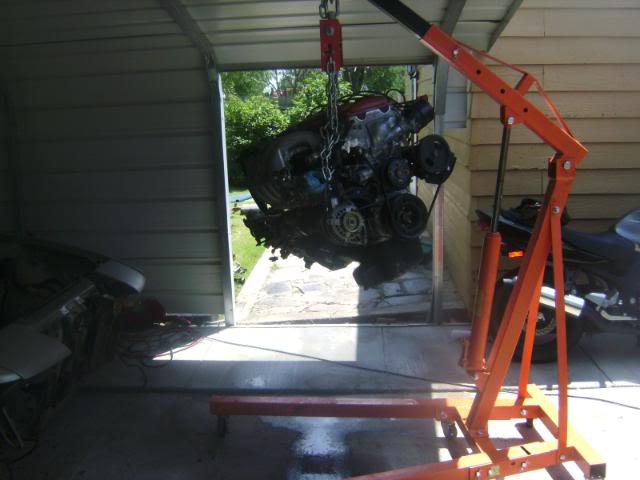
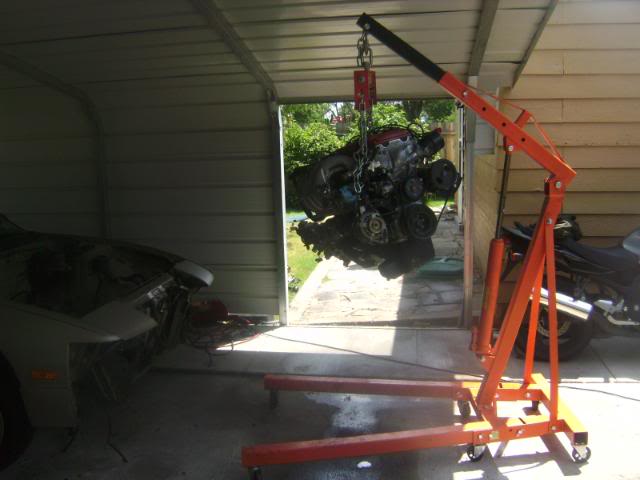
Getting stripped:
Coming out:
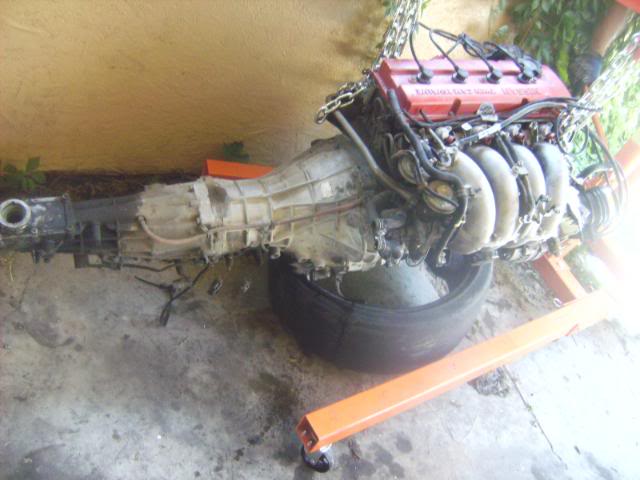
OUT:
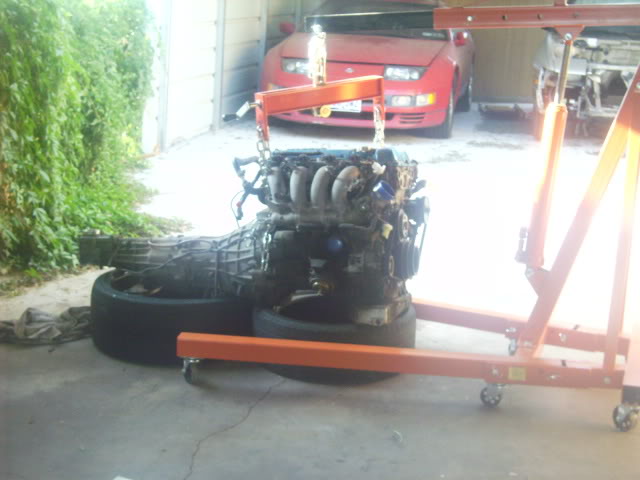
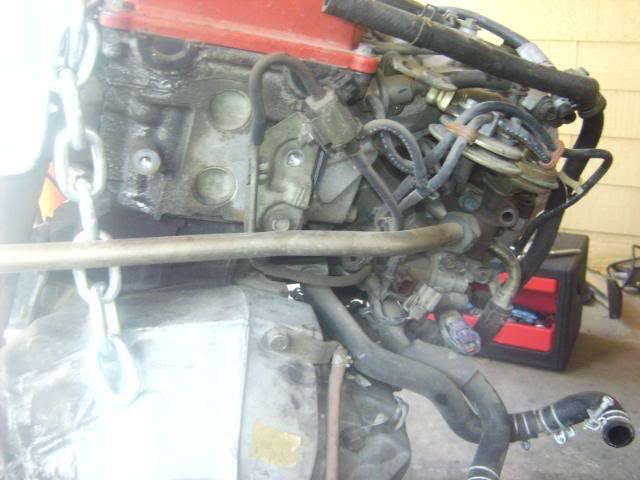
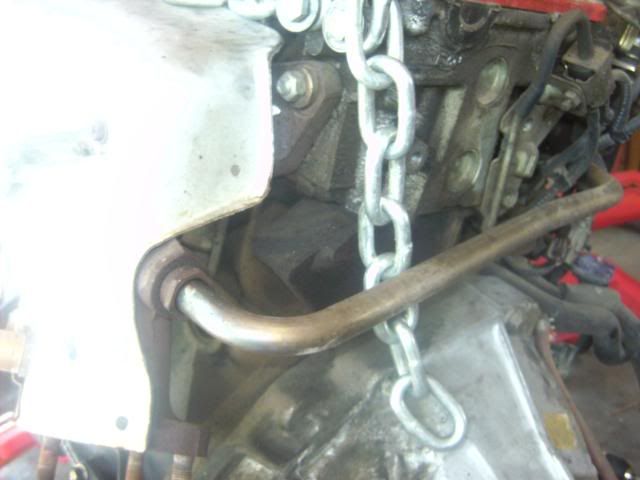
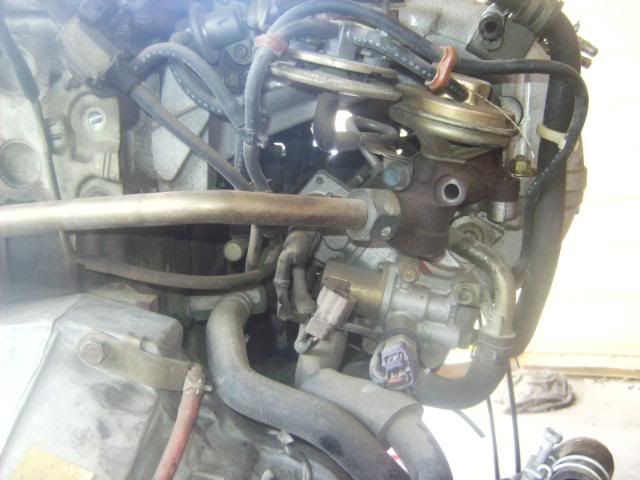
I cleaned it, i just forgot to take pictures of the clean engine bay!
DIRTY Engine:
This summer I decided to "down grade" my car. I removed the SR and swapped in a KA.
Then I upgraded my daily driver! Put that SR in my RED 240, and keeping all the good GOODIES (comfort, A/C, heater, Stereo, cruise control, LSD, etc).
The pictures show 2 weeks of work, mostly by myself, but my brother in law helped me pull engines and clutches and other stuff.
This was the first time I ever pull an engine, no experience what so ever. It was easier than I expected.
I spent a lot of time on little details that previous owners didn't do, or just to make the engine bay look more clean.
Here are some pictures. . .
Before:
The ugly RHD wiring harness loop.
The Wiring harness:
The wireless engine:
Getting stripped:
Coming out:
OUT:
I cleaned it, i just forgot to take pictures of the clean engine bay!
DIRTY Engine:
Last edited by FuriousZ; Aug 10, 2009 at 08:48 AM.
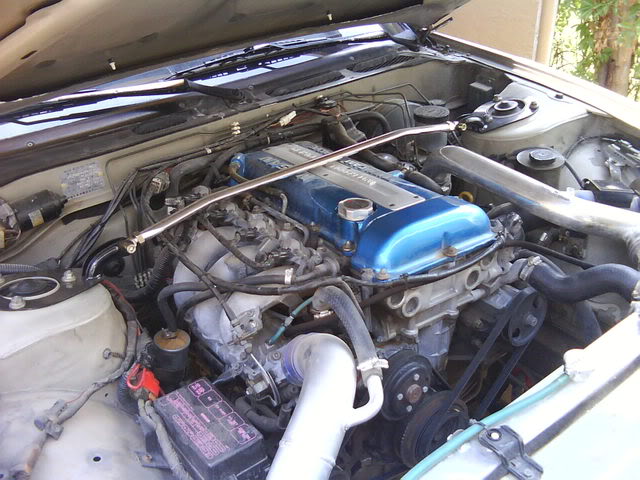
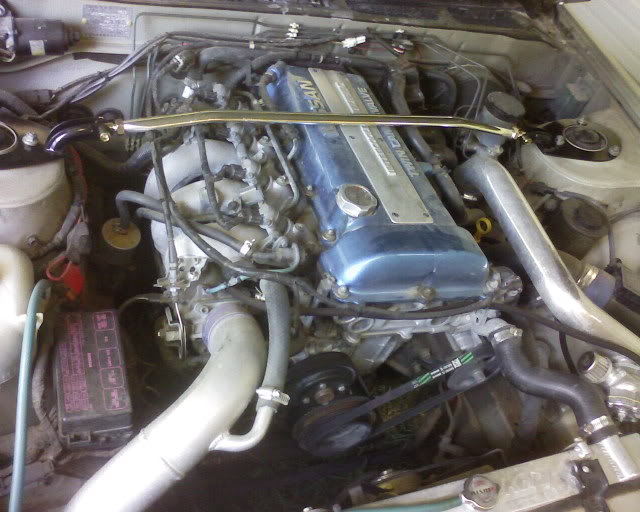
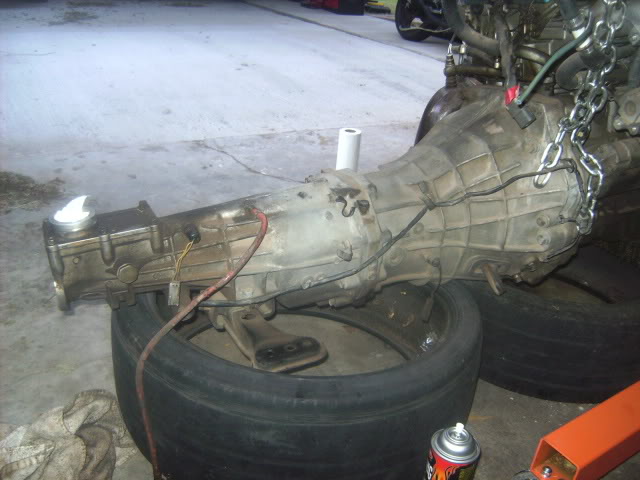
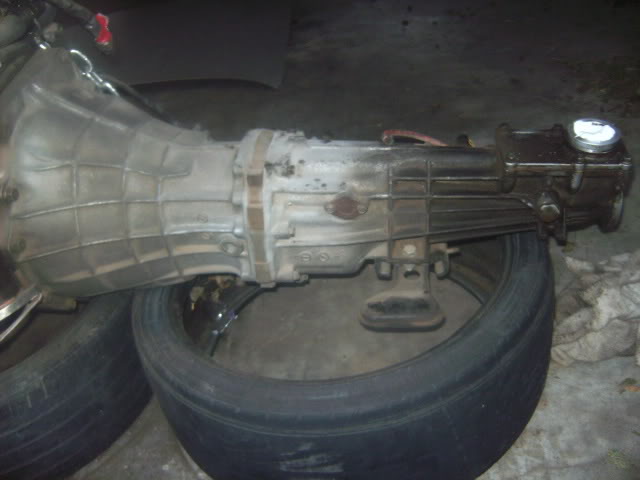
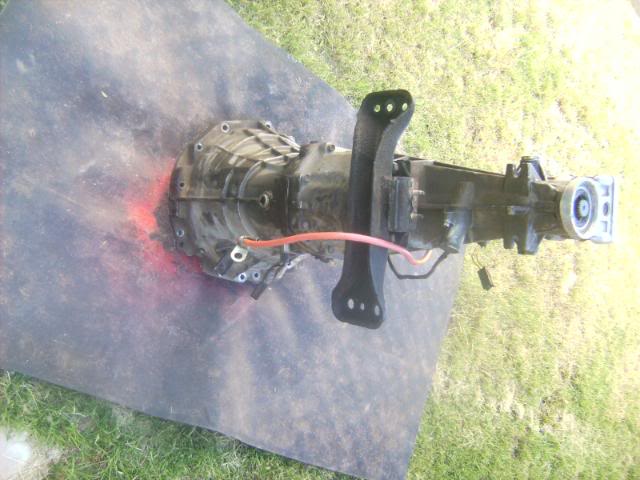
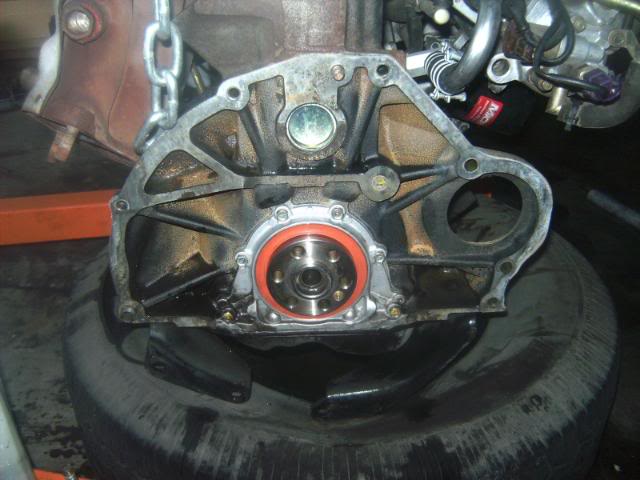
Cleaned the Engine, changed the clutch/flywheel, painted transmission:
I don't have many pictures of the engine cleaned, I think I lost them.


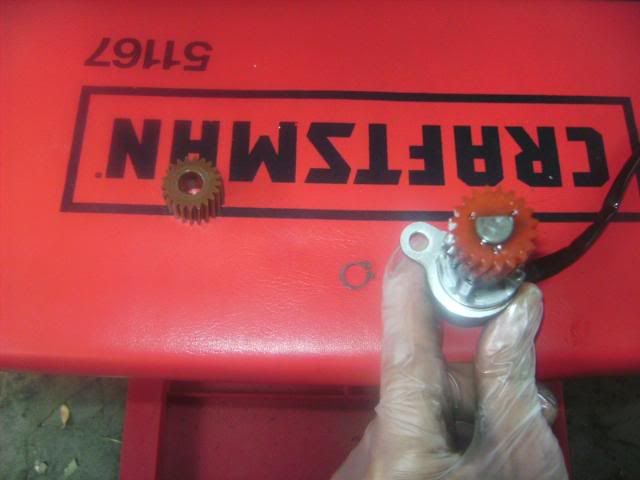
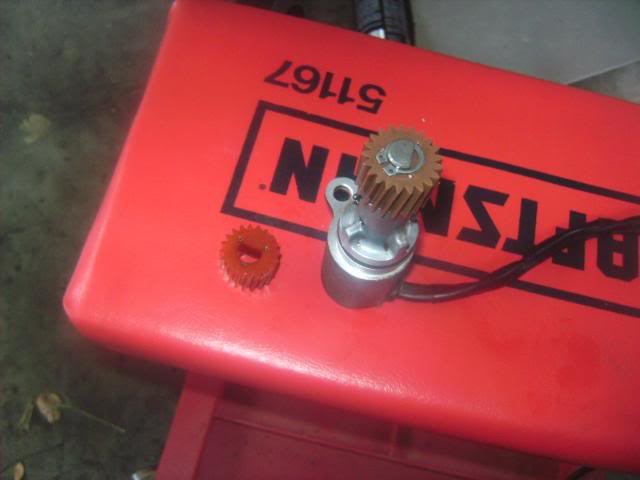
I changed the little gear on the speed sensor because the red car has an LSD with the 4.36 gear ratio for faster acceleration.
With the orginal gear from KA diff, the car showed the speedometer 3-5 miles higher than the real speed.
So I did some research, and the TT 300zx guys who swap a N/A differential have a similar problem.
They fix the problem by just changing the gears. I found Courtesy nissan to sell two gears, one with 20 teeth, and one with 21 teeth for the s13.
[32703] PINION-SPEEDOMETER
240SX (S13) 32743-S13003 20T F/SPORT PAK
or
[32703] PINION-SPEEDOMETER
240SX (S13) 32743-S13004 21T
So I bought the one with 21 teeth ^
After swaping in the engine it reads the correct speed.
So if anyone swaps in a differential with lower gears, like the 4.36, (i thinkg from some of the JDM 180s) you can do this so you don't have to send out your gauge cluster to have it adjusted/reprogrammed.
NEXT:
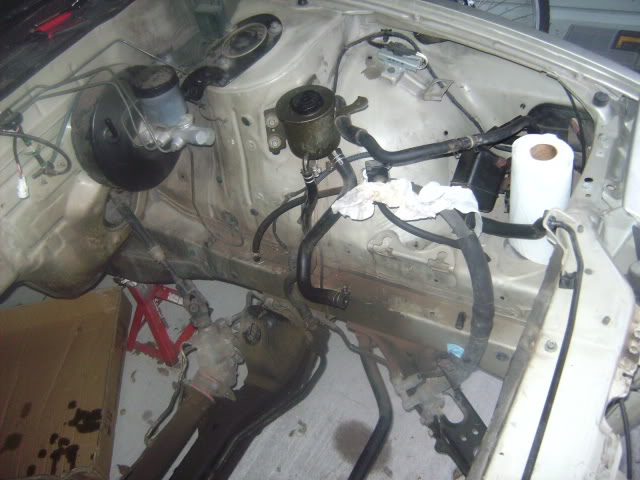
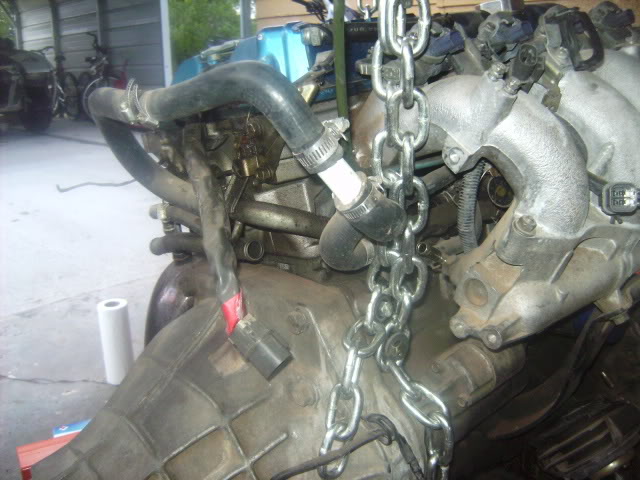
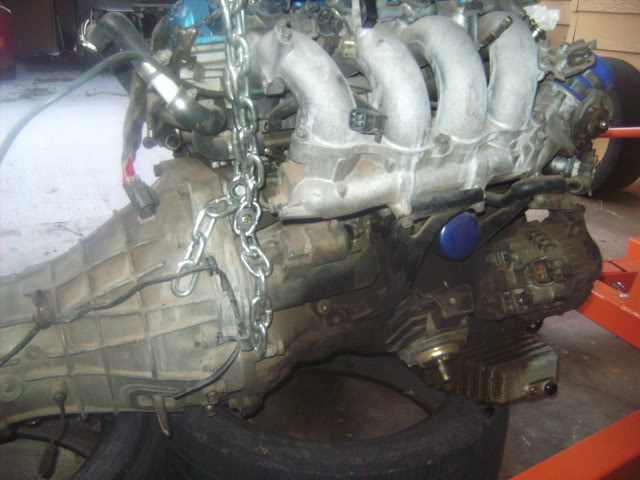
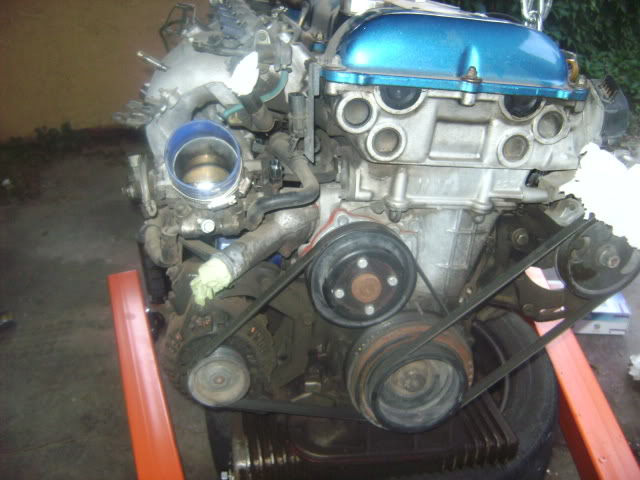
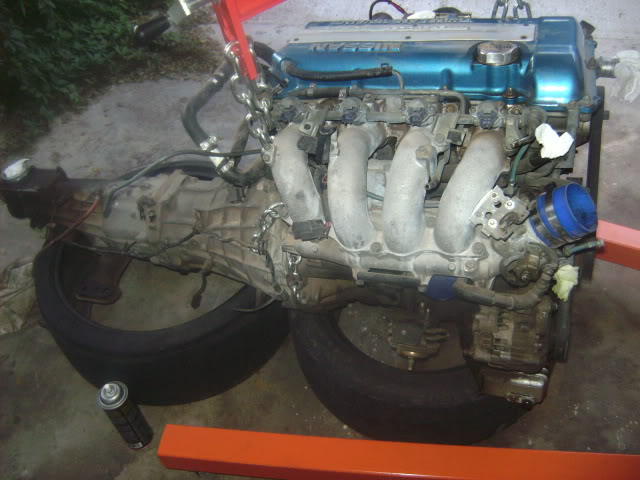
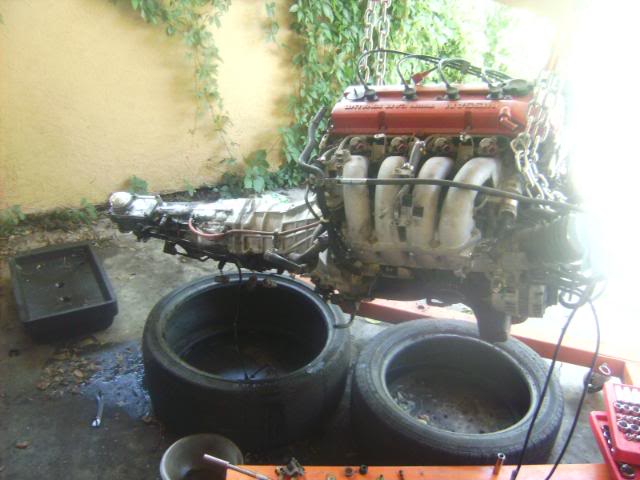
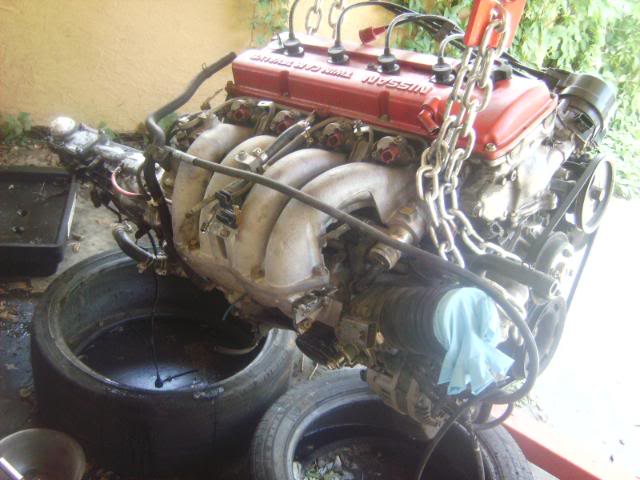
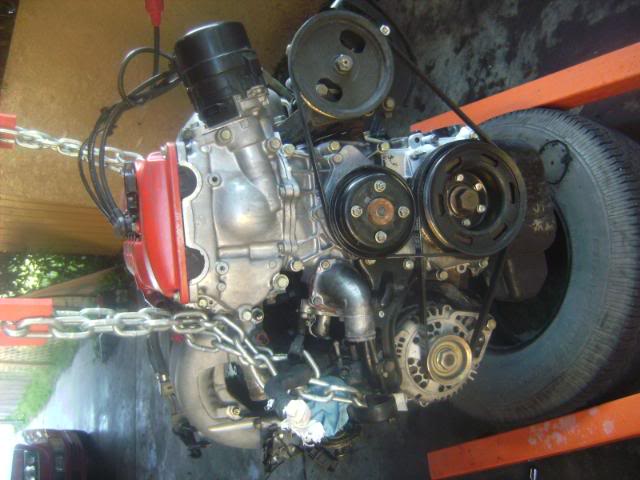
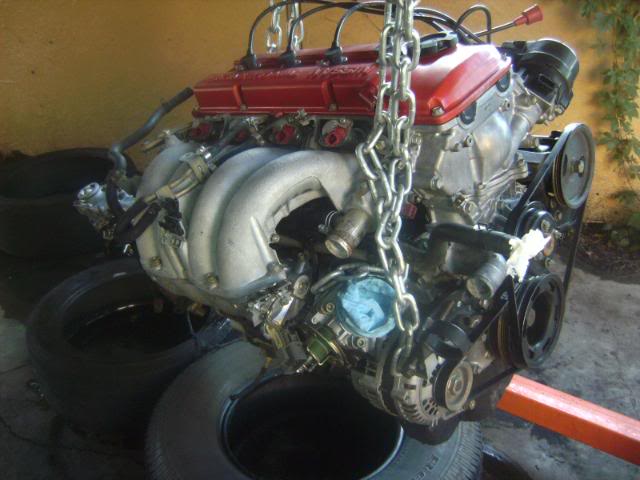
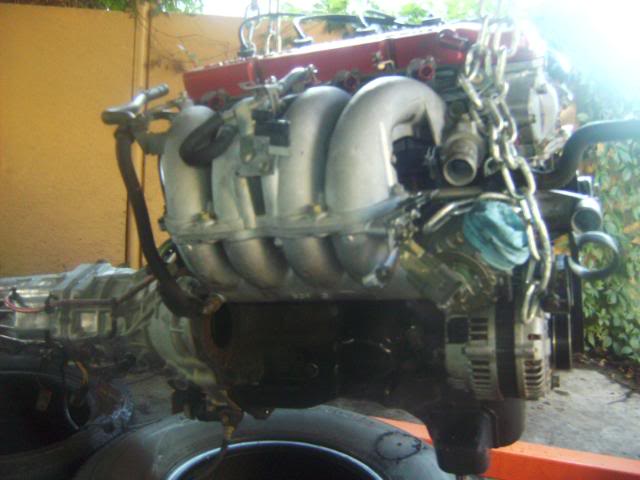
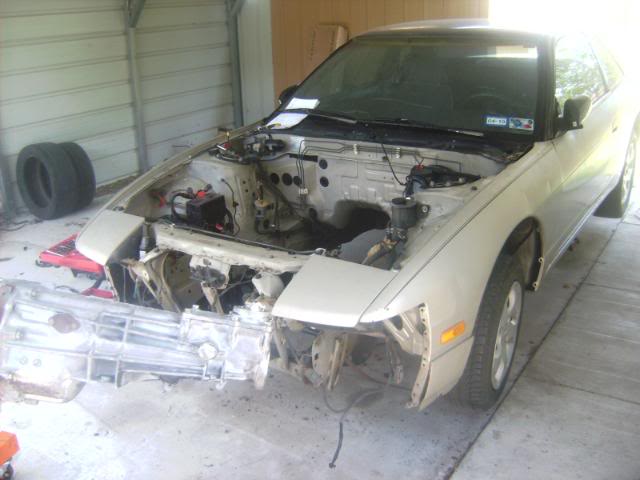
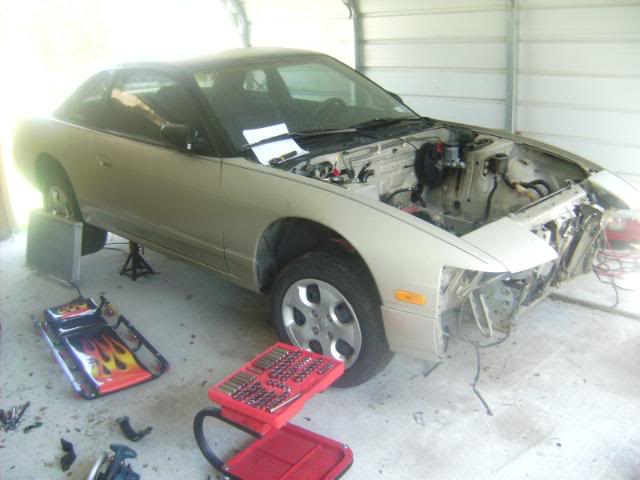
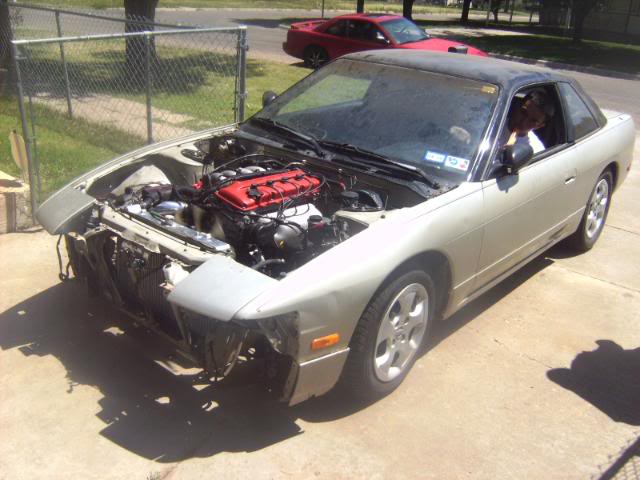
Took out KA from RED Coupe DD:
The Virgin: (Stock except for cone filter, and radiator which the OE broke a month ago, where darkvillin predicted it would break on the top inlet!)

Taking out the bumper took a while because it had ALL the bolts and nuts. Never been off...
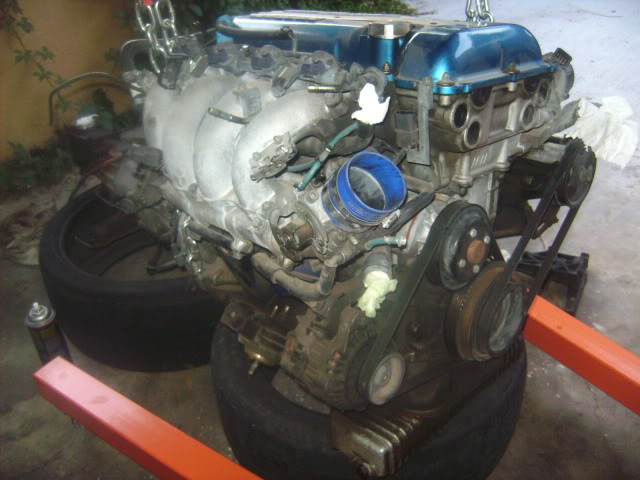
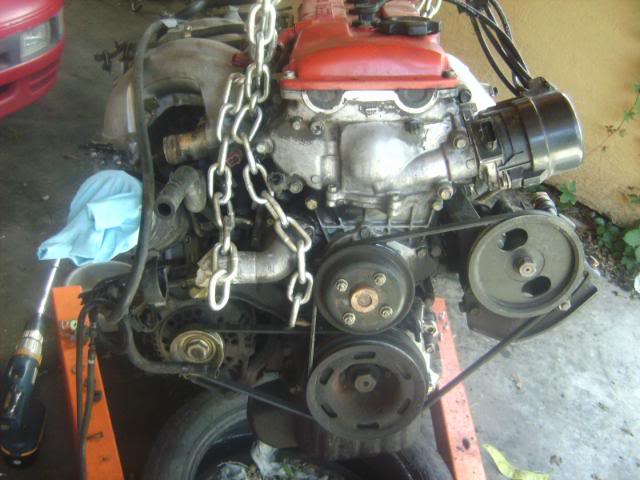
DIRTY ENGINE
Dirty! ! !
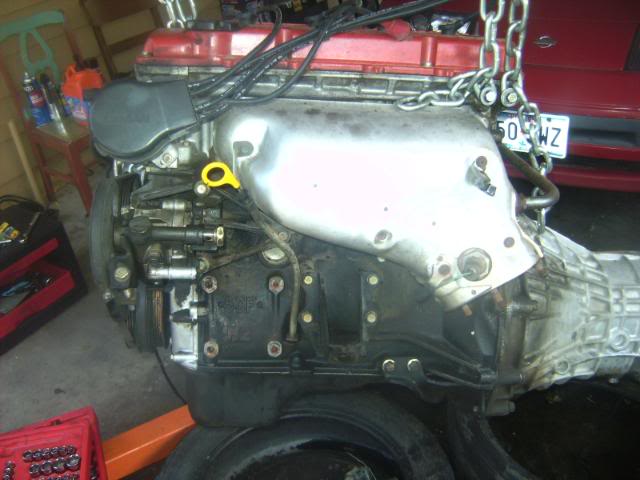
Broken motor mount as you can see, will repair.
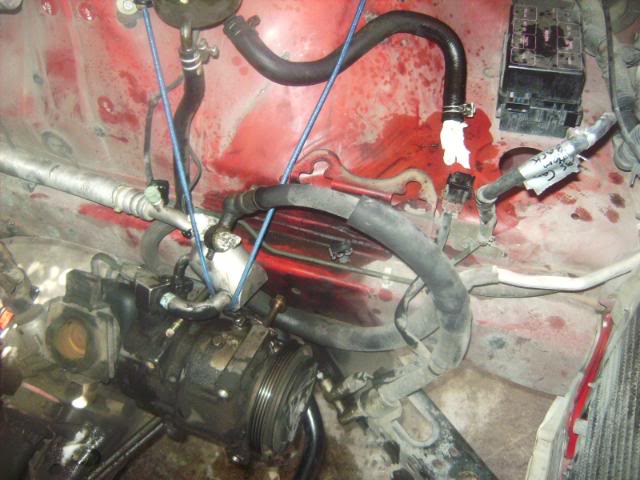
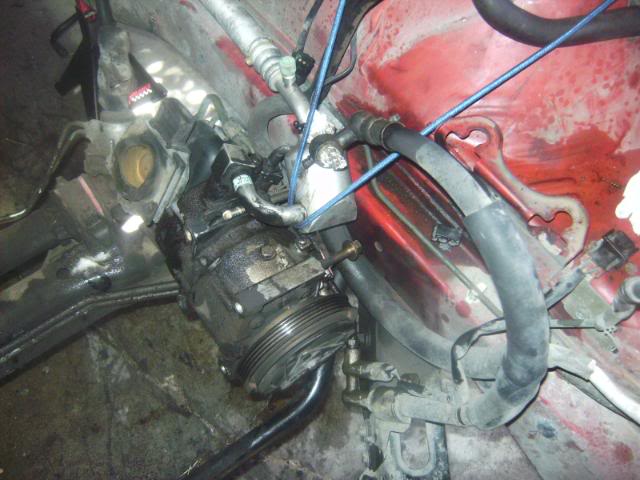
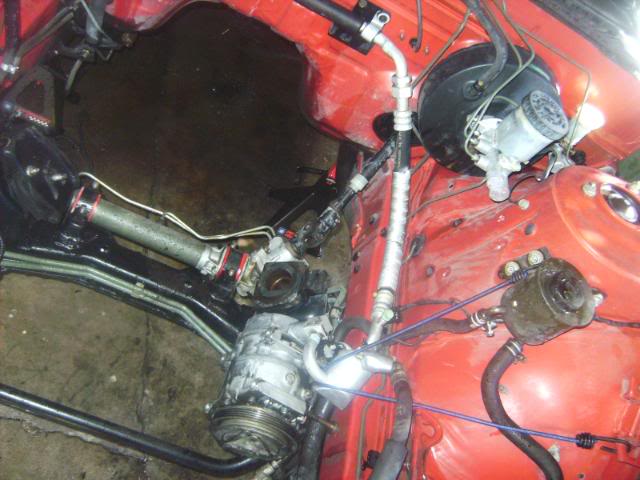
and the beautiful a/c compressor on the side, uncharged for the SR.
I used a SR bracket that I bought separate, and the compressor bolted right up.
I don't have many pictures of the engine cleaned, I think I lost them.
I changed the little gear on the speed sensor because the red car has an LSD with the 4.36 gear ratio for faster acceleration.
With the orginal gear from KA diff, the car showed the speedometer 3-5 miles higher than the real speed.
So I did some research, and the TT 300zx guys who swap a N/A differential have a similar problem.
They fix the problem by just changing the gears. I found Courtesy nissan to sell two gears, one with 20 teeth, and one with 21 teeth for the s13.
[32703] PINION-SPEEDOMETER
240SX (S13) 32743-S13003 20T F/SPORT PAK
or
[32703] PINION-SPEEDOMETER
240SX (S13) 32743-S13004 21T
So I bought the one with 21 teeth ^
After swaping in the engine it reads the correct speed.
So if anyone swaps in a differential with lower gears, like the 4.36, (i thinkg from some of the JDM 180s) you can do this so you don't have to send out your gauge cluster to have it adjusted/reprogrammed.
NEXT:
Took out KA from RED Coupe DD:
The Virgin: (Stock except for cone filter, and radiator which the OE broke a month ago, where darkvillin predicted it would break on the top inlet!)
Taking out the bumper took a while because it had ALL the bolts and nuts. Never been off...
DIRTY ENGINE
Dirty! ! !
Broken motor mount as you can see, will repair.
and the beautiful a/c compressor on the side, uncharged for the SR.
I used a SR bracket that I bought separate, and the compressor bolted right up.
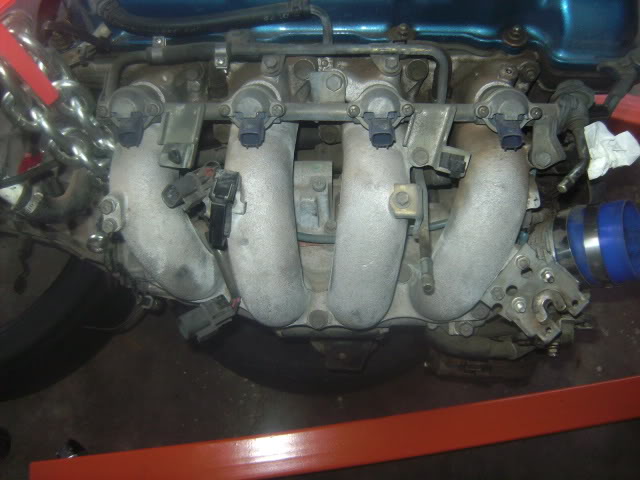
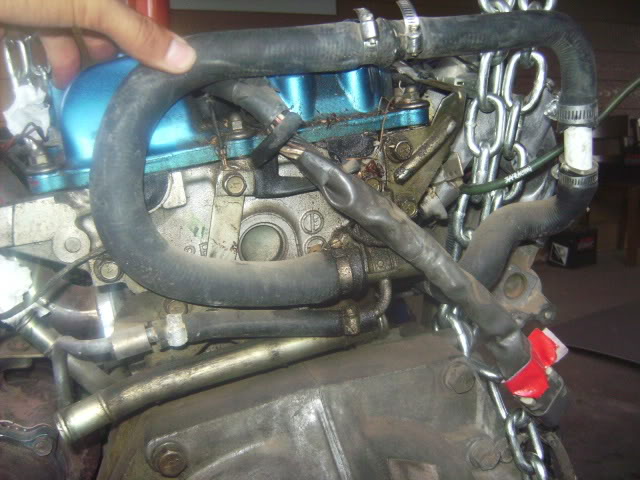
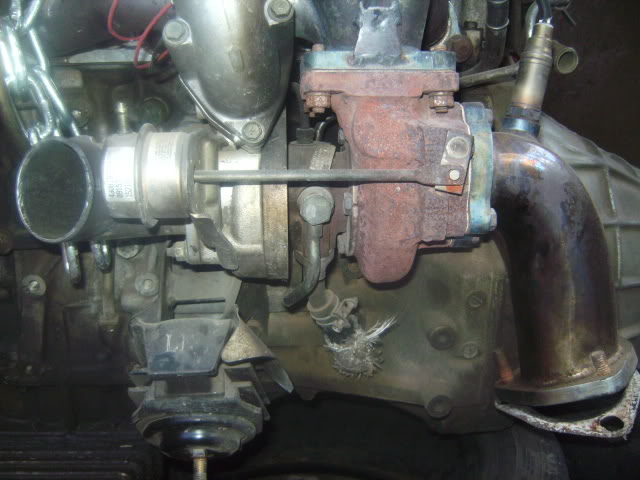
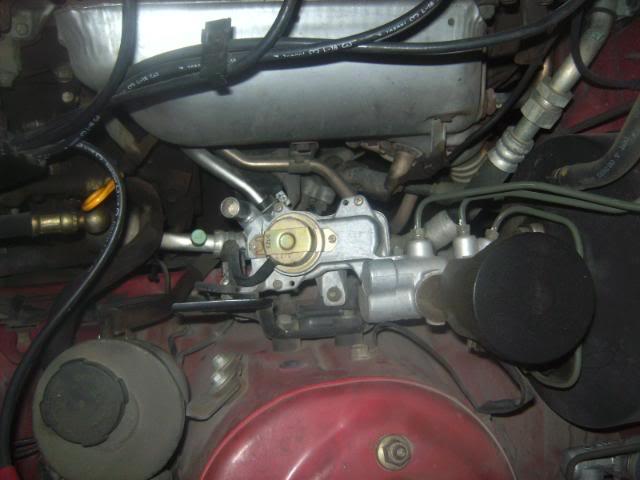
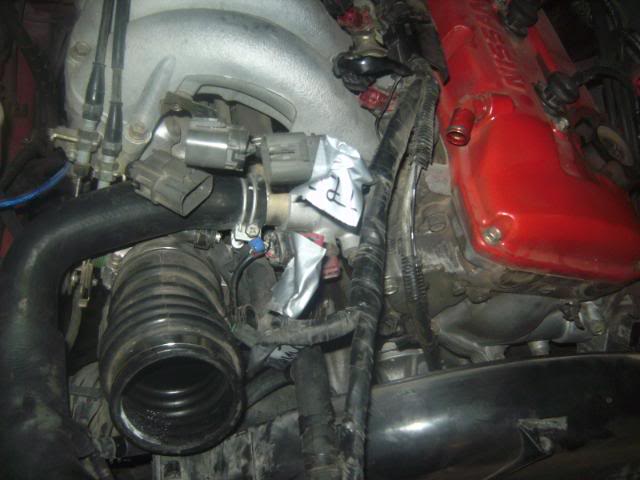
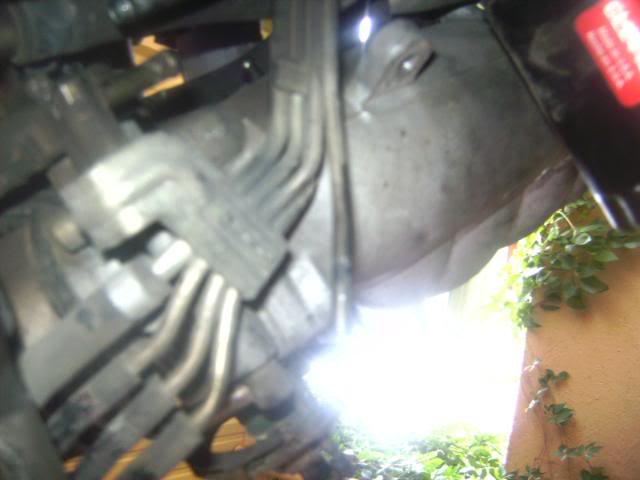
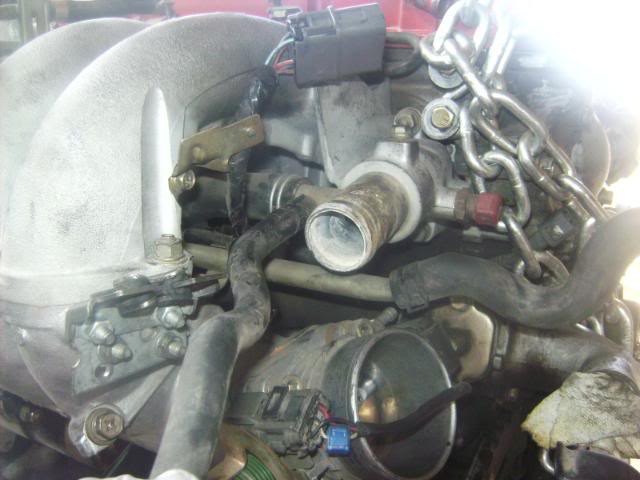
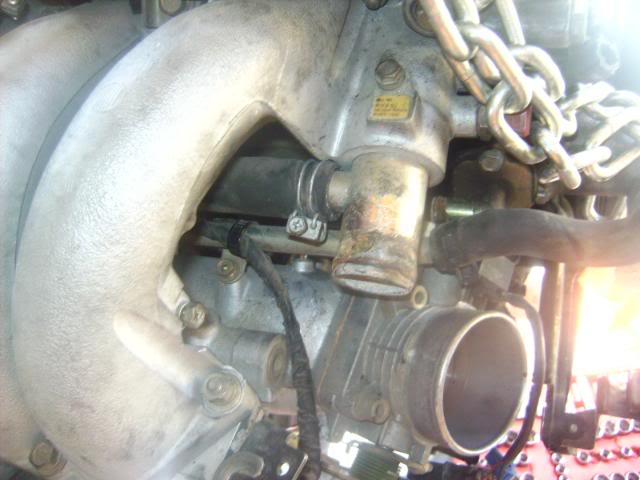
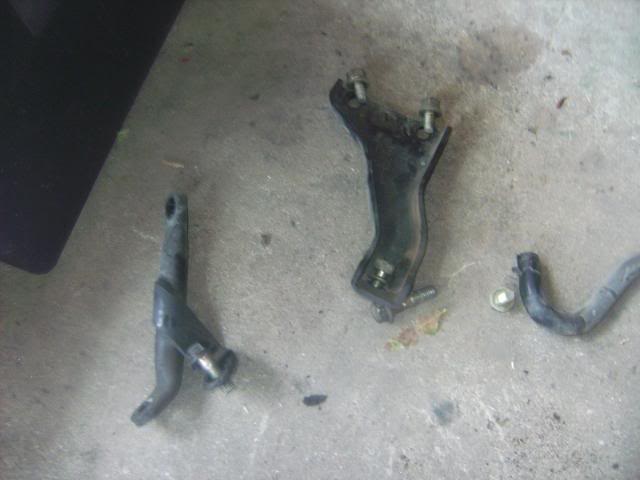
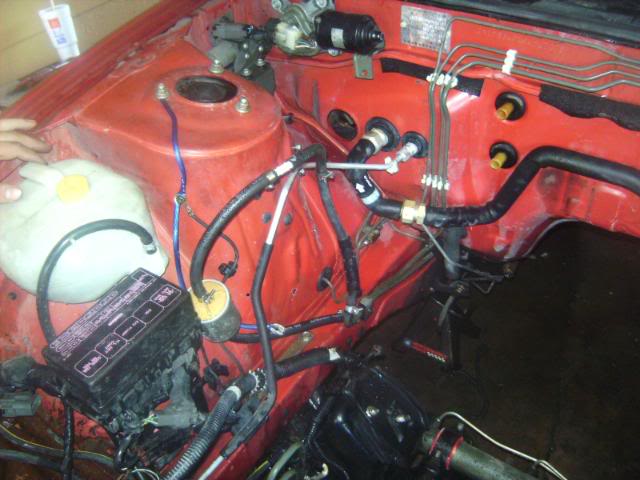
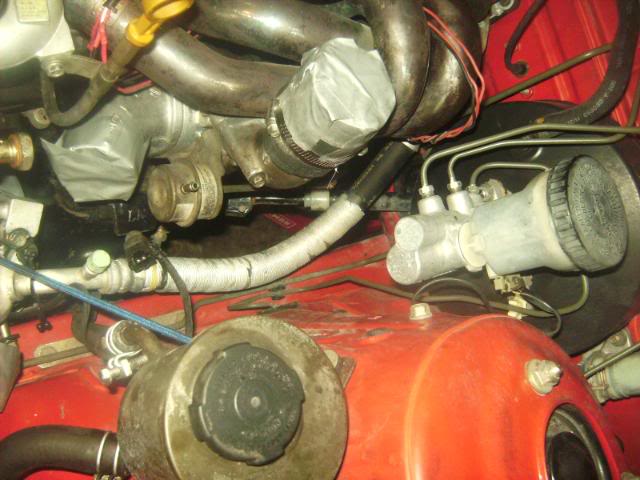
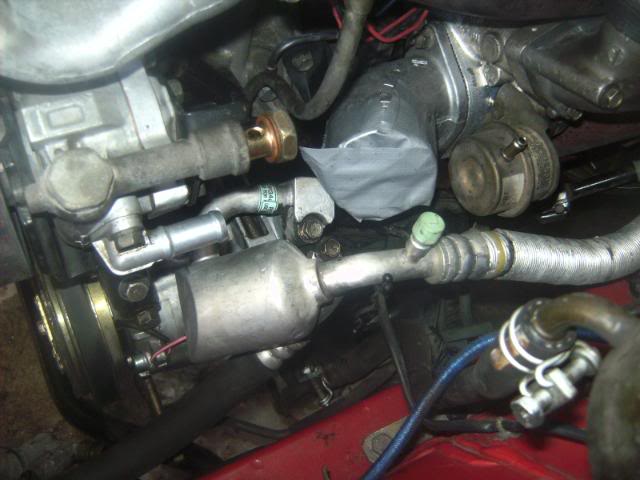
Before I cleaned the engine, I took out all the useless Emissions stuff. . . .

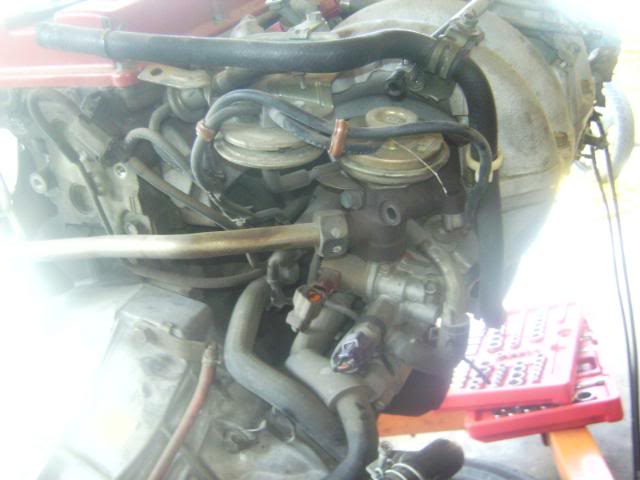
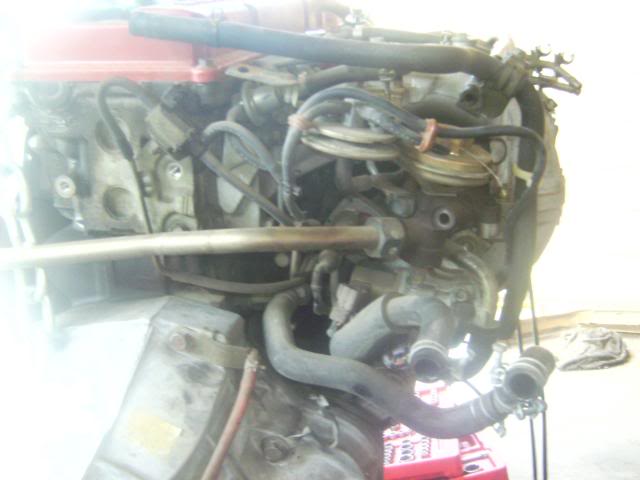
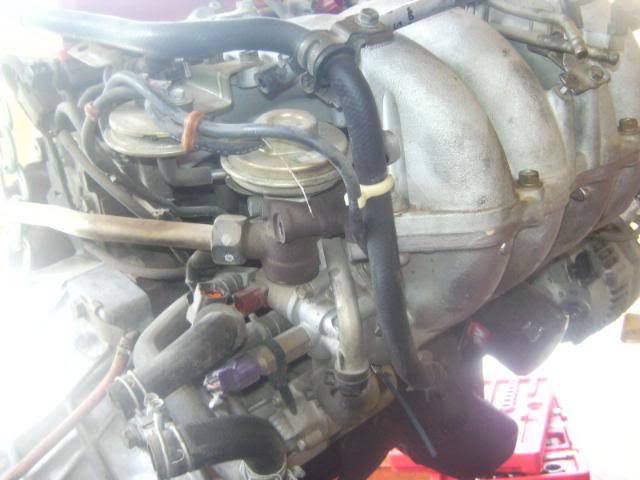
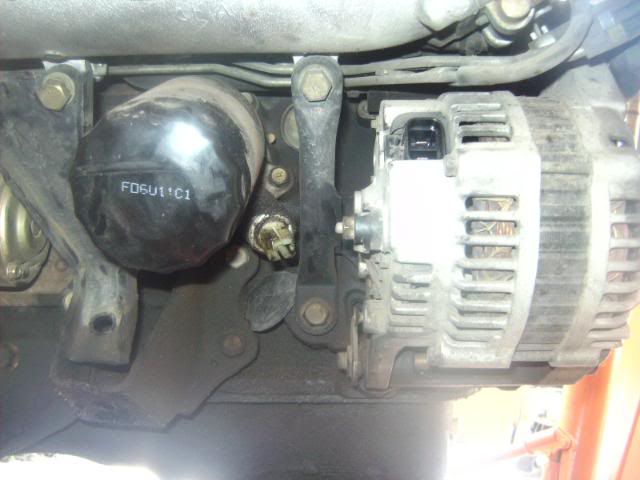
TB throttle body water line removed.
the other one.
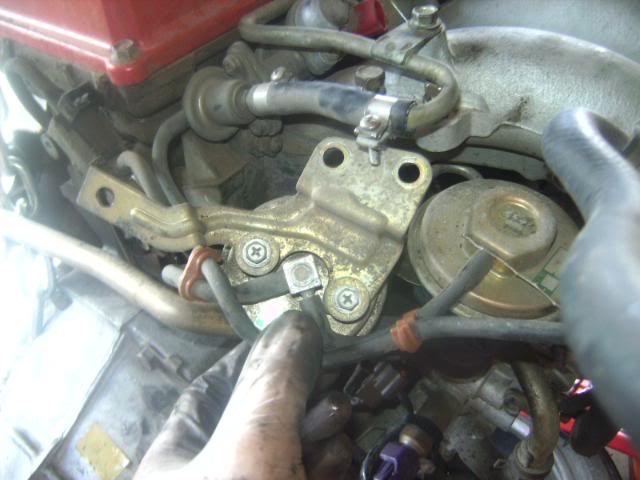
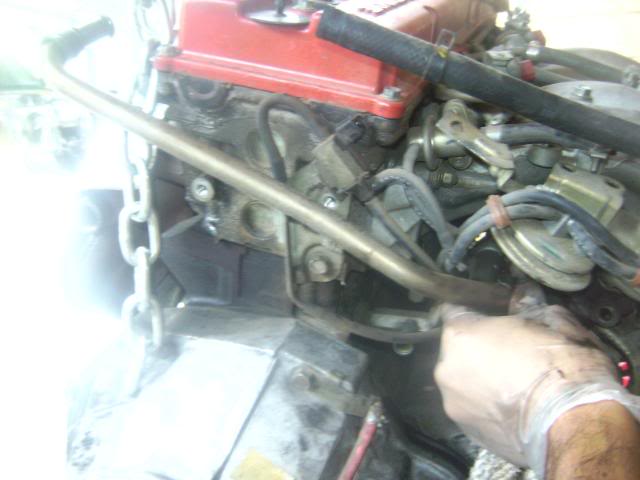

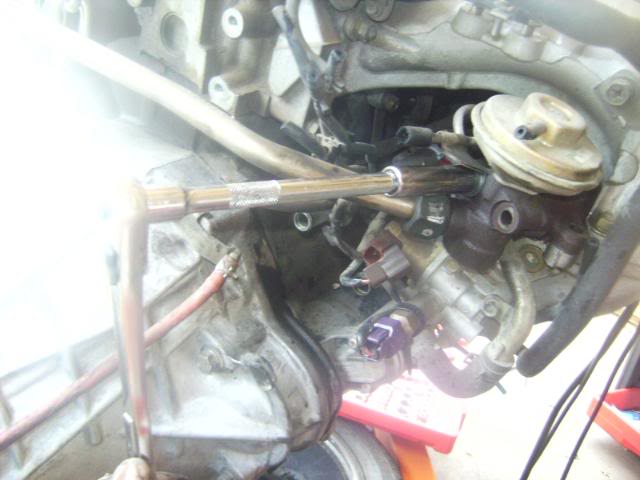
Looks like this:
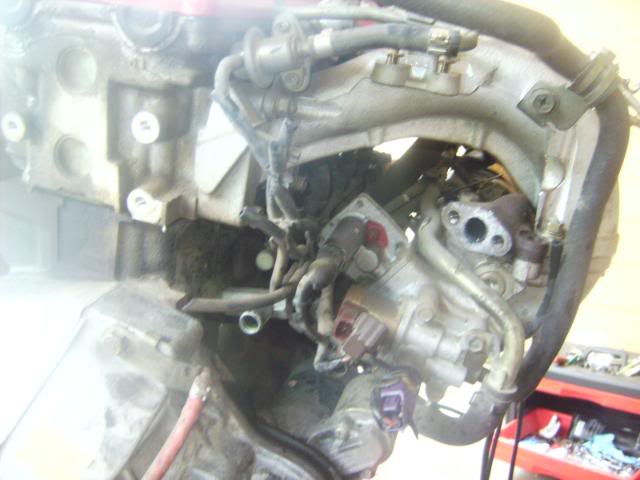
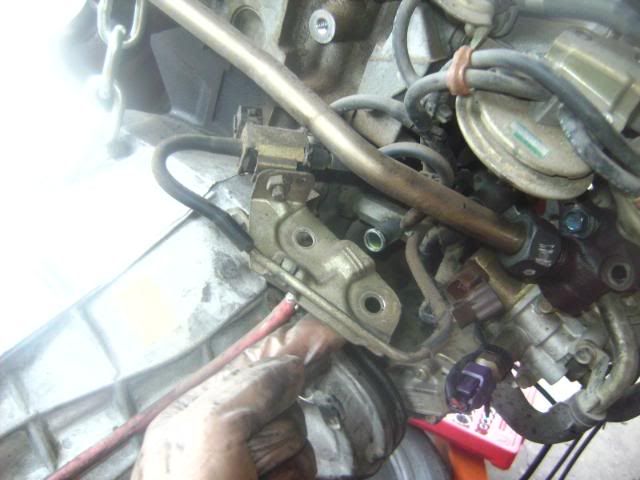
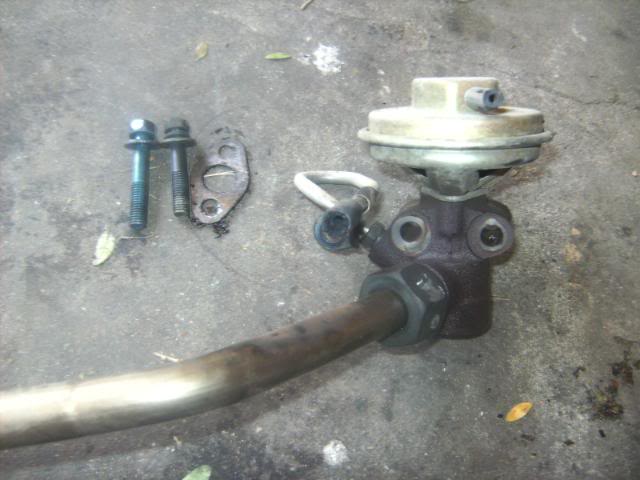
Then remove the other part:
and install a block off plate:
I removed all of the above with out pulling out the Intake manifold, It was harder but I wanted to
challenge myself and I didn't want to buy new gaskets. Another reason is that I didn't have the butterflies
in the manifold, so it wasn't necessary for me. The butterflies are in older 240sx, 89-90.
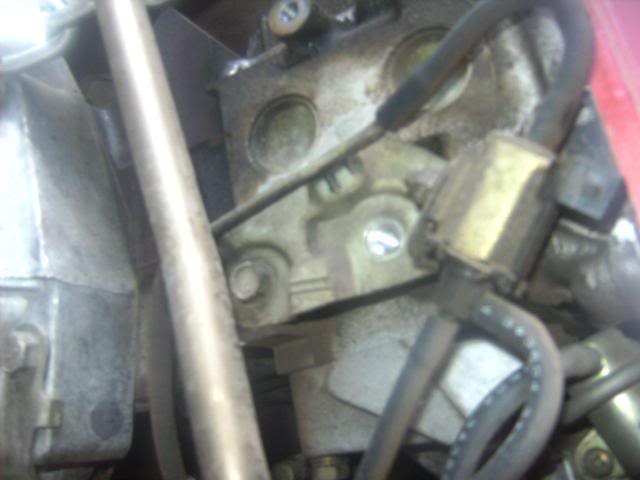
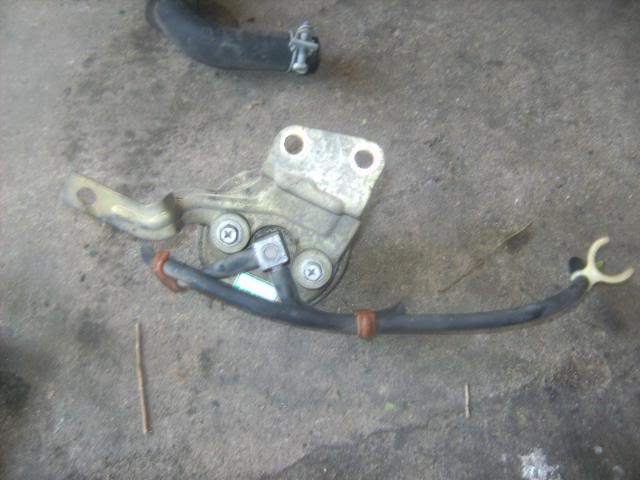
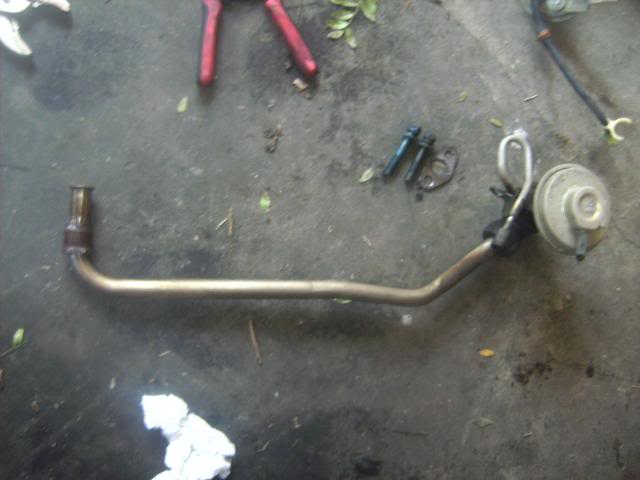
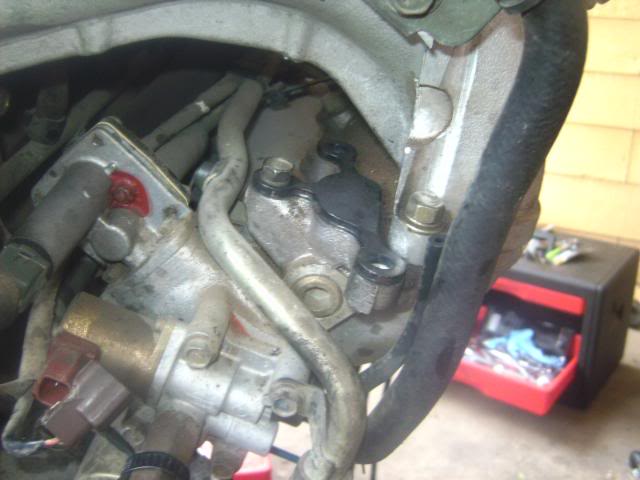
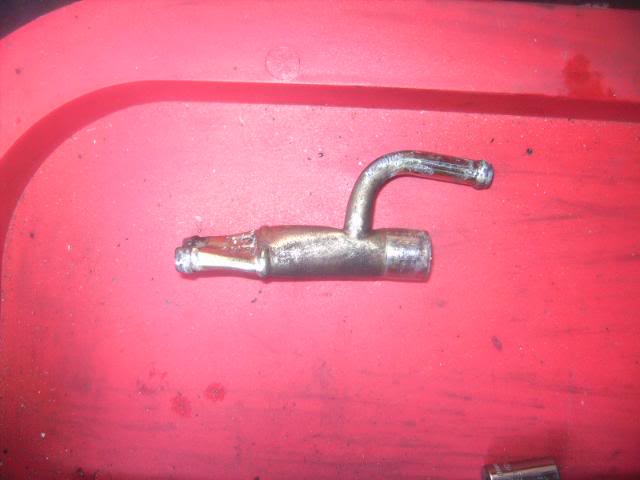
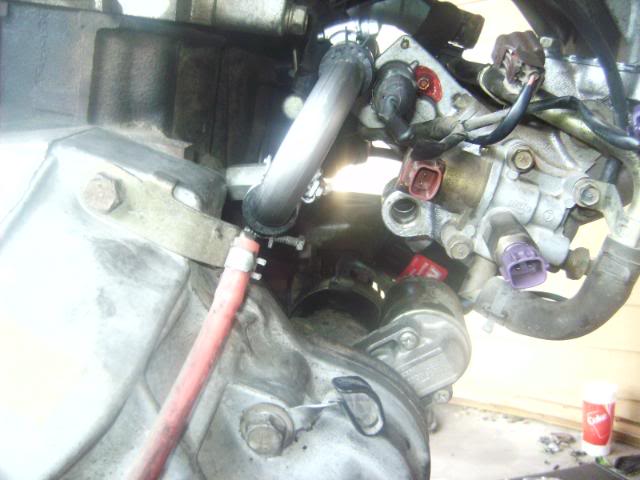
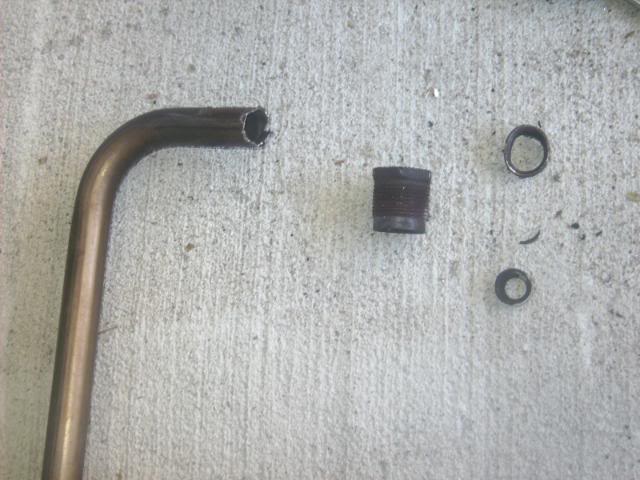
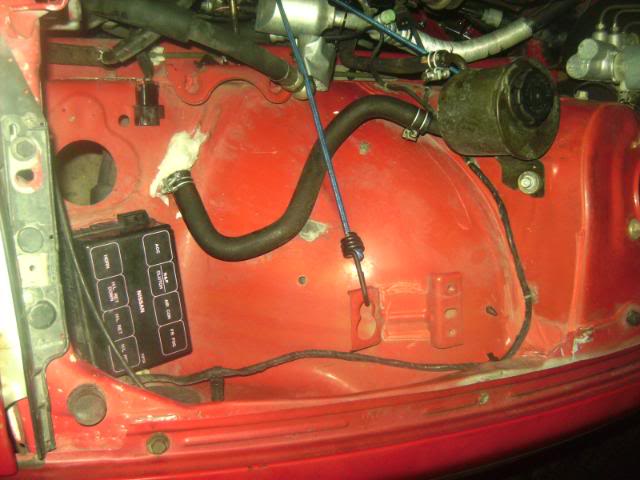
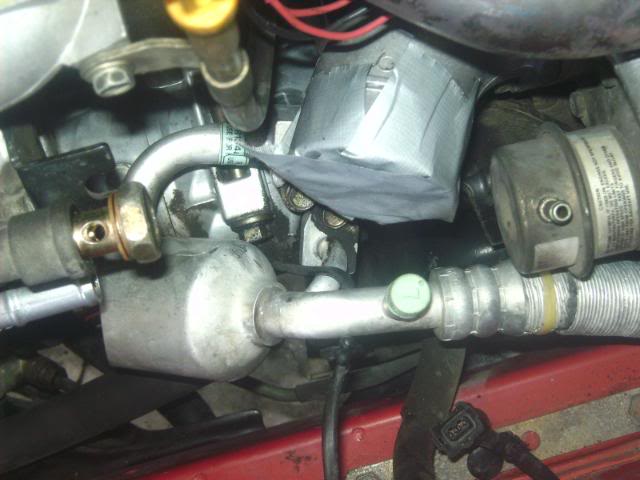
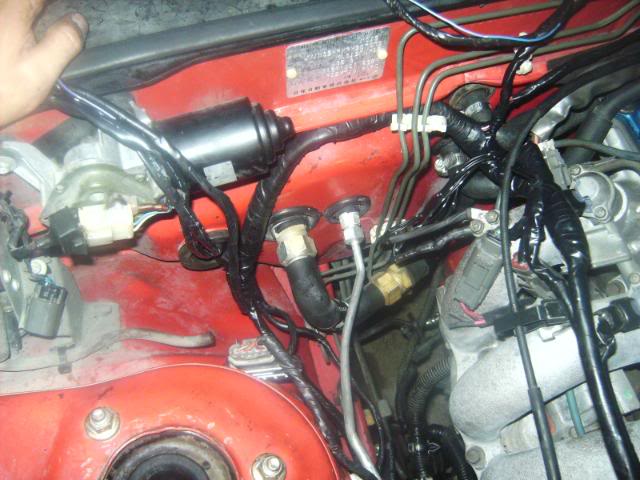
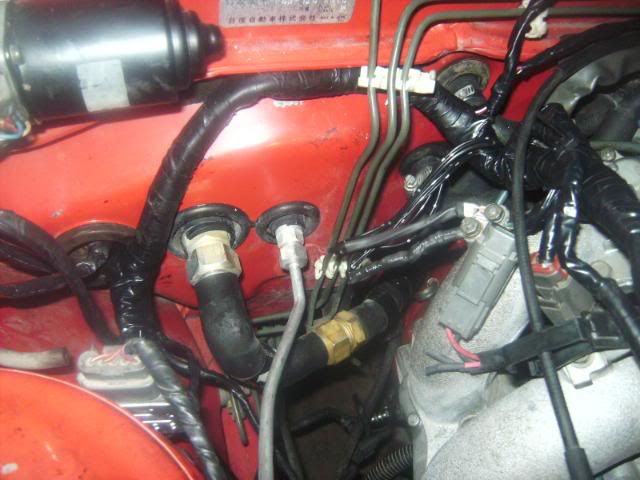
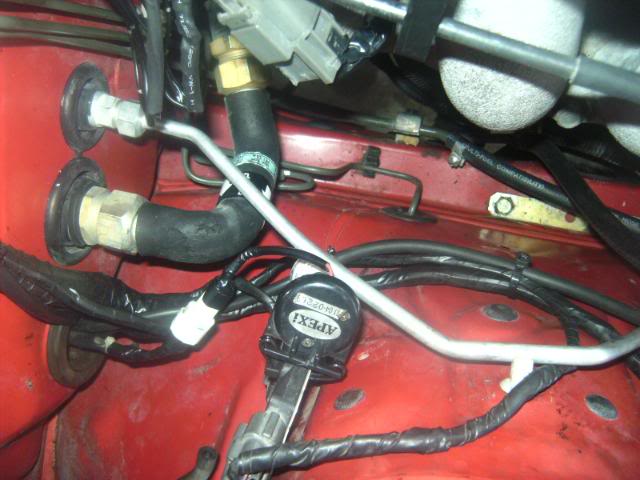
To help the air run colder inside the engine, I removed the TB water lines:
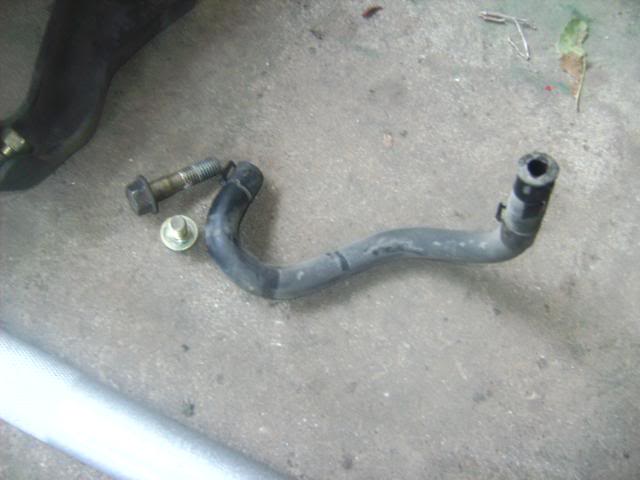
I removed the source of the water that goes to the TB. It is that hose right there:
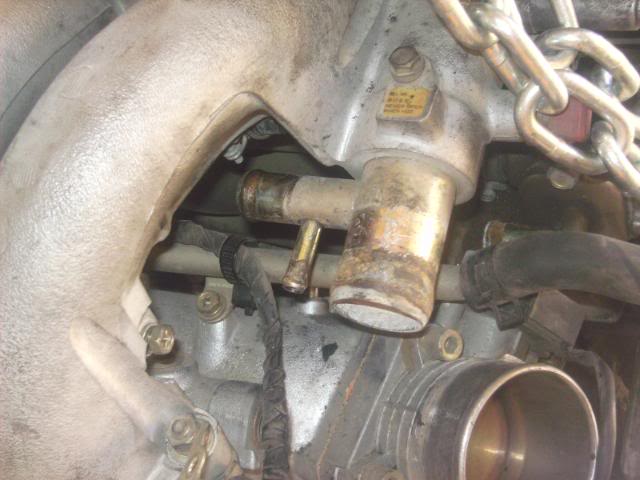
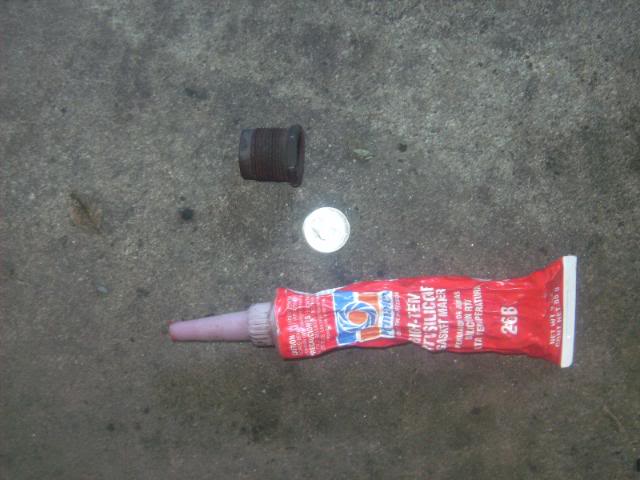
Cut it off and filed it down:
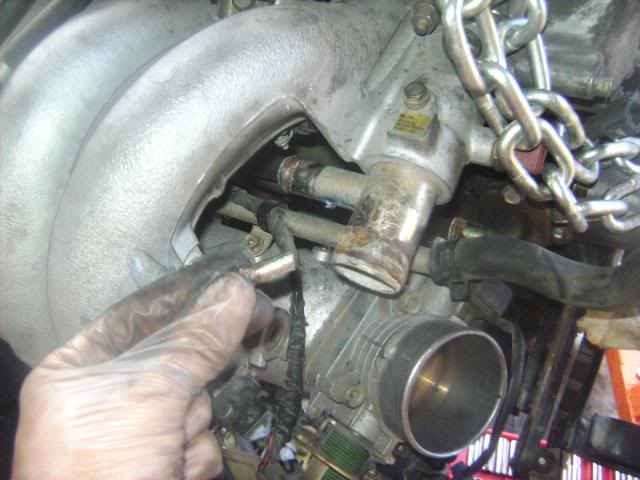
Clamped the hose over the hole like this:
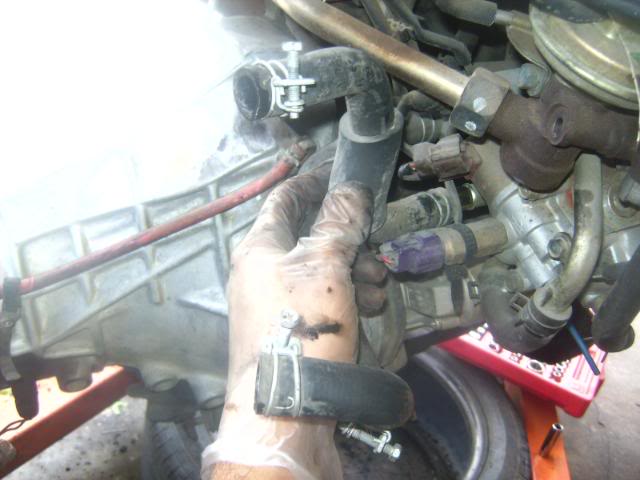
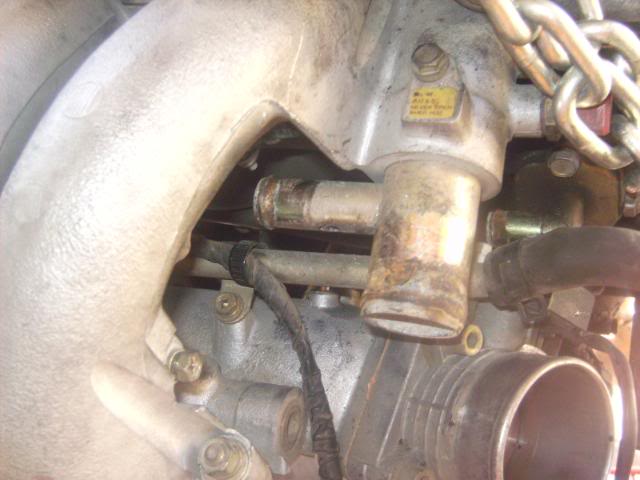
That hose goes to the heater core which I deleted so I ran it like this:
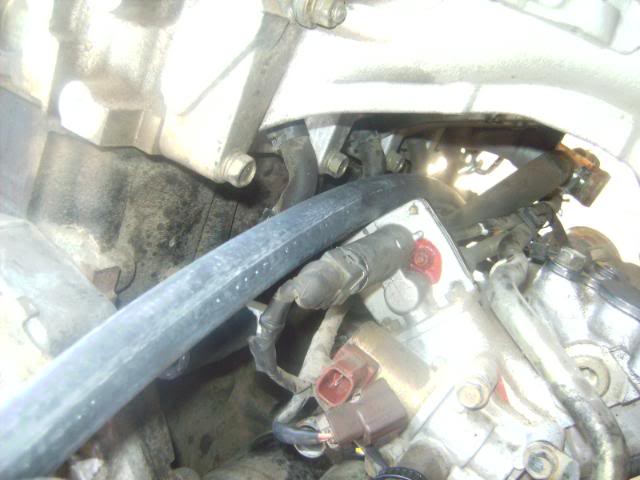
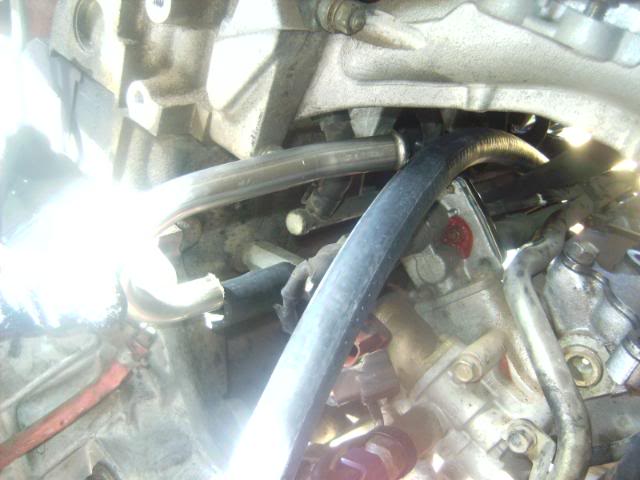
I used the tube from the EGR to make a U for the heater hoses return water line:
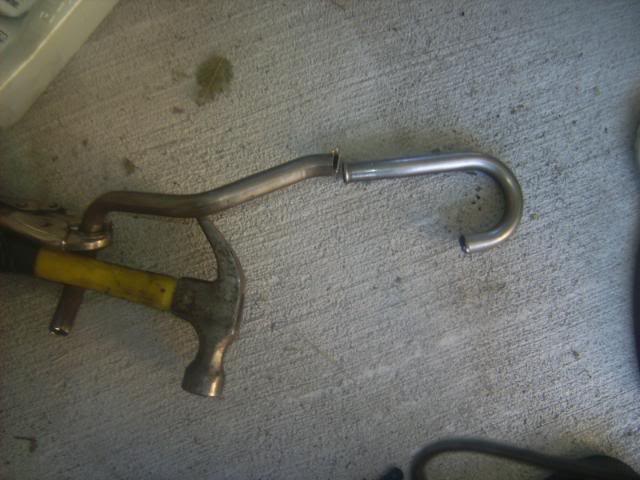
Cut some more to clear the AICV:

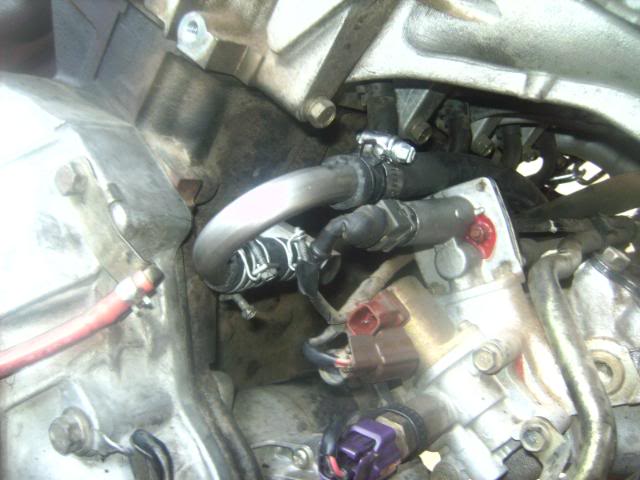
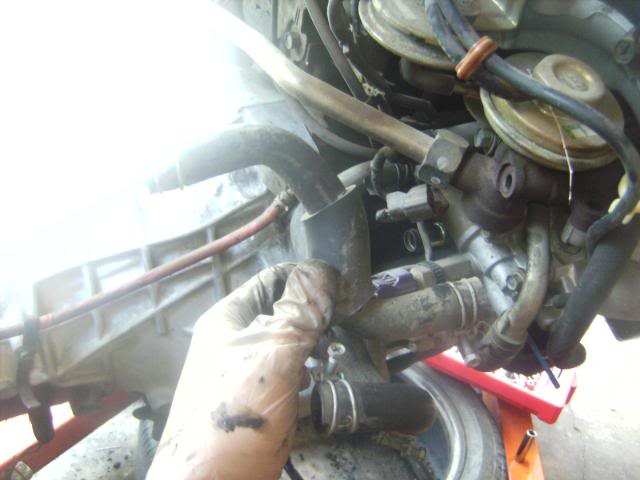
final product:
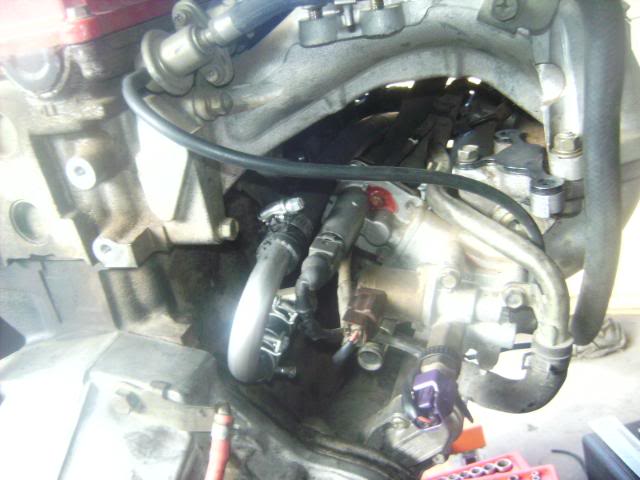
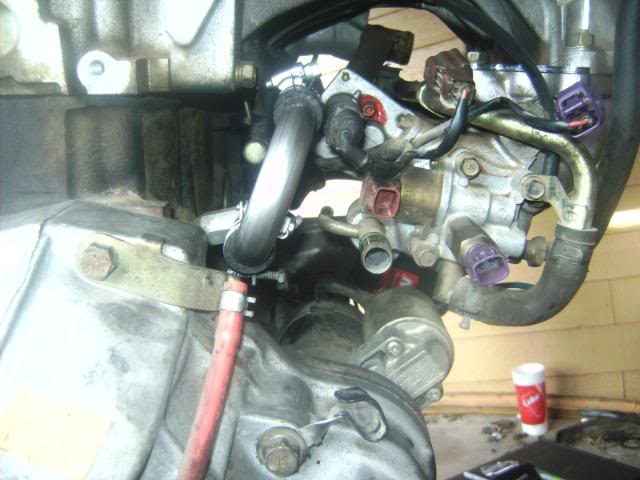
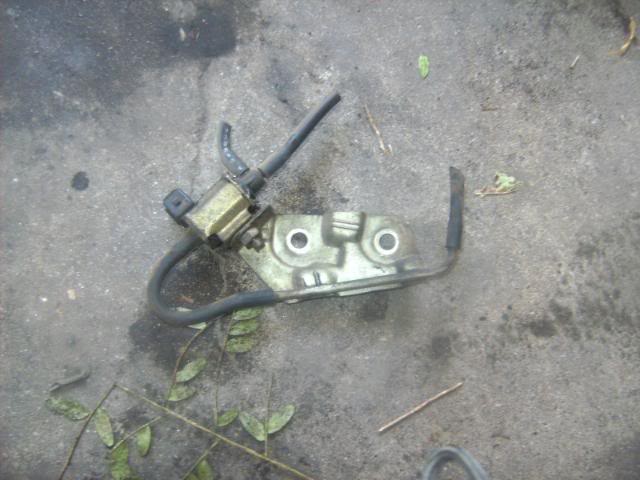
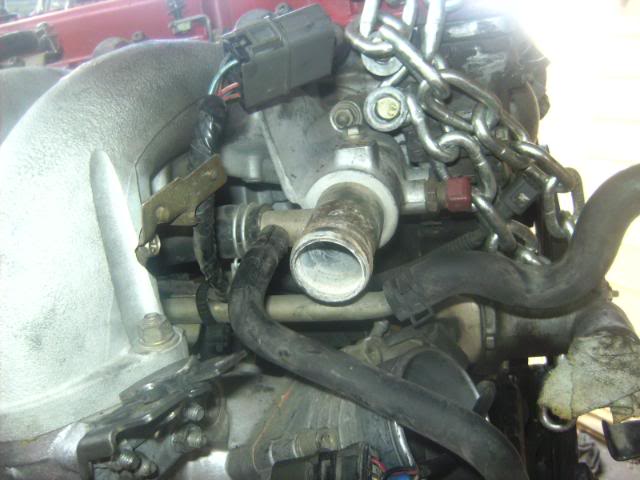
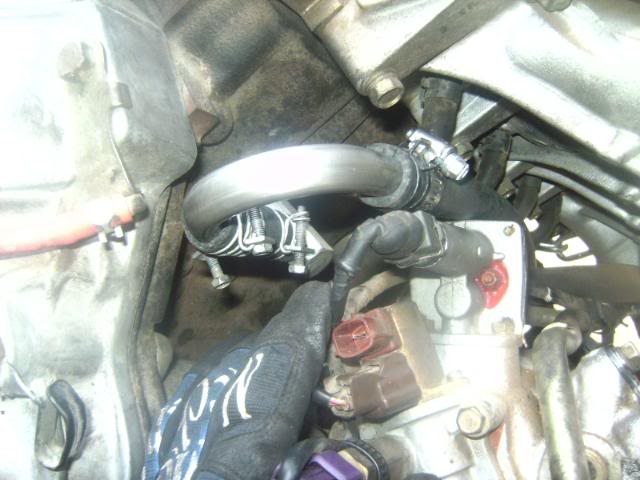
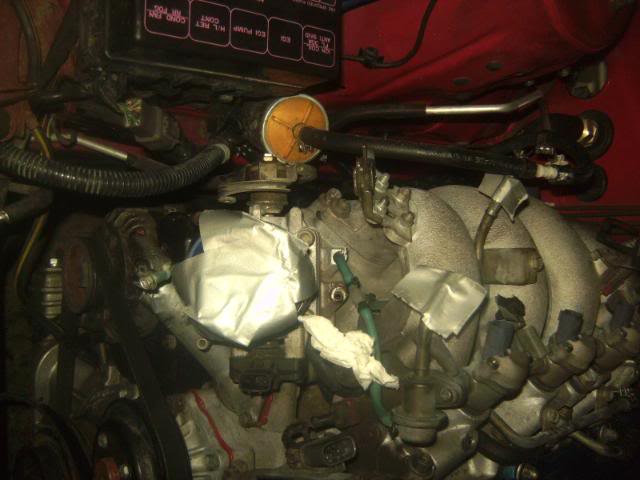
and Yanked this out: (its where the water line Y's into the small throttle body hose, and back to the other line that I connected.
look at pic above and below for comparison.)
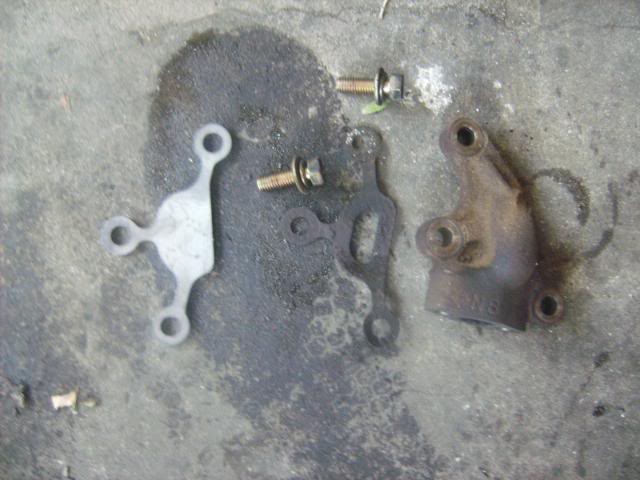
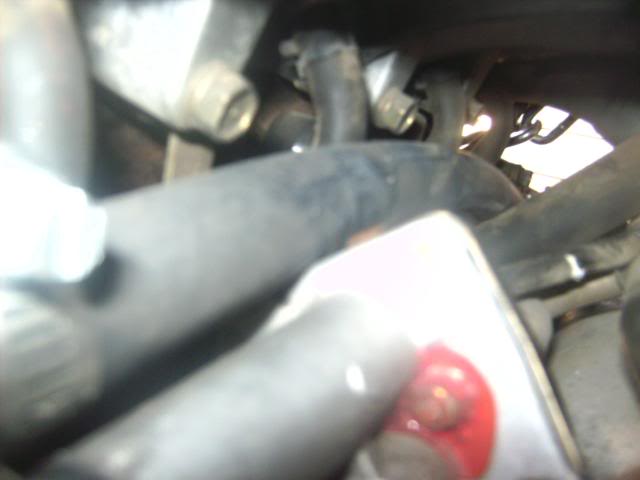
Took out these brackets:
Cut the end piece to make a plug with a nickle:
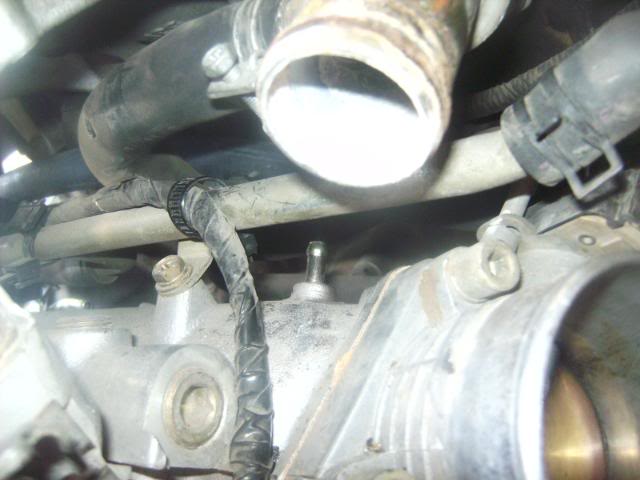
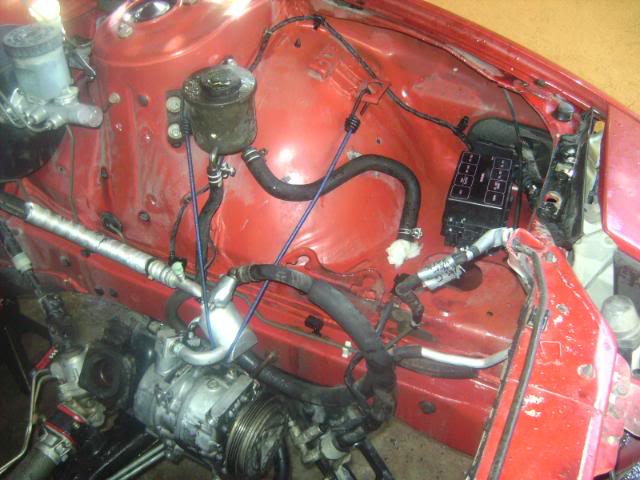
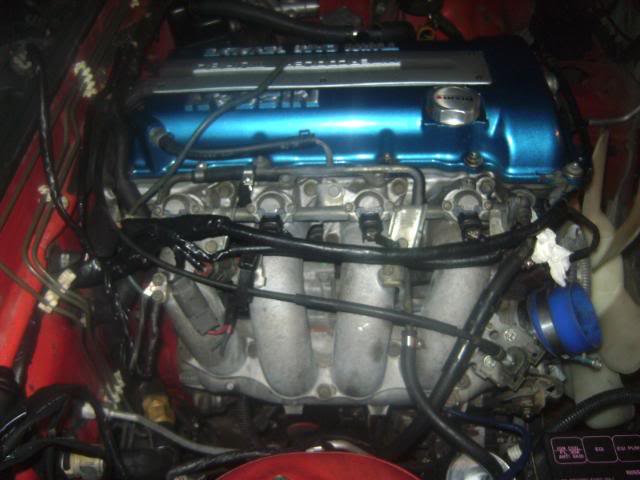
Cleanned the Engine:
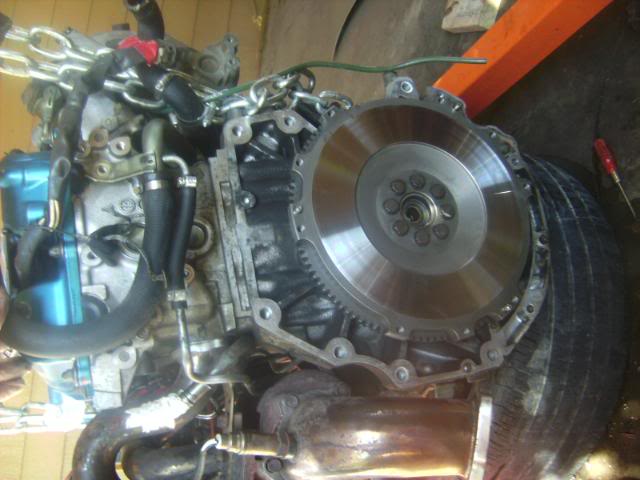
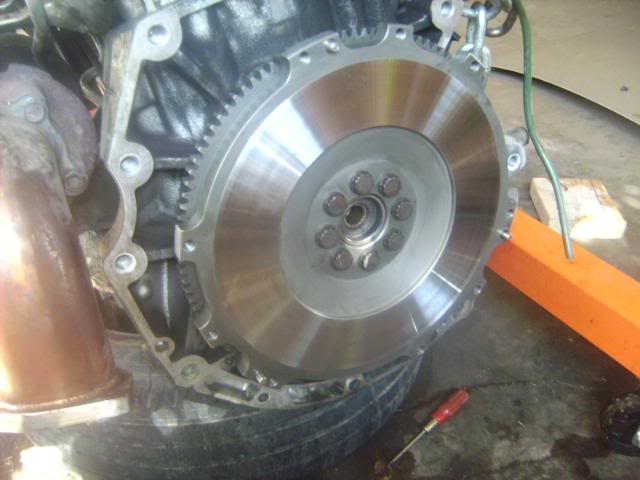
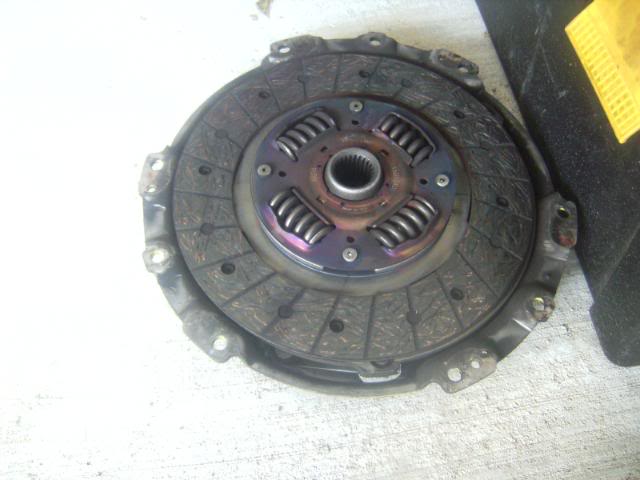
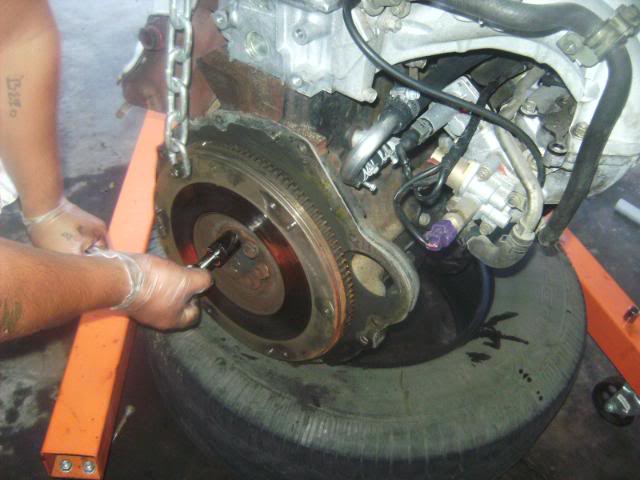
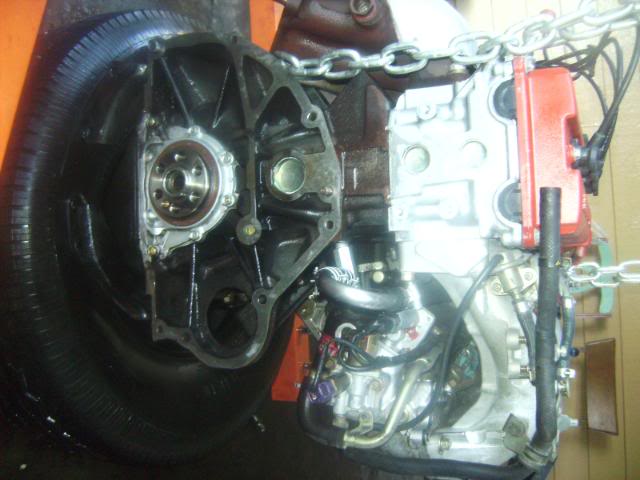
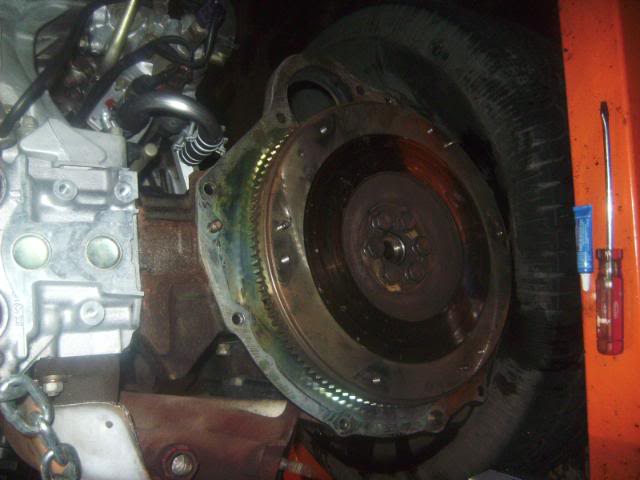
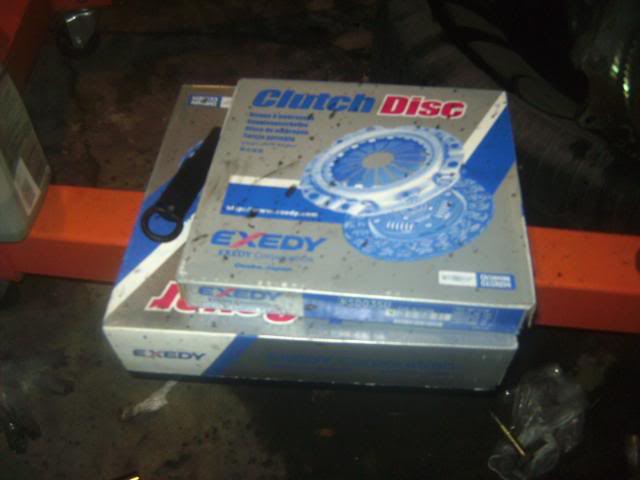
Then we changed the clutch, and rear main oil seal.

TB throttle body water line removed.
the other one.
Looks like this:
Then remove the other part:
and install a block off plate:
I removed all of the above with out pulling out the Intake manifold, It was harder but I wanted to
challenge myself and I didn't want to buy new gaskets. Another reason is that I didn't have the butterflies
in the manifold, so it wasn't necessary for me. The butterflies are in older 240sx, 89-90.
To help the air run colder inside the engine, I removed the TB water lines:
I removed the source of the water that goes to the TB. It is that hose right there:
Cut it off and filed it down:
Clamped the hose over the hole like this:
That hose goes to the heater core which I deleted so I ran it like this:
I used the tube from the EGR to make a U for the heater hoses return water line:
Cut some more to clear the AICV:
final product:
and Yanked this out: (its where the water line Y's into the small throttle body hose, and back to the other line that I connected.
look at pic above and below for comparison.)
Took out these brackets:
Cut the end piece to make a plug with a nickle:
Cleanned the Engine:
Then we changed the clutch, and rear main oil seal.
Last edited by FuriousZ; Aug 10, 2009 at 12:47 PM.
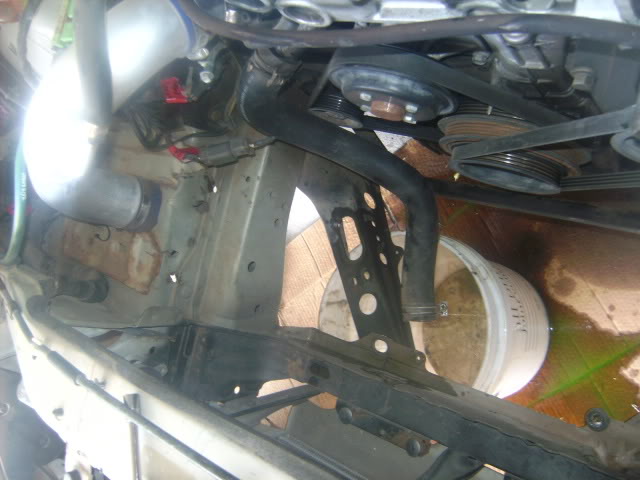
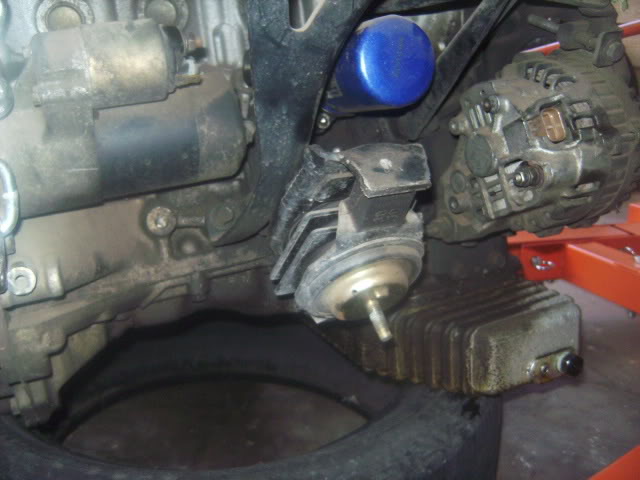
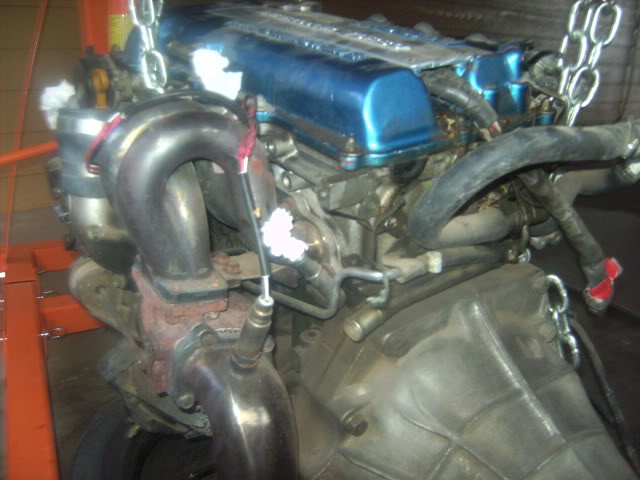
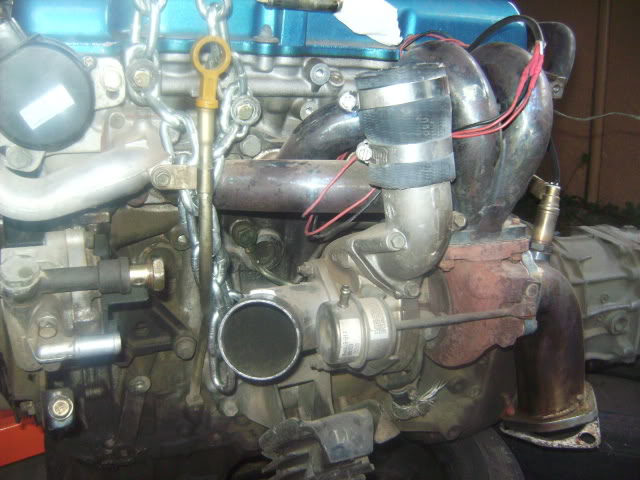
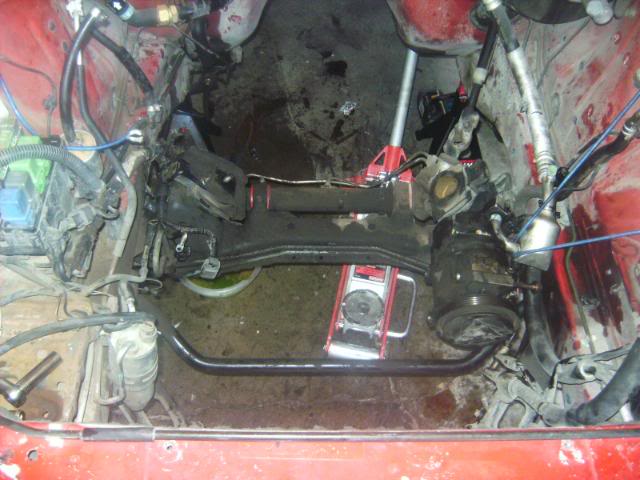
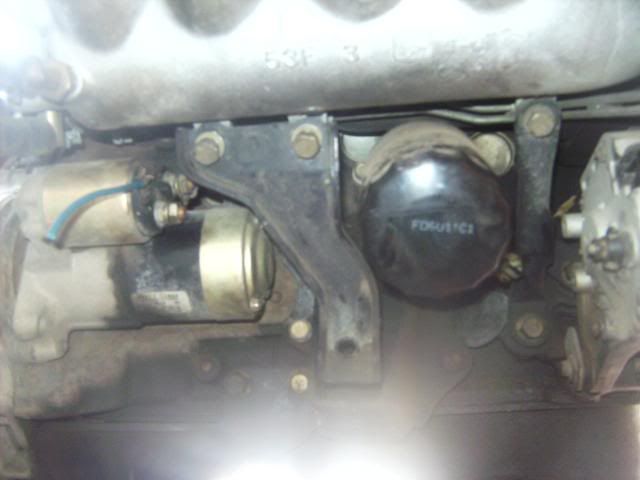
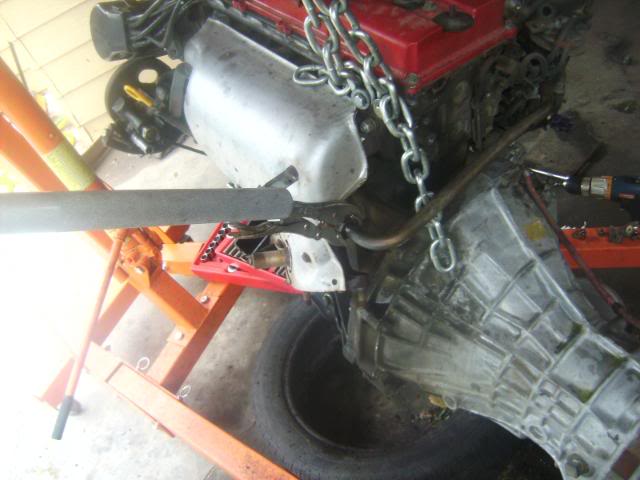
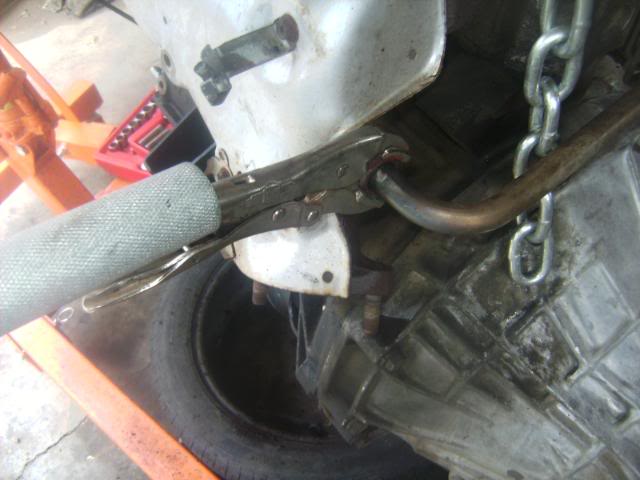
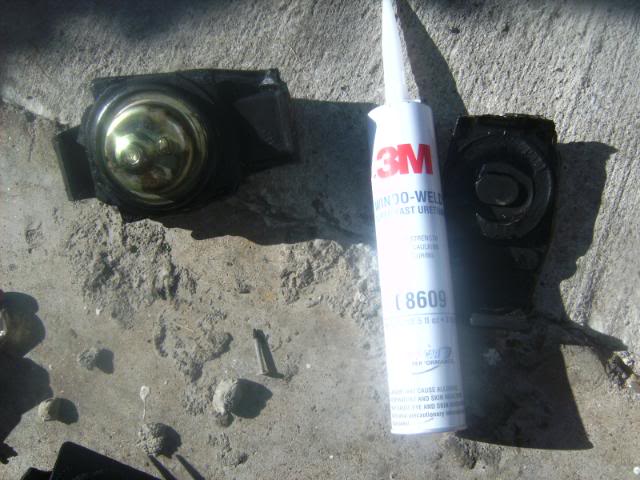
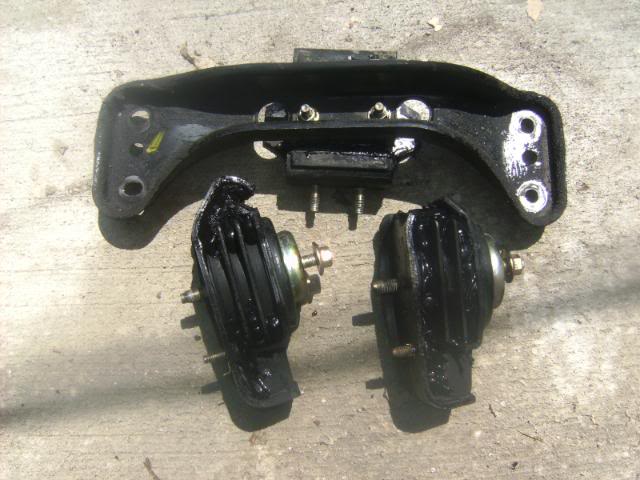
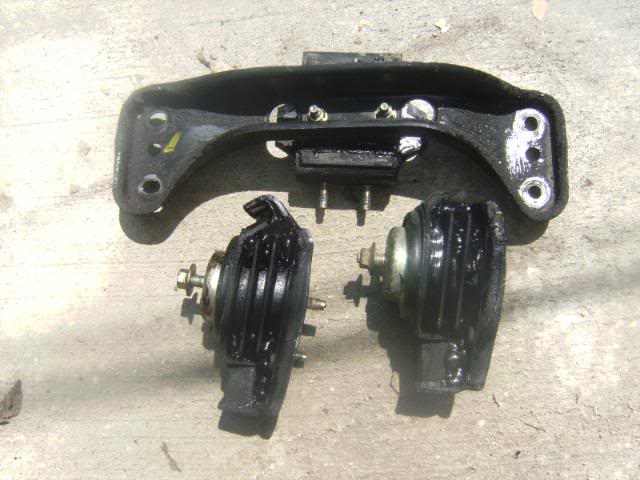
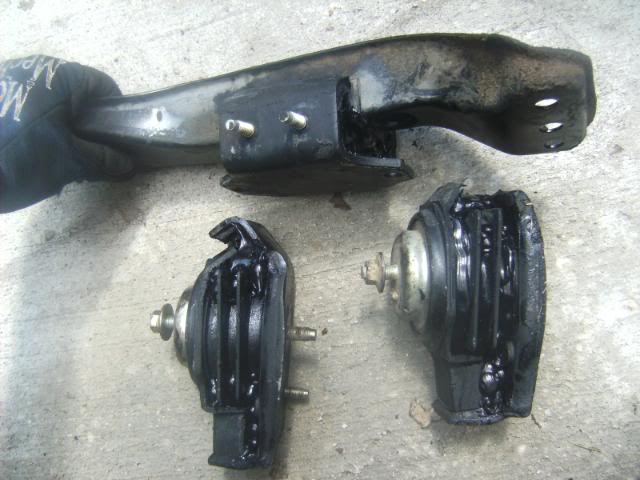
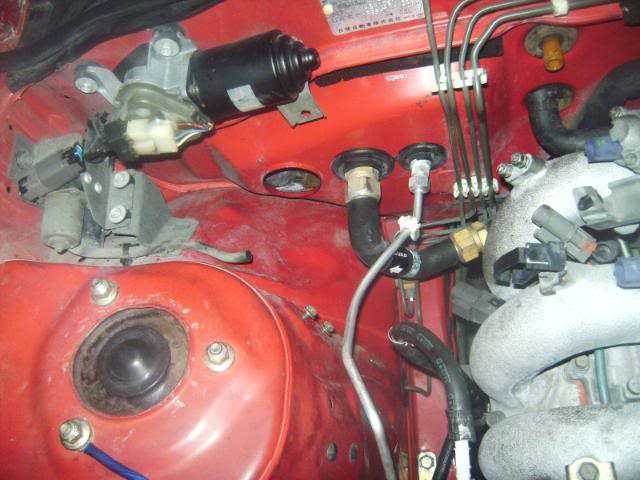
I had to repair the engine mounts:
And then into the car:

In:
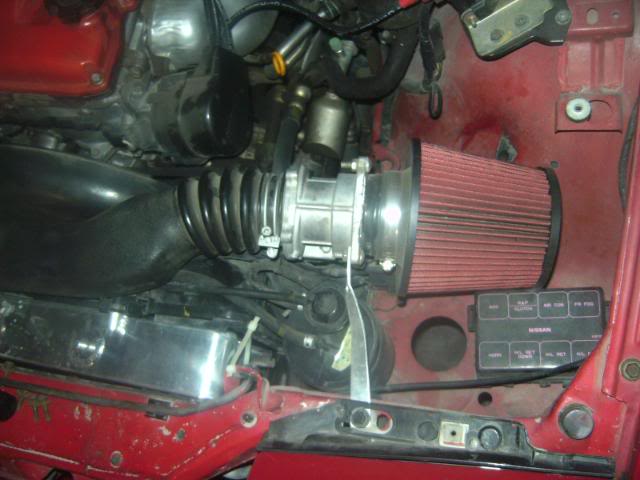
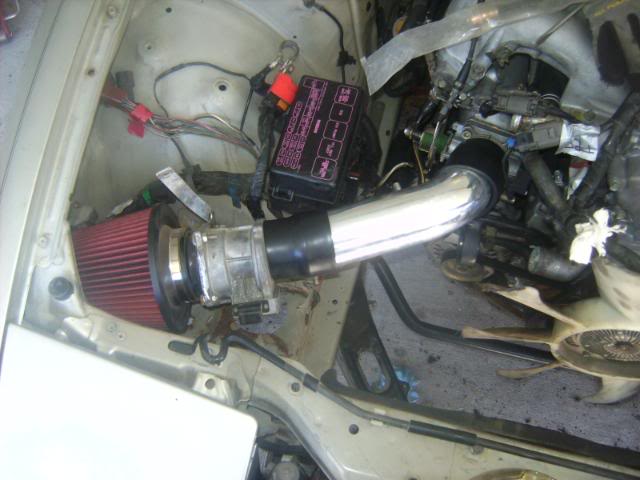
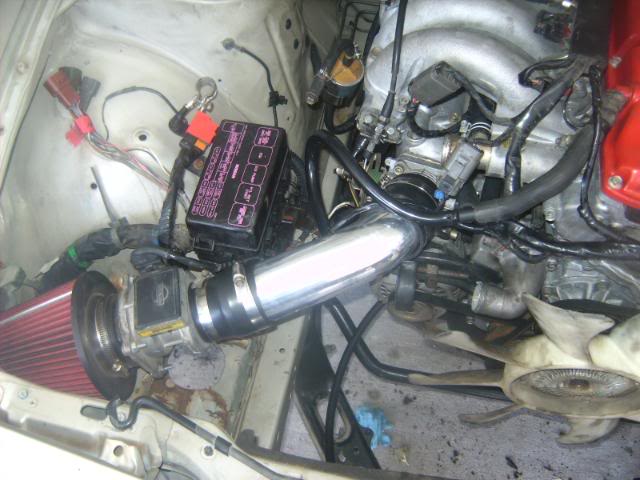
Custom made (from a 96-98 Honda civic cold air intake ebay kit $20 plust lots of other tubing left including an S tube, just in case!)

cut it:
Radiator:

After some electrical issues from the previous owner:
And then into the car:
In:
Custom made (from a 96-98 Honda civic cold air intake ebay kit $20 plust lots of other tubing left including an S tube, just in case!)
cut it:
Radiator:
After some electrical issues from the previous owner:
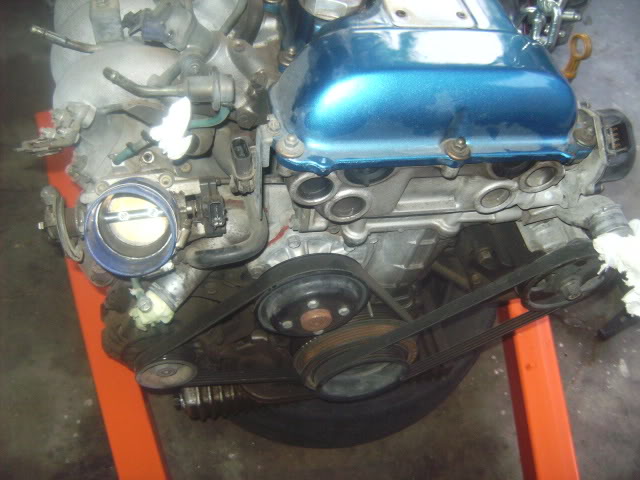
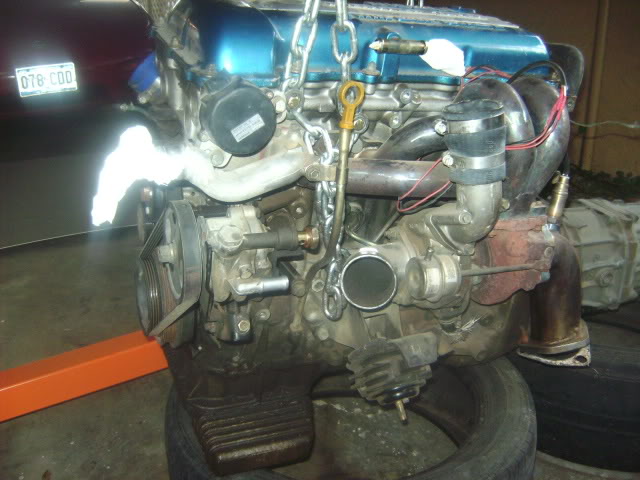
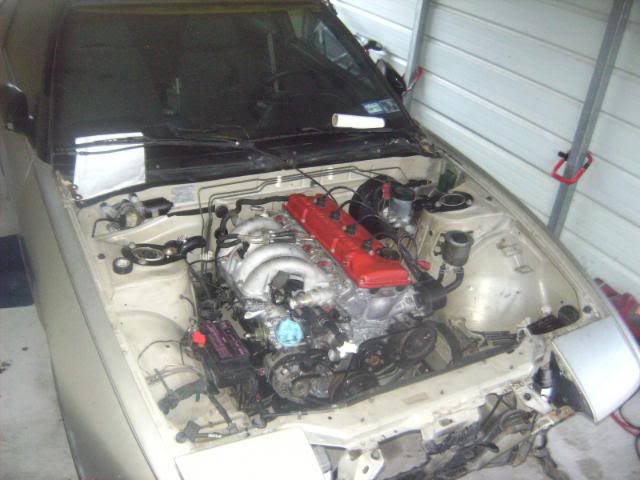
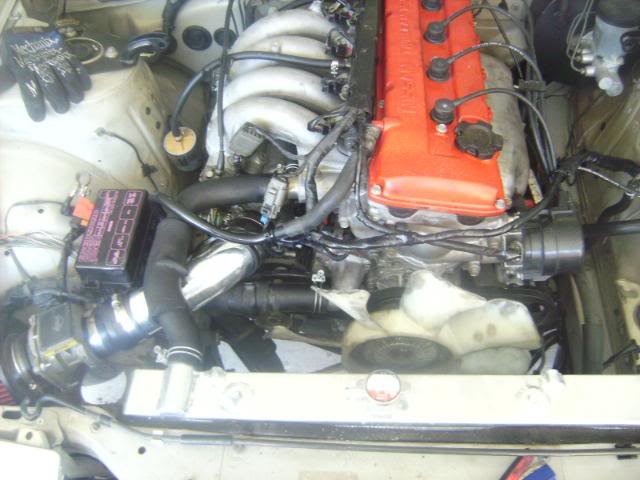
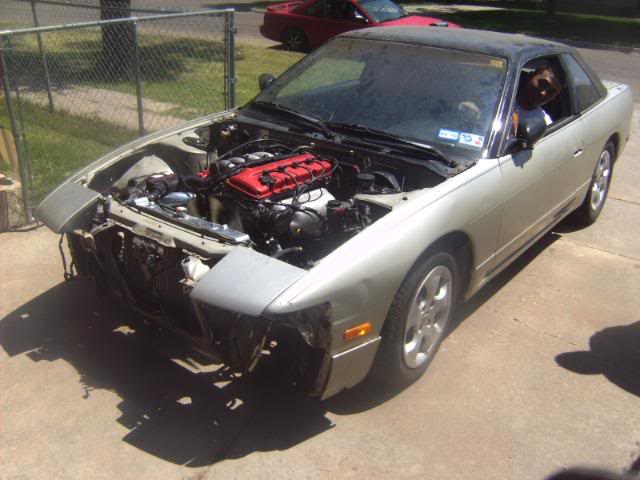
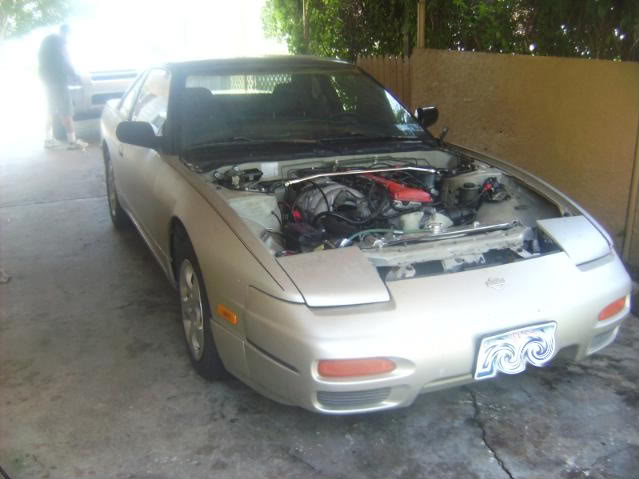
The RED 240SX went like this:


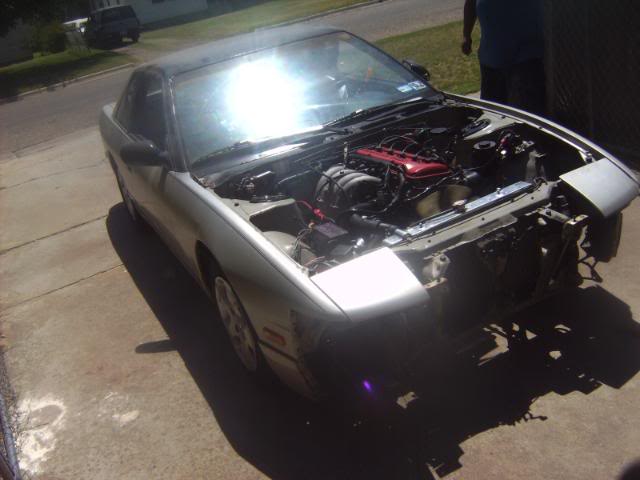
clean version:

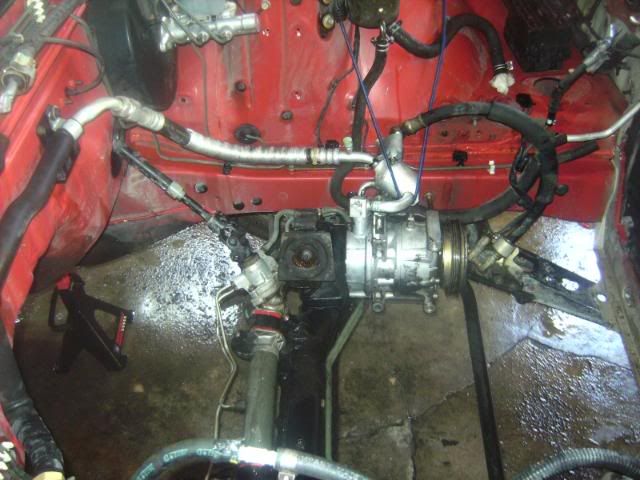
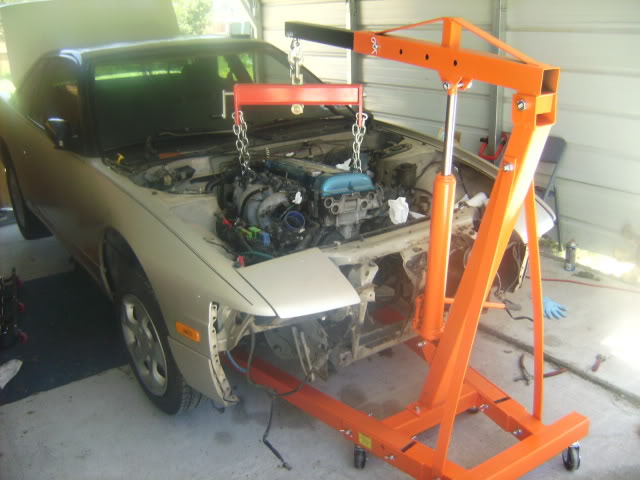
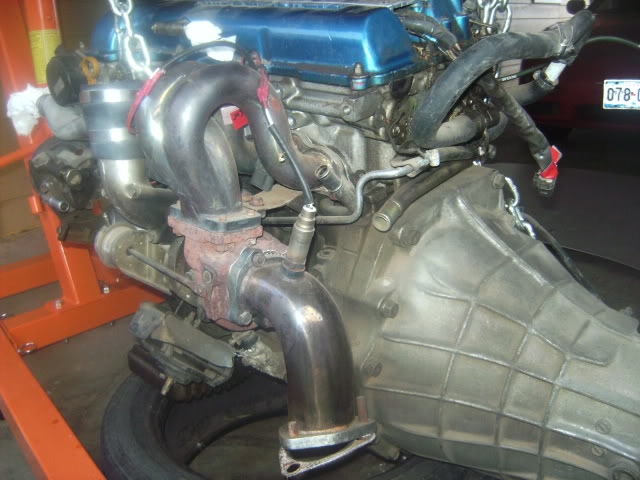
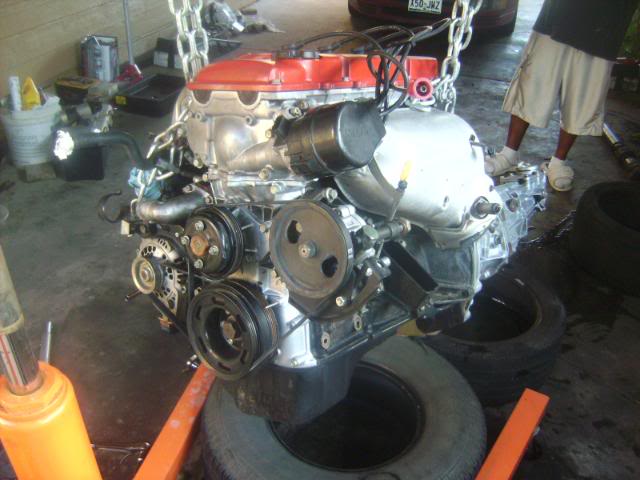
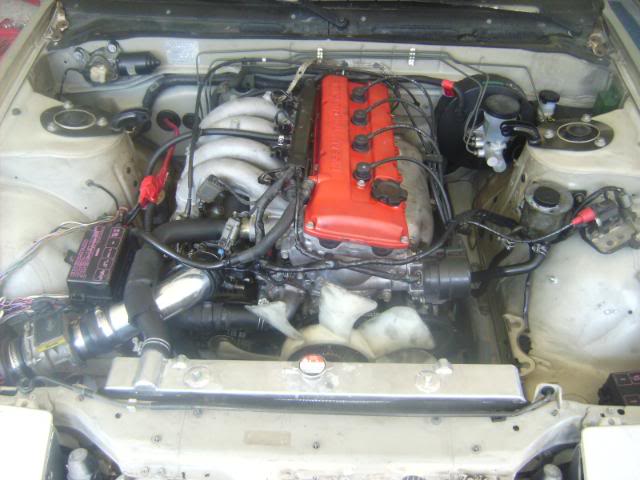
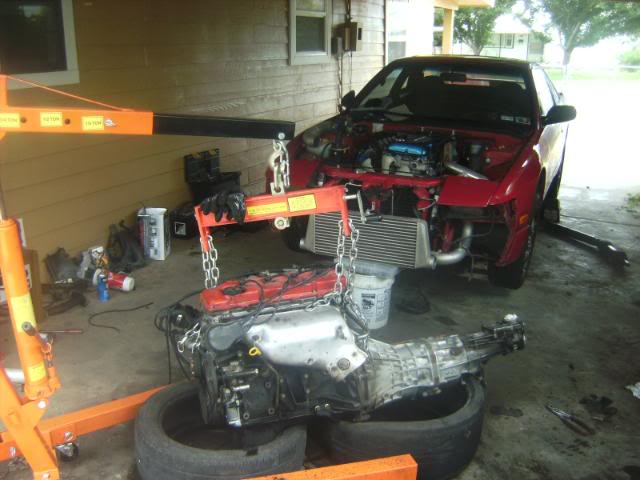
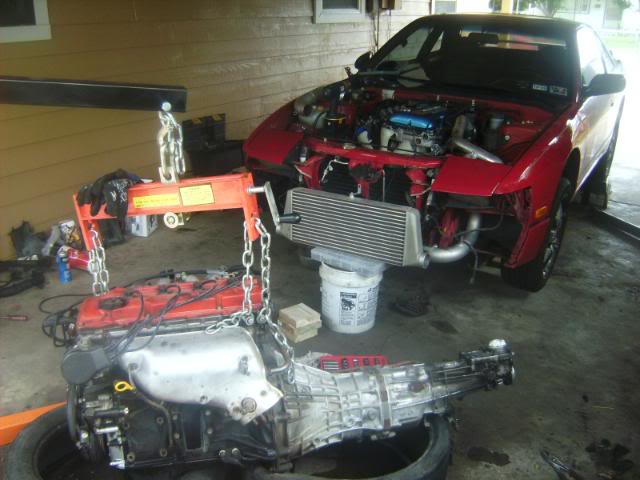
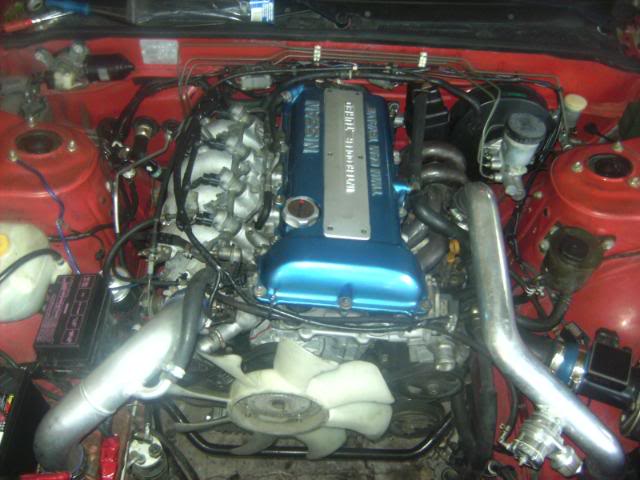
Then the motor went IN!
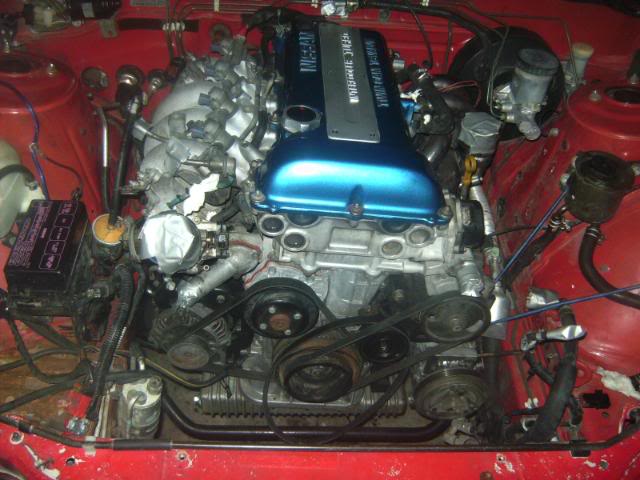
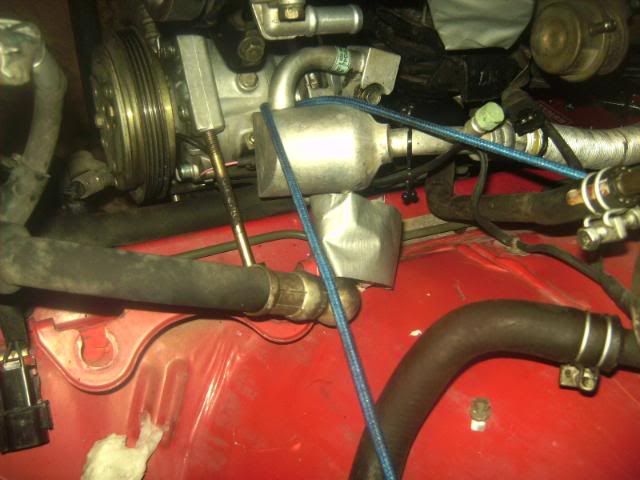
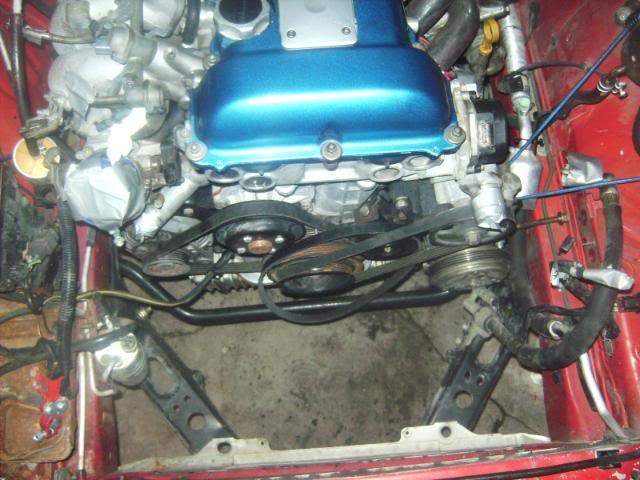
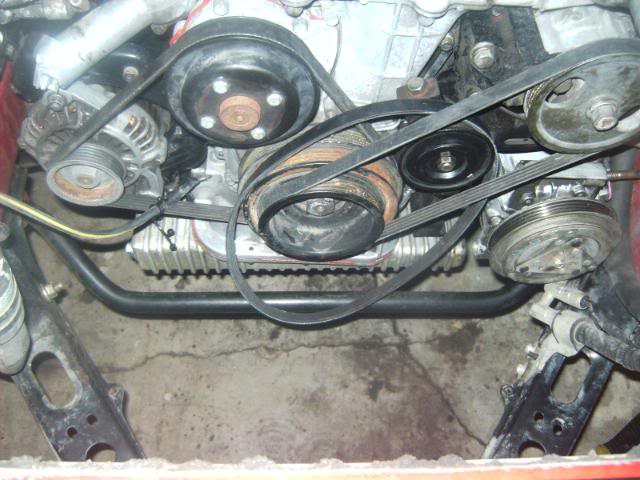
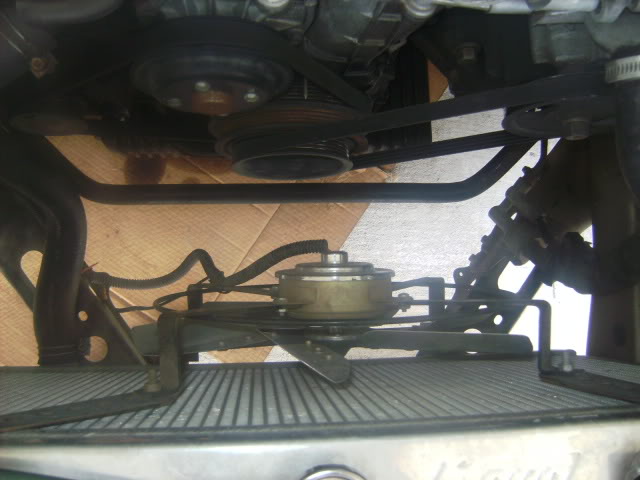
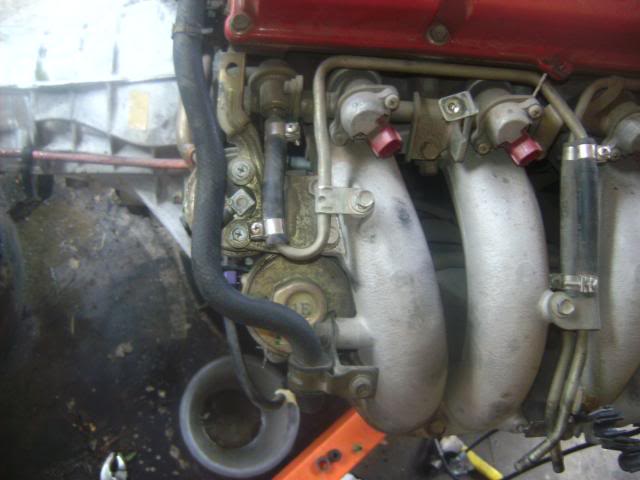
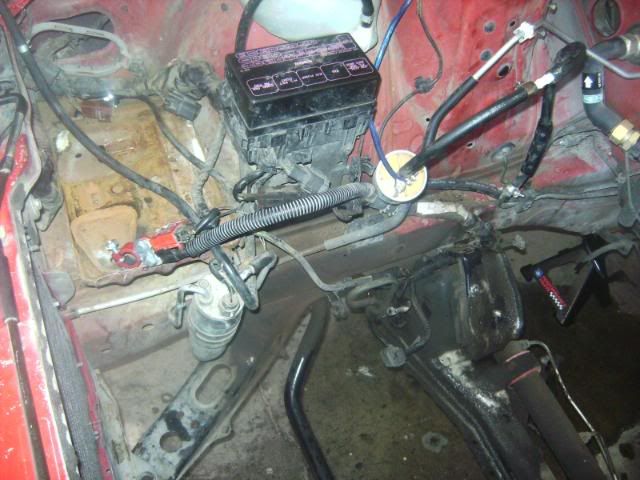
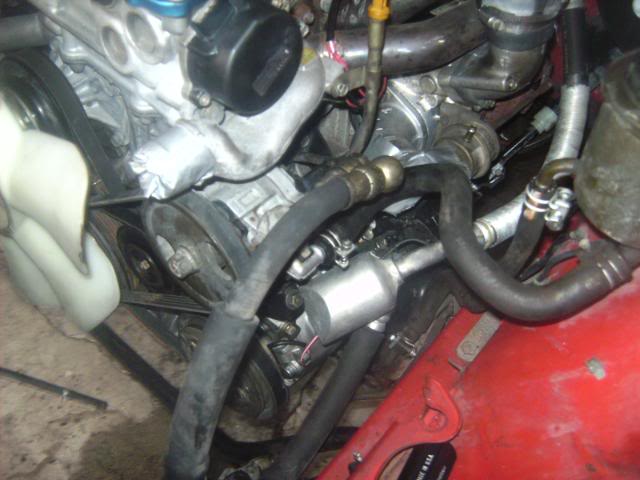
A/C Compressor bolted on, Just a little off line but the belt is on. I had to bend the little nipple to clear the intake elbow:
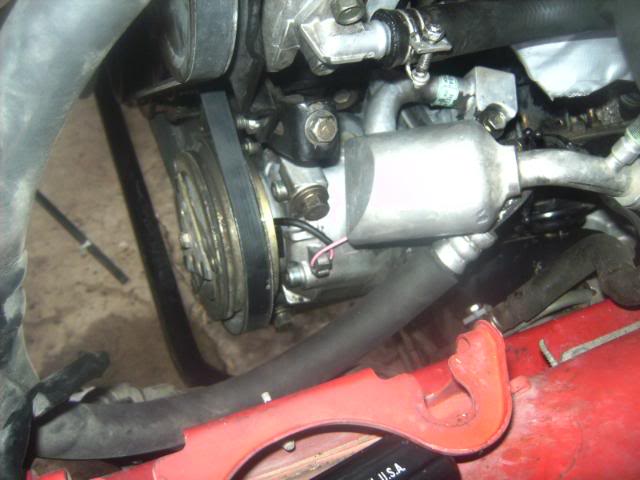
I had to put washers to space out the fan because the KA and SR are different. The KA would hit the Crank shaft pulley:
P/S:
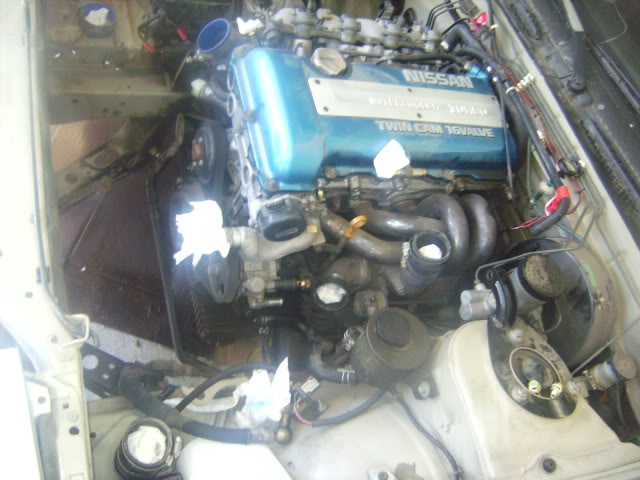
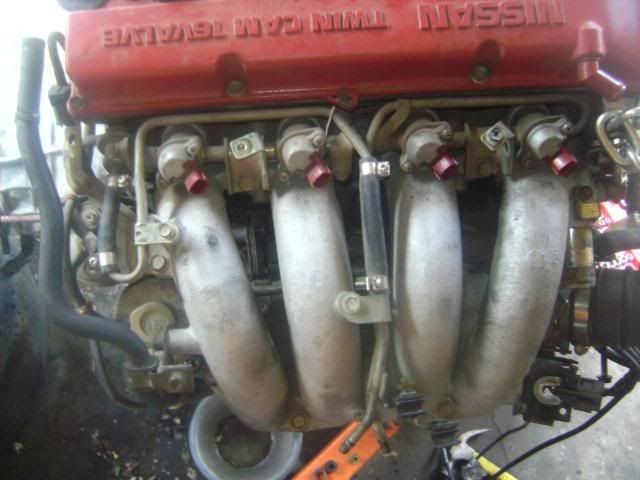
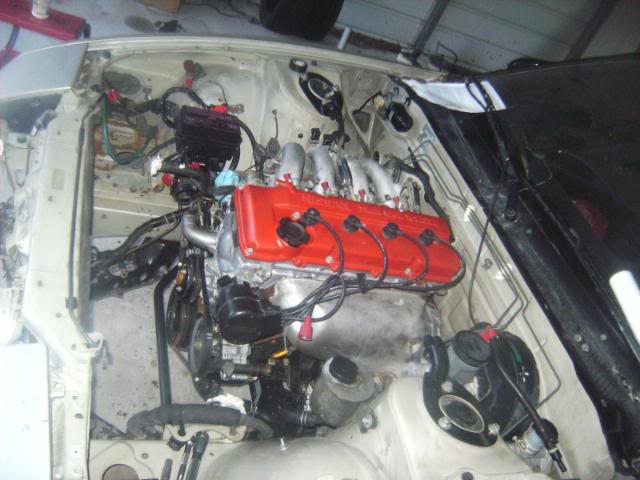
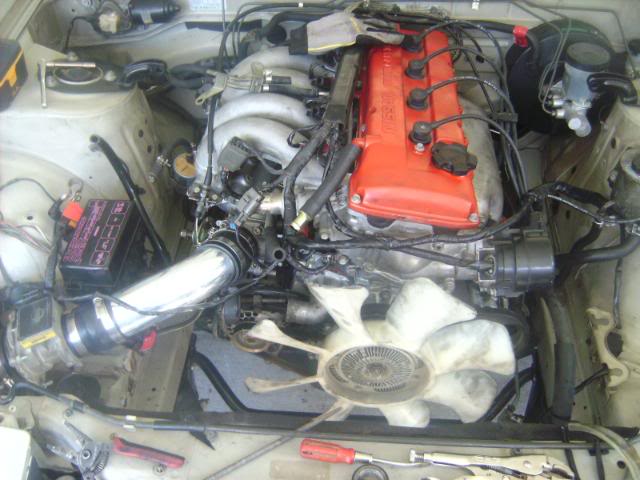
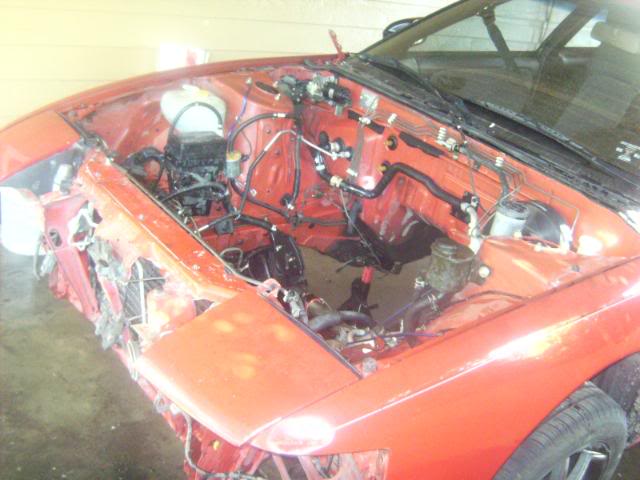
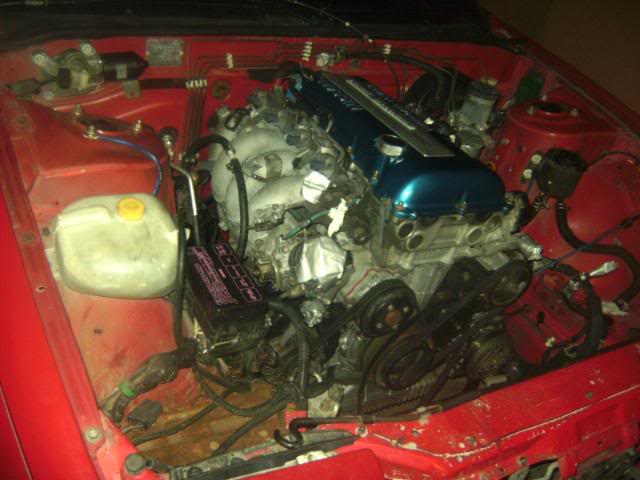
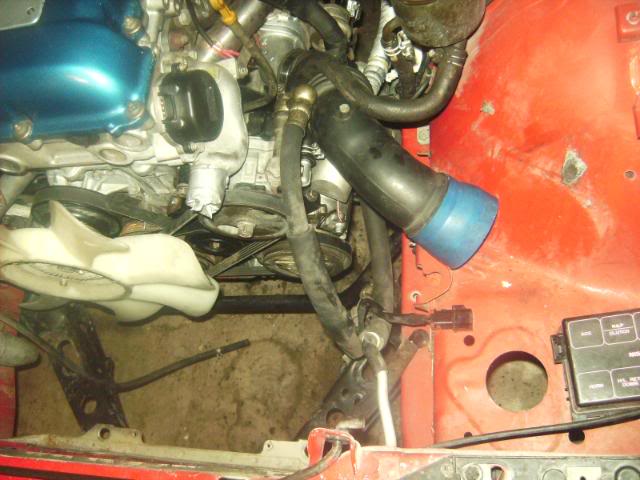
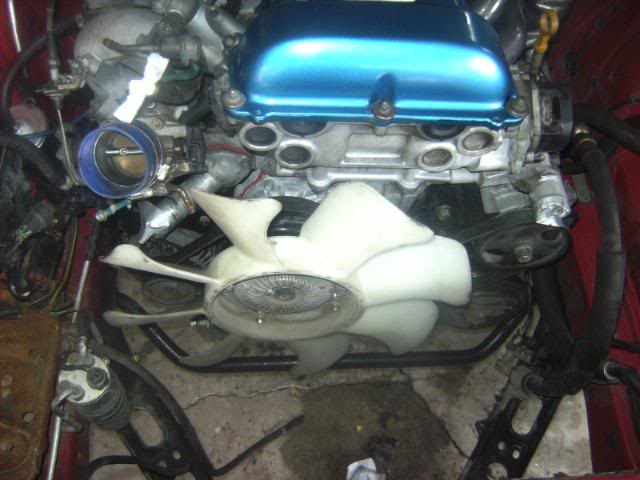
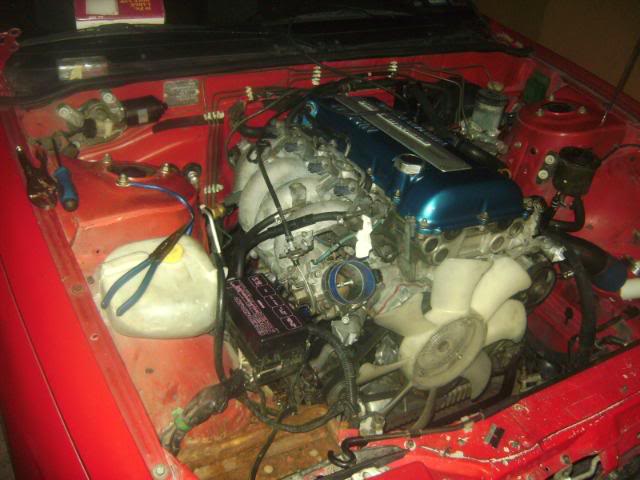
Engine IN:
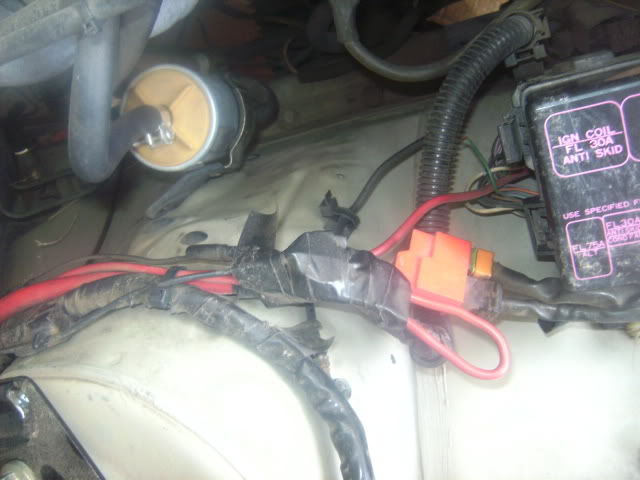
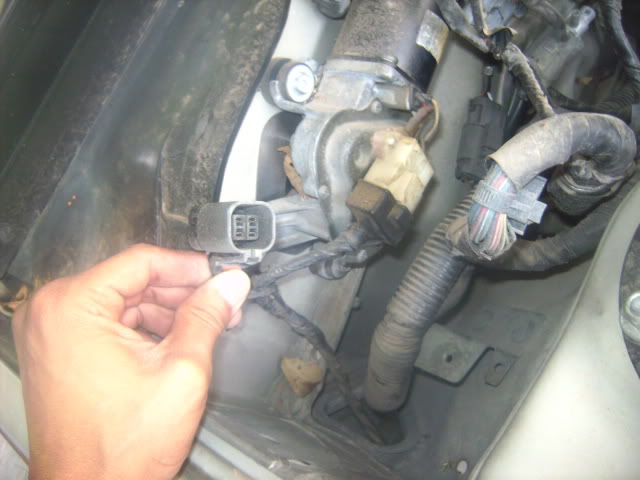
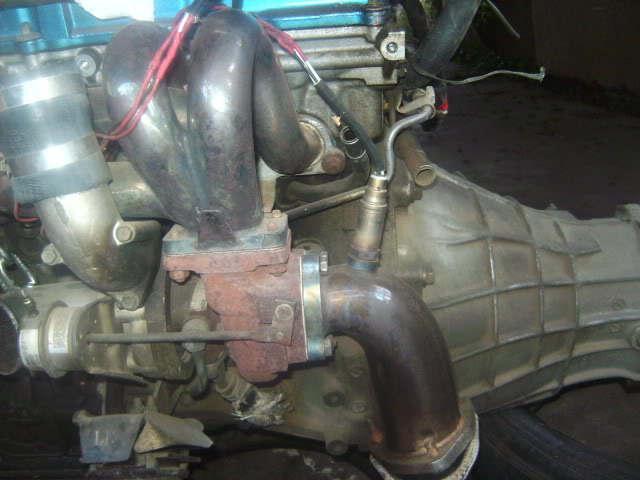
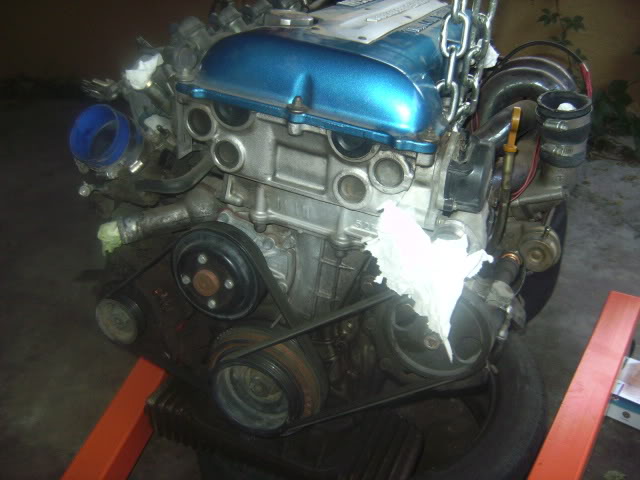
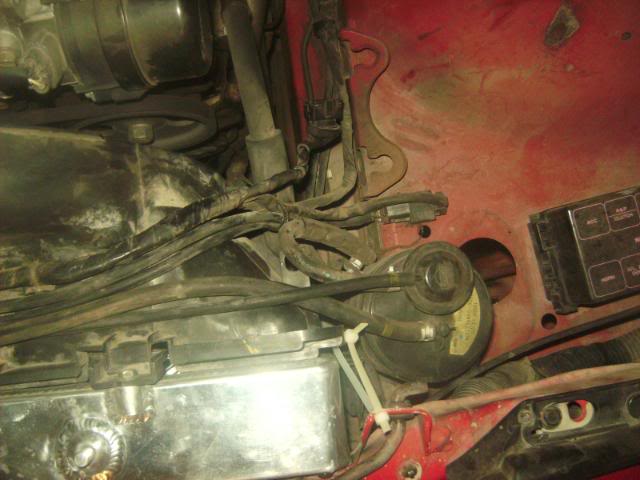
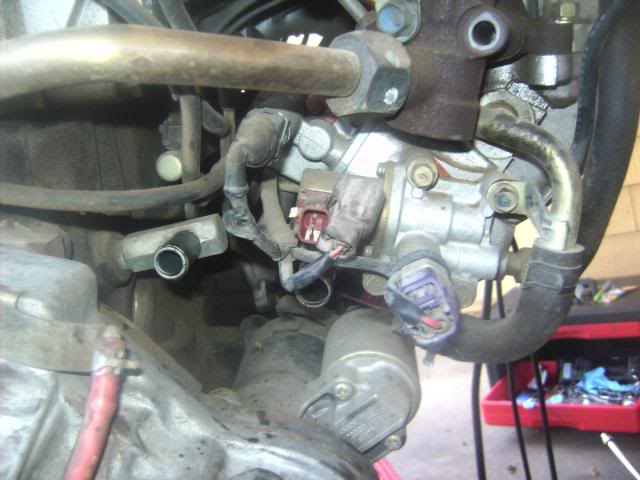
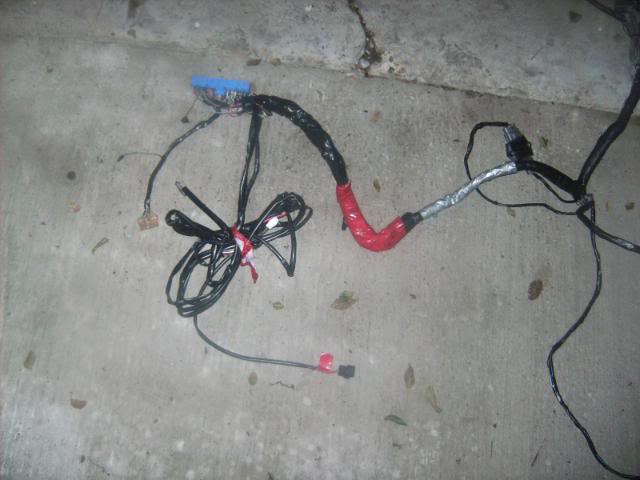
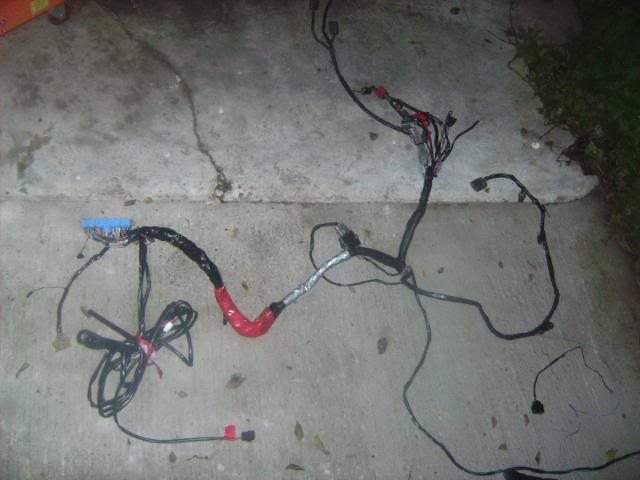
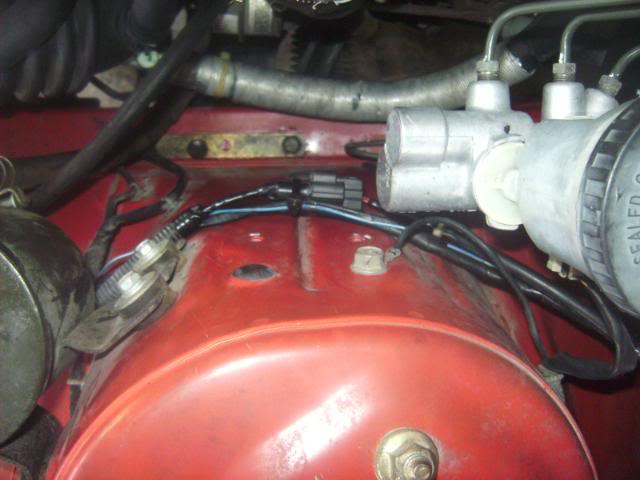
I spent one whole day checking the wiring harness, cutting the LOOP ! ! ! and adding the PS sensor:
Then I put it in the car:
Trying to get it situated:
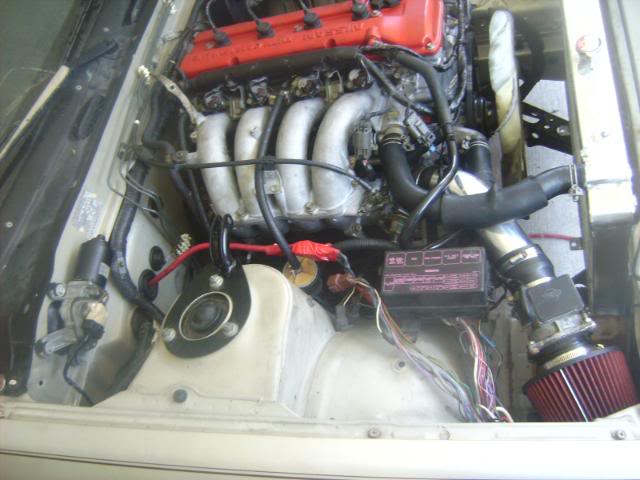
From firewall to injectors, NO LOOP!
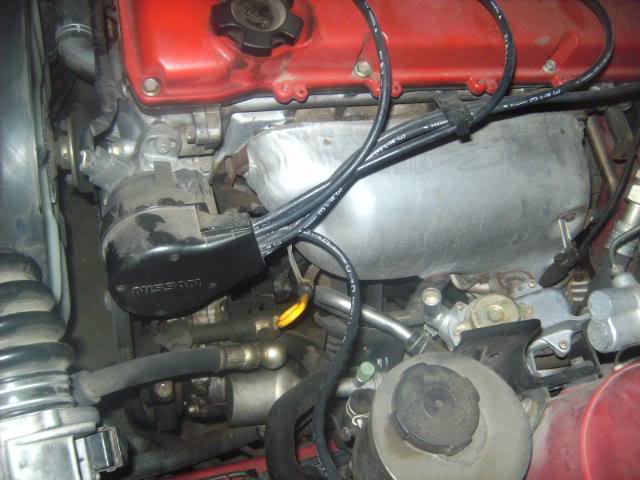
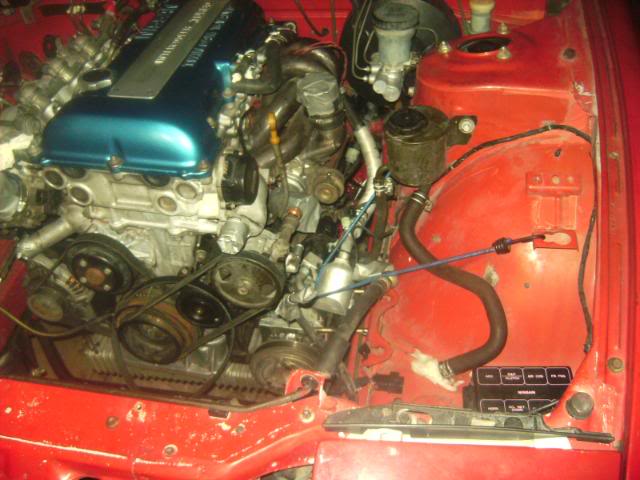
Igninter chip mounted and Boost controller thing:

o2 sensor, MAF, PS Sensor:
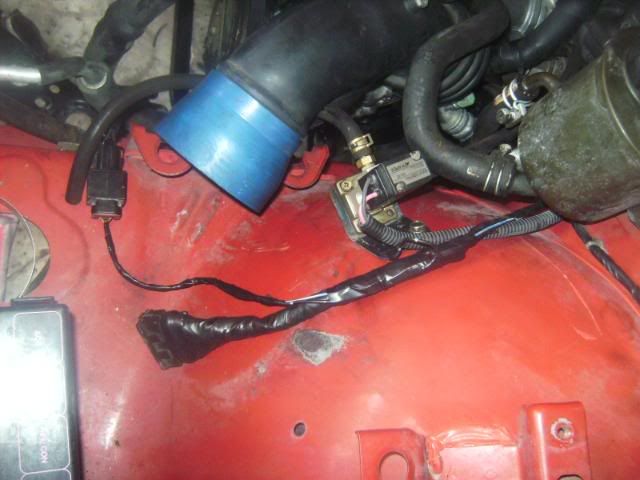
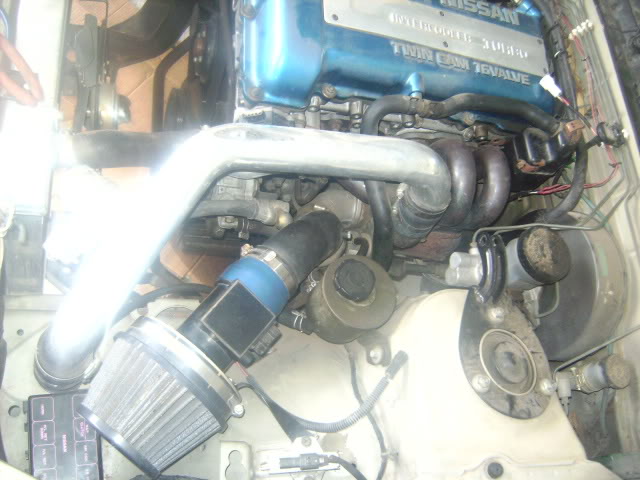
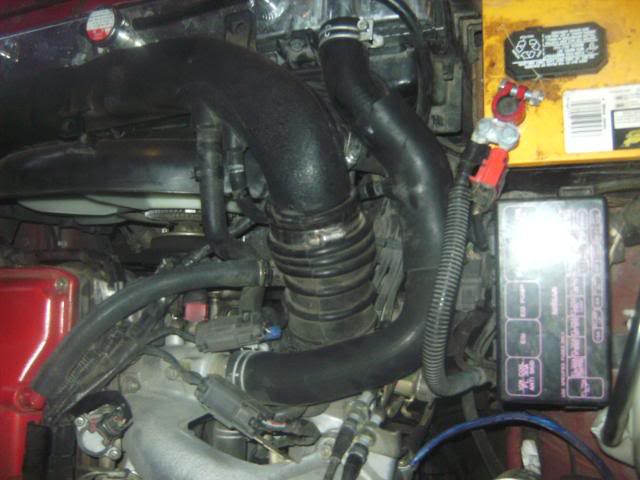
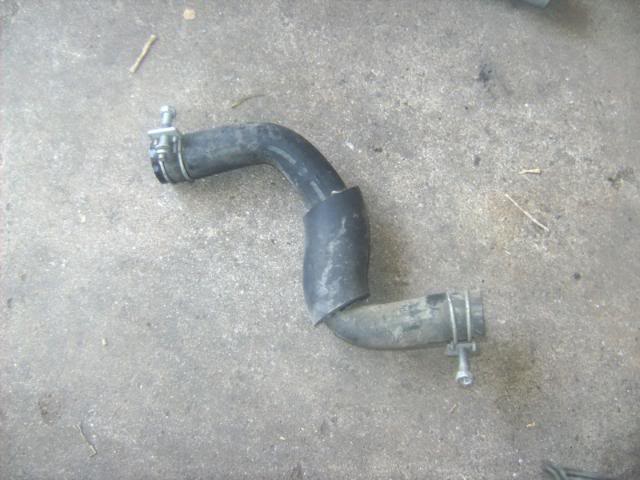
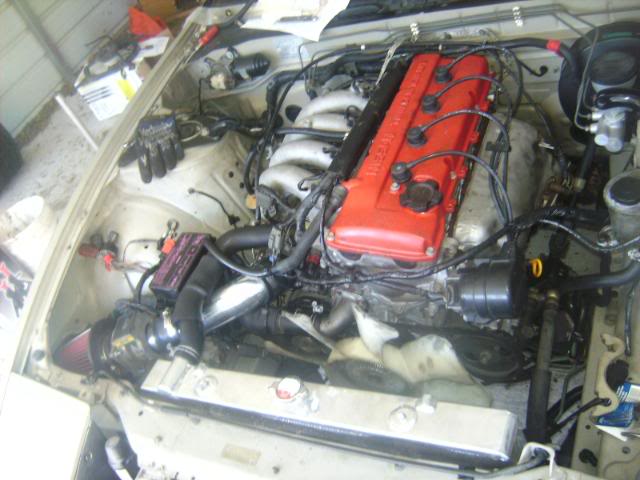
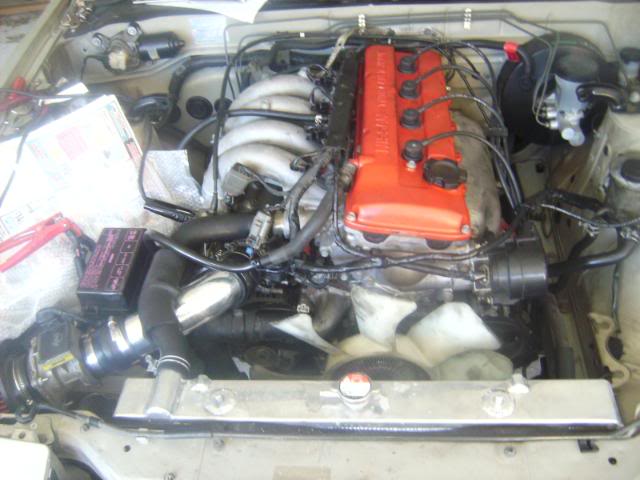
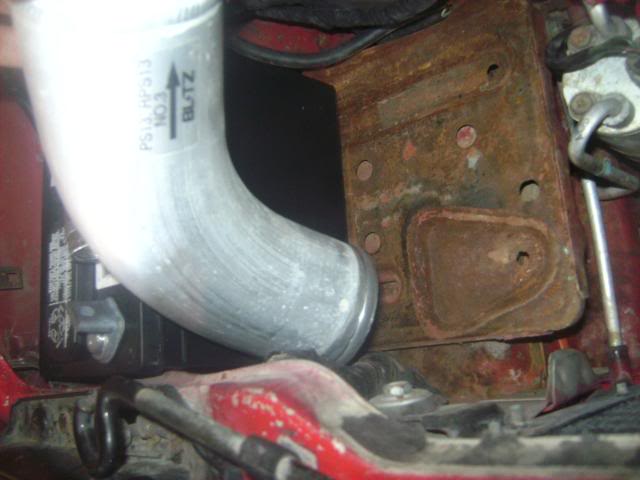
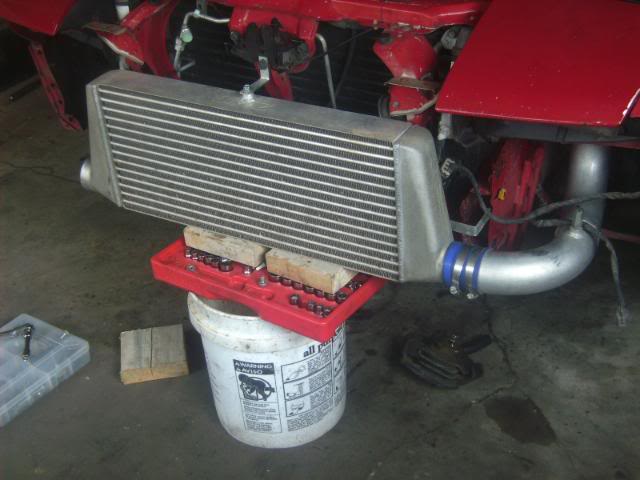
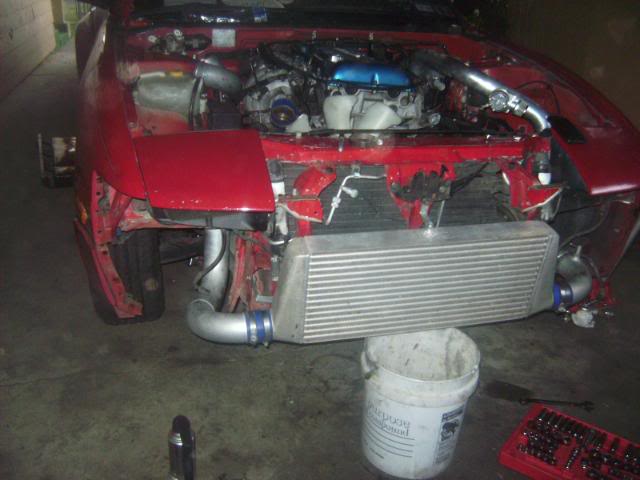
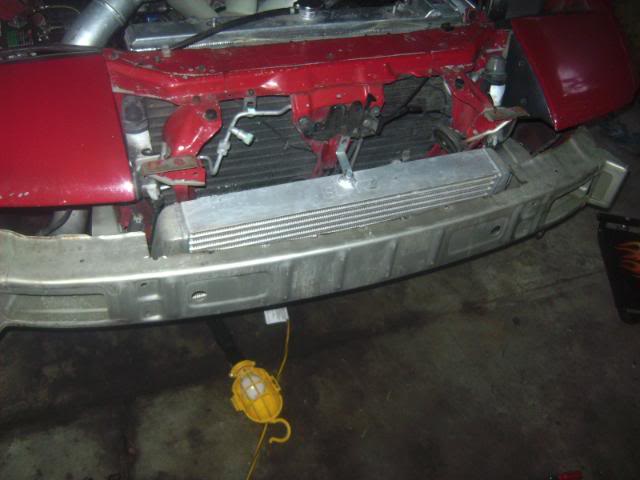
NOW the intercooler piping:


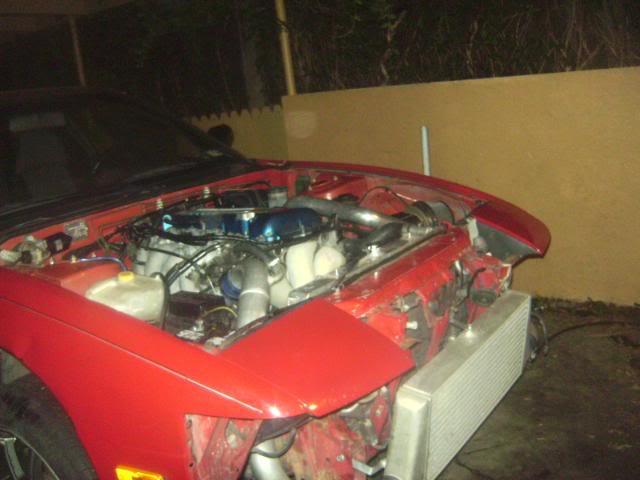
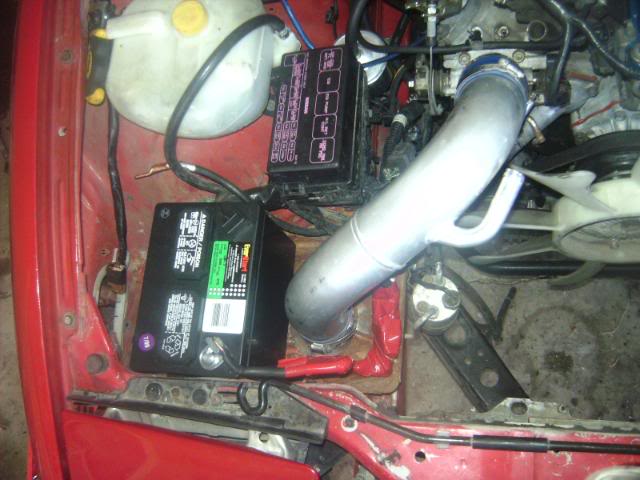
lawn mower battery:
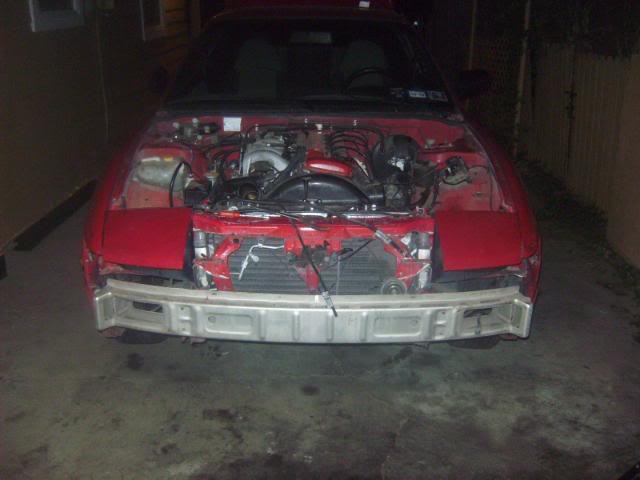
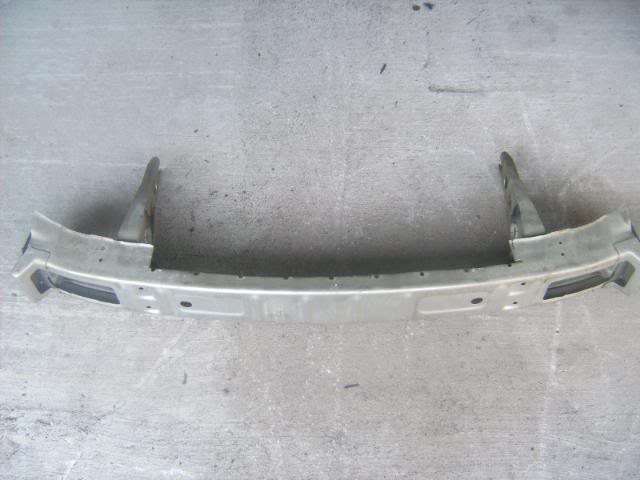
Bumper support:
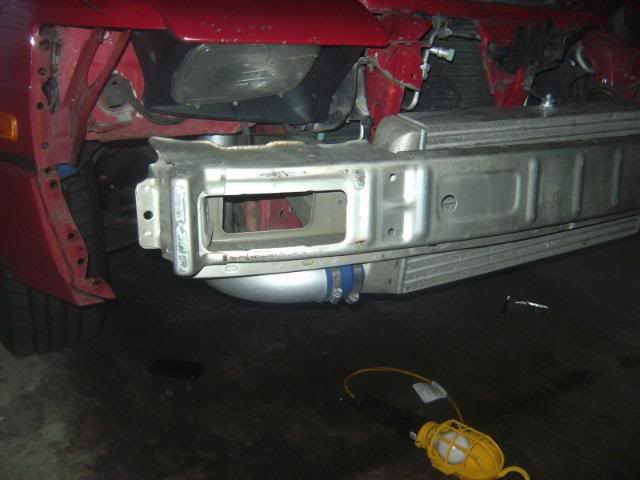
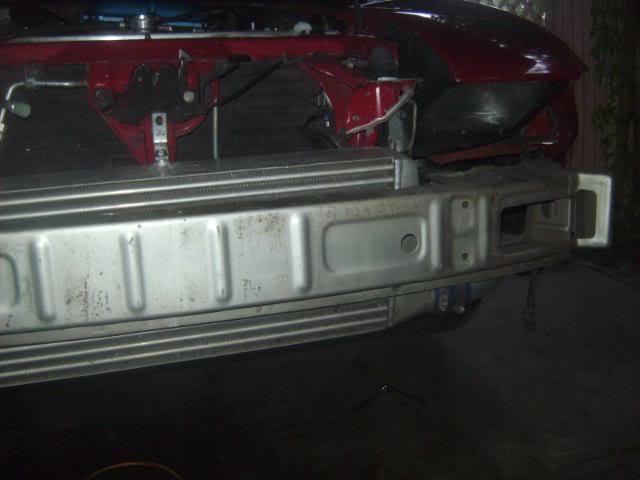
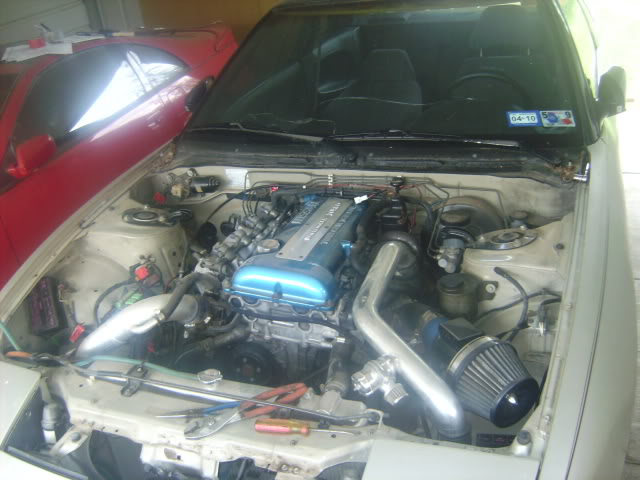
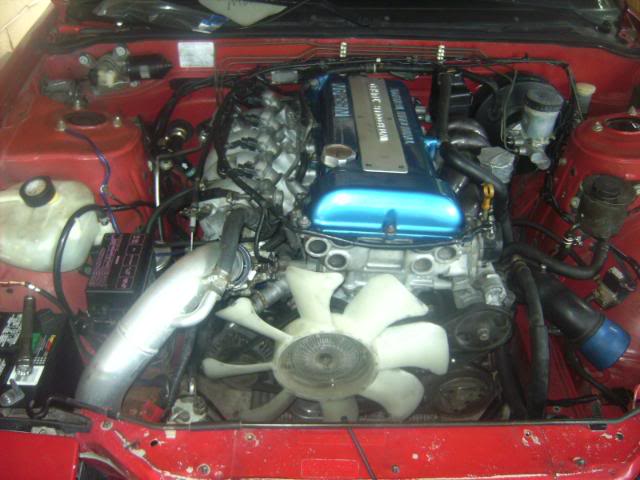
DONE:
clean version:
Then the motor went IN!
A/C Compressor bolted on, Just a little off line but the belt is on. I had to bend the little nipple to clear the intake elbow:
I had to put washers to space out the fan because the KA and SR are different. The KA would hit the Crank shaft pulley:
P/S:
Engine IN:
I spent one whole day checking the wiring harness, cutting the LOOP ! ! ! and adding the PS sensor:
Then I put it in the car:
Trying to get it situated:
From firewall to injectors, NO LOOP!
Igninter chip mounted and Boost controller thing:
o2 sensor, MAF, PS Sensor:
NOW the intercooler piping:
lawn mower battery:
Bumper support:
DONE:
Last edited by FuriousZ; Aug 10, 2009 at 01:32 PM.
