
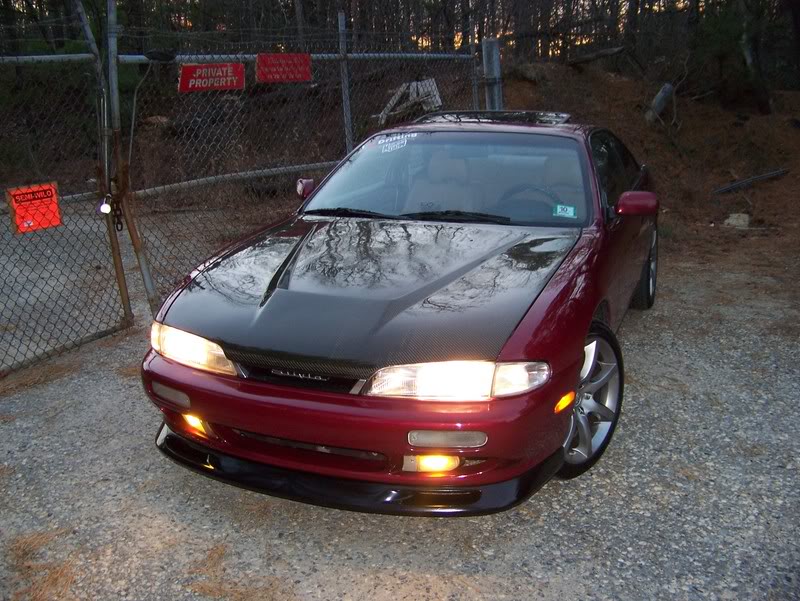
Bumper repair


Thread Starter
Registered User
Joined: Nov 2008
Posts: 49
From: Minnesota
Bumper repair
So, I posted this on Zilvia a while back and thought that it would fit nicely here. Let me know what you guys think.
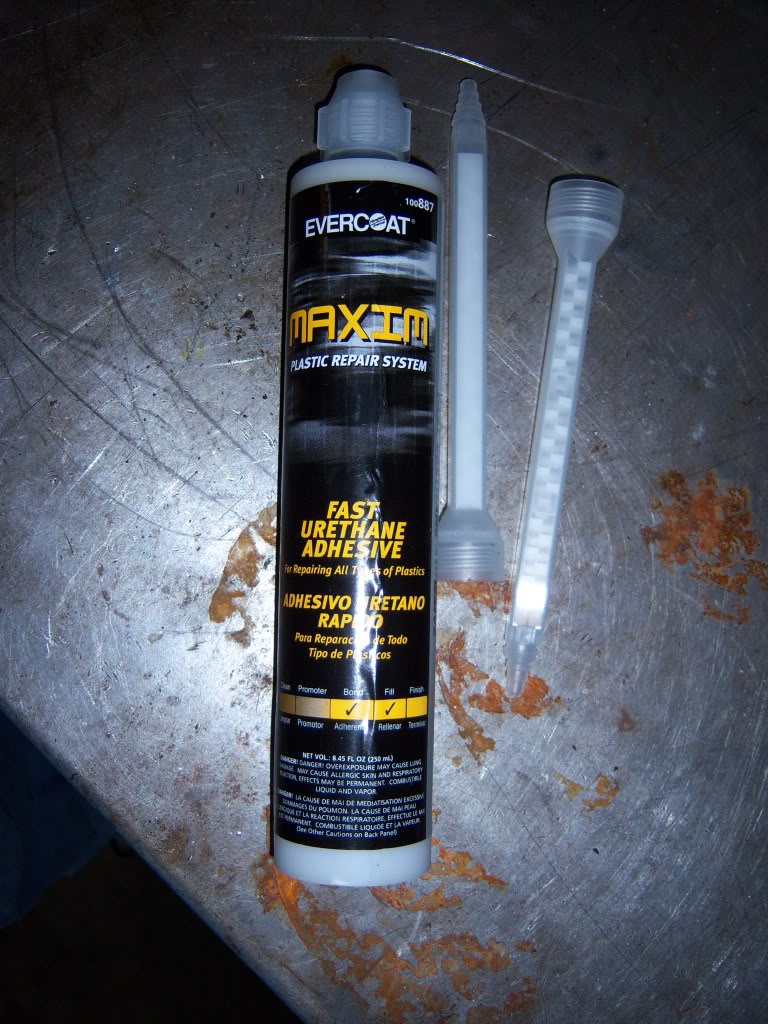
So I got my sweet ride with one major blemish. The front bumper has a big tear in it. Now, being its a sweet *** "aero" bumper, I had to get it fixed. Being the handy (and cheap) fella that I would like to think I am, I figured I'd try to repair it myself. First thing I did is stroll down to my local parts store/body shop supplier to get the skinny on what was used to do such a repair. Less than $80 later, I'm out the door. Here's what I ended up purchasing.
The patch panels are pretty much just sound deadening and in this case were pretty much useless. It took me an hour of trying to make that work to realize it.
So anyway on to the repair.
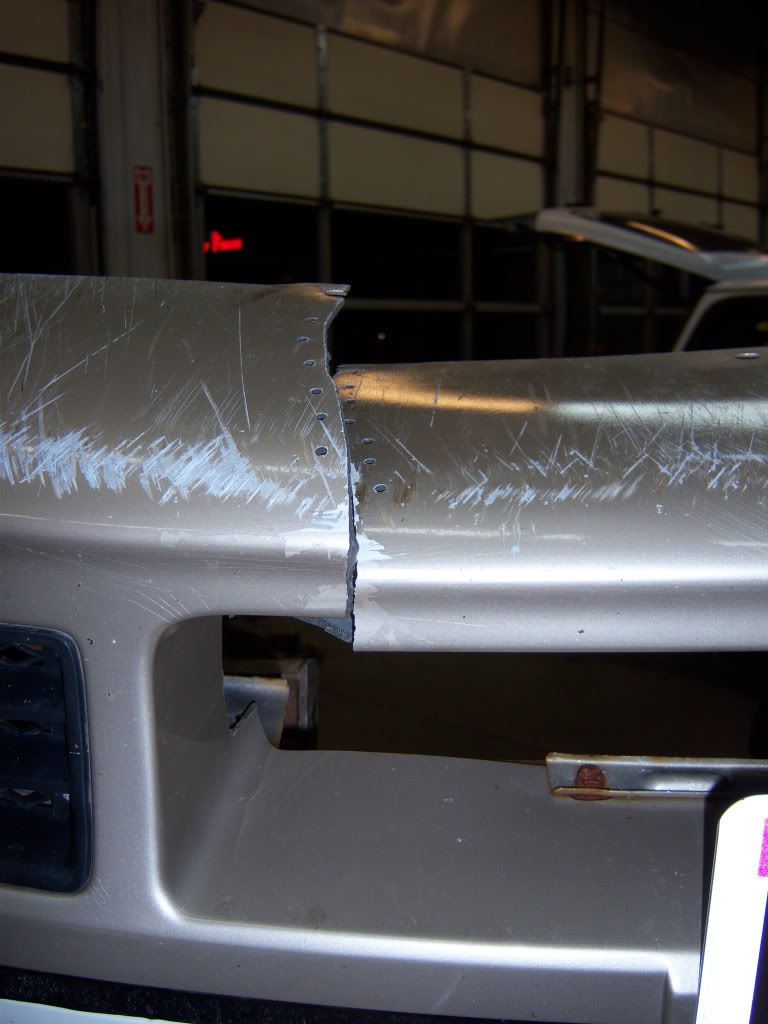
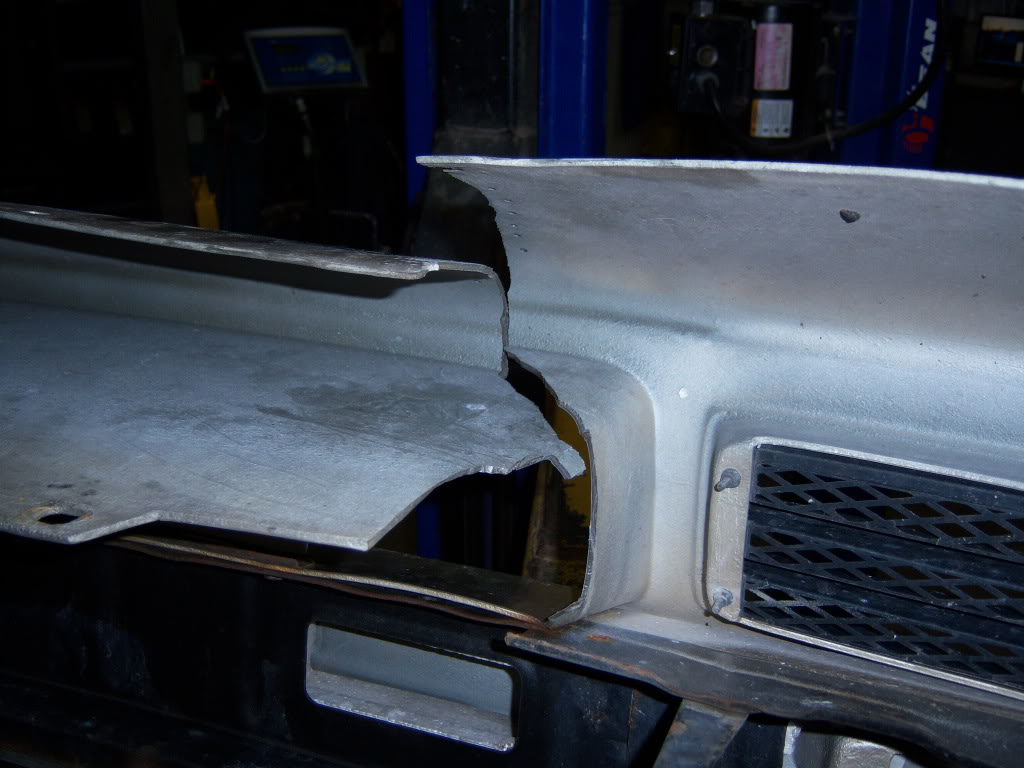
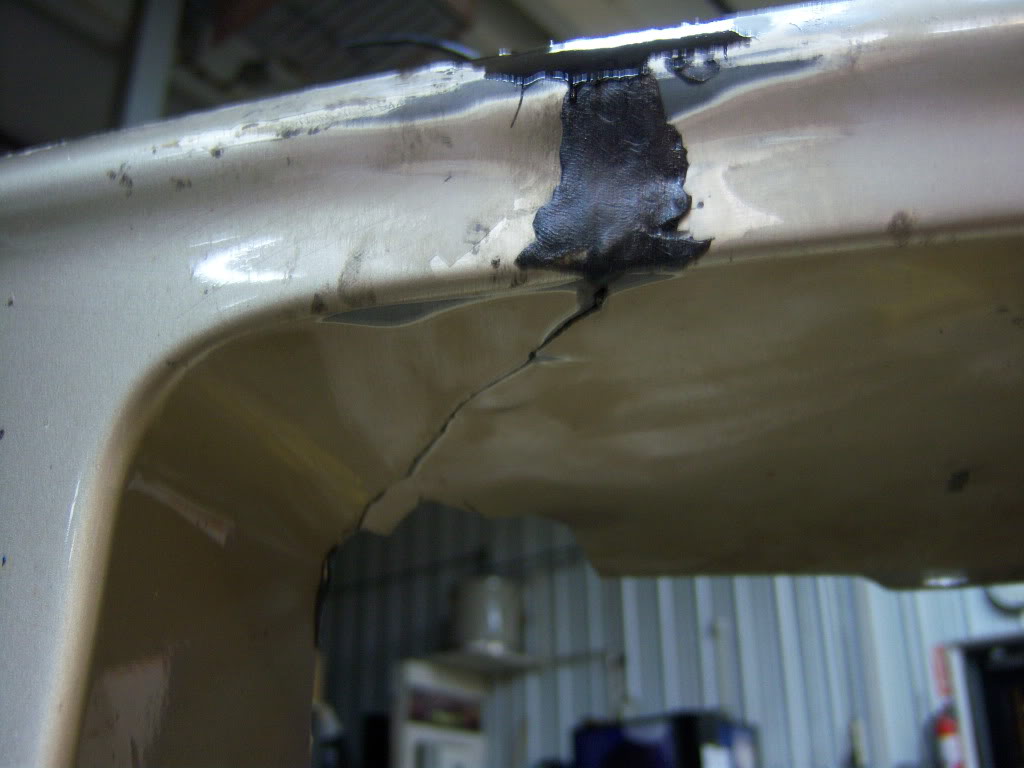
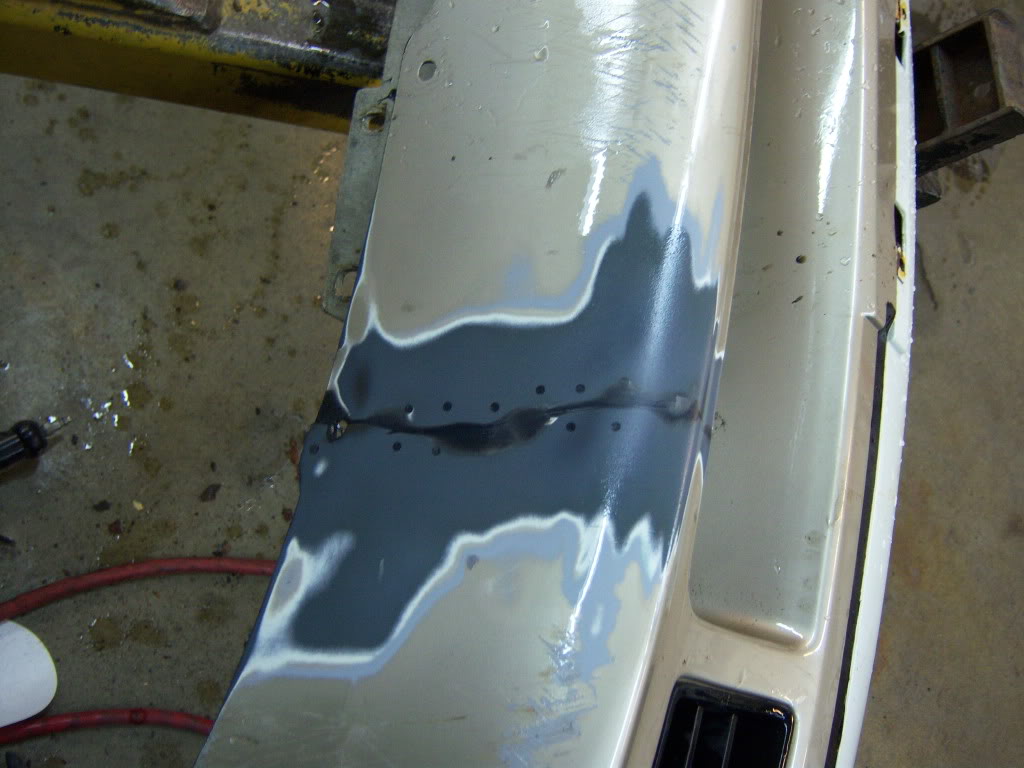
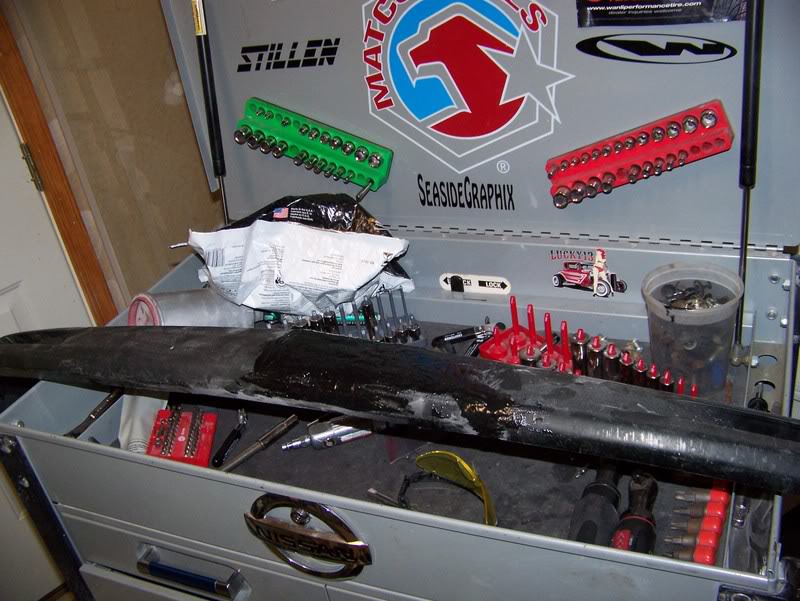
Here's what I started with.... N otice the nice lil frankenstien stich holes that the previous owner made to keep it intact. SWEET!!!
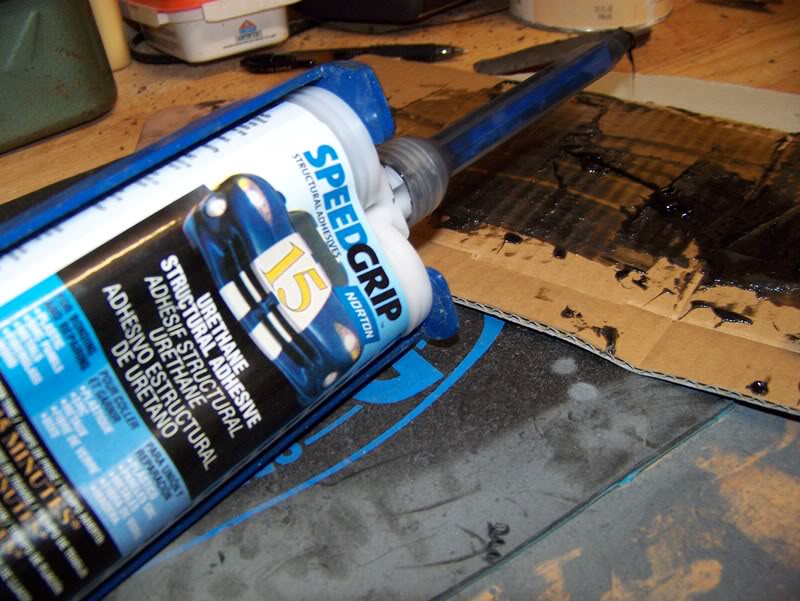
Here's the actual adhesive/filler in its un mixed form.
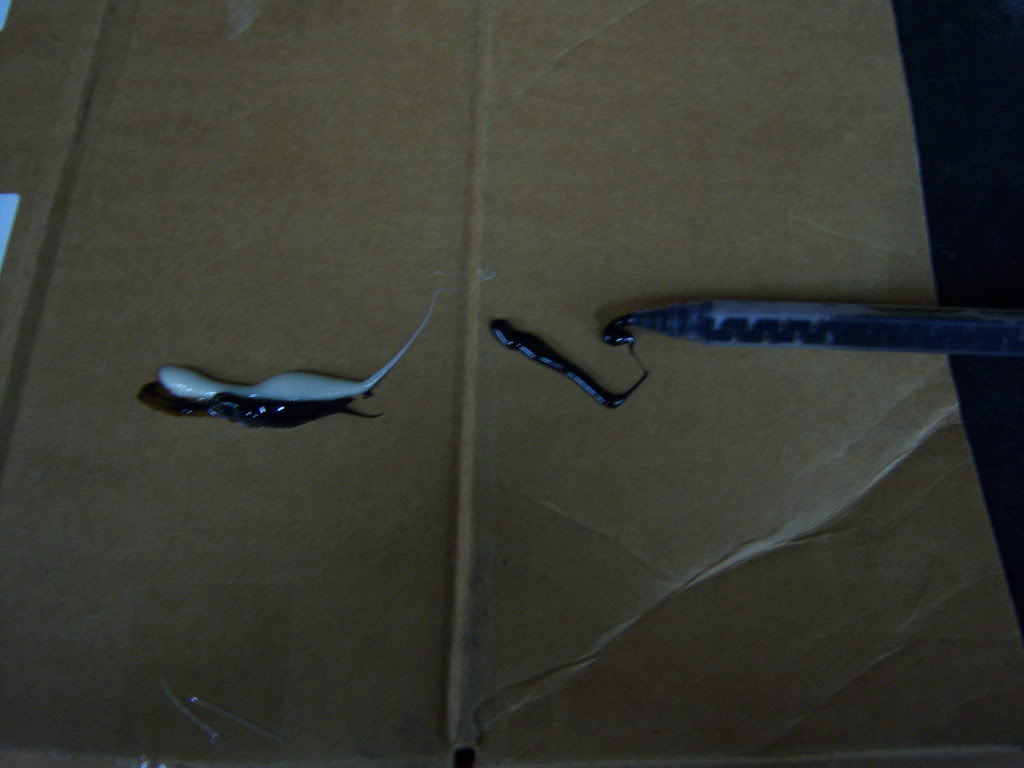
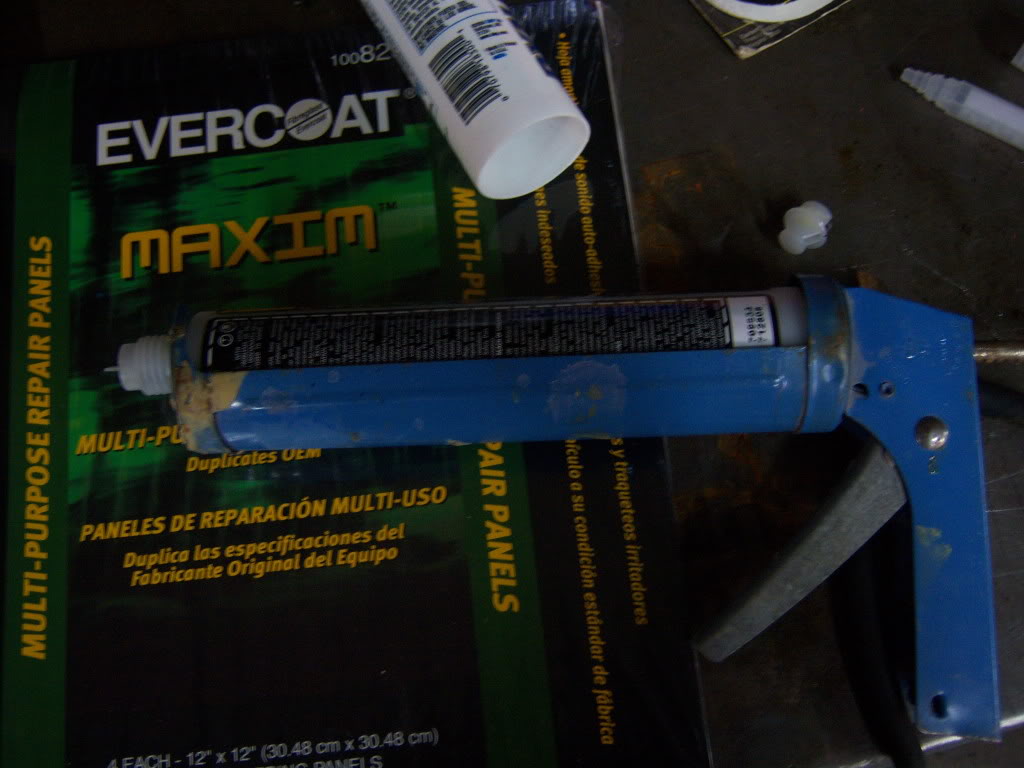
Remember this pic?
See that calking gun? Aint no way in hell thatll work for this stuff. Im a big guy and I struggled to even get it to come out. So, a different plan was in order. I had to take the tip off and squirt a little bit onto a pallet to mix the old fasioned way, with a putty spreader.
O.K. now the hardest part of this repair happens now. Remember the patch panels I posted a pic of earlier? They are supposed to give you some backing and hold the panel together so to speak while the adhesive sets up. Well, that too wasnt going to happen. So I ended up mixing a little bit up, putting it on the front most part of the bumper, and holding it for 15-20 minutes for it to set up solid so It would hold its shape.
This was hard because the bumper itself wanted to go every which way but where it was supposed to go.
Next, went to the lower portion of the bumper and applied some more adhesive to the outer part of the bumper. I only went about 2/3 the way back because again, it didnt want to stay flush. So, another 20 minutes gone holding it in place.
After that set up, I wanted to give it some structural integrity so I mixed up a good size glob of the stuff and went to the backside of what I just repaired and let the love flow so to speak.
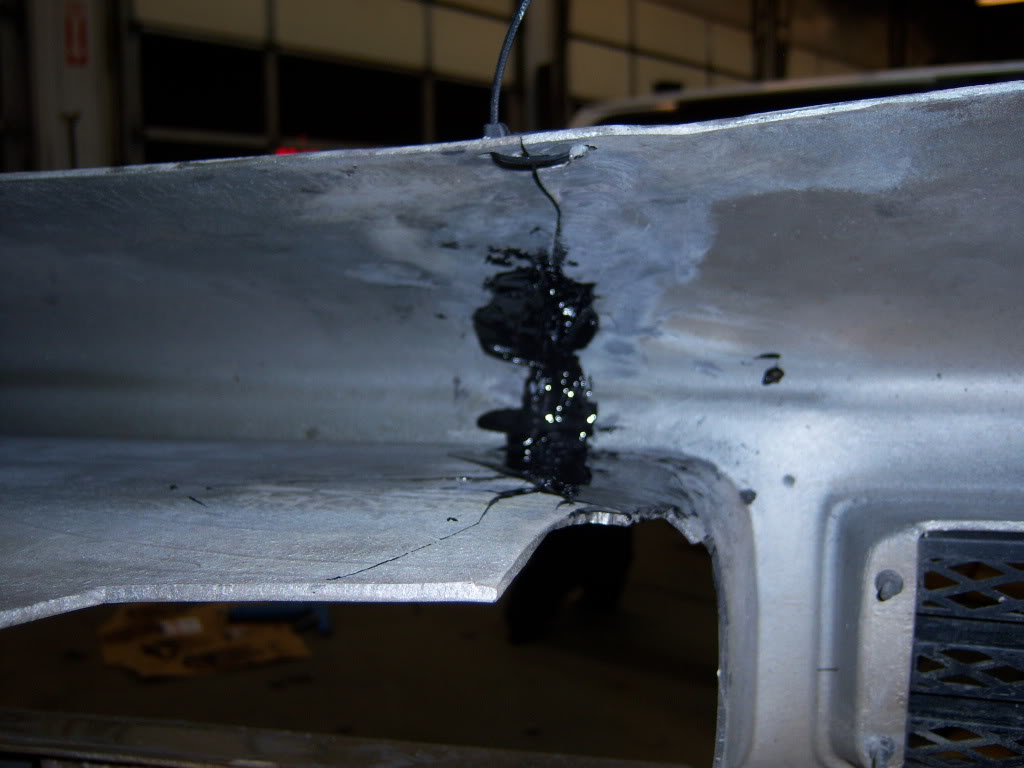
Note the zip tie i put back in the bumper. I had to do this while I was doing the job to keep the two pieces in somewhat close proximity to each other to make the bond.
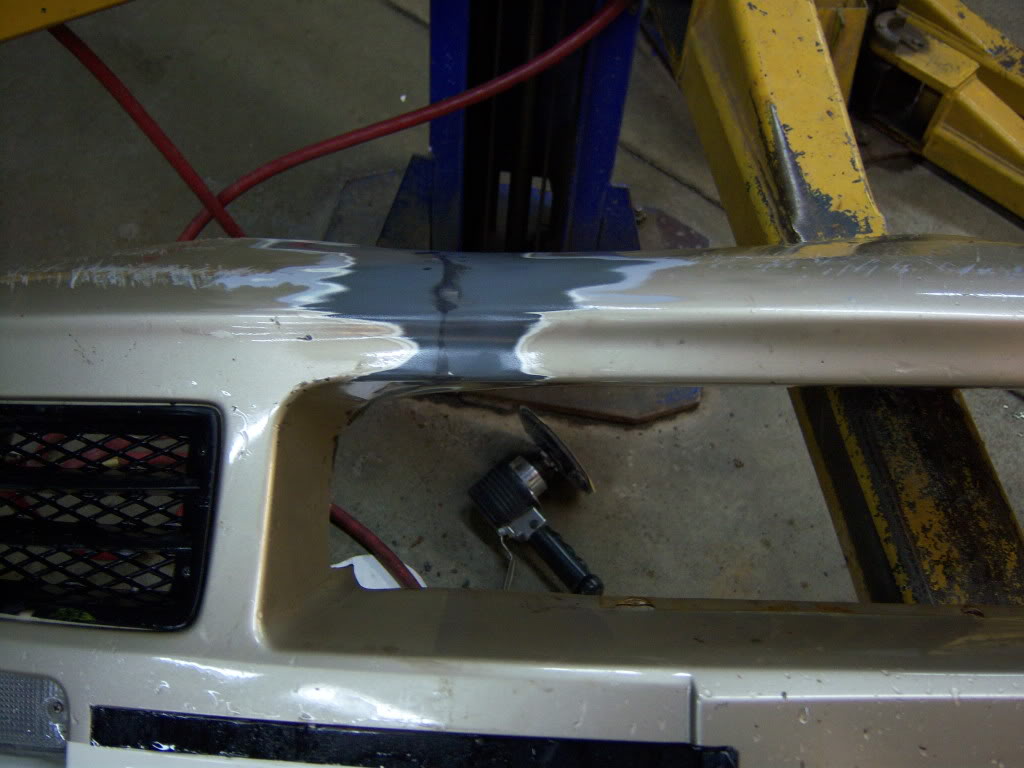
The rest of the filling consists of the same thing. I went to the rear most part of the lower section first and finished both outside and inside filling. then to the upper (opening) area to do the same.


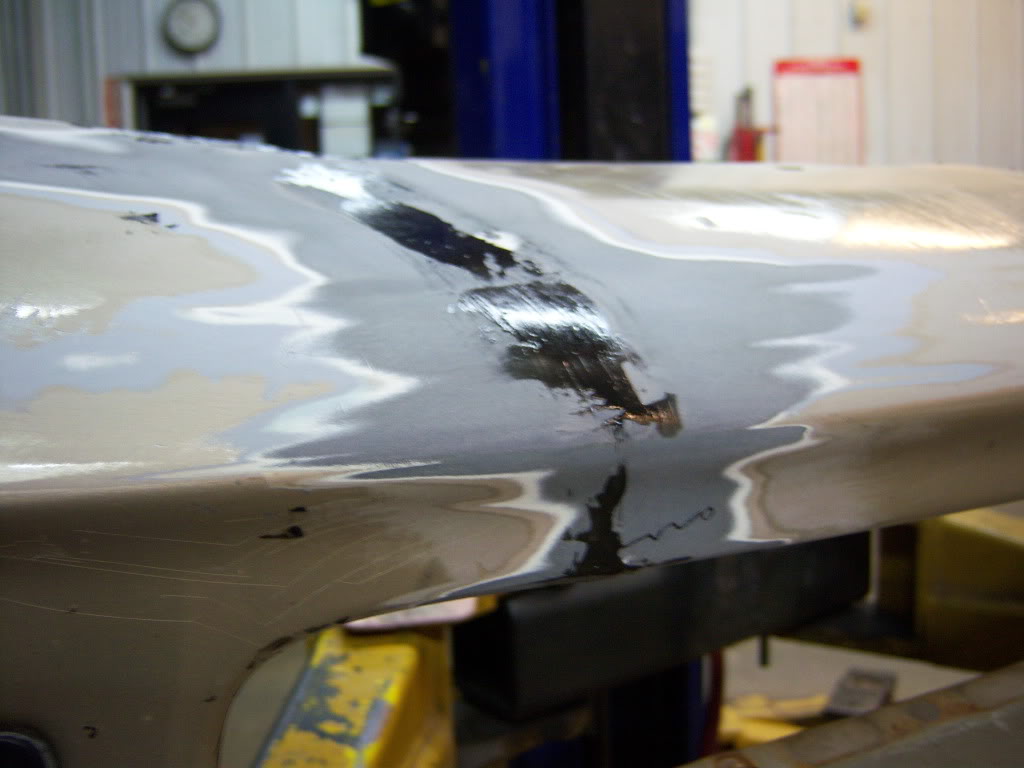
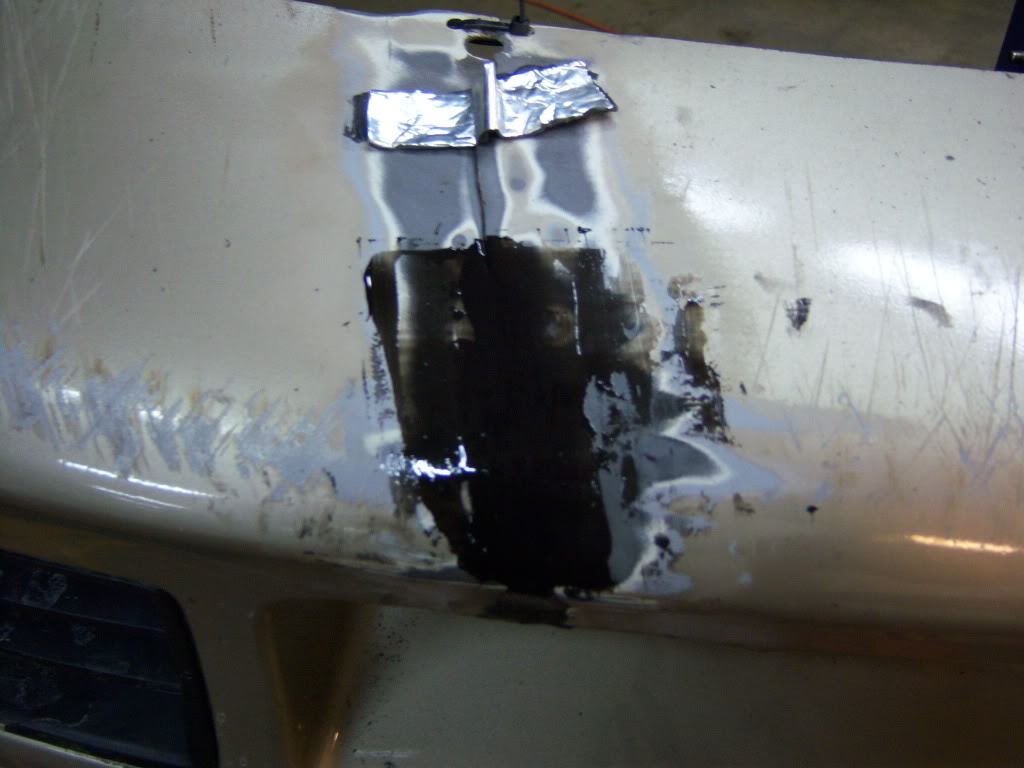
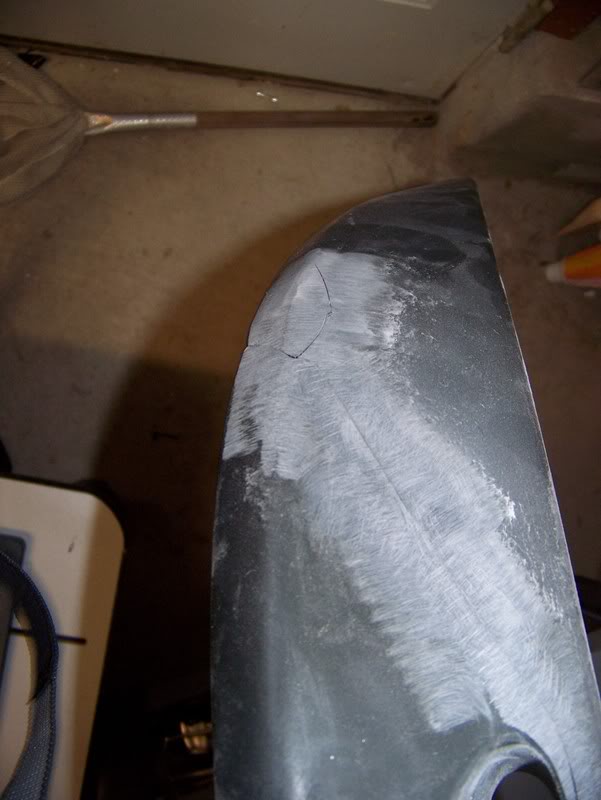
Here's what it looked like after my initial sanding with the da. Btw, all sanding on this was done with 180 grit sandpaper.
So then I added some more to fill in the imperfections and here's the semi finished result. Had to touch it up a lil more after this.
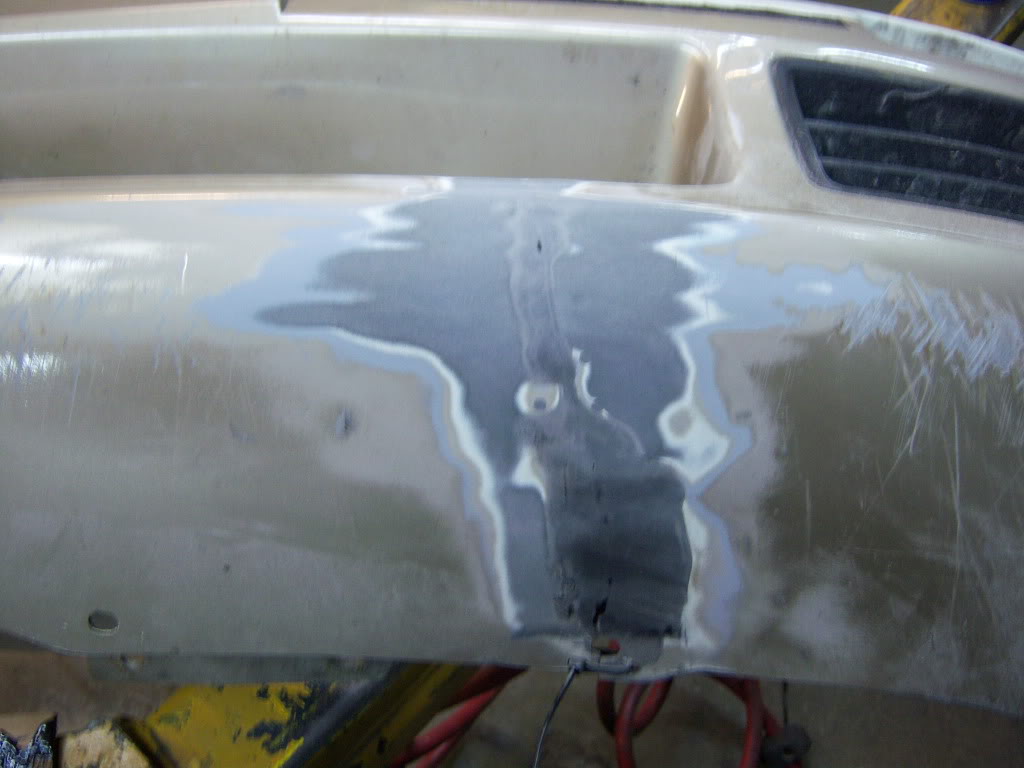
And here's a closeup ready for primer. Notice that you can still see the the actual rip area. It is only visible and unable to be felt so it should cover up fine.
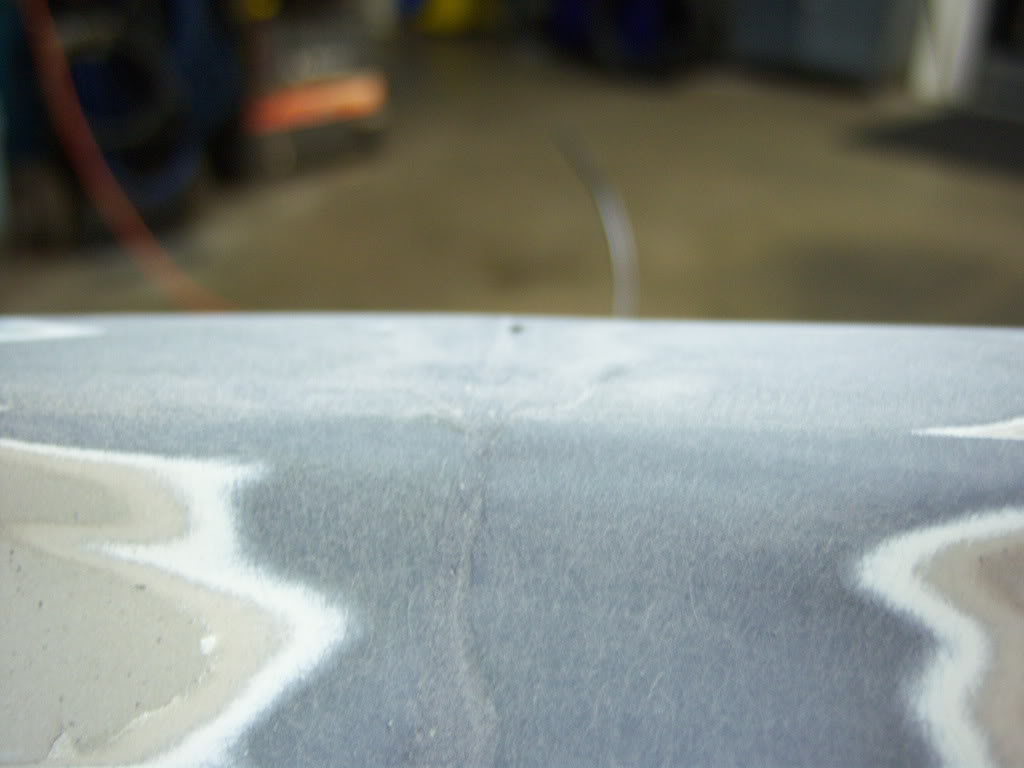
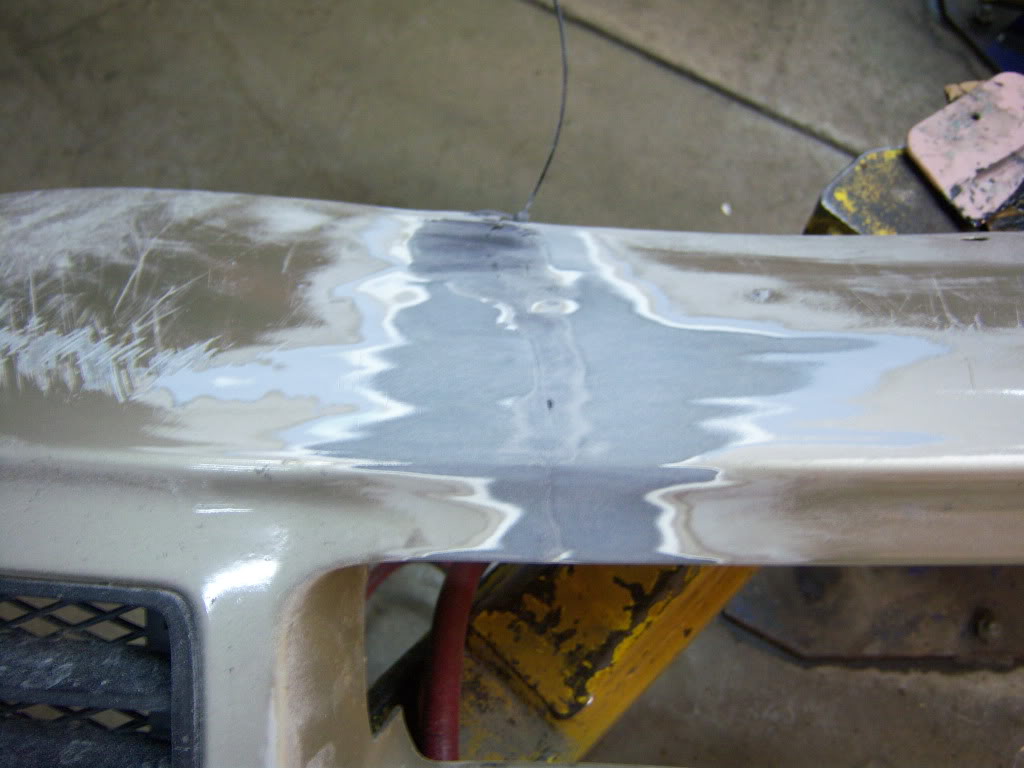
Here's some finished product pice taken right after I washed it off. I wanted to take pics of it wet to show the visible repair. It turned out great imho. Tomorrow it get some primer.
So I got my sweet ride with one major blemish. The front bumper has a big tear in it. Now, being its a sweet *** "aero" bumper, I had to get it fixed. Being the handy (and cheap) fella that I would like to think I am, I figured I'd try to repair it myself. First thing I did is stroll down to my local parts store/body shop supplier to get the skinny on what was used to do such a repair. Less than $80 later, I'm out the door. Here's what I ended up purchasing.
The patch panels are pretty much just sound deadening and in this case were pretty much useless. It took me an hour of trying to make that work to realize it.
So anyway on to the repair.
Here's what I started with.... N otice the nice lil frankenstien stich holes that the previous owner made to keep it intact. SWEET!!!
Here's the actual adhesive/filler in its un mixed form.
Remember this pic?
See that calking gun? Aint no way in hell thatll work for this stuff. Im a big guy and I struggled to even get it to come out. So, a different plan was in order. I had to take the tip off and squirt a little bit onto a pallet to mix the old fasioned way, with a putty spreader.
O.K. now the hardest part of this repair happens now. Remember the patch panels I posted a pic of earlier? They are supposed to give you some backing and hold the panel together so to speak while the adhesive sets up. Well, that too wasnt going to happen. So I ended up mixing a little bit up, putting it on the front most part of the bumper, and holding it for 15-20 minutes for it to set up solid so It would hold its shape.
This was hard because the bumper itself wanted to go every which way but where it was supposed to go.
Next, went to the lower portion of the bumper and applied some more adhesive to the outer part of the bumper. I only went about 2/3 the way back because again, it didnt want to stay flush. So, another 20 minutes gone holding it in place.
After that set up, I wanted to give it some structural integrity so I mixed up a good size glob of the stuff and went to the backside of what I just repaired and let the love flow so to speak.
Note the zip tie i put back in the bumper. I had to do this while I was doing the job to keep the two pieces in somewhat close proximity to each other to make the bond.
The rest of the filling consists of the same thing. I went to the rear most part of the lower section first and finished both outside and inside filling. then to the upper (opening) area to do the same.
Here's what it looked like after my initial sanding with the da. Btw, all sanding on this was done with 180 grit sandpaper.
So then I added some more to fill in the imperfections and here's the semi finished result. Had to touch it up a lil more after this.
And here's a closeup ready for primer. Notice that you can still see the the actual rip area. It is only visible and unable to be felt so it should cover up fine.
Here's some finished product pice taken right after I washed it off. I wanted to take pics of it wet to show the visible repair. It turned out great imho. Tomorrow it get some primer.
nice job that glue is great right? i fixed my greddy lip which was in three pieces a little while back. i used a similar urethane like the one you used and its one tough glue. rock hard when it dries.
i cut up my old bumper to fill in the gaps and glued it behind the lip and filled in the big gaping holes with the urethane
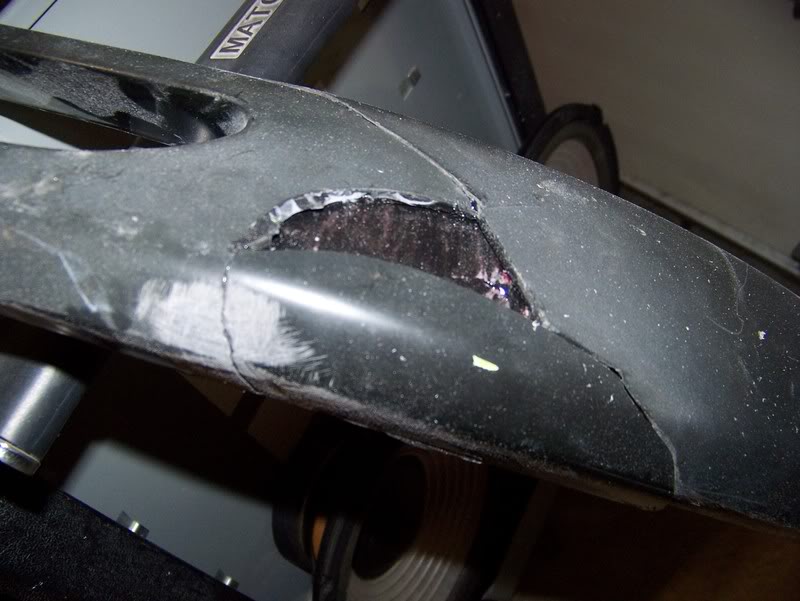
painted it straight black and heres how it looks
i cut up my old bumper to fill in the gaps and glued it behind the lip and filled in the big gaping holes with the urethane
painted it straight black and heres how it looks


Thread
Thread Starter
Forum
Replies
Last Post
180sxdrifter
For Sale - Wanting To Buy (WTB) Or Trade (WTT)
1
Apr 9, 2003 12:02 PM
StanBo
General
3
Jun 11, 2002 12:19 PM