
S13 Nismo Power Brace Install

Thread Starter
Contributing Member
Joined: Sep 2002
Posts: 1,192
From: Starkville, MS.
S13 Nismo Power Brace Install
This is from my Nismo Power Brace Install, here's the pictures.
Tools needed:
Socket wrench
17mm socket
15mm socket
17mm wrench
10mm wrench
Breaker bar
Torque wrench
Small hammer
Jack
Jackstands

I got a Nismo Powerbrace off ebay for $130 shipped. It was used, had a stain on the right side but otherwise in great condition. Start off by jacking up the car and placing jackstands in the appropriate places.
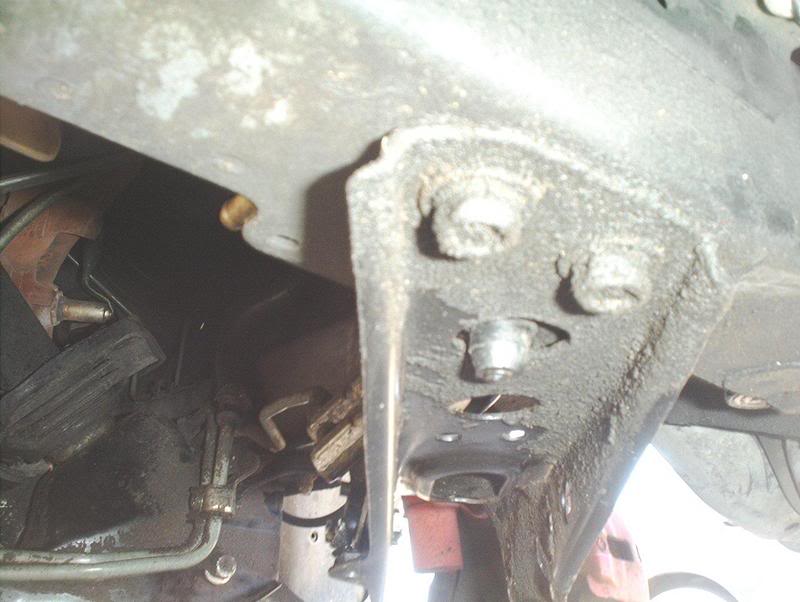
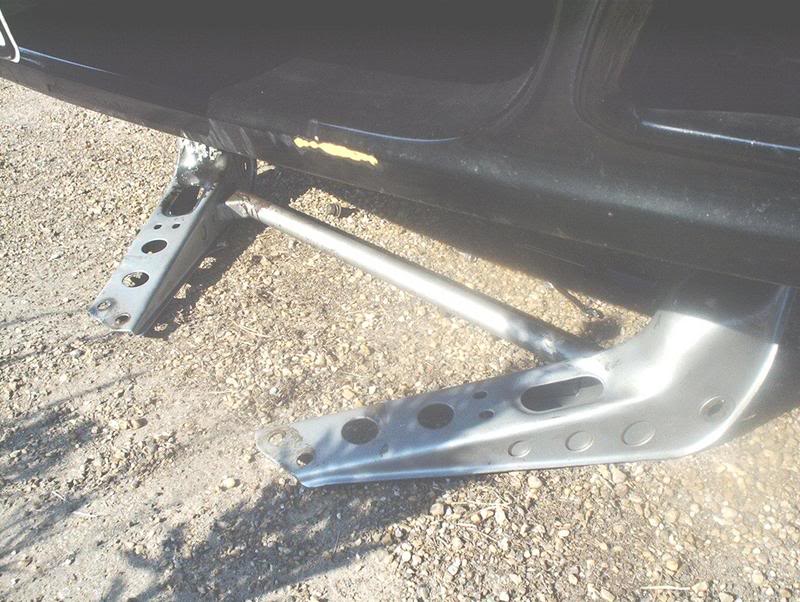
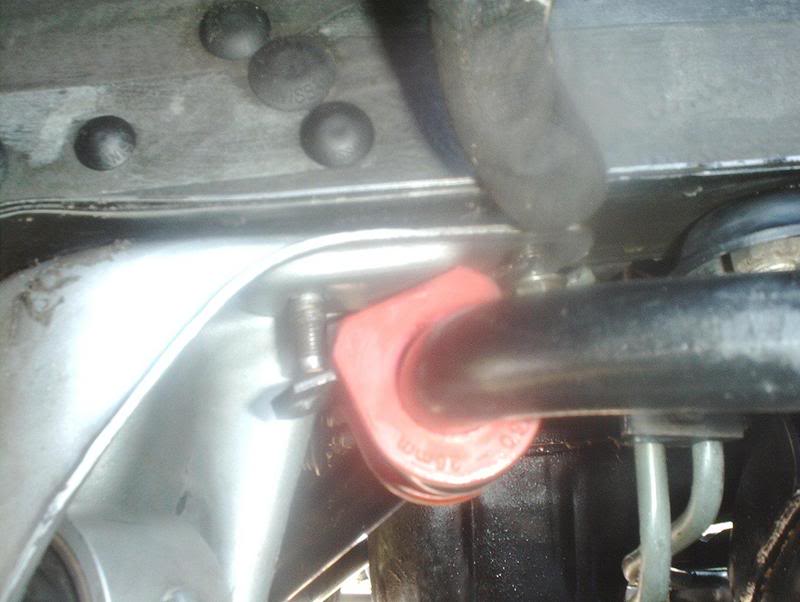
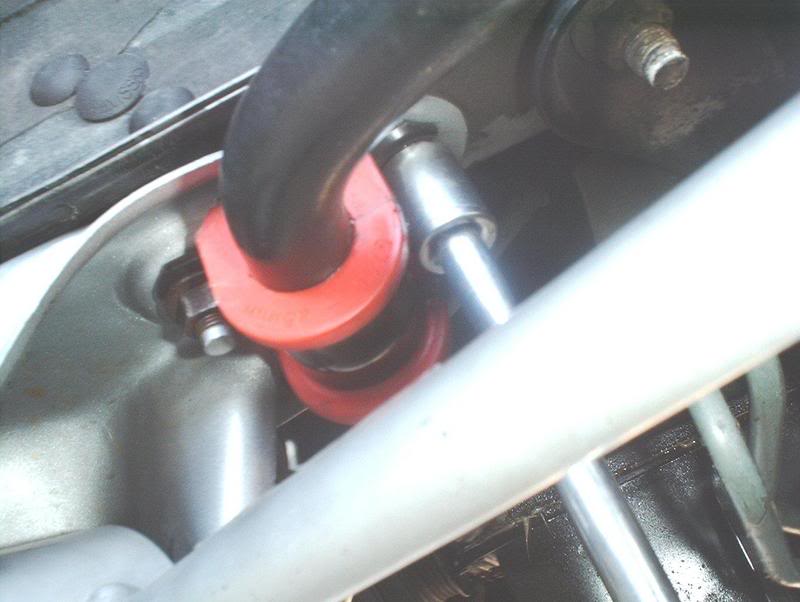
Stock tension control rod bracket.
You need the 15mm socket to remove the stock tension control rod brackets. There are 4 bolts on the front of the stock tension control rod brackets that need to come off. If you have powersteering, use a 10mm wrench to remove the powersteering pressure hose bracket from the stock tension control rod bracket.
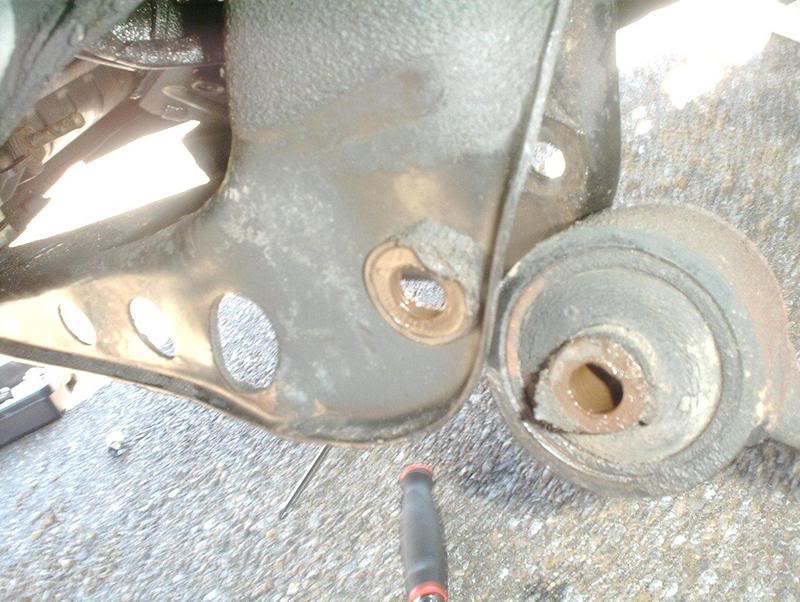
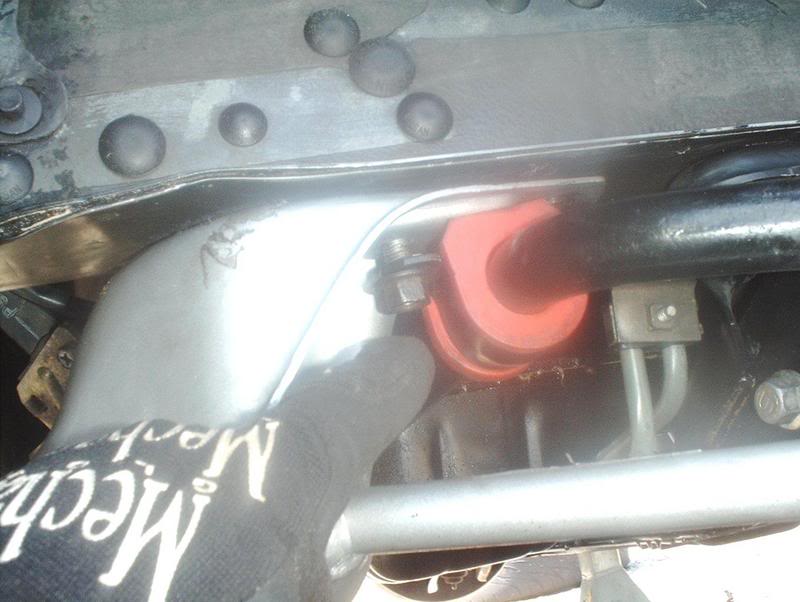
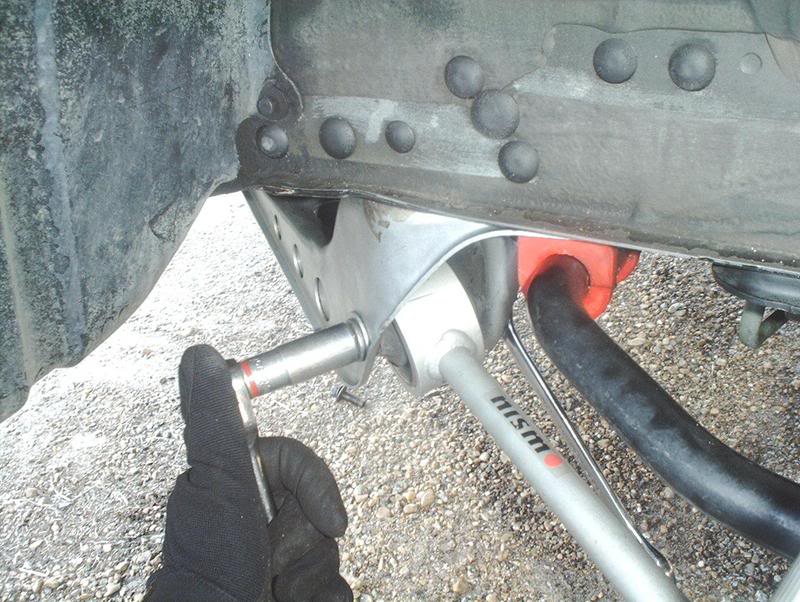
Next you need the 17mm socket and a 17mm wrench to remove the stock tension control rod bolt from the bracket. Use the wrench to keep the tension control rod nut from spinning while you remove the bolt.
Use the 17mm socket again to remove the swaybar d-brackets from the tension control rod bracket then you can pull the bracket off the car. Repeat for the other side to remove the other tension control rod bracket.
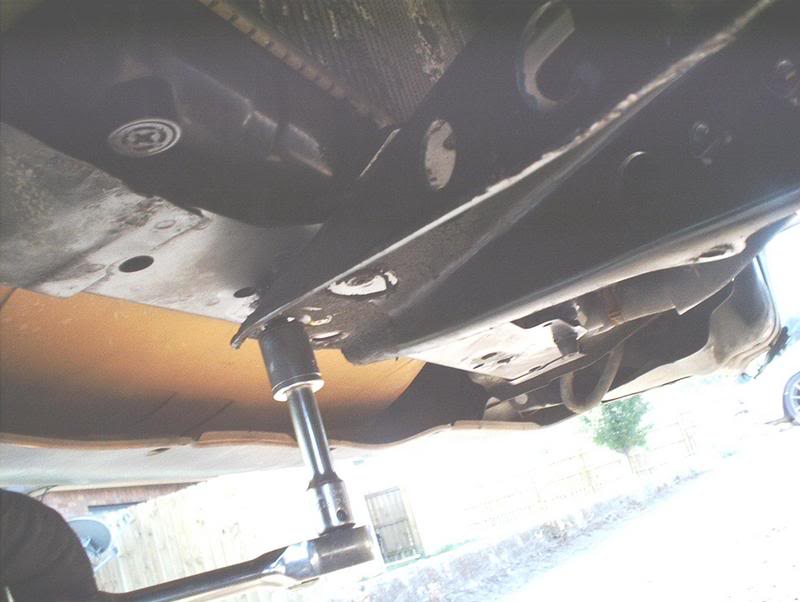
Now take the powerbrace and place it under the car. From this point forward, many people install the powerbrace many different ways but this is how I did it.
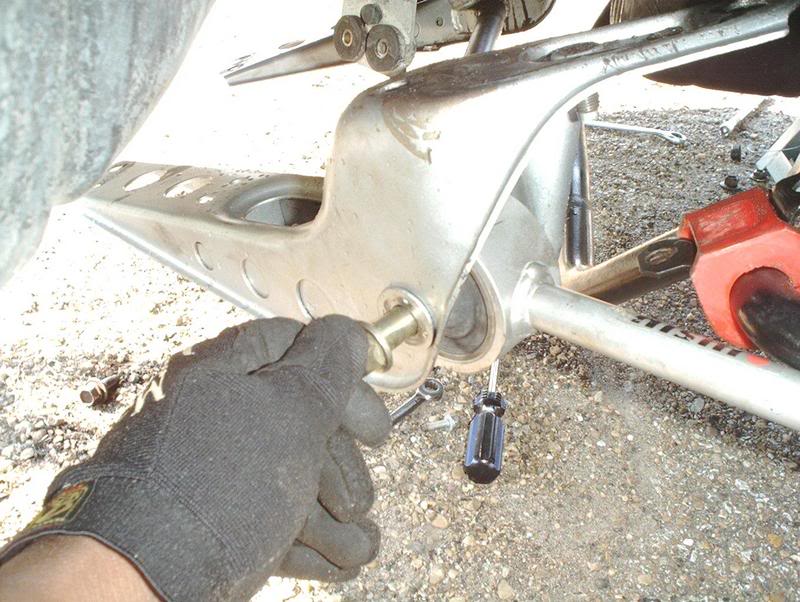
Insert the T/C rod bolt, this will hold the brace in place.
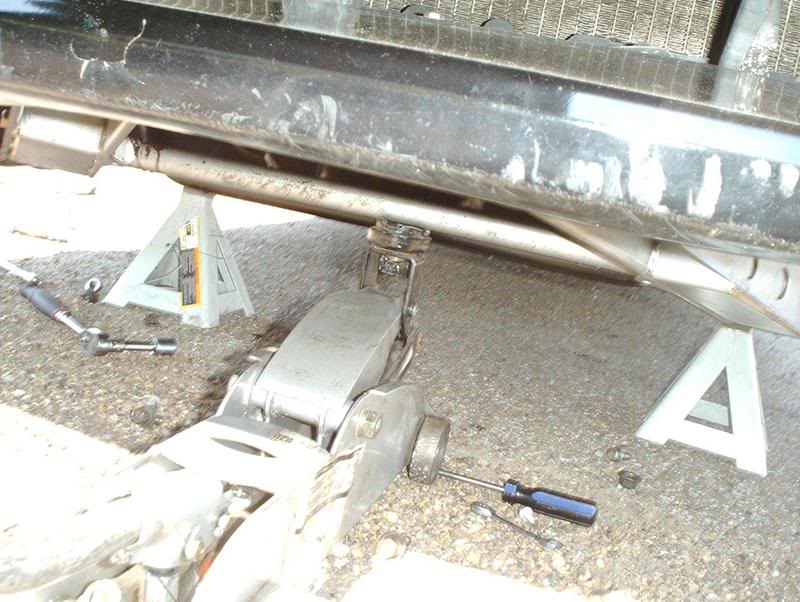
Then I used the jack to lift the brace up to the chassis so I would have my hands free to move it around if neccessary.
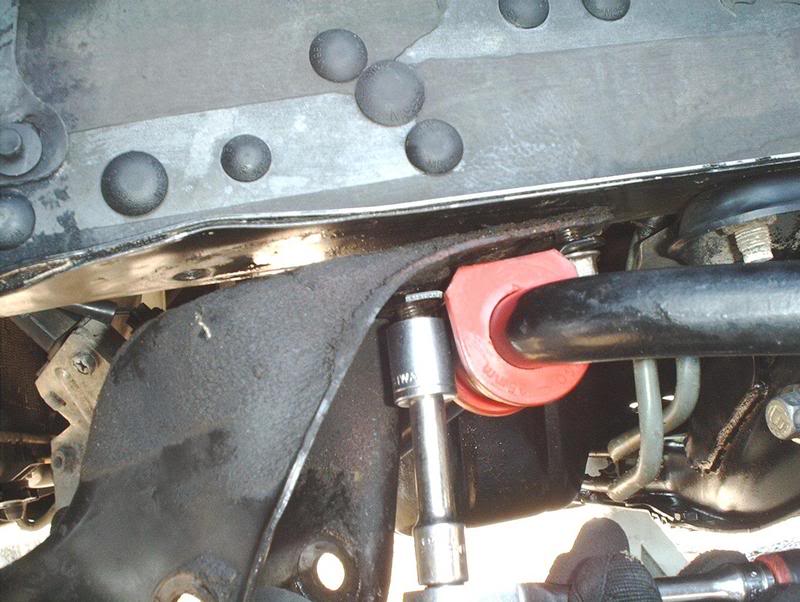
Go ahead and place this swaybar d-bracket bolt in but do not tighten it. Just get it threaded enough to hold the powerbrace. After that you can jack the powerbrace up as close to the chassis as you can get it.
Grab the swaybar d-bracket and swing it onto the first d-bracket bolt, one side of the d-bracket is open ended so you can swing it into place...
and put the second swaybar d-bracket bolt into place but do not tighten.
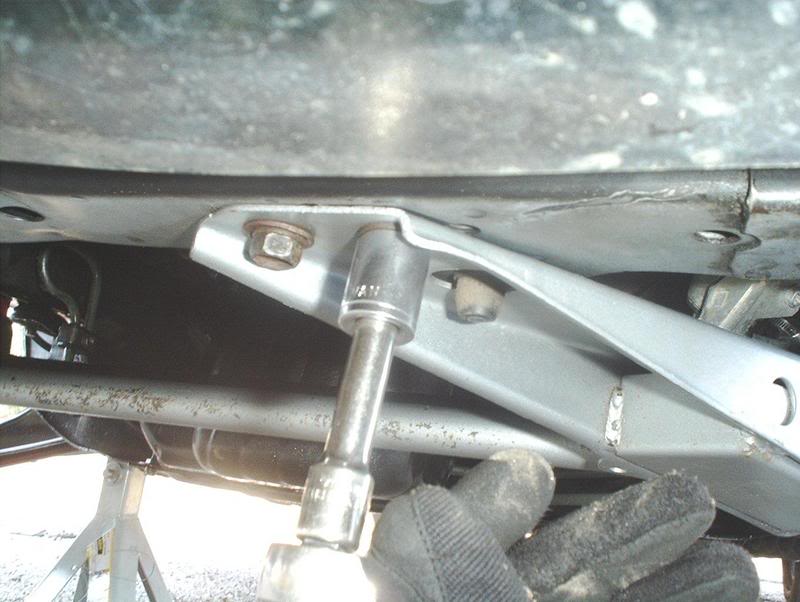
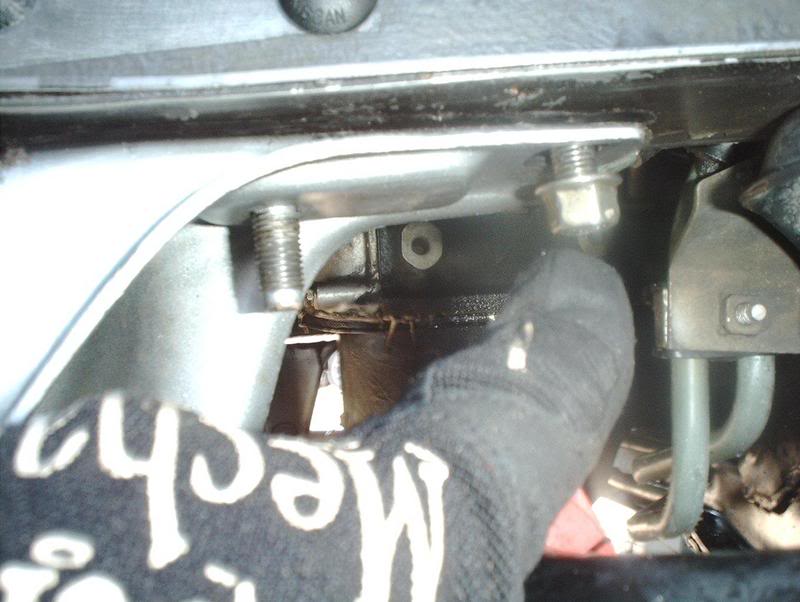
Insert the four bolts into the front of the powerbrace. You may have to manuever the front of the powerbrace a little to line it up with the four mounting points. Torque these four bolts to 80-94ft.lbs.
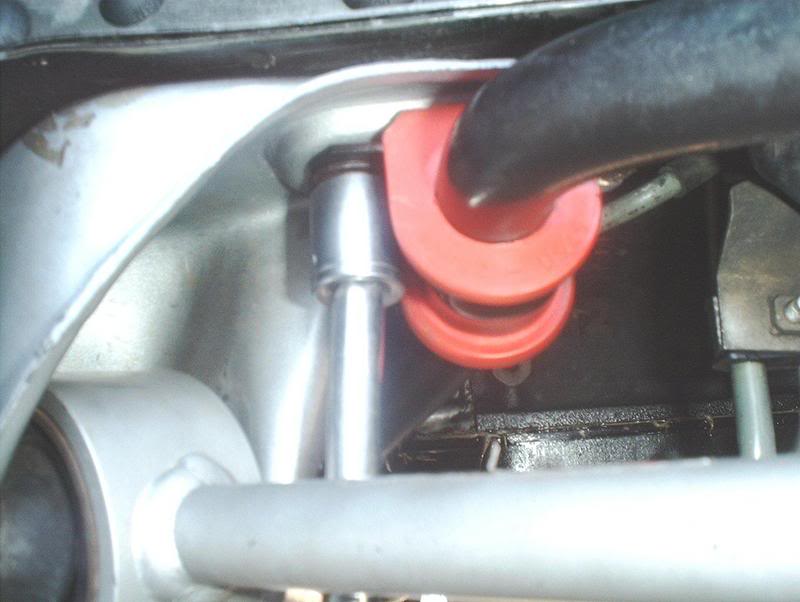
Now you can tighten the swaybar d-bracket bolts...
and torque to 29-36ft.lbs.
Tighten and torque the T/C rod bolts to 80-94ft.lbs.
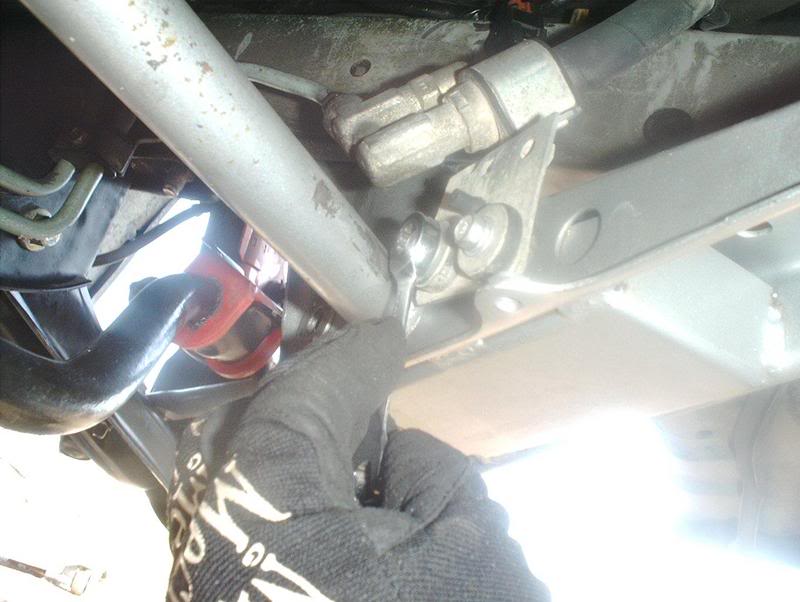
If you have powersteering don't forget about bolting the powersteering pressure hose bracket to the powerbrace. Use a 10mm wrench for two bolts.
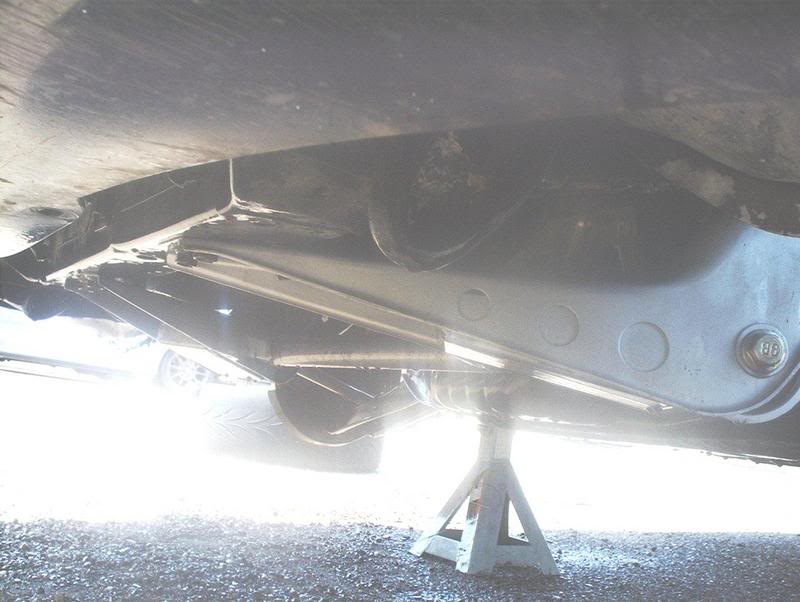
Finished! Put your wheels back on, lower the car and go for a drive!
Tools needed:
Socket wrench
17mm socket
15mm socket
17mm wrench
10mm wrench
Breaker bar
Torque wrench
Small hammer
Jack
Jackstands
I got a Nismo Powerbrace off ebay for $130 shipped. It was used, had a stain on the right side but otherwise in great condition. Start off by jacking up the car and placing jackstands in the appropriate places.
Stock tension control rod bracket.
You need the 15mm socket to remove the stock tension control rod brackets. There are 4 bolts on the front of the stock tension control rod brackets that need to come off. If you have powersteering, use a 10mm wrench to remove the powersteering pressure hose bracket from the stock tension control rod bracket.
Next you need the 17mm socket and a 17mm wrench to remove the stock tension control rod bolt from the bracket. Use the wrench to keep the tension control rod nut from spinning while you remove the bolt.
Use the 17mm socket again to remove the swaybar d-brackets from the tension control rod bracket then you can pull the bracket off the car. Repeat for the other side to remove the other tension control rod bracket.
Now take the powerbrace and place it under the car. From this point forward, many people install the powerbrace many different ways but this is how I did it.
Insert the T/C rod bolt, this will hold the brace in place.
Then I used the jack to lift the brace up to the chassis so I would have my hands free to move it around if neccessary.
Go ahead and place this swaybar d-bracket bolt in but do not tighten it. Just get it threaded enough to hold the powerbrace. After that you can jack the powerbrace up as close to the chassis as you can get it.
Grab the swaybar d-bracket and swing it onto the first d-bracket bolt, one side of the d-bracket is open ended so you can swing it into place...
and put the second swaybar d-bracket bolt into place but do not tighten.
Insert the four bolts into the front of the powerbrace. You may have to manuever the front of the powerbrace a little to line it up with the four mounting points. Torque these four bolts to 80-94ft.lbs.
Now you can tighten the swaybar d-bracket bolts...
and torque to 29-36ft.lbs.
Tighten and torque the T/C rod bolts to 80-94ft.lbs.
If you have powersteering don't forget about bolting the powersteering pressure hose bracket to the powerbrace. Use a 10mm wrench for two bolts.
Finished! Put your wheels back on, lower the car and go for a drive!
Last edited by positron; Jun 23, 2007 at 12:03 PM.

Thread Starter
Contributing Member
Joined: Sep 2002
Posts: 1,192
From: Starkville, MS.
At the time, I had stock worn out suspension with the exception of new struts and springs. I put tension control arms and this brace on at the same time so it made a tremendous change in the feel of my front suspension. It felt much stiffer and tighter on turns.

Thread
Thread Starter
Forum
Replies
Last Post
Champster
Private For Sale / Wanted
4
Oct 11, 2006 10:20 AM
middlerth
Service, Parts & Tuning Review
7
Oct 29, 2004 01:35 PM