
Operation Delete 240 insert 180!


Contributing Member
Joined: Feb 2005
Posts: 2,586
From: 神奈川県,日本
take off the turbo and the lock washers...dont even waste ur time on licktite because its gona turn into dust on your first drive..
let me tell u ive personally had to take off my manifold and turbo 3 times due to using those materials and its not fun...
what ive done that has held up so far (about 6 months, which is a lot longer than any of the other times) is put 2 nuts on the bottom and once the top one is cranked down as hard as my wrench could possibly twist it i put another nut on and then cranked that one down against the other one, then put a wrench on the top and bottom nut and twisted them against each other (basically hold the top one still while tightening the bottom as much as possib.le.)
i also got some small spot welds on the top of the stud where it sticks oout, mine kept wanting to twist and back itself out, this has prevented it...
another way would be to drill small holes and use cotter pins to stop it from coming apart
just trying to save you a massive headache, because as you guessed..its not fun doing it while its in the car..
Contributing Member
Joined: May 2005
Posts: 3,096
From: San Jose, CA
have you looked at the project nissan and kazama motor mounts? they are wayy stiffer than nismos and the project nissan ones, which are the same design as the kazamas, are going for like $100.
http://projectnissan.com/shopping/pc...idproduct=4289
good luck on the project man, i too am planning on going CA...or KAE...still debating ahhh....
http://projectnissan.com/shopping/pc...idproduct=4289
good luck on the project man, i too am planning on going CA...or KAE...still debating ahhh....
Thread Starter
Registered User
Joined: Feb 2005
Posts: 232
From: Binghamton, NY
Originally posted by motegineon
what ive done that has held up so far (about 6 months, which is a lot longer than any of the other times) is put 2 nuts on the bottom and once the top one is cranked down as hard as my wrench could possibly twist it i put another nut on and then cranked that one down against the other one, then put a wrench on the top and bottom nut and twisted them against each other (basically hold the top one still while tightening the bottom as much as possib.le.)
what ive done that has held up so far (about 6 months, which is a lot longer than any of the other times) is put 2 nuts on the bottom and once the top one is cranked down as hard as my wrench could possibly twist it i put another nut on and then cranked that one down against the other one, then put a wrench on the top and bottom nut and twisted them against each other (basically hold the top one still while tightening the bottom as much as possib.le.)
Nice project so far man. I hate rust. Yours wasnt super bad just the floor pan in the drivers area, that was horrific.
In my car it was all on the strut wall, I hate to weld in sheetmetal then lay some kitty hair over it.
and there actually is another company that just made a new Motor/Trans mount set which is a little MORE stiffer than the Kazama/Cusco mounts, but of course engine vibrations are gonna be nuts with this set up.
http://phase2motorsports.stores.yaho...acncsomos.html
Thread Starter
Registered User
Joined: Feb 2005
Posts: 232
From: Binghamton, NY
^^^ Yea rust definitely does suck. Will be working on the engine bay rust next week.
I'm beginning to feel that the car gods have been messing with me all week. Earlier, I swore up and down, and would of even bet my left nut that the pressure plate would not bolt to the flywheel... a day later, with some extra sleep and less frustration, damn thing bolted right up... smart asses.
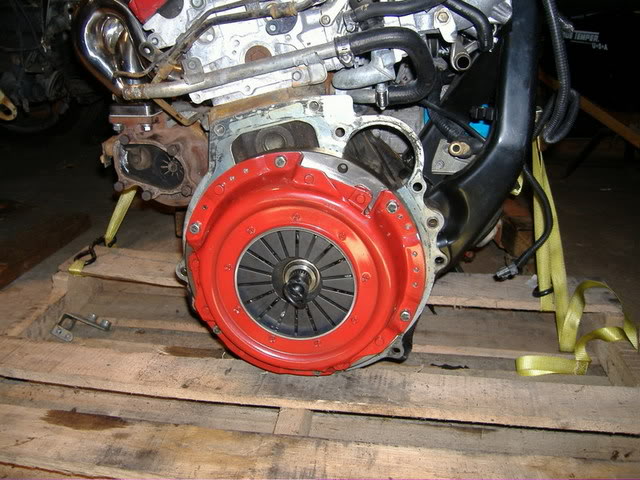
Today I installed the new throwout bearing, all went fine there. I had some problems mounting the tranny to the engine. No matter what I tried, I couldn't get the tranny to mount all the way with the motor, so I gave up before I got really ticked with it.
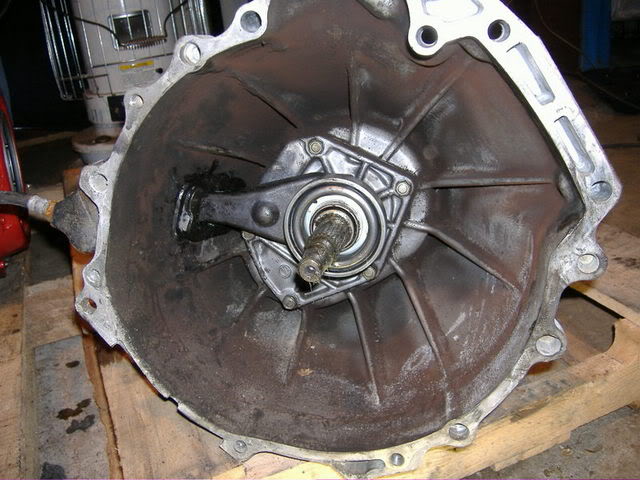
Thinking back on it now, I'm undecided whether to install the motor first, then attaching the tranny separately, or install with the tranny attached. Any help on this would be appreciated. Catch you all later till then.. happy holidays!
I'm beginning to feel that the car gods have been messing with me all week. Earlier, I swore up and down, and would of even bet my left nut that the pressure plate would not bolt to the flywheel... a day later, with some extra sleep and less frustration, damn thing bolted right up... smart asses.
Today I installed the new throwout bearing, all went fine there. I had some problems mounting the tranny to the engine. No matter what I tried, I couldn't get the tranny to mount all the way with the motor, so I gave up before I got really ticked with it.
Thinking back on it now, I'm undecided whether to install the motor first, then attaching the tranny separately, or install with the tranny attached. Any help on this would be appreciated. Catch you all later till then.. happy holidays!
I think it probably be quicker if you were to install motor/trans as one unit the only tricky part is gettin proper angle into the motor bay when dropping it in.
Install two seperate pieces wouldn't be that bad either but then you would have to have some time of trans jack to help bring the motor up and mate it to the block.
Install two seperate pieces wouldn't be that bad either but then you would have to have some time of trans jack to help bring the motor up and mate it to the block.
Thread Starter
Registered User
Joined: Feb 2005
Posts: 232
From: Binghamton, NY
Originally posted by Zenki_SliderS14
BUMP FOR UPDATE!
BUMP FOR UPDATE!
I tried to use the ka mounts with the ca motor. It dropped right in without any problems (without tranny). It sat about an inch from the firewall, and an inch 1/2 above the cross member, which allowed it to rock back and forth quite far without the tranny on. Also it had a slight tilt, plus from the look of it, closing the hood would hit the top of the exhaust header. The whole idea was just asking for problems, so I pulled to motor back out.
With the motor back out, I removed the bumper overlay, and began some painting in the engine bay. Below the radiator had a little rust, I went through where I could with a wire brush, and then painted with high temp rubberized paint.
One cool thing, before I was able to take the bumper overlay off, was to put up the lights. So I connected the ecu, that part of the wire harness, popped in a battery and was not only able to put the lights up, but they went on also.. whoo whoo! Then I shat myself cause the alarm went off too. But it gave me a little bit of hope when it comes time to do the wiring.
Thats about it for the past week or so. Progress should pick up once the mounts arrive. The temperature in the NE dropped to the lower 30's so I've been a little lazy. Soon as I get some parts in I'll fire up the kerosene heater and post some good times. Peace for now.

Contributing Member
Joined: Sep 2006
Posts: 589
From: WI
one thing about this project, it is awesome. i love the CA, and hope to do a CA swap myself in a few. i like the fact that you go into detail, and it gives me hope that maybe i can do it as my first swap.
Thread Starter
Registered User
Joined: Feb 2005
Posts: 232
From: Binghamton, NY
^^^^Thanks I appreciate that comment  ^^^^
^^^^
I too think the CA is great for a first swap. I paid $1250 for the complete engine & tranny. I've taken in consideration that since this is my first swap there is the possibility that I may kill this engine on some rookie mistake. If that happens I can most likely get a replacement barebone motor for less than $600 and mate it with the parts I've already got.
You're going to hear gripe about the lack of parts for the CA out there. So far, in my experience, I would say there are plenty of parts available, and depending on how much you want to spend you can get what you need.
I just hope the mounts get here this month, so I can start the tasks of wiring and starting up my project... we'll see what santa brings! Good luck with yours.
^^^^I too think the CA is great for a first swap. I paid $1250 for the complete engine & tranny. I've taken in consideration that since this is my first swap there is the possibility that I may kill this engine on some rookie mistake. If that happens I can most likely get a replacement barebone motor for less than $600 and mate it with the parts I've already got.
You're going to hear gripe about the lack of parts for the CA out there. So far, in my experience, I would say there are plenty of parts available, and depending on how much you want to spend you can get what you need.
I just hope the mounts get here this month, so I can start the tasks of wiring and starting up my project... we'll see what santa brings! Good luck with yours.
Last edited by trevr; Dec 7, 2006 at 08:44 AM.
Thread Starter
Registered User
Joined: Feb 2005
Posts: 232
From: Binghamton, NY
So.. after being lazy for the past week, I decided its time to make some more progress with my swap. Friday night, I called the guys at performancenissanparts.com and asked where the hell are my mounts, they couldn�t give me a knowledgeable answer or an ETA on arrival so I had them refund my paypal account and cancelled the order. It�s very upsetting when you�re told an item is in stock when it actually isn�t. Two months of waiting for nothing. I�m happy that they instantly refunded my paypal account, and I didn�t suffer any paypal fees. So with that set back finally behind me, I decided to proceed using the KA mounts and get the motor in, and that I did today.
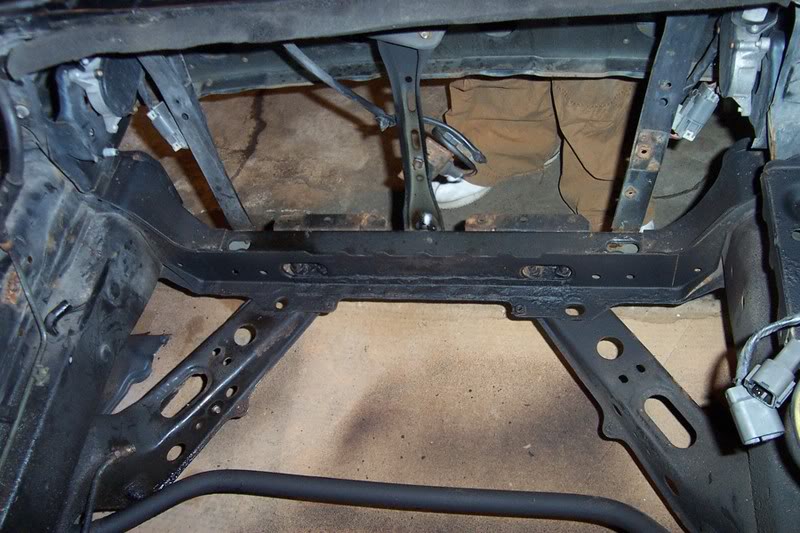
I removed some of the rust that formed below where the radiator sits and touched up with some high temp rubberized paint.
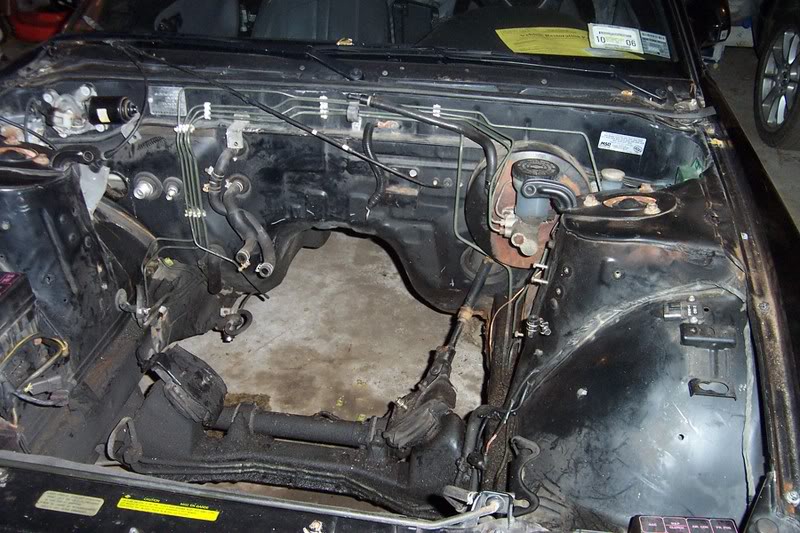
A shot of the empty engine bay. There are still spots I want to clean up and repaint. Its too cold for painting, plus my laziness isn't helping.

When I was lowering the engine in, this is the side that came down first. I guided the stud on the mount through the hold on the mounting bracket on the motor and threaded the top bolt down enough to hold the motor on that stud.
With the other side secure, this is where the fun really began. It is a huge pain in the nuts to mate this side. But when my brain is functioning to its potential, I discovered an easy method to drop it in.
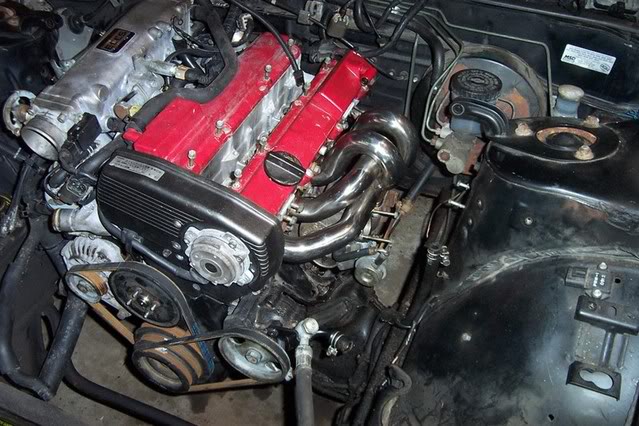
What I did was loosen the three bolts holding the mounting bracket to the block. This gave me about an extra inch of up, down, left right movement. I easily mated up the bracket the engine mount. I then retightened the three mounting bracket bolts, lowered the engine completely and finally tightened the stud bolt. Prolly didn't take longer than 40 minutes to put this in.
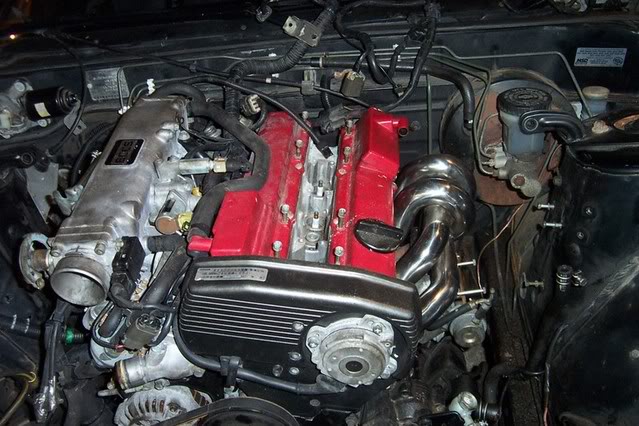
So here is how it looks. Intake plume sits rather high (before I think I said exhaust header, but I mean intake header), and you can see the tilt. Underneath, I have a jack steadying the motor from leaning on the firewall. Tomorrow I plan to attach the transmission and start running the electrical. I would have done more today, but my friend had to be to work so we had to cut it short. Tomorrow I work on it some more, and I'll update you all then.... later for now.
I removed some of the rust that formed below where the radiator sits and touched up with some high temp rubberized paint.
A shot of the empty engine bay. There are still spots I want to clean up and repaint. Its too cold for painting, plus my laziness isn't helping.
When I was lowering the engine in, this is the side that came down first. I guided the stud on the mount through the hold on the mounting bracket on the motor and threaded the top bolt down enough to hold the motor on that stud.
With the other side secure, this is where the fun really began. It is a huge pain in the nuts to mate this side. But when my brain is functioning to its potential, I discovered an easy method to drop it in.
What I did was loosen the three bolts holding the mounting bracket to the block. This gave me about an extra inch of up, down, left right movement. I easily mated up the bracket the engine mount. I then retightened the three mounting bracket bolts, lowered the engine completely and finally tightened the stud bolt. Prolly didn't take longer than 40 minutes to put this in.
So here is how it looks. Intake plume sits rather high (before I think I said exhaust header, but I mean intake header), and you can see the tilt. Underneath, I have a jack steadying the motor from leaning on the firewall. Tomorrow I plan to attach the transmission and start running the electrical. I would have done more today, but my friend had to be to work so we had to cut it short. Tomorrow I work on it some more, and I'll update you all then.... later for now.