View Poll Results: What color would you suggest i paint the car.. it was originally black.
Flat black... nothing sexier...


11
57.89%
Gloss black... pain in the ass, but kudos from general public.


4
21.05%
Metallic blue, either like the c6 vettes or something darker


2
10.53%
... anything else, just post it.


2
10.53%
Voters: 19. You may not vote on this poll
project: paint my 240 UPDATE.. with pics :)
 05-16-2006, 04:36 PM
#31
Registered User

Join Date: Apr 2006
Location: slidell
Posts: 34
hey i can find out with mike or nick then we can take the bumper off. i'll help you man no prob
it looking good got me thinking bout mine and what color, my sun roof is on hold for now but ill get it nice and then it's color choosing time?
it looking good got me thinking bout mine and what color, my sun roof is on hold for now but ill get it nice and then it's color choosing time?
 05-17-2006, 08:31 PM
#34
Contributing Member
Thread Starter
Join Date: Apr 2005
Location: Slidell, LA
Posts: 2,550
How about i give the whole forum the tips?
Well this is how I did my paint...
I started with the OEM paint, or at least what i thought was OEM. Before you start sanding, i would recommend using a heavy duty degreaser detergent, like Castrol Superclean, Mean Green, or Simple Green. I like castrol superclean myself. You need to wash all dirt and contaminants off of the car ENTIRELY, and also any wax or protectants need to be removed, which is why i like Superclean... its a very good product. I took a DA sander, which is a random orbital sander powered by air, and 180 grit sticky sanding discs. Now here's where i got a little confused. My dad told me i had to get ALL of the clearcoat off to repaint the car, and others have told me that the top layer of clearcoat has to be removed or roughed up enough for the paint to stick, which makes sense. Also, trying to take just the clearcoat down to nothing but the basecoat is a pain in the *** on the 240sx cuz they have so much curvature that you get blad spots and such... But as far as my experience, as long as you take the shinyness out of the clearcoat youre in good hands.
As far as which particular paints to use, im not an expert there, though i DO know that urethane based paints are best, and lacquer based paints are teh suxor. When selecting paint, dont try to mix and match... if you get a particular line of primer from DuPont, get that line in base and clear also... mixing and matching rarely results in a good finish.
Applying paint: well im not an expert here either, but i do know this: try not to apply the paint when body panels are hot... the paint dries too quickly and your strokes wont blend together, as my hood shows.
05-17-2006, 08:40 PM
#35
Contributing Member
Thread Starter
Join Date: Apr 2005
Location: Slidell, LA
Posts: 2,550
>>>>>>>>>>>>>>Now on to dents<<<<<<<<<<<<<<
Dents are tough to gauge... being that our cars have alot of curves and such. The best thing to do is try to pound the dent back into its original position as best you can, but that isnt always possible, in which case there are different tool that can be used, but the average person doesnt have them... If you MUST apply bondo to a surface, be sure to remove as much paint as possible using 40-80 grit paper, that way the bondo can adhere properly... As far as applying bondo, you want to mix the bondo with the hardener as best you can to the label's directions and make sure that the hardener and bondo are completely mixed before applying. Use a putty spreader to spread the bondo. Dont spread it skin tight, you want to leave a little excess to shape and smooth out the surface. You will need a body rasp, or "cheese grater" to take the majority of excess bondo off just before it is finished curing, about half an hour after application. After it hardens, you can use sandpaper to shape and smooth the bondo as you see fit, harsher grains will take the bondo down faster, and finer grades will smooth it out. DONT GOUGE THE BONDO! you WILL NOT be able to correct it as easily as you think. ...
... ill type more once my hand stops hurting.
05-29-2006, 09:12 AM
#36
Contributing Member
Thread Starter
Join Date: Apr 2005
Location: Slidell, LA
Posts: 2,550
Well i finally got around to doing more paint on my car, this time the bumper. I decided to take the bumper completely off, because i thought it would be easier to paint that way... so i started taking bolts out here and there to get it off the car... then i ran into the last 2 on each side where it connects to the front corner of the front fenders, near the headlights... at that point i was stumped, so i decided to paint it ON the car... Well i sanded it with 320 grit and pulled the blinkers and lil' grills down at the bottom and my fogs and stuff... my bumper's emblem broke a while back, so i filled it in with BONDO! no emblems on my car whatsoever... cept where it says "240SX" on the quarter glass. Man masking off the places where i didnt want paint was hell... oh yeah and i did my headlight covers too... heres what the Pass. side of the car looks like, the driver's door and rear quarter panel still need paint... oh yeah and my windows are now tinted as well! thats not so hard to do... as long as youre in a garage and not in the wind like i was....
Here's a pic!
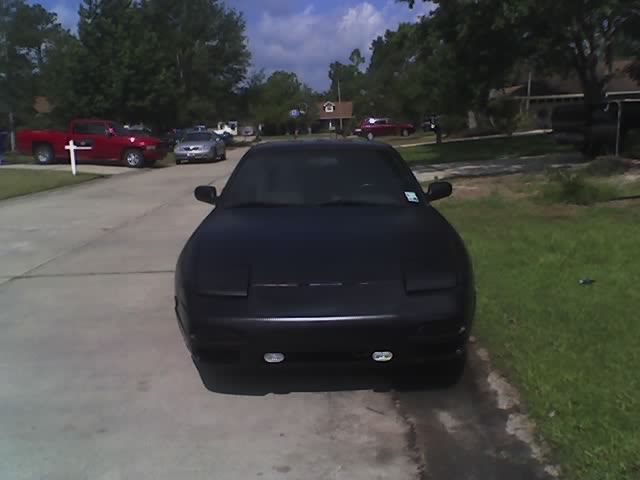
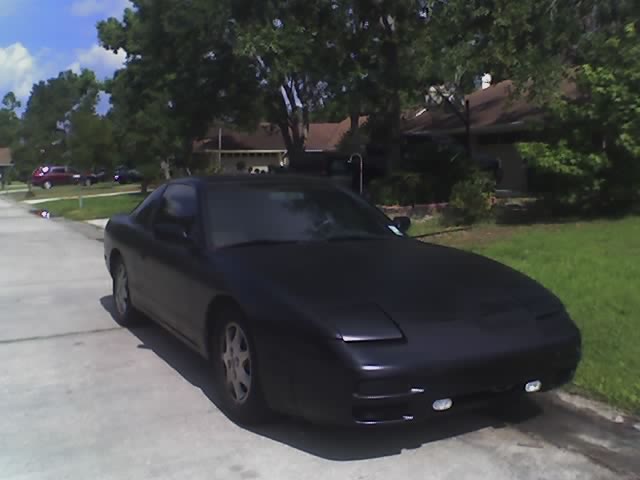
hell yeah my sidemarkers are dark!
Here's a pic!
hell yeah my sidemarkers are dark!
05-30-2006, 06:37 AM
#37
Contributing Member

Join Date: Nov 2004
Location: In a 240 near you
Posts: 831
You need to jack your car up to reach thoose last bumper bolts and then bend back or remove the fender linner. It was hard as hell and the fender liner kept cutting me but I removed my bumper awhile ago.
05-30-2006, 07:17 AM
#38
Contributing Member
Thread Starter
Join Date: Apr 2005
Location: Slidell, LA
Posts: 2,550
yeah i figured it would be somehting stupid like that... but i cant get my floor jack underneath the car, so i wasnt gonna go through having to use the factory jack.... it turned out just fine on the car, just be sure to take your time and also dont forget to remove the headlights and have the eyelids open ^_^
 06-03-2006, 07:07 AM
#40
Contributing Member
Thread Starter
Join Date: Apr 2005
Location: Slidell, LA
Posts: 2,550
well factory paint is smooth to the point where your finger makes a sound going over is like a squeak... this particular paint is a silky type of smooth...
Oh and an update:
Well it seems as though i have to backtrack a bit... because i seem to have had a dent in the pass. side fender just come from nowhere and some chick in a red celica side swiped my drivers fender... leaving 2 nice dents on the top of the wheel well... now i have to debate replacing the fender or just trying to hammer what i can out of it, fill the rest in, and repaint it. ill post a pice later to see what you guys think.

Thread
Thread Starter
Forum
Replies
Last Post
SilviaVerT
Show and Shine
128
10-13-2013 08:28 AM