
My S13 SR20DET Prep

Thread Starter
Contributing Member
Joined: Sep 2002
Posts: 1,192
From: Starkville, MS.
Wire Harness
Got my wire harness back. I did the headlights for the conversion and the digital climate but this was out of my league so I sent it off.
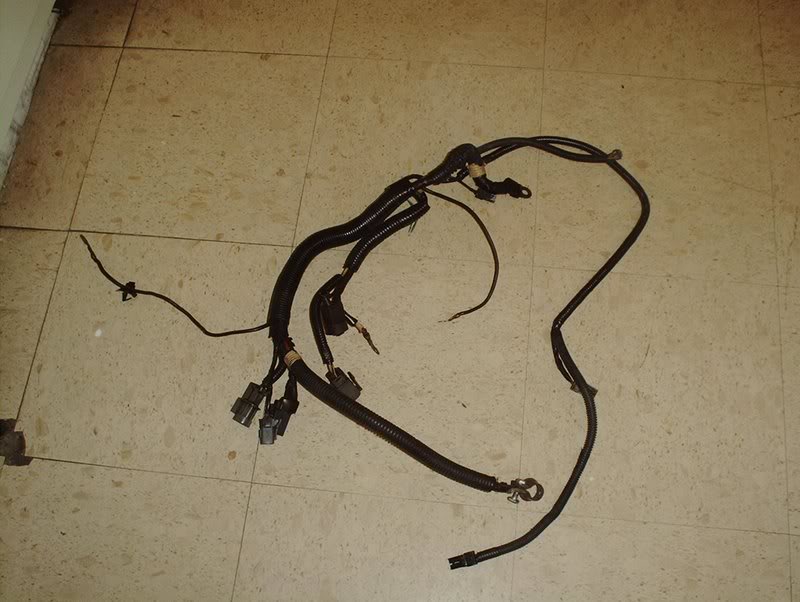
Lower engine harness.
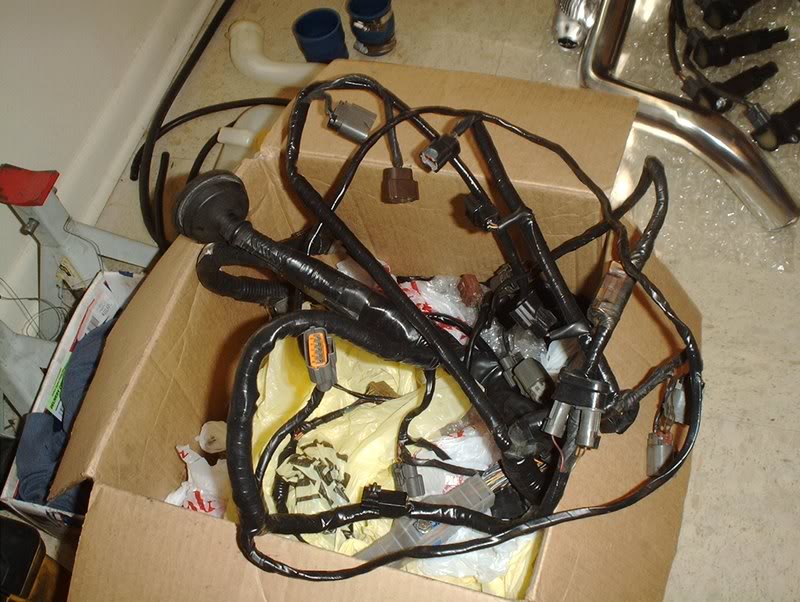
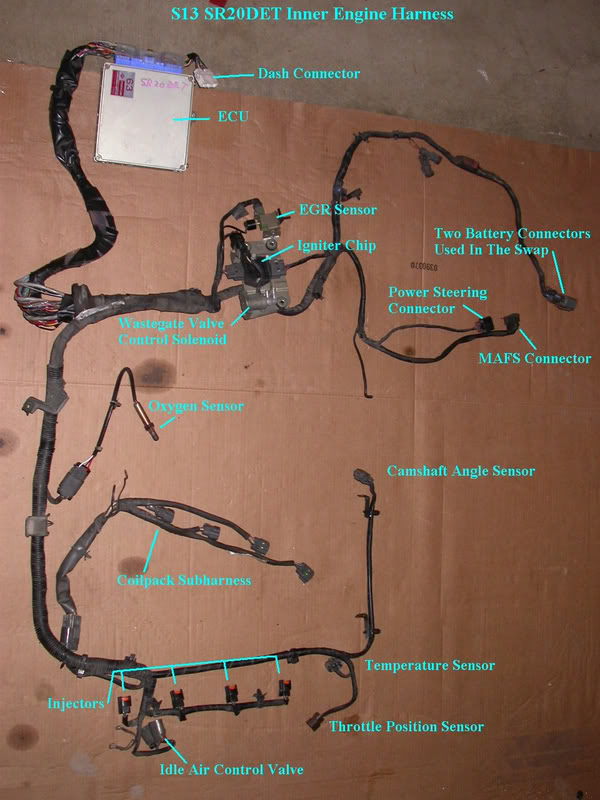
Engine harness...everything appears intact like the diagram below.
Lower engine harness.
Engine harness...everything appears intact like the diagram below.
Thread Starter
Contributing Member
Joined: Sep 2002
Posts: 1,192
From: Starkville, MS.
P/S Pump Adjuster Bracket
I managed to track down yet another P/S pump adjuster bracket...got one from a forum member.
Tools needed:
Socket wrench
Socket extension
13mm socket
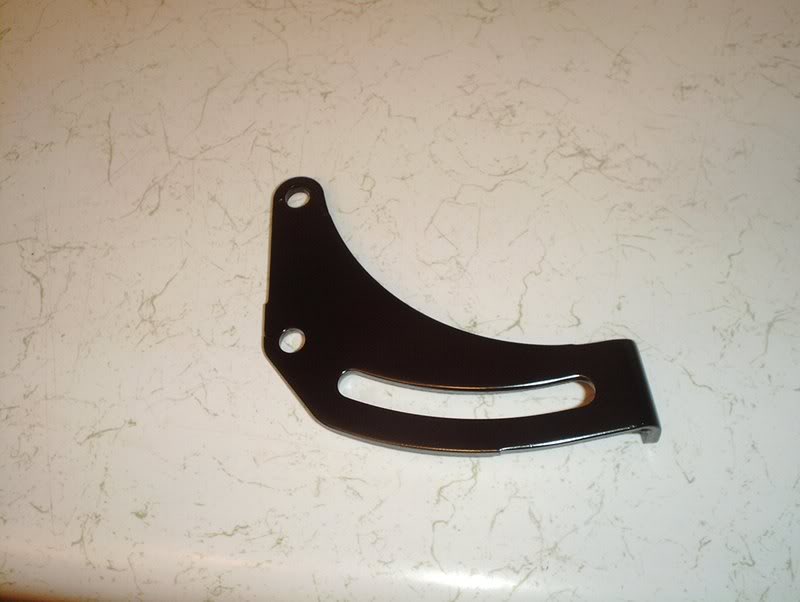
This bracket appears to be the one that I need so I removed the one that I already had on...
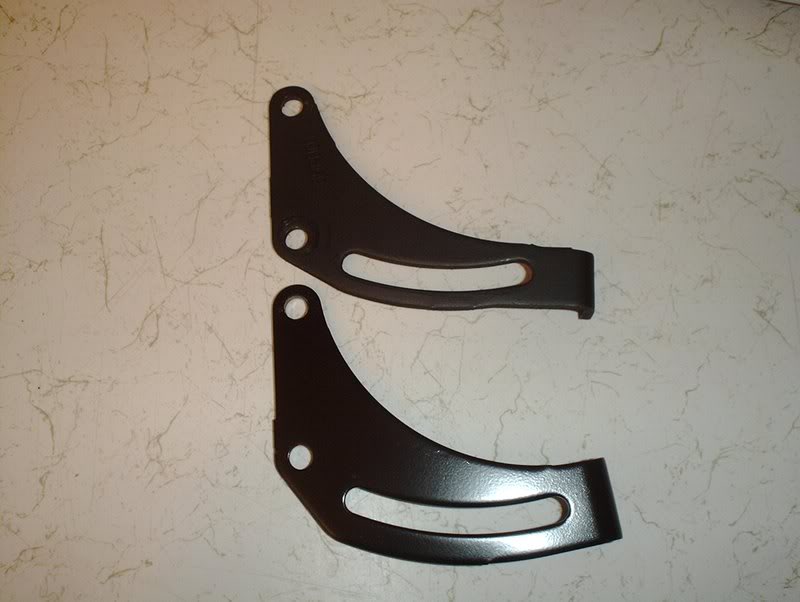
and as you can see they are slightly different. I think that while I had all those brackets laying around and selling them that I switched them by mistake. The top bracket I believe is a SR HICAS adjuster bracket while the bottom one is a SR non-HICAS adjuster bracket.
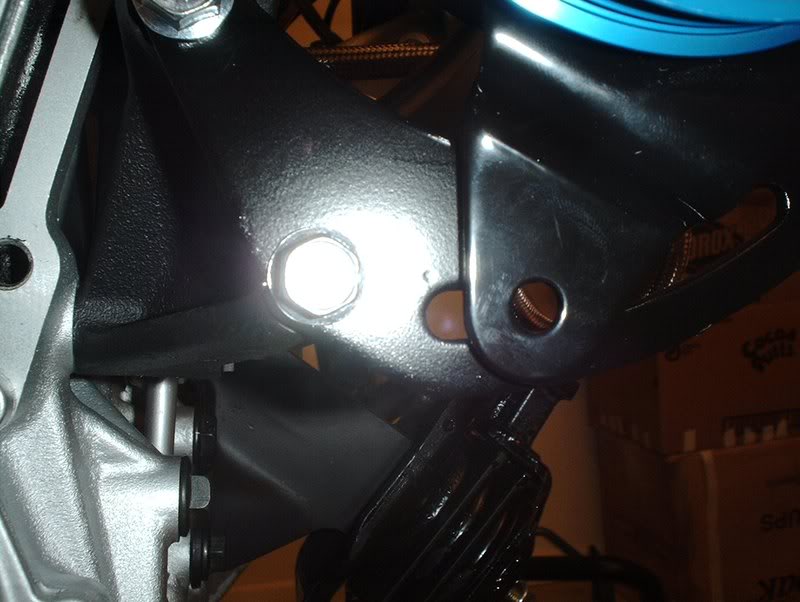
Use a 13mm socket to mount the adjuster bracket on the P/S pump bracket.
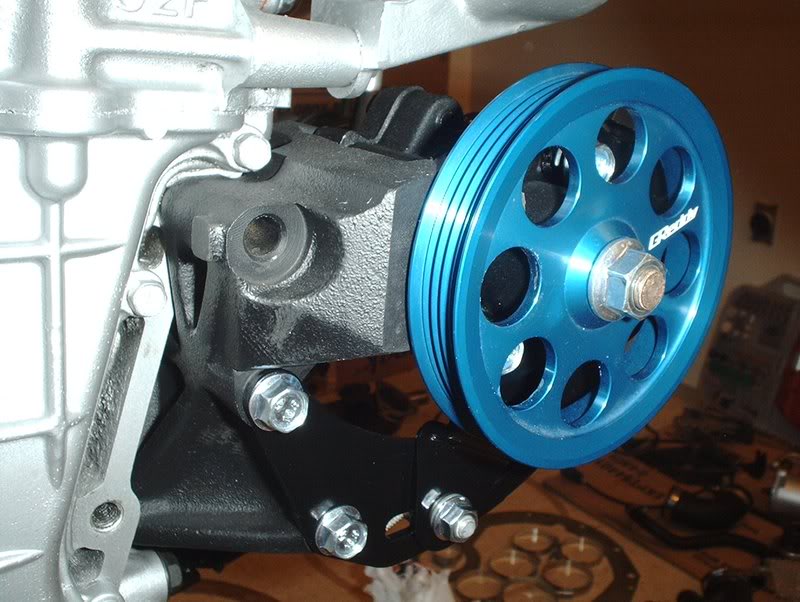
This is indeed the correct adjuster bracket, the two line up perfectly!
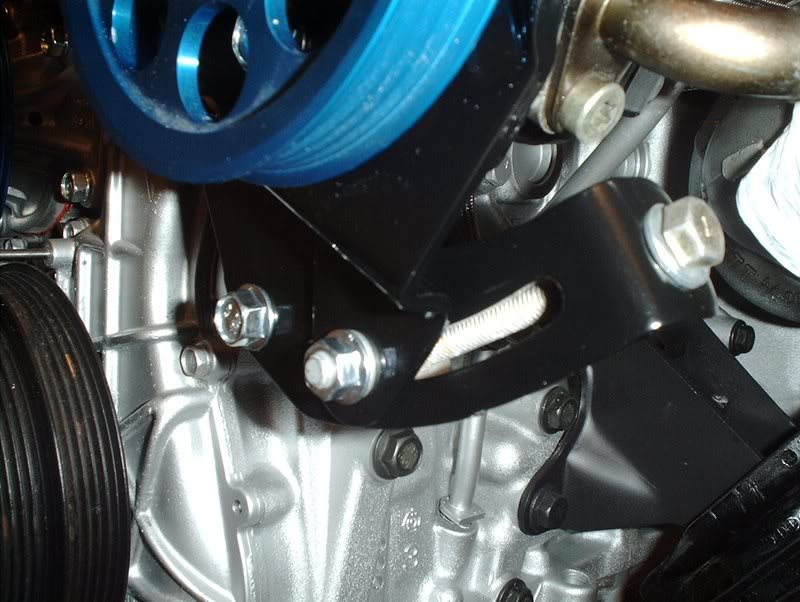
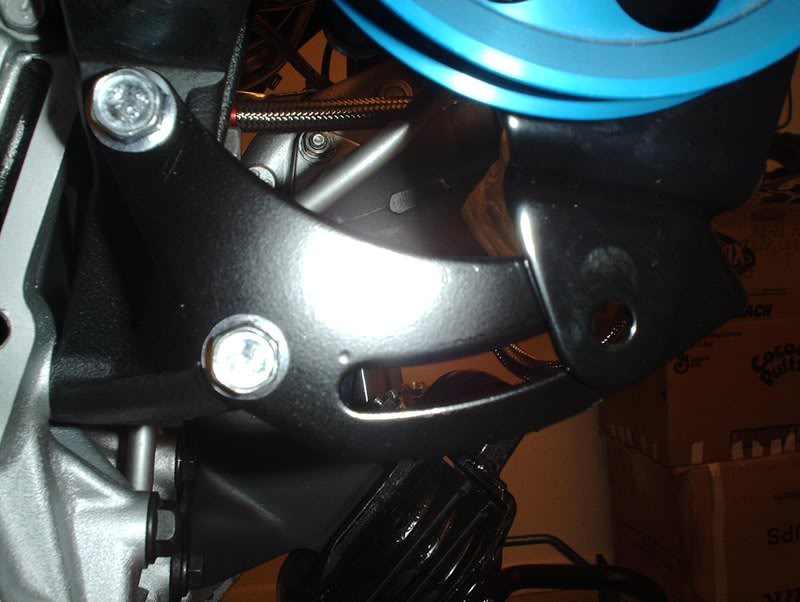
Install the hardware and this is finally complete.
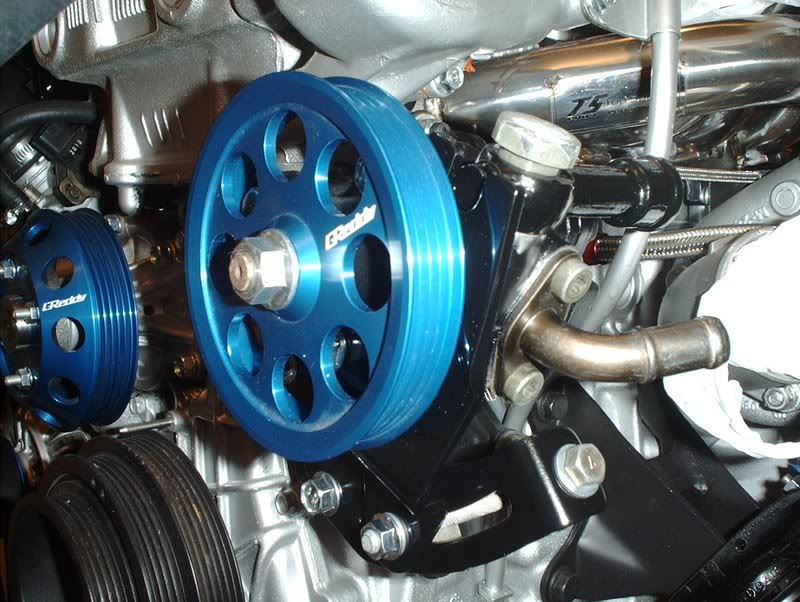
I just need to put my belts on.
Tools needed:
Socket wrench
Socket extension
13mm socket
This bracket appears to be the one that I need so I removed the one that I already had on...
and as you can see they are slightly different. I think that while I had all those brackets laying around and selling them that I switched them by mistake. The top bracket I believe is a SR HICAS adjuster bracket while the bottom one is a SR non-HICAS adjuster bracket.
Use a 13mm socket to mount the adjuster bracket on the P/S pump bracket.
This is indeed the correct adjuster bracket, the two line up perfectly!
Install the hardware and this is finally complete.
I just need to put my belts on.
Thread Starter
Contributing Member
Joined: Sep 2002
Posts: 1,192
From: Starkville, MS.
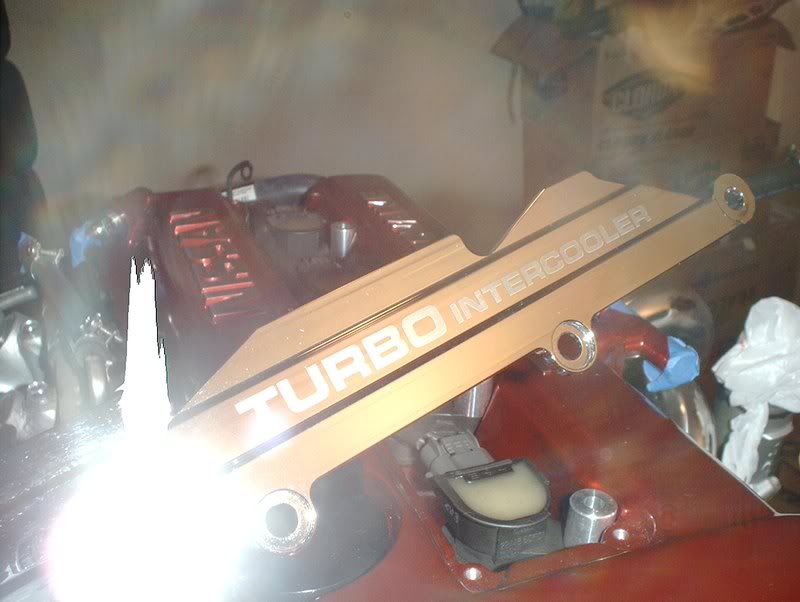
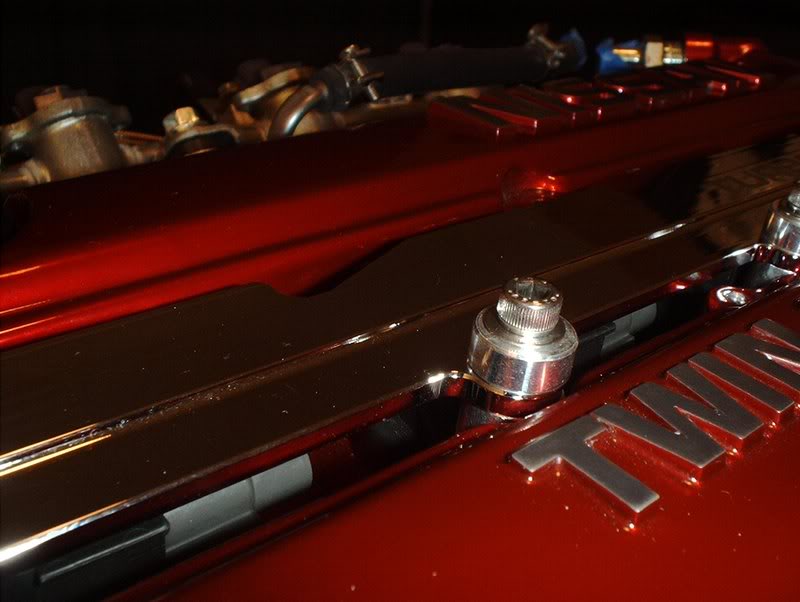
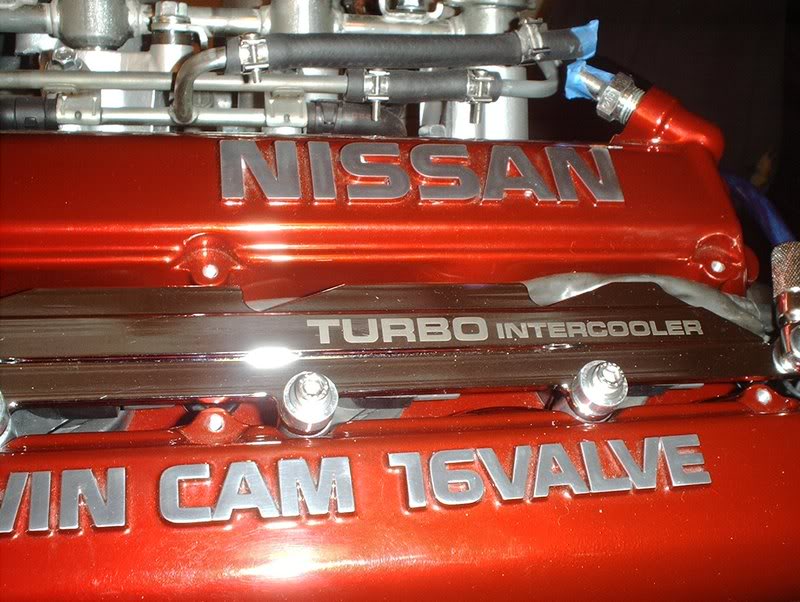
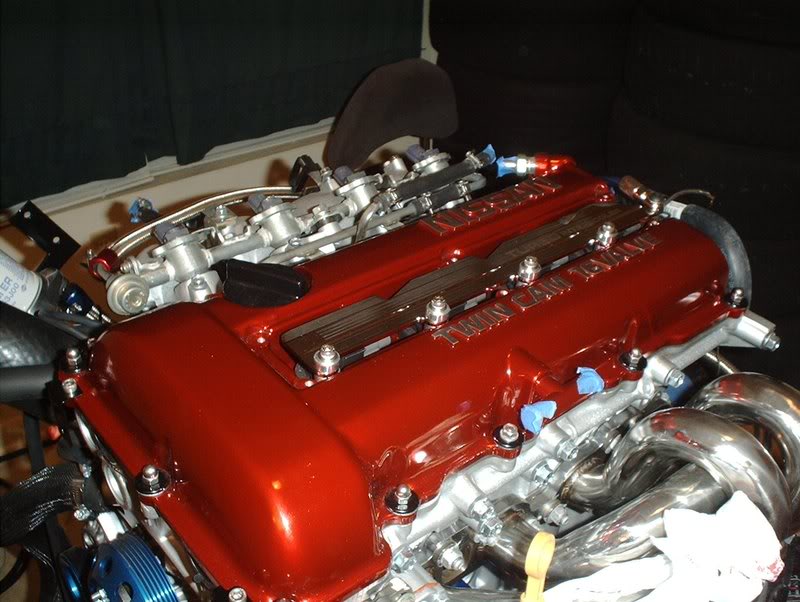
Ignition Grounding Plate
I decided to replace my stock spark plug cover with an ignition plate.
Tools needed:
Wire cutters
Allen wrenches
Razor
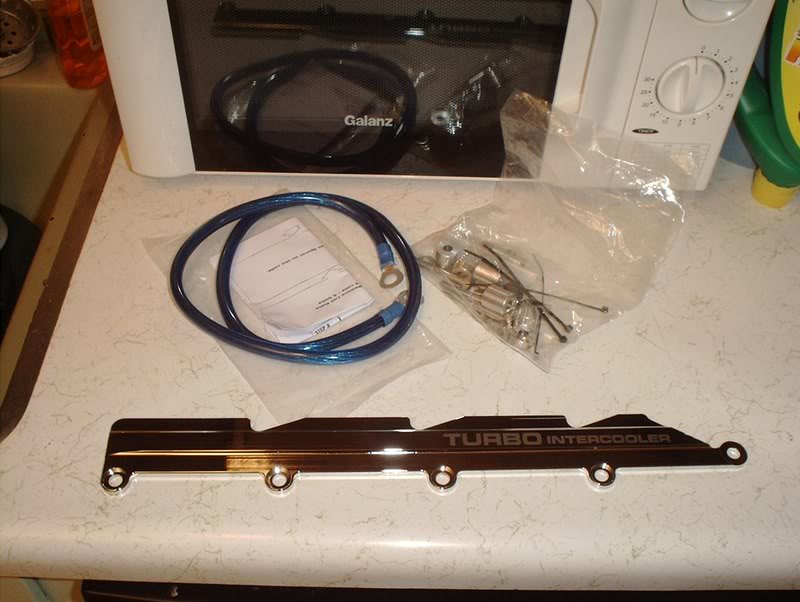
I picked up this ignition plate from FRSport. They state the functunality to be as follows "It helps improve the grounding to your ignition coilpack by grounding the engine's coil packs to the chassis. Doing this will help improve cooling for the coil packs that usually overheat with stock spark plug covers.".....uh whatever.
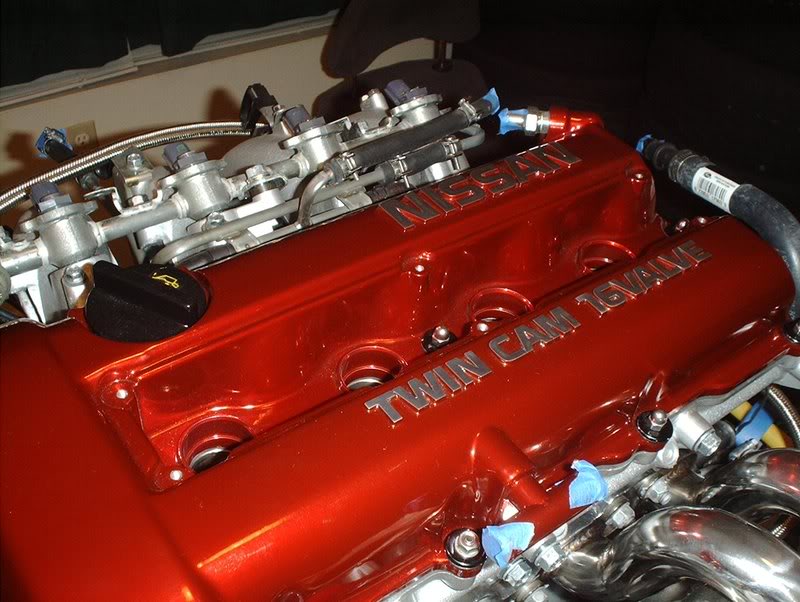
First...
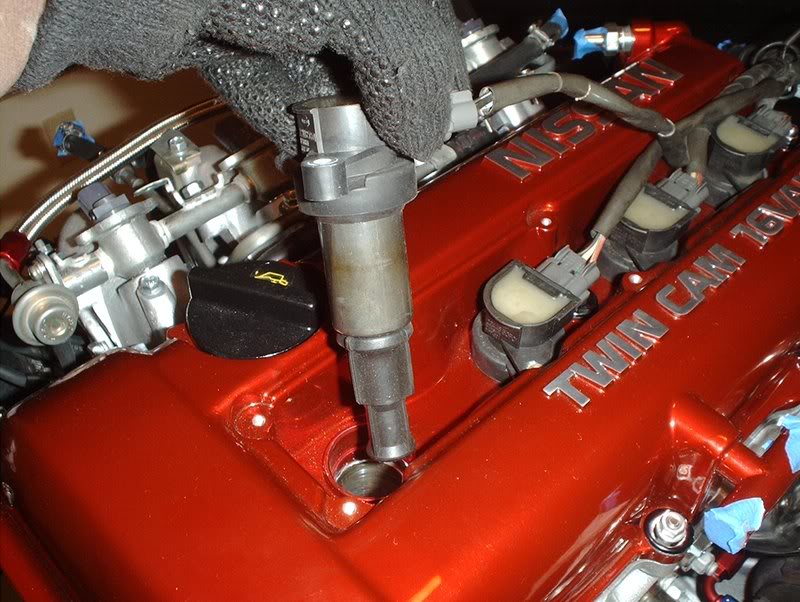
I need to put my coil packs back in place...
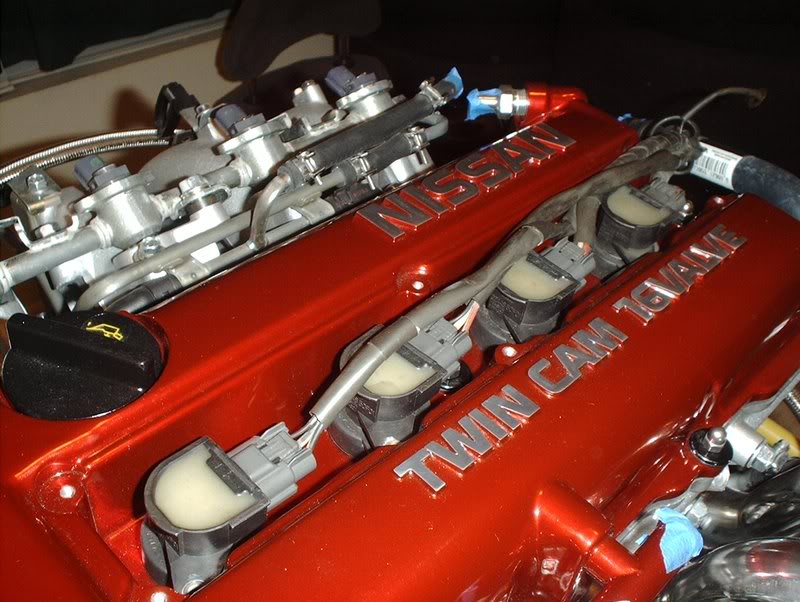
like so.
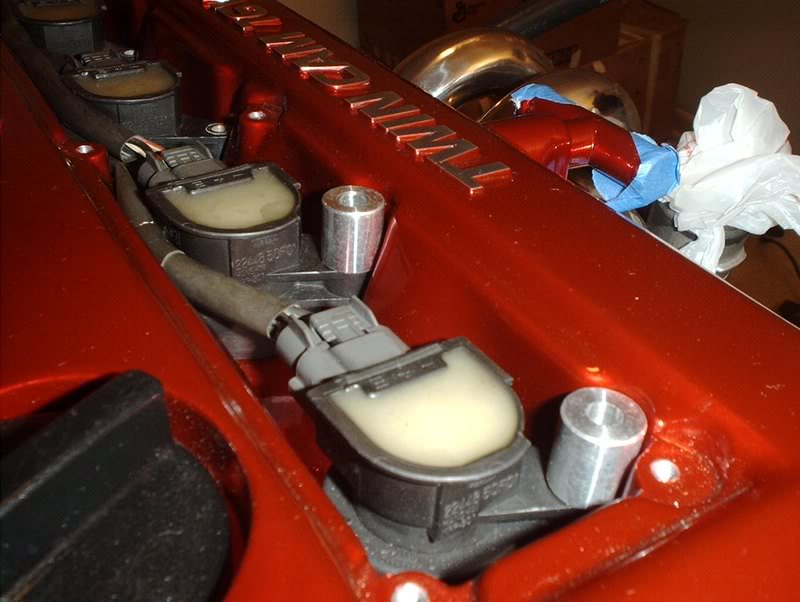
Take the four large spacers provided with the plate and place them on the four mounting points on the coil packs.
Take the plate...
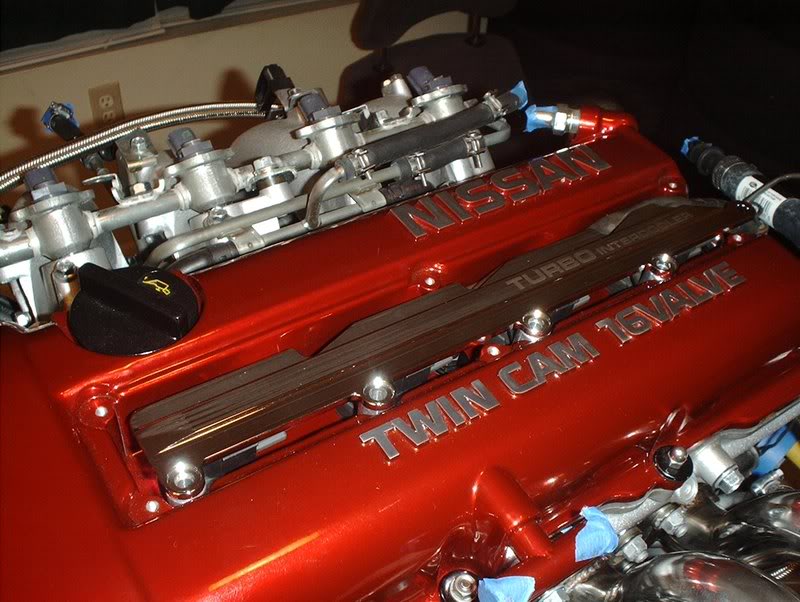
and place it over the coil packs.
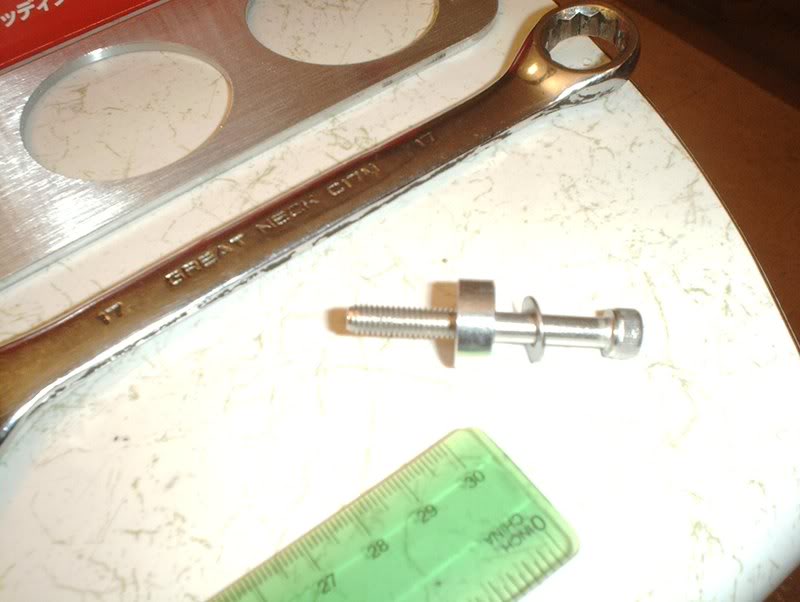
Next, take the four long M6 bolts and put a washer and the smaller spacer on them.
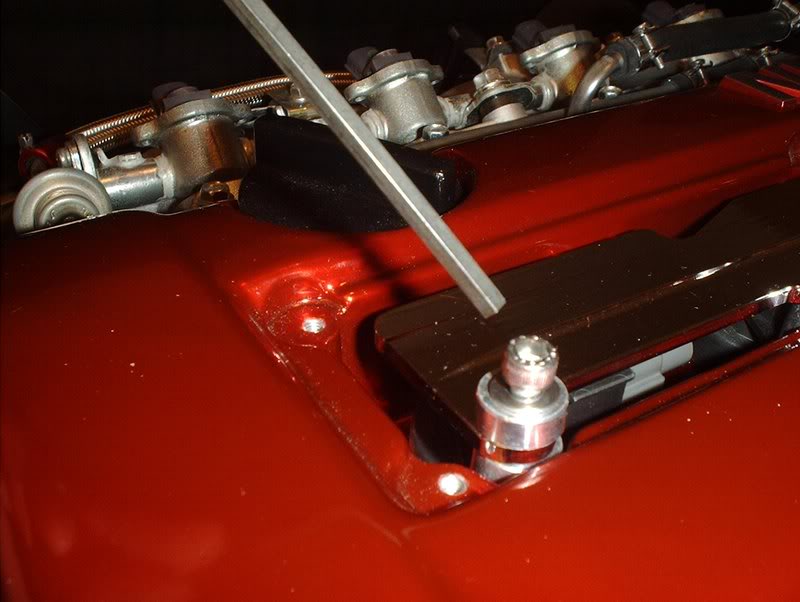
Carefully thread the bolts in the valve cover until tight.
Use a allen wrench(don't know what size) to tighten the plate down.
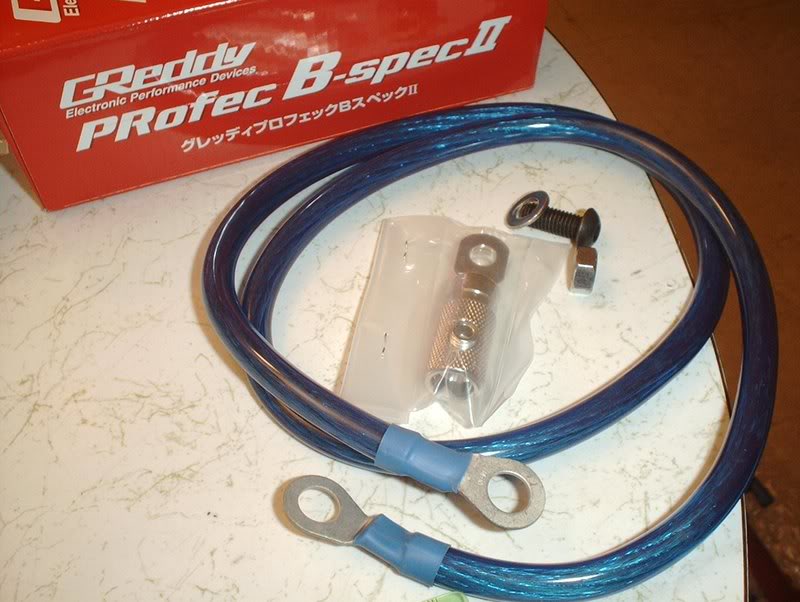
Next you need to install the Earth wires and Earth terminal..."Earth" they call them........them copper wires man don't get fancy!
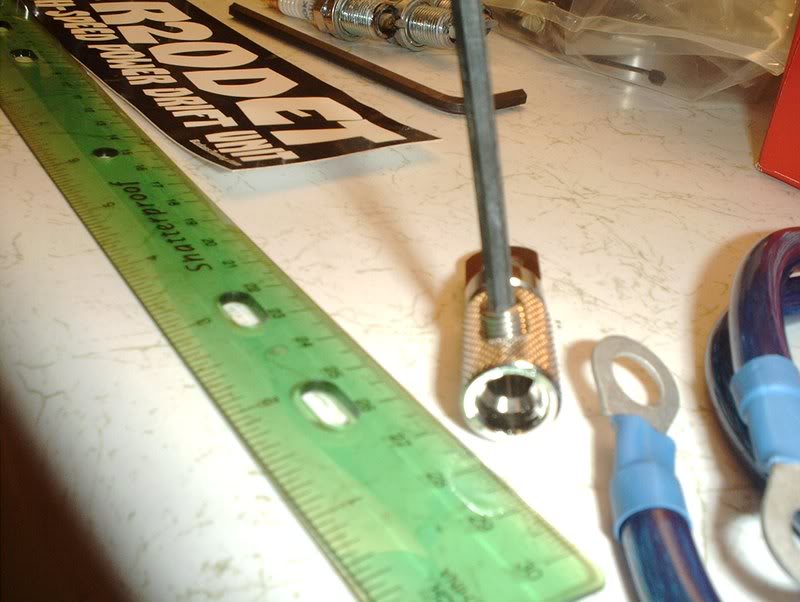
The provided Earth wire came with a terminal ring on both ends which is strange since you obviously have to remove one of them in order to put the Earth terminal on the Earth wire. Start by using one of the allen wrenches to back out this port to give some room for the wire to slide into the terminal.
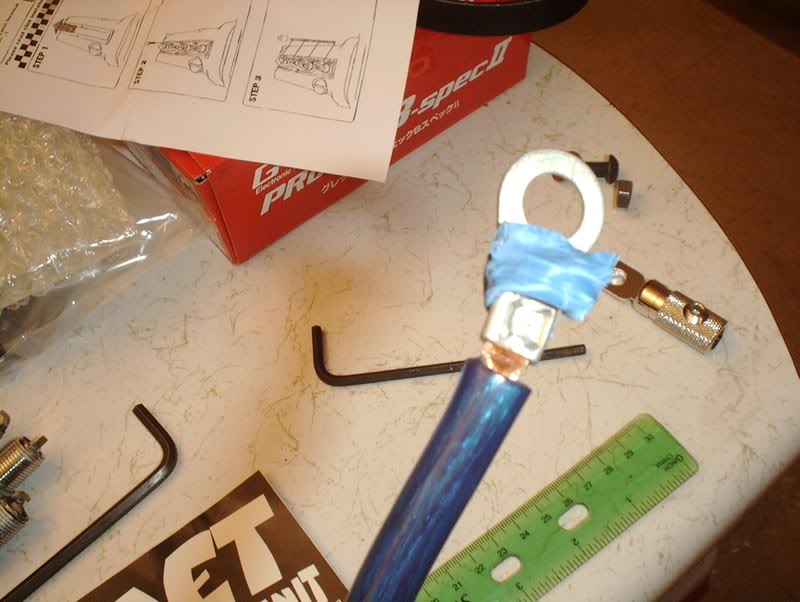
Take the wire and use a razor to cut back some of the cover...
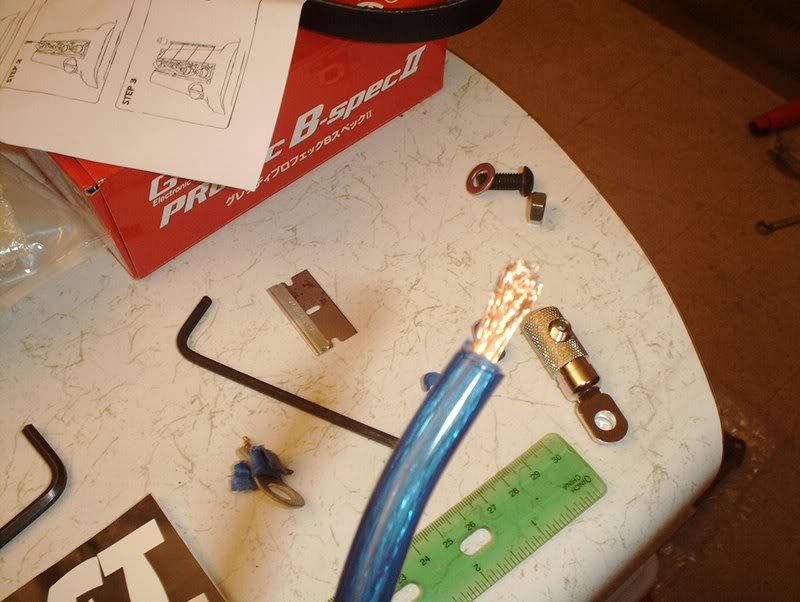
and use a pair of wire cutters to remove the ring terminal.
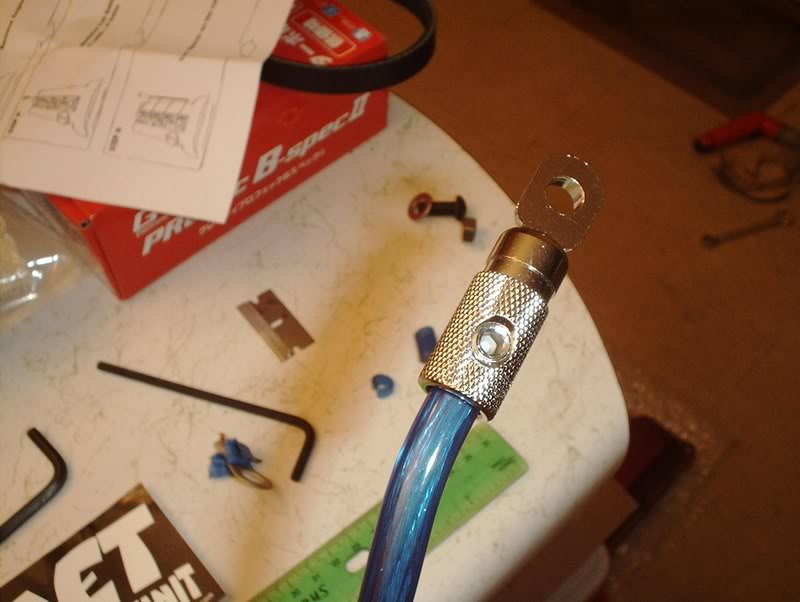
Insert the wire into the Earth terminal and tighten the fitting with the allen wrench.
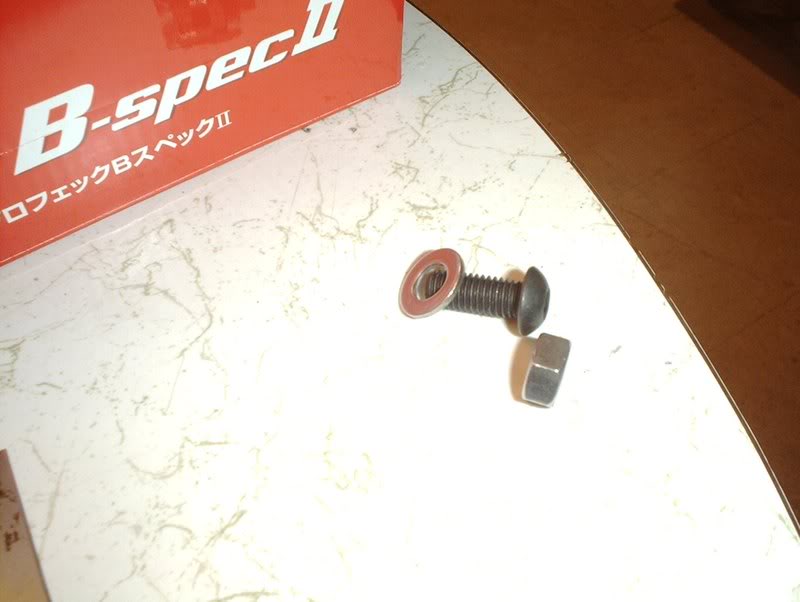
Take the left over hardware...
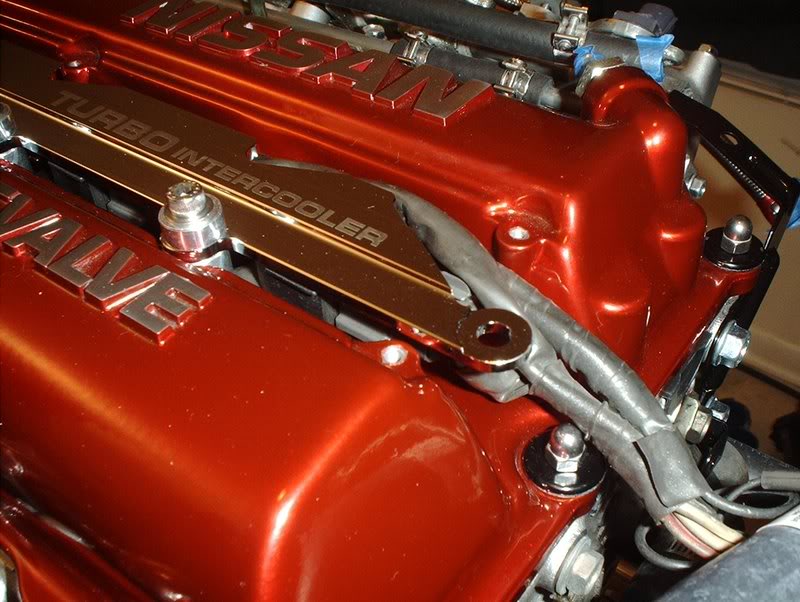
and use it to bolt the Earth wire to the ignition plate here.

Use a allen wrench to tighten.
This is completed.
The Earth wire is to be connected to the ground or - on the battery. Sidenote, this wire does not look like it's going to be long enough to make it to the battery but we'll see.
Tools needed:
Wire cutters
Allen wrenches
Razor
I picked up this ignition plate from FRSport. They state the functunality to be as follows "It helps improve the grounding to your ignition coilpack by grounding the engine's coil packs to the chassis. Doing this will help improve cooling for the coil packs that usually overheat with stock spark plug covers.".....uh whatever.
First...
I need to put my coil packs back in place...
like so.
Take the four large spacers provided with the plate and place them on the four mounting points on the coil packs.
Take the plate...
and place it over the coil packs.
Next, take the four long M6 bolts and put a washer and the smaller spacer on them.
Carefully thread the bolts in the valve cover until tight.
Use a allen wrench(don't know what size) to tighten the plate down.
Next you need to install the Earth wires and Earth terminal..."Earth" they call them........them copper wires man don't get fancy!
The provided Earth wire came with a terminal ring on both ends which is strange since you obviously have to remove one of them in order to put the Earth terminal on the Earth wire. Start by using one of the allen wrenches to back out this port to give some room for the wire to slide into the terminal.
Take the wire and use a razor to cut back some of the cover...
and use a pair of wire cutters to remove the ring terminal.
Insert the wire into the Earth terminal and tighten the fitting with the allen wrench.
Take the left over hardware...
and use it to bolt the Earth wire to the ignition plate here.
Use a allen wrench to tighten.
This is completed.
The Earth wire is to be connected to the ground or - on the battery. Sidenote, this wire does not look like it's going to be long enough to make it to the battery but we'll see.


Thread Starter
Contributing Member
Joined: Sep 2002
Posts: 1,192
From: Starkville, MS.
Turbo Timer
Question, are turbo timers necessary. I've been talking to some people and some say yay and some say nay. If you don't use one, how long would you have to let your car idle before you shut it off?
just if you drive it normal 30seconds to 1 min if you drive it hard id do atleast 1min 30 seconds. also remember this is for highly modded engines with aftermarket turbos and what not if your stock you dont need a turbo timer
Registered User
Joined: Feb 2008
Posts: 99
From: Texas
can't you somhow make it delay and then shut itself off, a friend of mine a while back had an oldschool eclipse boosted and he'd turn it off, then it would stay on for a 1-2 min and then shut off by itself. anyone ever heard of that
Thread Starter
Contributing Member
Joined: Sep 2002
Posts: 1,192
From: Starkville, MS.
Water Temp Gauge
I got my other two gauges in today.
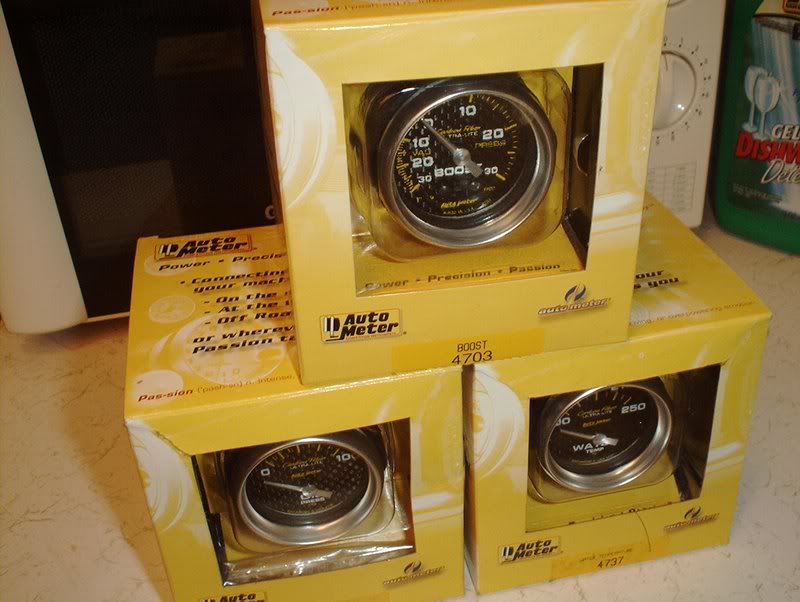
I deciced to drop the air fuel and oil temperature gauges for a water temp gauge. I looked up the many different ways people were hooking up these gauges and went for what seemed like the two easiet ways.
1. The Blitz upper radiator hose with the temp sensor port in it.

Blitz radiator hose...drawback, this one hose is $100 so I chose the latter...
2.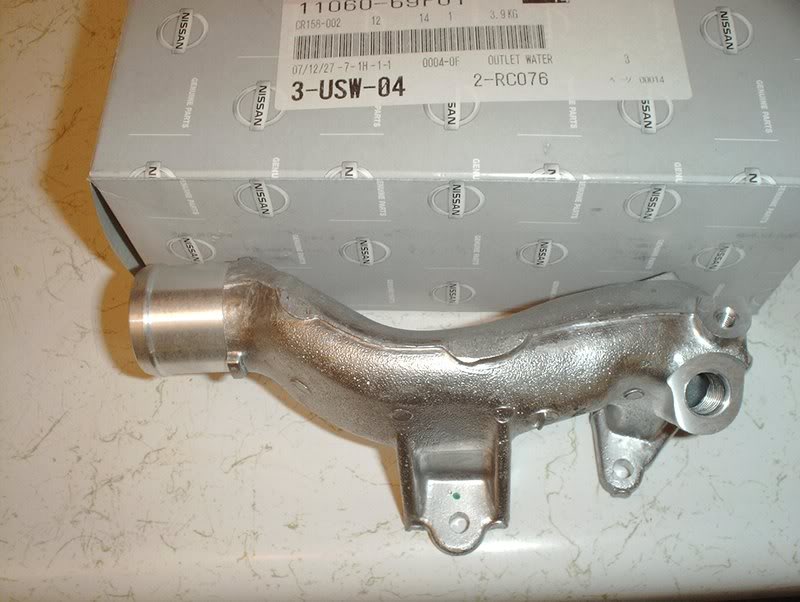
A S14 water outlet/neck part#: 11060-69F01 and is half the price of the Blitz hose.
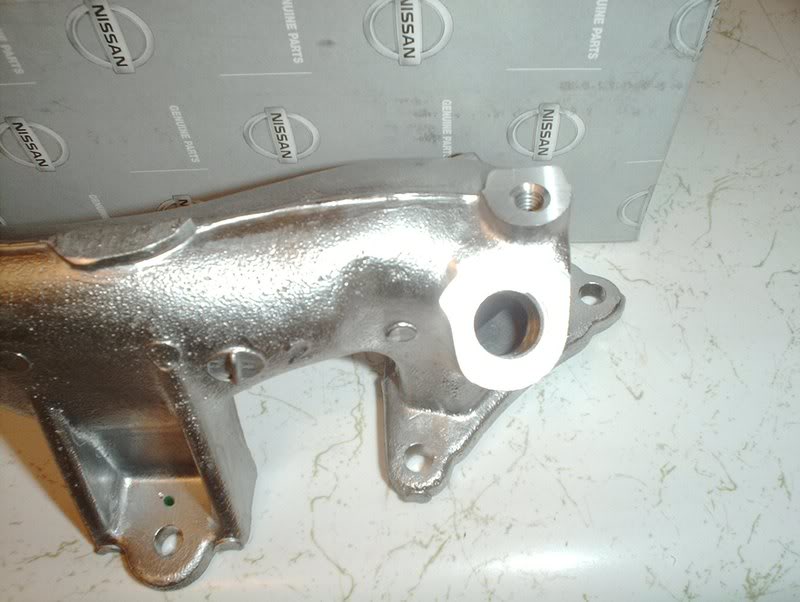
The difference between the S13 water outlet and the S14 water outlet is the bung that is in the S14 water outlet. It can be used for another water line source, water temp fitting, etc.

I decided to use it for the water temp sensor but I ran into a little problem...
The temp sensor included with the gauge comes with a temp sender(1/8 NPT) two adapters(3/8'' NPT & a 1/2" NPT) unfortunately neither one of these adapters fit the bung on the water outlet. So I checked the thread pitch on the bung, which is M12x1.5, and found this...
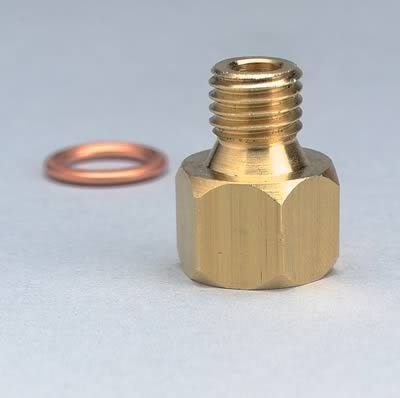
An adapter for electric temperature or pressure gauges 1/8" NPT to M12x1.5. None of the local parts stores had it in stock so I have to order and wait.
TO BE CONTINUED...
I deciced to drop the air fuel and oil temperature gauges for a water temp gauge. I looked up the many different ways people were hooking up these gauges and went for what seemed like the two easiet ways.
1. The Blitz upper radiator hose with the temp sensor port in it.
Blitz radiator hose...drawback, this one hose is $100 so I chose the latter...
2.
A S14 water outlet/neck part#: 11060-69F01 and is half the price of the Blitz hose.
The difference between the S13 water outlet and the S14 water outlet is the bung that is in the S14 water outlet. It can be used for another water line source, water temp fitting, etc.
I decided to use it for the water temp sensor but I ran into a little problem...
The temp sensor included with the gauge comes with a temp sender(1/8 NPT) two adapters(3/8'' NPT & a 1/2" NPT) unfortunately neither one of these adapters fit the bung on the water outlet. So I checked the thread pitch on the bung, which is M12x1.5, and found this...
An adapter for electric temperature or pressure gauges 1/8" NPT to M12x1.5. None of the local parts stores had it in stock so I have to order and wait.
TO BE CONTINUED...
Thread Starter
Contributing Member
Joined: Sep 2002
Posts: 1,192
From: Starkville, MS.
Coolant/Water Line Hose Replacement
I was reading some threads the other day and came across some info on hoses..."When the SR is out of the clip and sitting on an engine stand, take the time to replace every single rubber hose and belt on there.
Rubber has a lifespan of about 5 years under perfect conditions. Less if it's out in the elements.
Sometimes a hose or a belt may look perfect, but the rubber coating is just cosmetic. The rubber makes it look good, like dressing.
The weaves under the rubber is what gives the belt strength and structural integrity. Usually SRs has been sitting in a yard somewhere for some time.
So take the time to replace all the rubber parts."
After reading that I remembered that I hadn't replaced the coolant/water lines under the intake manifold so I took it back off and swapped them out.
Tools needed:
Socket wrench
Socket extension
13mm socket
Cutter/knife
Flathead screwdriver

Better do it now rather than later.
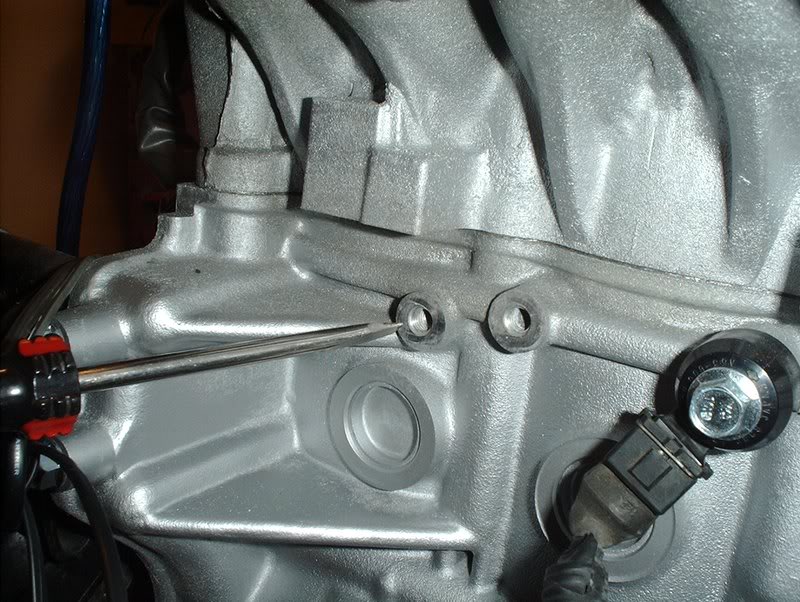
13mm socket takes two bolts off here and one bolt on the back of the block...
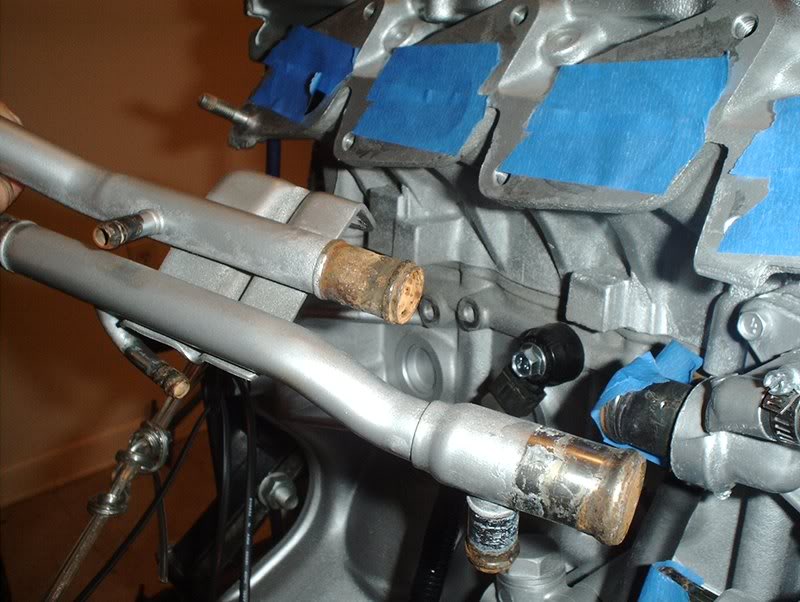
and you can take the airpipe off. You'll probably have to cut the old hoses in order to completely get it off...mine were on tight.
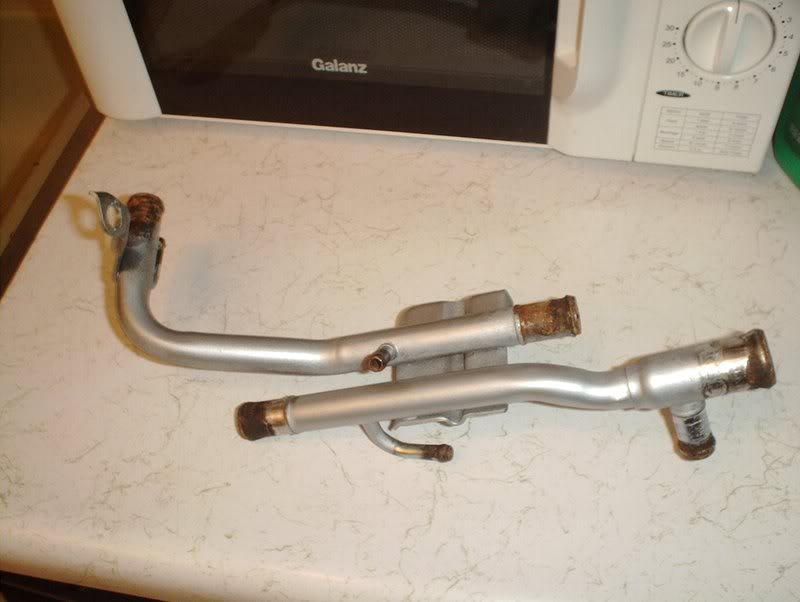
I went to the local AutoZone and tried to get some hoses as close to what I removed as possible.
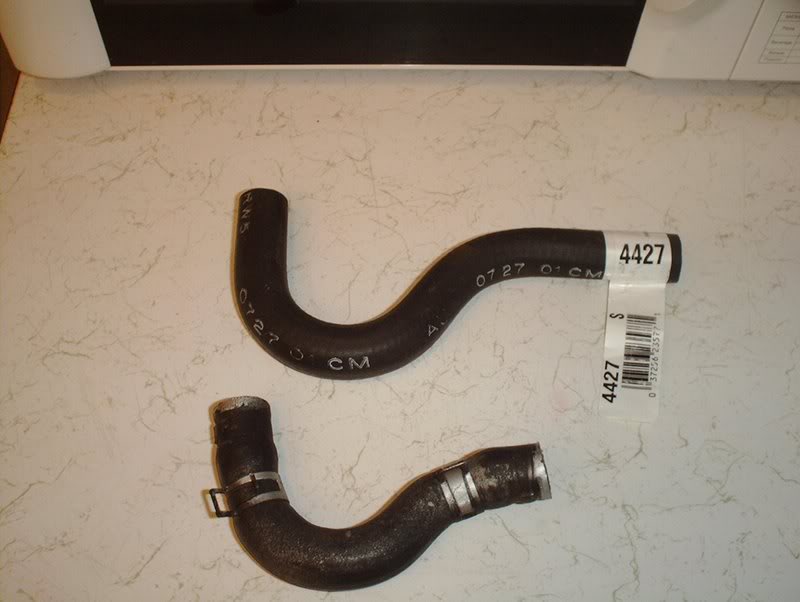
For the hose coming off the thermometer housing I got this one. Part#: 4427
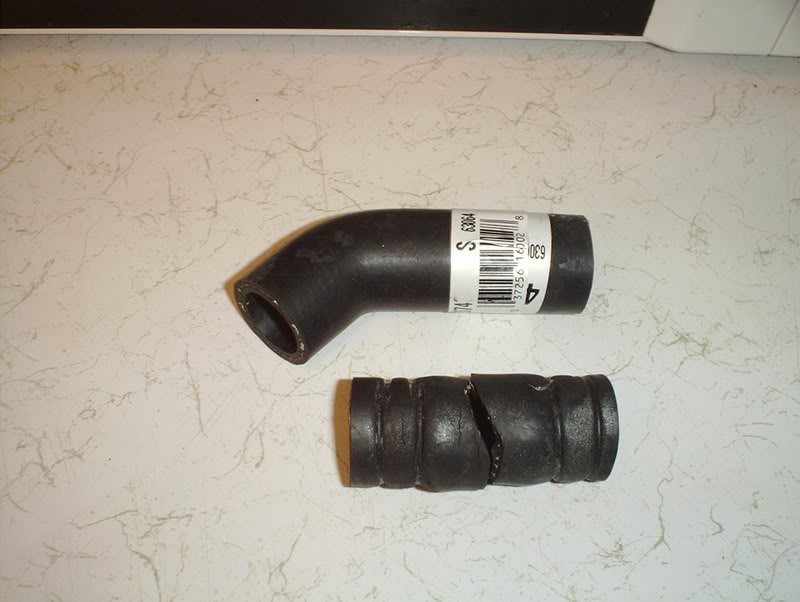
For the larger coolant/water line. Part#: 4374
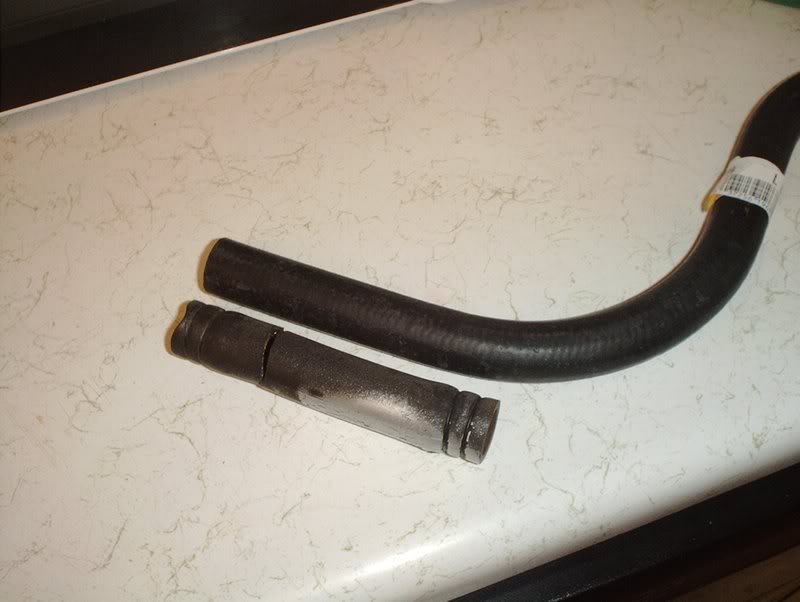
For the smaller coolant/water line. Part#: 4427
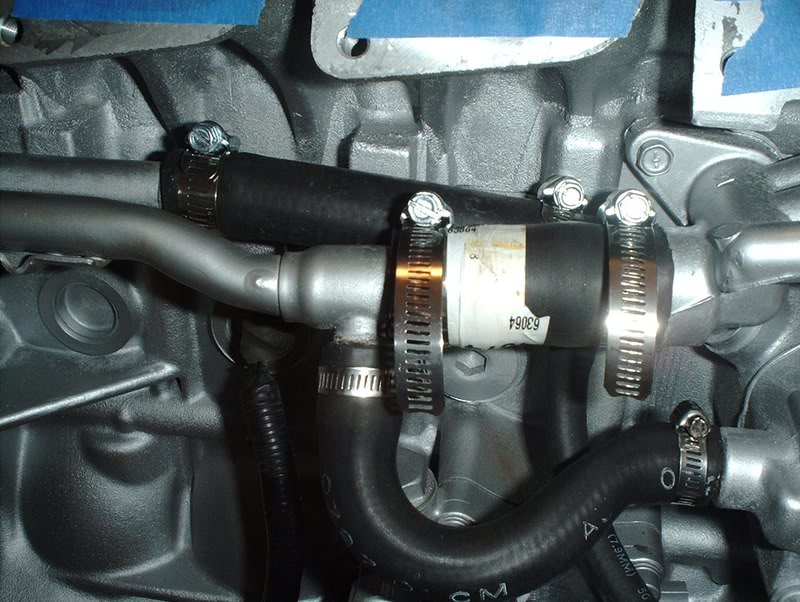
Hoses installed with some different clamps, I hate those OEM clamps. Bolt the air pipe back on to the block with the three bolts that you removed earlier. No torque specs listed for this in the FSM.
Rubber has a lifespan of about 5 years under perfect conditions. Less if it's out in the elements.
Sometimes a hose or a belt may look perfect, but the rubber coating is just cosmetic. The rubber makes it look good, like dressing.
The weaves under the rubber is what gives the belt strength and structural integrity. Usually SRs has been sitting in a yard somewhere for some time.
So take the time to replace all the rubber parts."
After reading that I remembered that I hadn't replaced the coolant/water lines under the intake manifold so I took it back off and swapped them out.
Tools needed:
Socket wrench
Socket extension
13mm socket
Cutter/knife
Flathead screwdriver
Better do it now rather than later.
13mm socket takes two bolts off here and one bolt on the back of the block...
and you can take the airpipe off. You'll probably have to cut the old hoses in order to completely get it off...mine were on tight.
I went to the local AutoZone and tried to get some hoses as close to what I removed as possible.
For the hose coming off the thermometer housing I got this one. Part#: 4427
For the larger coolant/water line. Part#: 4374
For the smaller coolant/water line. Part#: 4427
Hoses installed with some different clamps, I hate those OEM clamps. Bolt the air pipe back on to the block with the three bolts that you removed earlier. No torque specs listed for this in the FSM.
Thread Starter
Contributing Member
Joined: Sep 2002
Posts: 1,192
From: Starkville, MS.
Water Temp Gauge
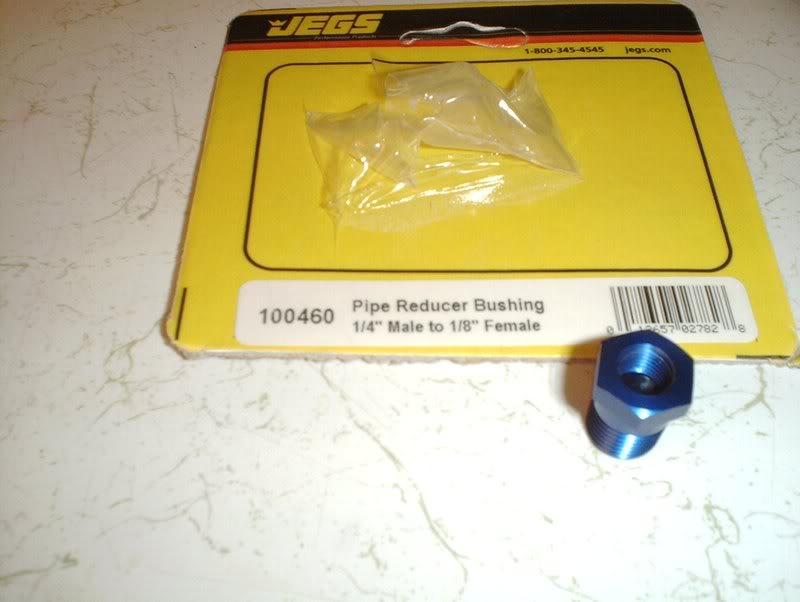
Eh...that first fitting that I got to adapt the water temp sensor...she no worky so forget about that! This is the one!

Pipe reducer bushing Part# 100460 1/4" male to 1/8' female
Pipe reducer bushing Part# 100460 1/4" male to 1/8' female
Thread Starter
Contributing Member
Joined: Sep 2002
Posts: 1,192
From: Starkville, MS.
Clutch...That Thing That Turns And Makes It Go!!!
Got this to replace my clutch line with. This line goes all the way from the clutch master cylinder to the slave cylinder. It replaces the hardline and the clutch slave line so this would be excellent for those doing a auto to manual swap as this line is cheaper than buying the OEM hardline and slave line setup brand new. Also, the end of my hardline was all kinked up anyway.
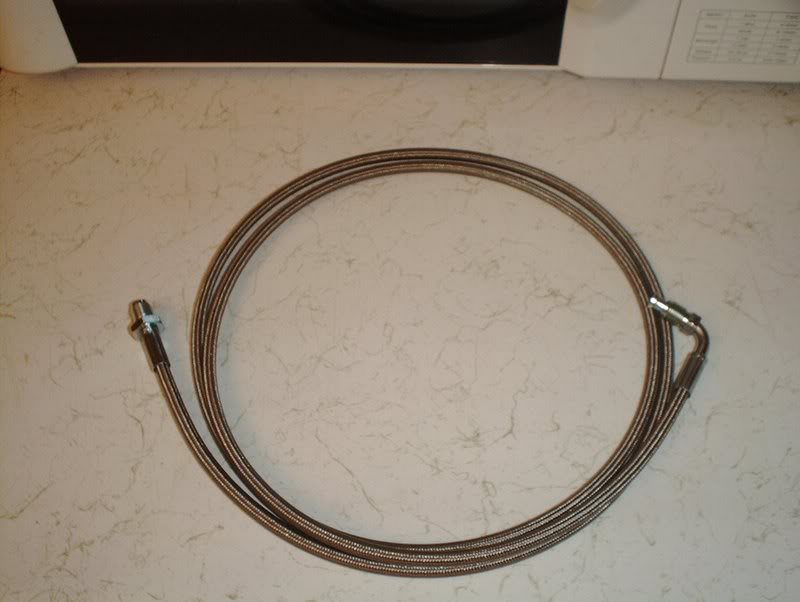
Clutch slave to master line.
Clutch slave to master line.
Thread Starter
Contributing Member
Joined: Sep 2002
Posts: 1,192
From: Starkville, MS.
Water Outlet
I placed the water temp sensor in today. I won't go over putting on the S14 water neck as I put the S13 neck on earlier in the thread and it's the same.
Pipe reducer bushing Part# 100460 1/4" male to 1/8' female

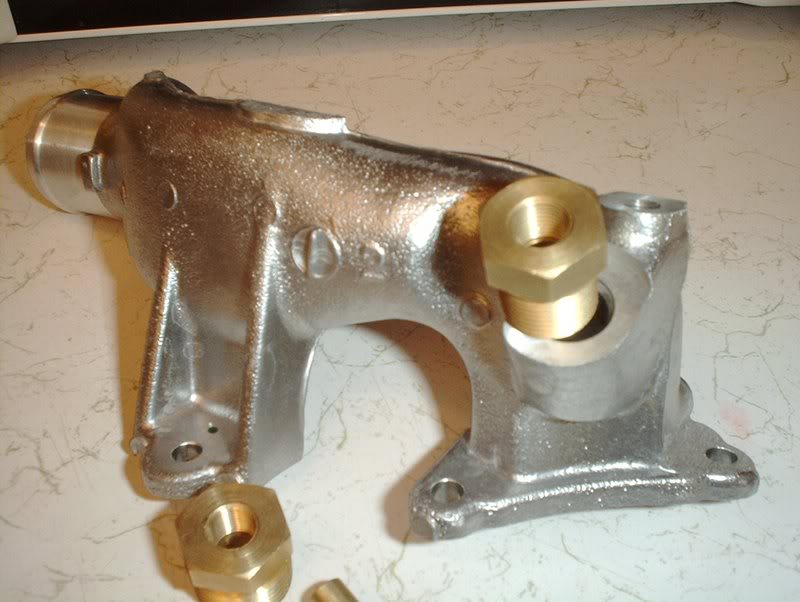
The two adapters, 3/8" and 1/2", do not fit the water neck bung.
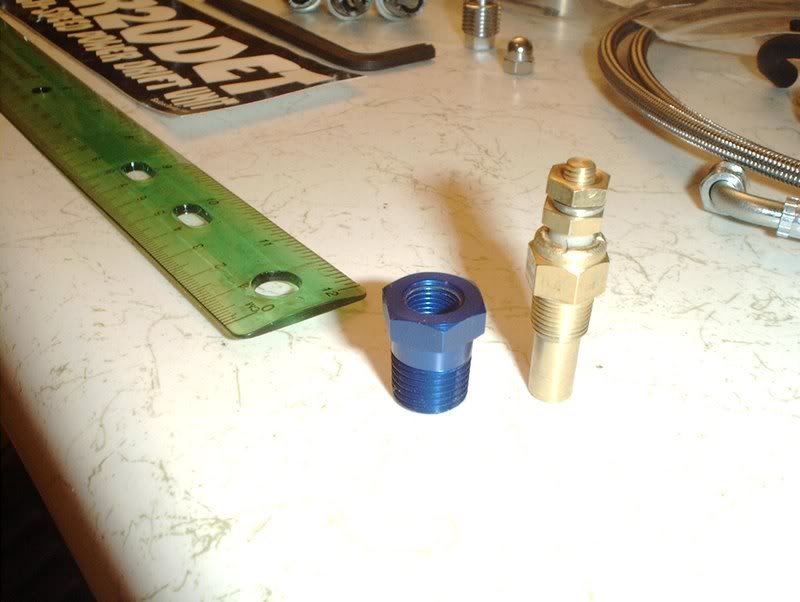
This new adapter is a perfect fit.
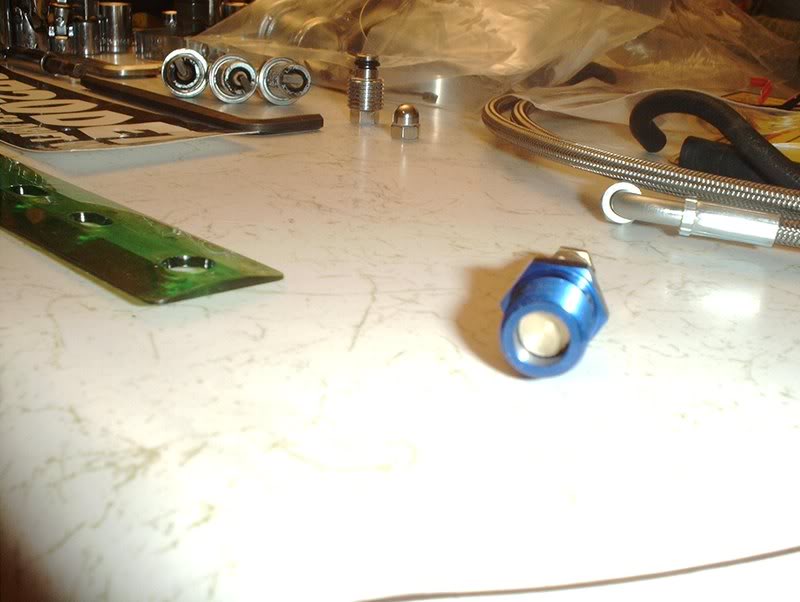
When threaded into the adapter fully...
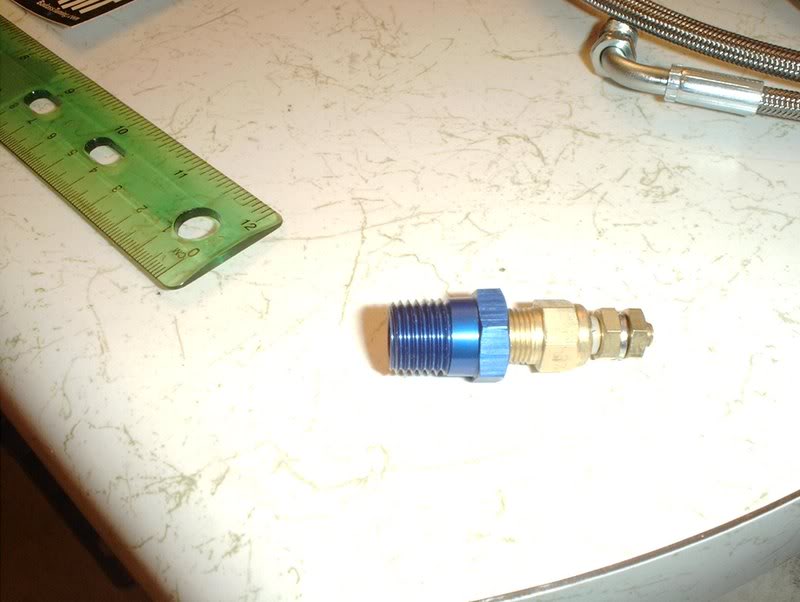
the temp sensor will come through the hole in the center so it's in the water neck with the fluids.

Use a 16mm socket to seat the adapter...the instructions say to put some teflon tape on the pipe threads.
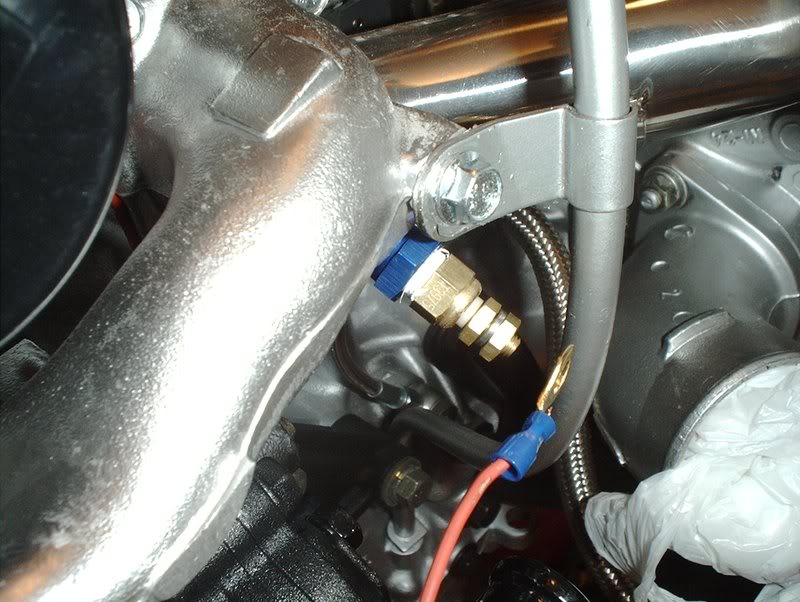
Use a 12mm wrench to tighten the sensor into the adapter and done...don't forget the teflon tape here also.
Pipe reducer bushing Part# 100460 1/4" male to 1/8' female
The two adapters, 3/8" and 1/2", do not fit the water neck bung.
This new adapter is a perfect fit.
When threaded into the adapter fully...
the temp sensor will come through the hole in the center so it's in the water neck with the fluids.
Use a 16mm socket to seat the adapter...the instructions say to put some teflon tape on the pipe threads.
Use a 12mm wrench to tighten the sensor into the adapter and done...don't forget the teflon tape here also.