
S13 Power Folding Mirror Install

Thread Starter
Contributing Member
Joined: Sep 2002
Posts: 1,192
From: Starkville, MS.
S13 Power Folding Mirror Install
After three attempts, I finally installed my power folding mirrors today. Here's the process for those who don't know.
Tools needed:
Phillips head screwdriver
Soldering kit
Electrical tape
Metal coat hanger
Wire cutters
Extra wire
Socket wrench
Power folding mirrors with switch. The reason that I failed on the first two attempts to install these mirrors was because my harness was incomplete, so make sure that you have a complete harness or your attempt to install these mirrors will be futile
The full JDM harness will have 10 wires total. My incomplete harness only had 7...whoops!
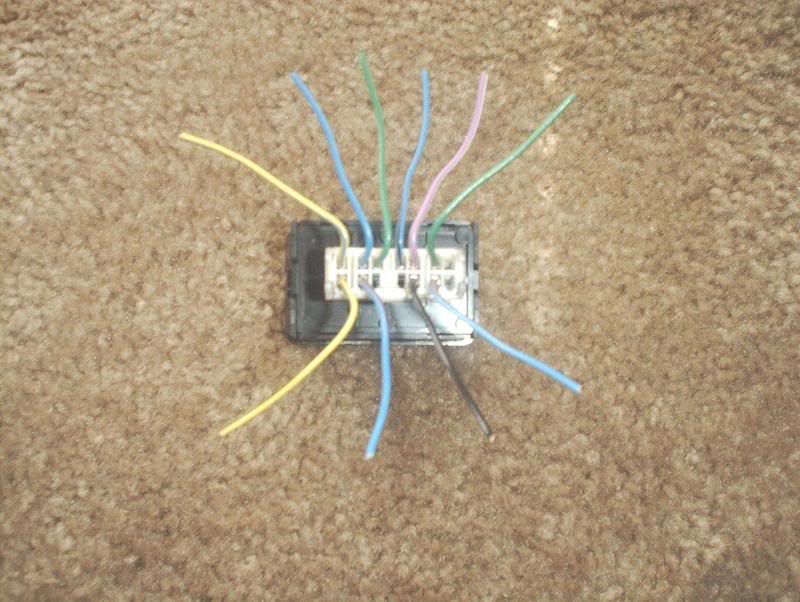
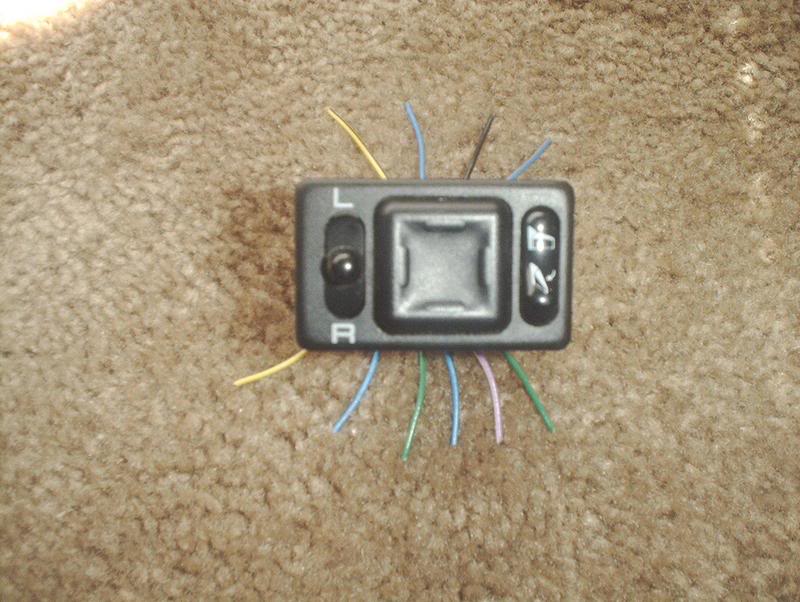
The full 10 wires compose of the following colors-yellow/blue, yellow/black, purple/white, black(for the ground), blue/black, blue/red, blue/white, blue(power folding), green/white, green(power folding). The plain blue and the plain green wires are the two extra wires that control the fold out fold in actions on the JDM mirrors. These are the two wires that you will need to splice and run to the center console. The other wires are exactly like your stock power mirrors if you have them and you will only need to connect the corresponding colors together and solder.
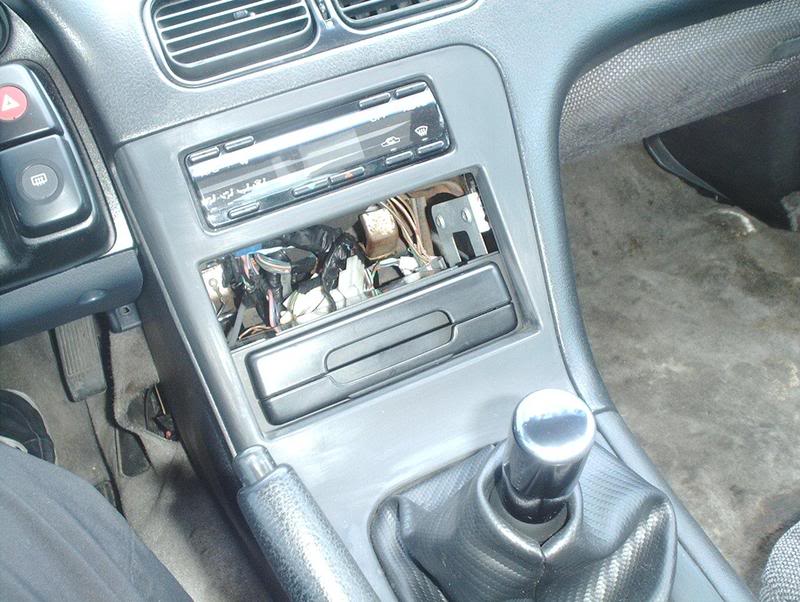
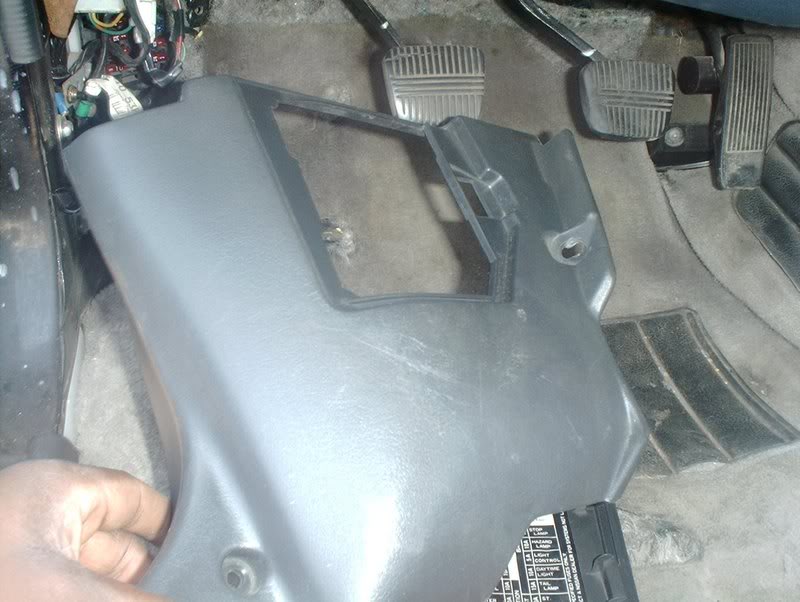
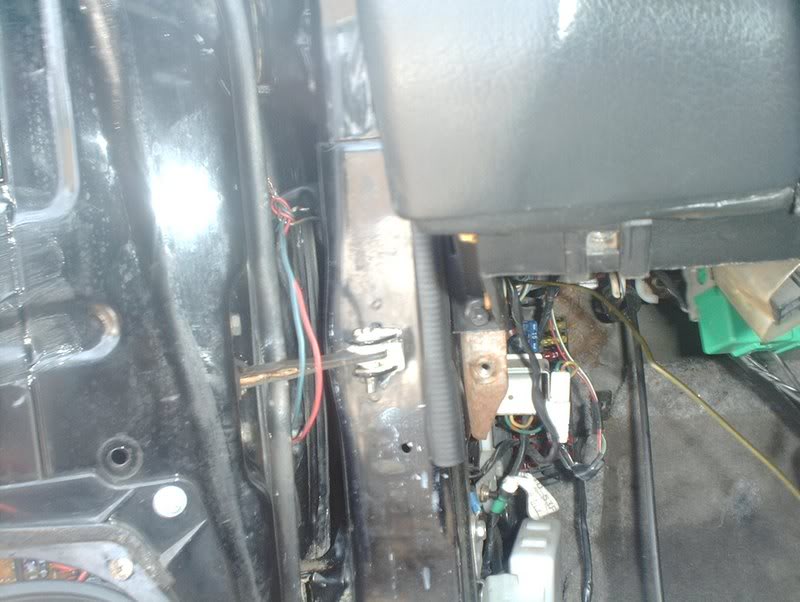
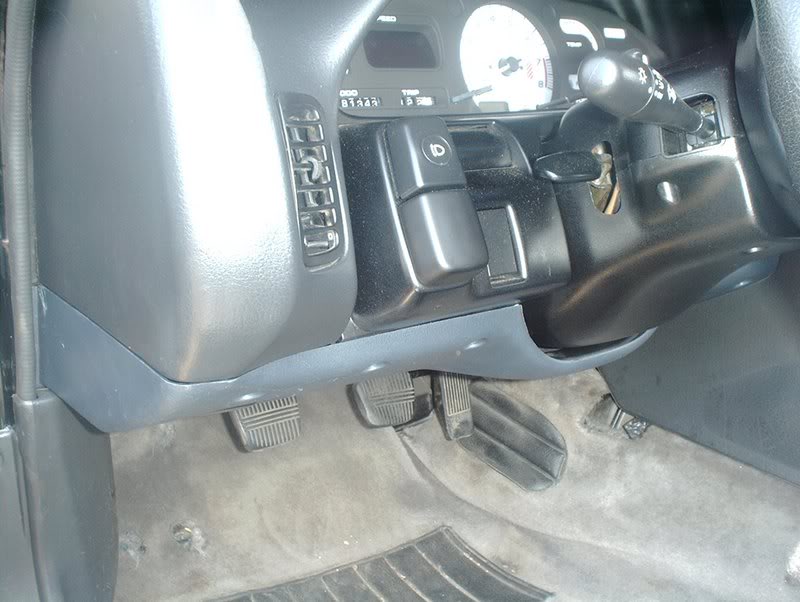
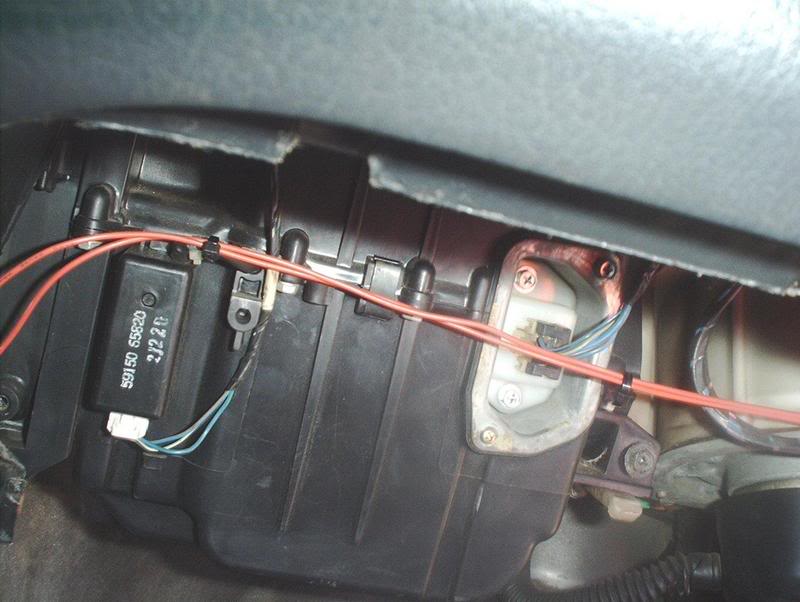
The first thing you need to do is disconnect your battery and then gain access to the power mirror harness by removing the trim plate and center console.
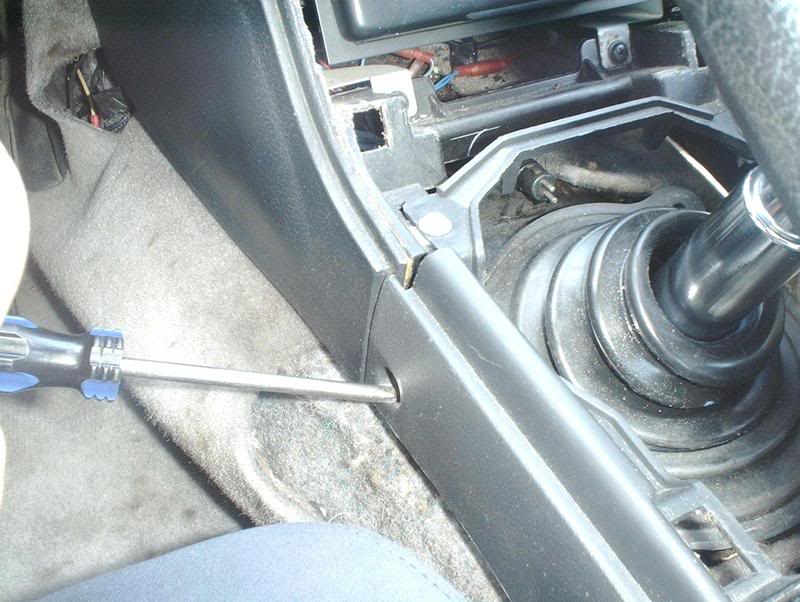
Grab the sides of the trim plate and carefully pull to remove it from the dash.
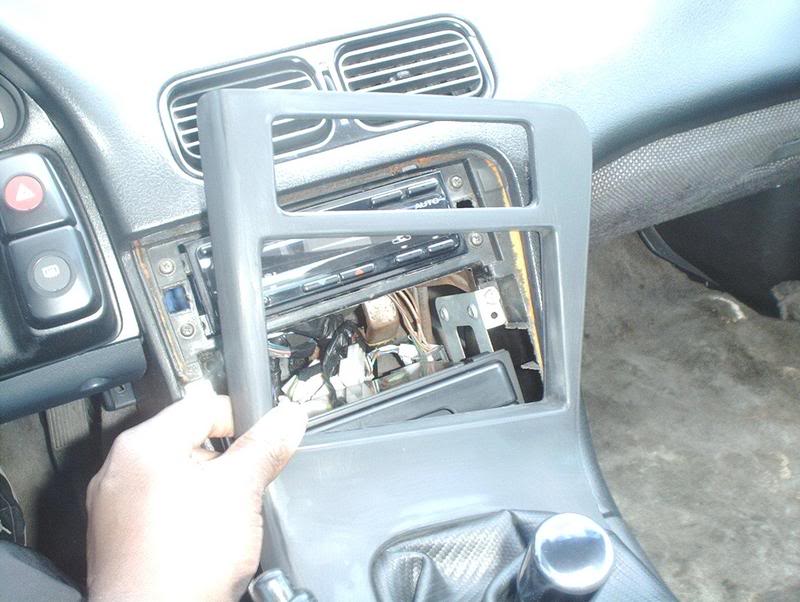
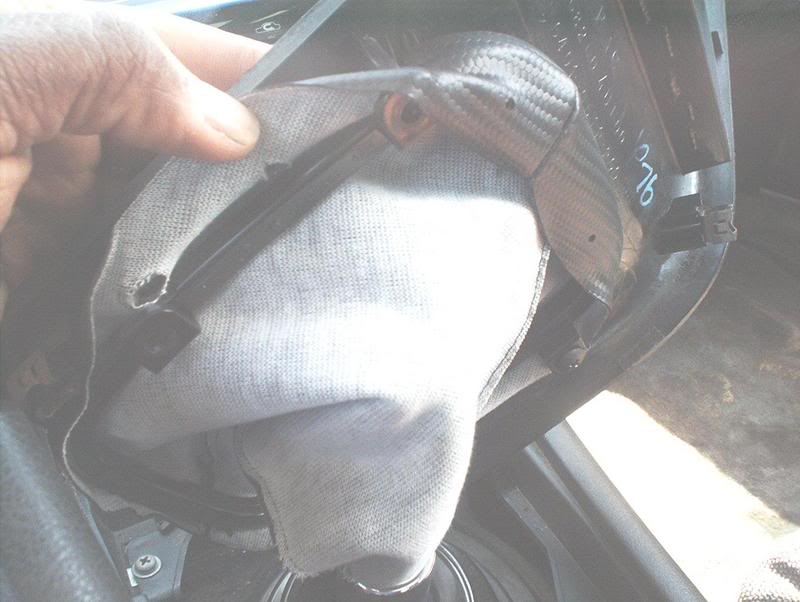
Use a phillips head screwdriver to remove the shifter trim plate from your shift boot.
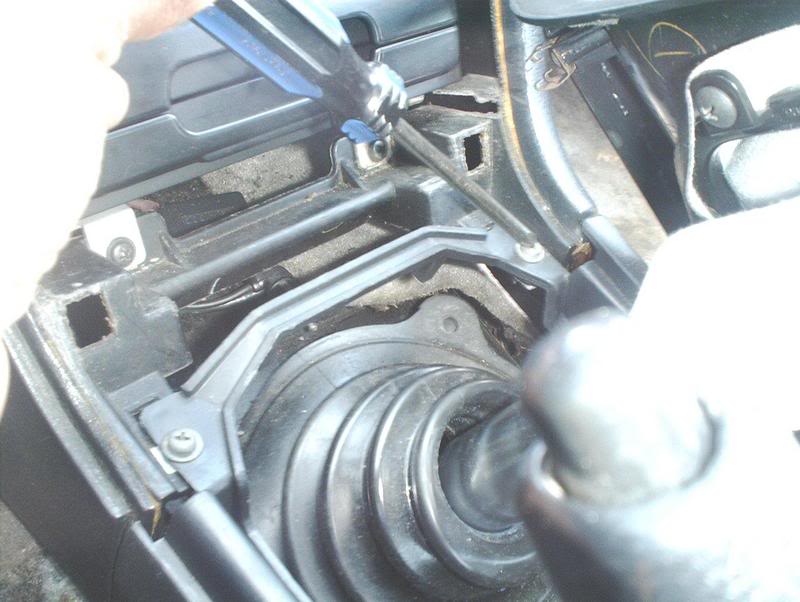
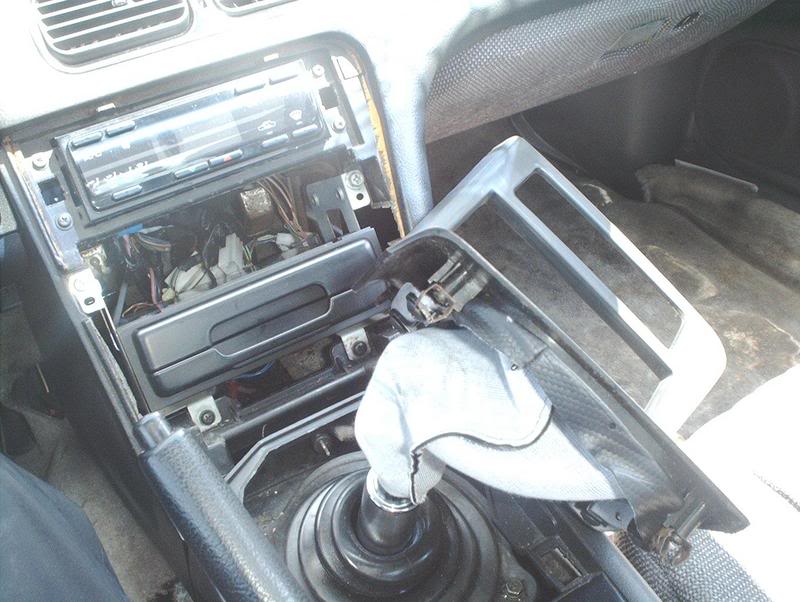
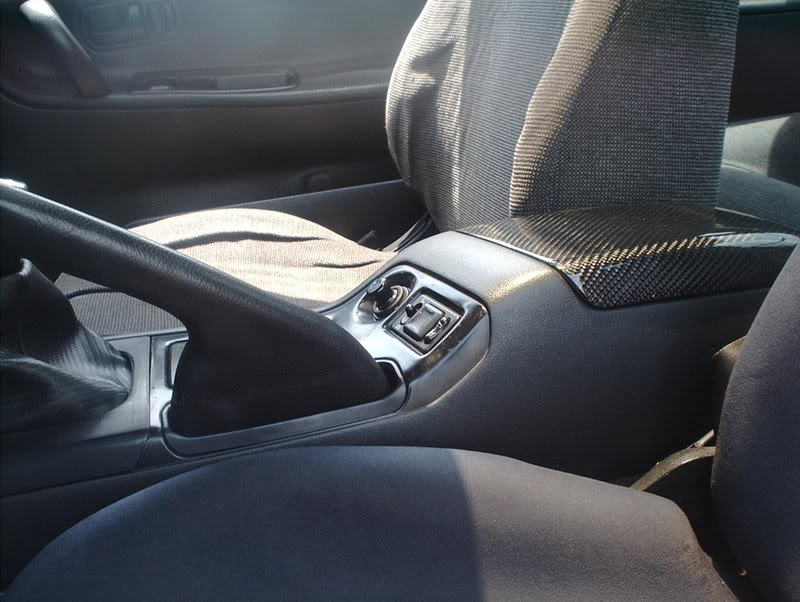
Now you'll need to remove the screws on the center console. There's two at the top of the console...
and four on the sides of the front and back of the console.
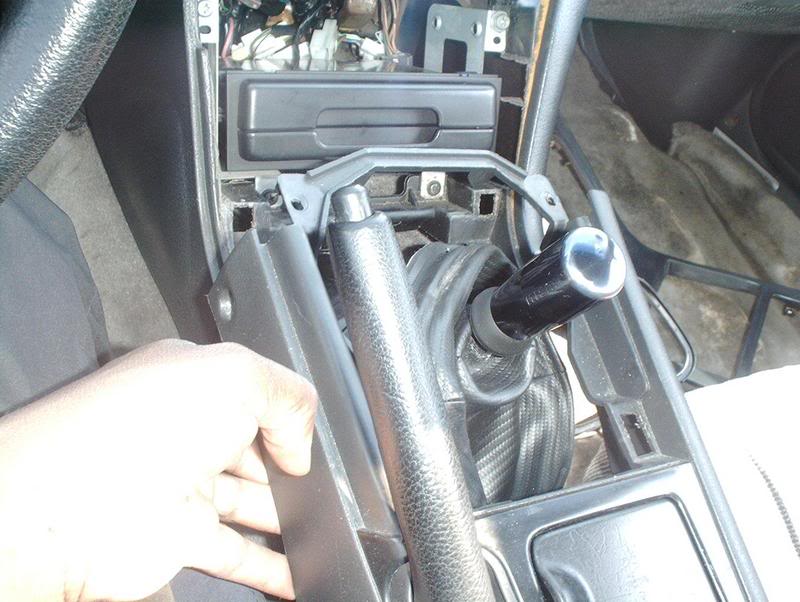
Now you can pull the console away from the dash.
Before you do, remember to remove the cigarette lighter harness and the ashtray light harness from the underside of the console.
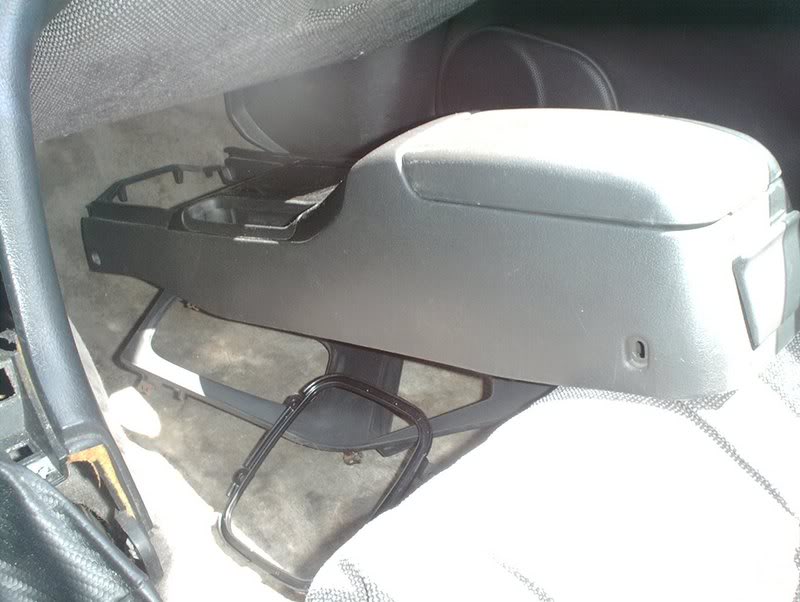
Sit the console on the passenger floorboard and out of the way.
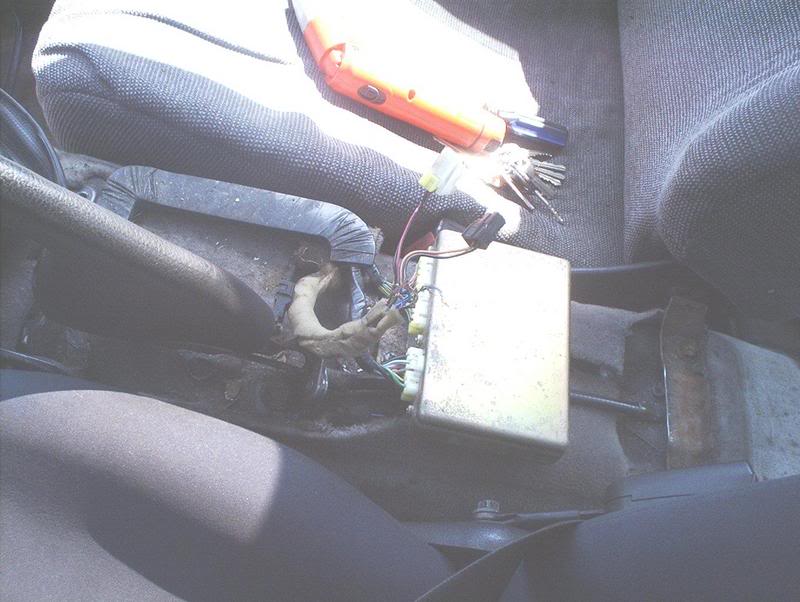
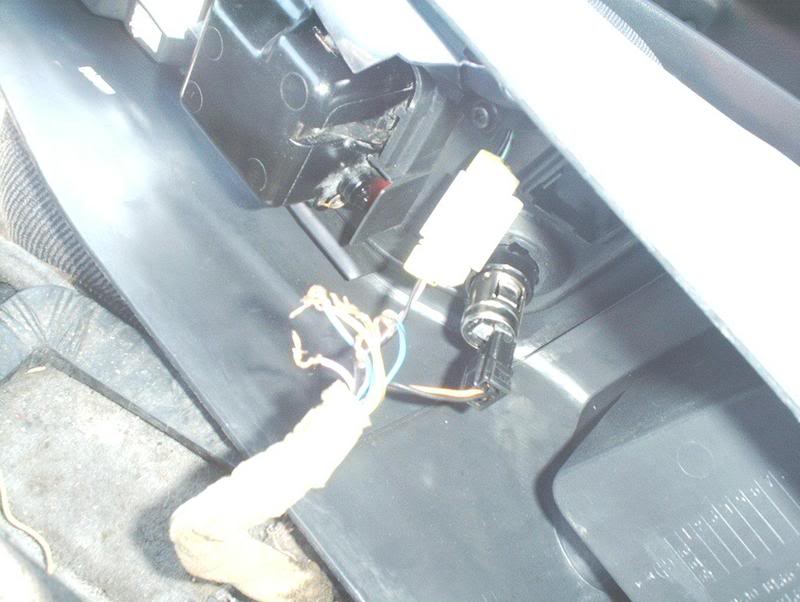
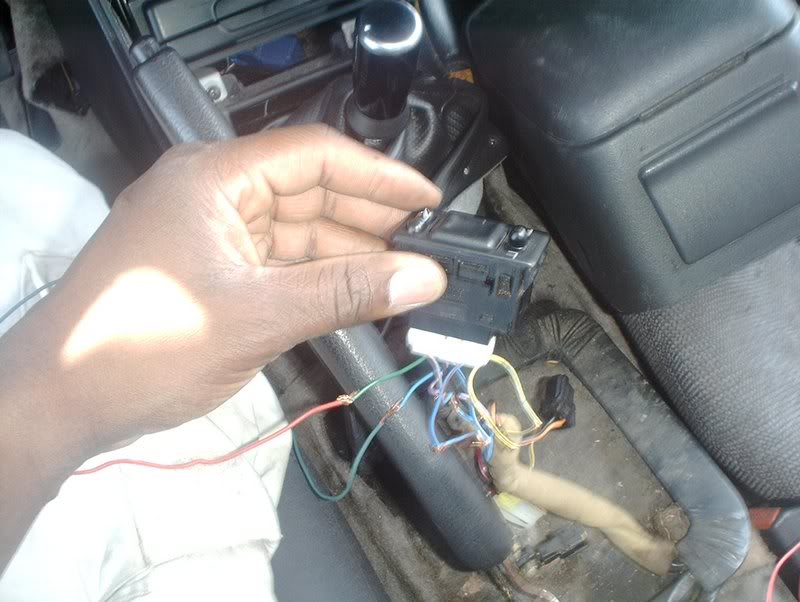
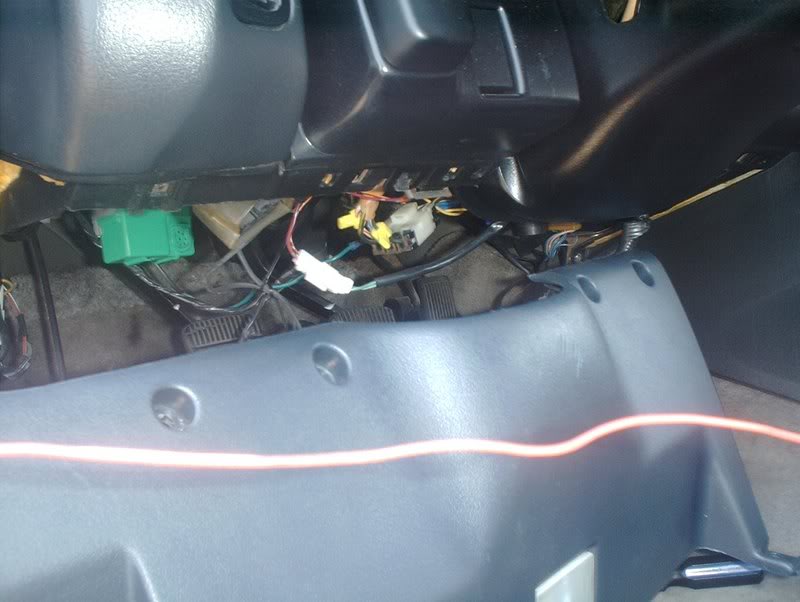
The mirror harness.
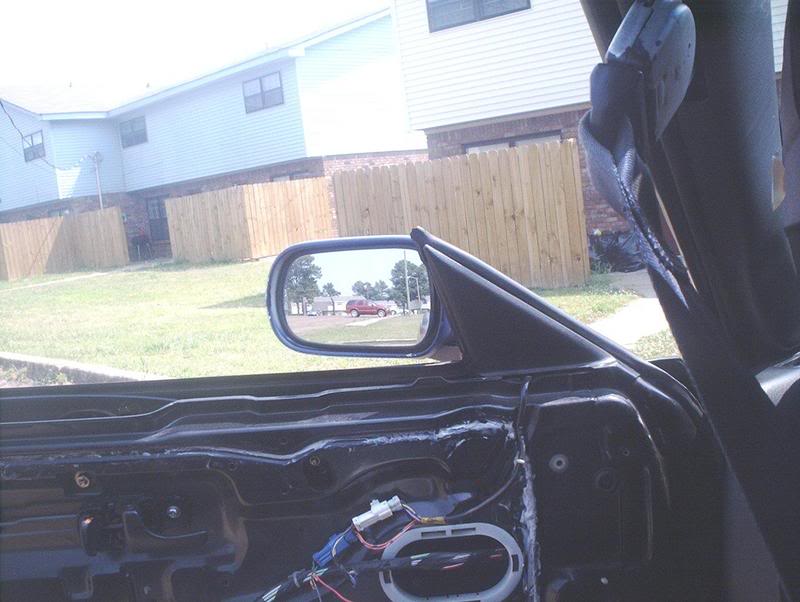
Now you'll need to remove the door panel. If you don't know how, use this thread-S13 Door Panel Removal http://www.club240.com/forums/showthread.php?t=38899
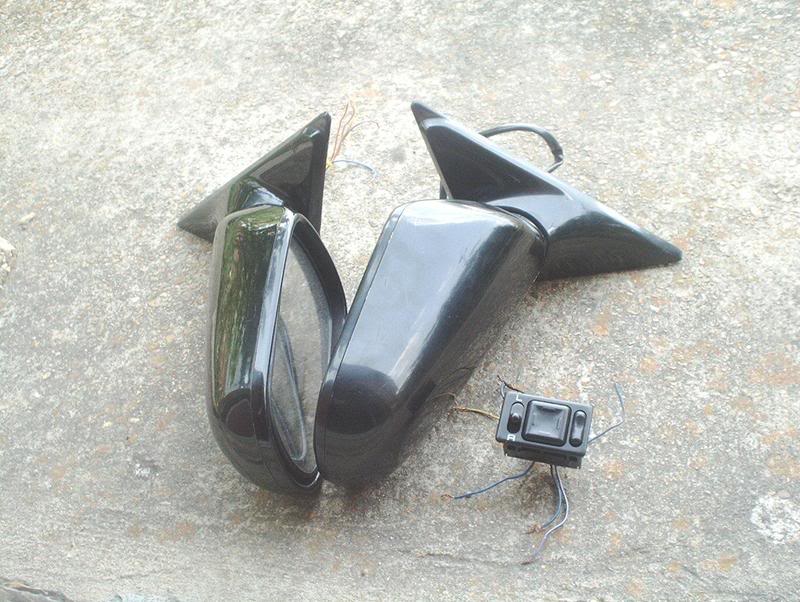
After removing the door panels you'll need to swap out your USDM mirrors with the JDM mirrors.
Start by removing the black bases. They pull off with ease.
Using a phillips head screwdriver or a socket wrench, remove the three bolts holding the mirrors in and put the JDM mirrors in their place.
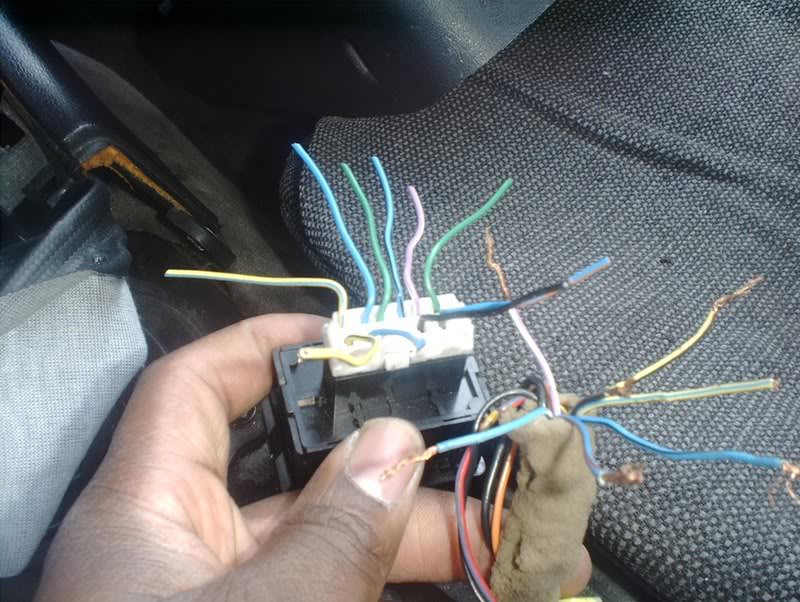
Now you need to take your stock mirror harness and your JDM harness and match up the corresponding wires.
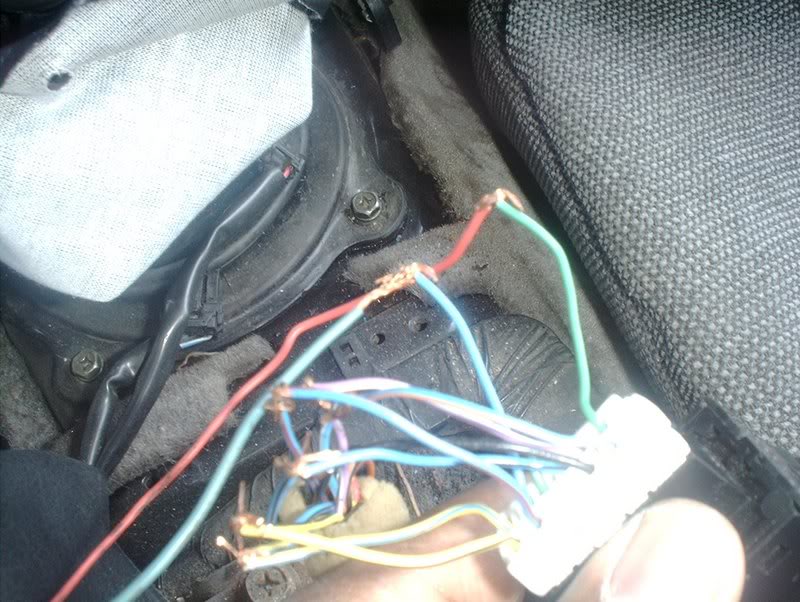
Sloppily connect the wires on your USDM harness to the wires on your JDM harness. At this point it just needs a connection, we want to make sure everything works before we start running any wires or soldering.
The JDM mirrors will have a white harness for the power function on the mirrors and a blue harness for the power folding function.
The blue harness will have a blue and a green wire, this is where you need to run two extra wires in order for the folding function to work.
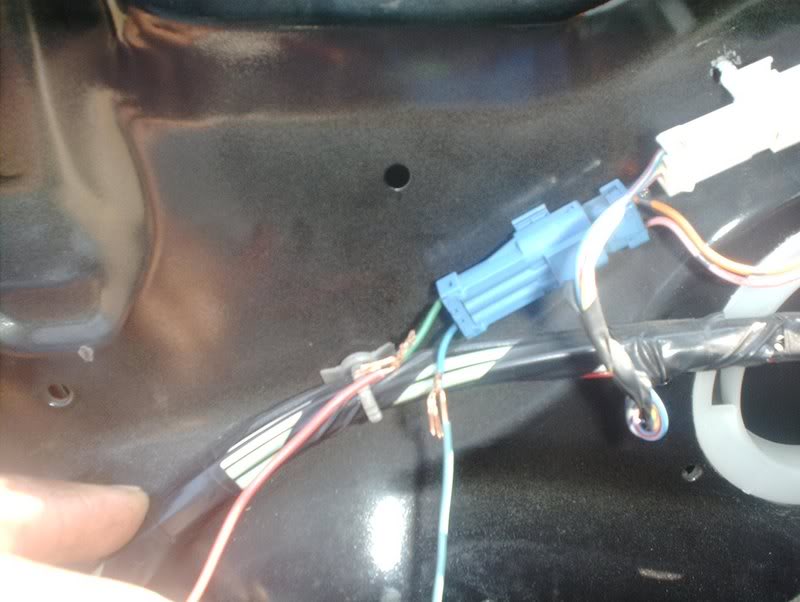
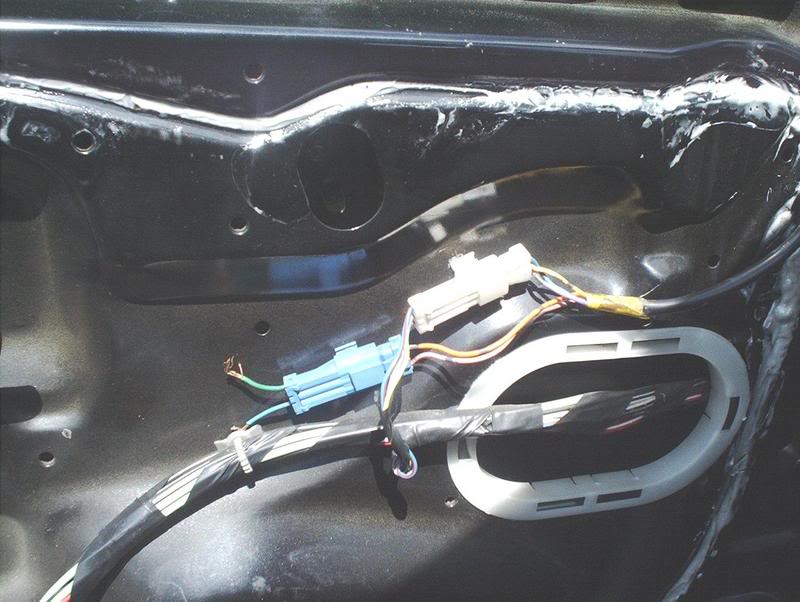
Go ahead and run the wires to the mirror harness...
and the switch harness.
Now that you have everything wired, you need to connect your battery and test the mirror to see if it works properly.
If everything goes well...voila! You now have power folding mirrors! Fold in!

Fold out!
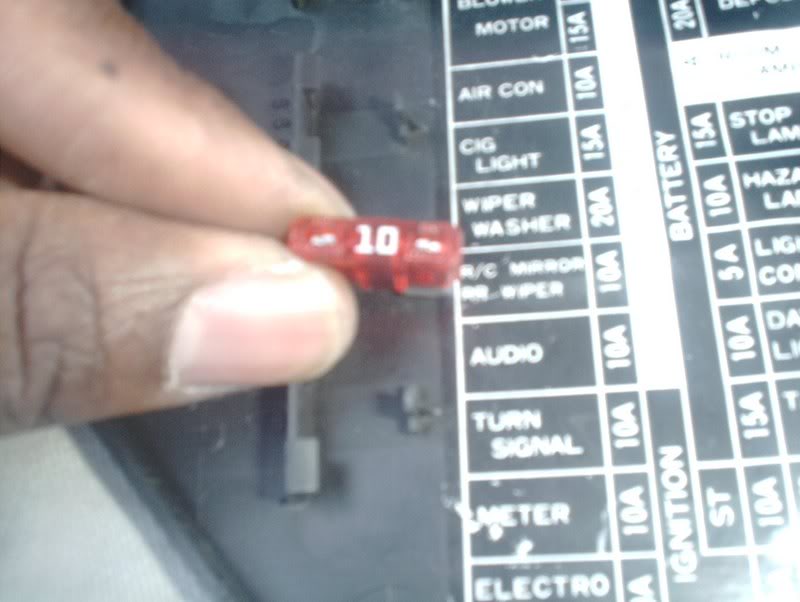
If your mirrors didn't function at all you might want to check the fuse.
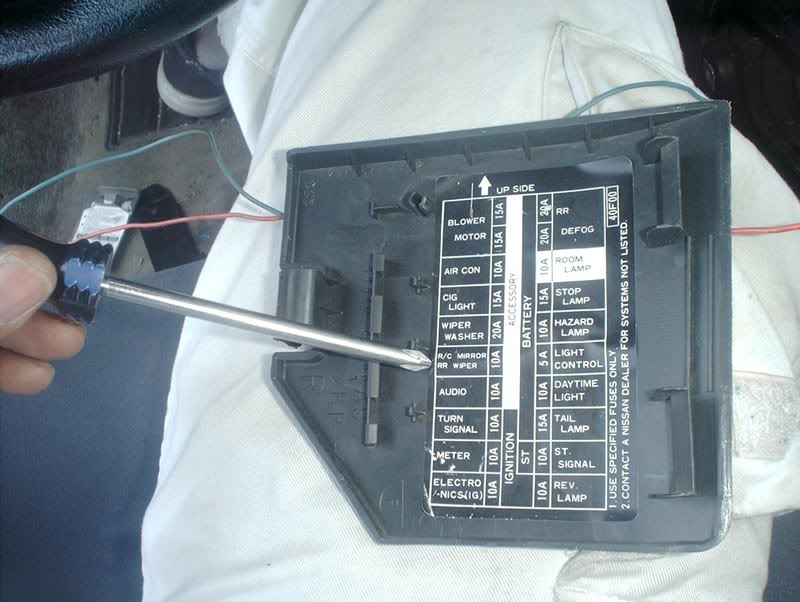
Mine didn't do anything the first time and it turns out that I didn't have a fuse for them.
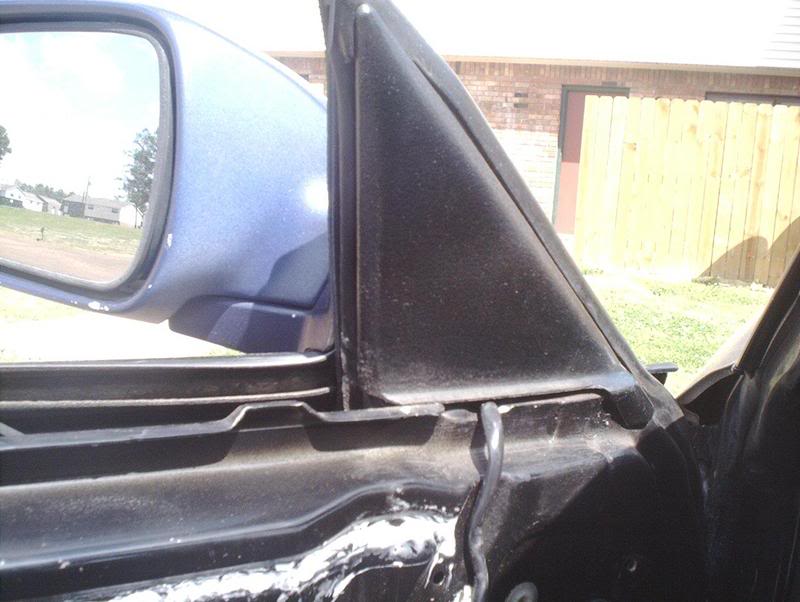
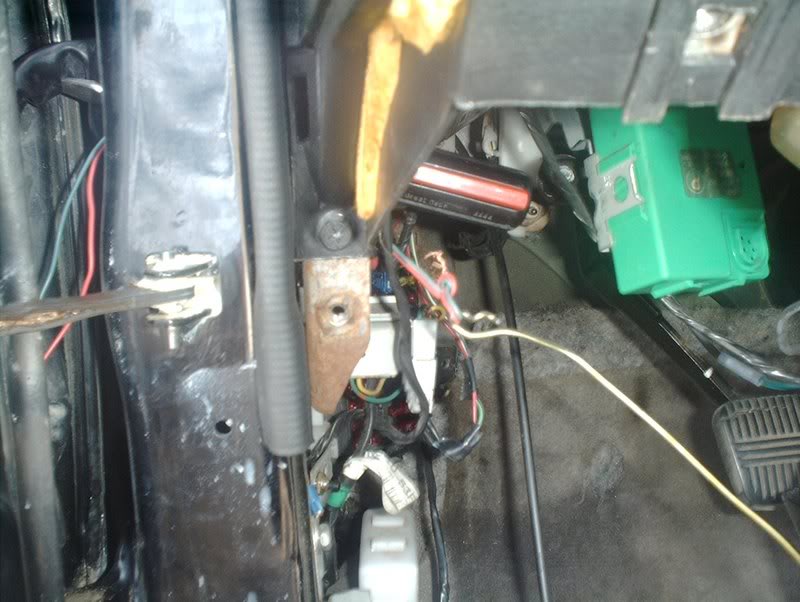
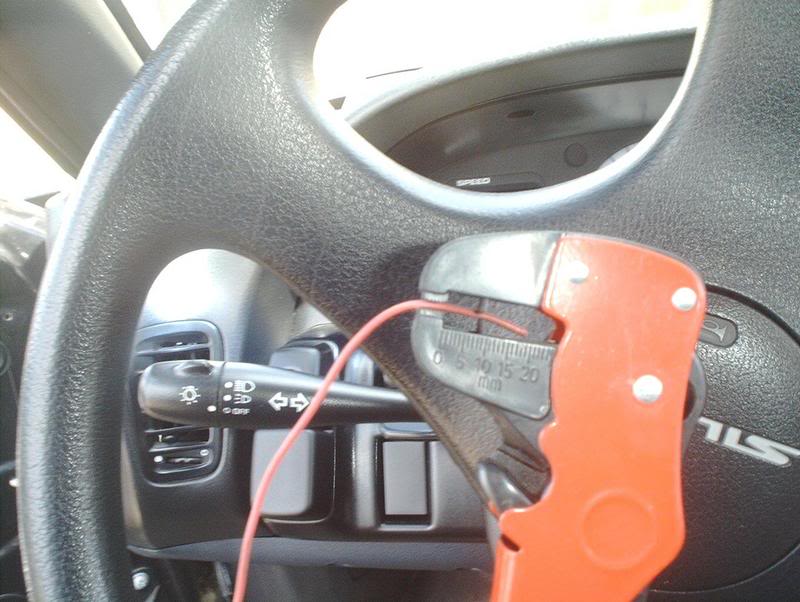
Now that everything is functioning you can go ahead and run your extra wires thru the door and the dash.
Remove the kick panel.
And the lower column cover.
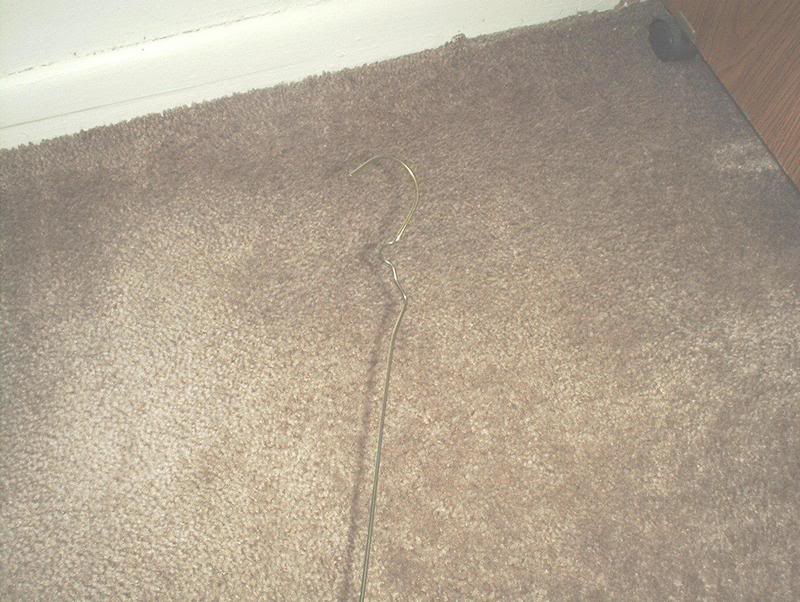
The coat hanger, man's best friend for running wires.
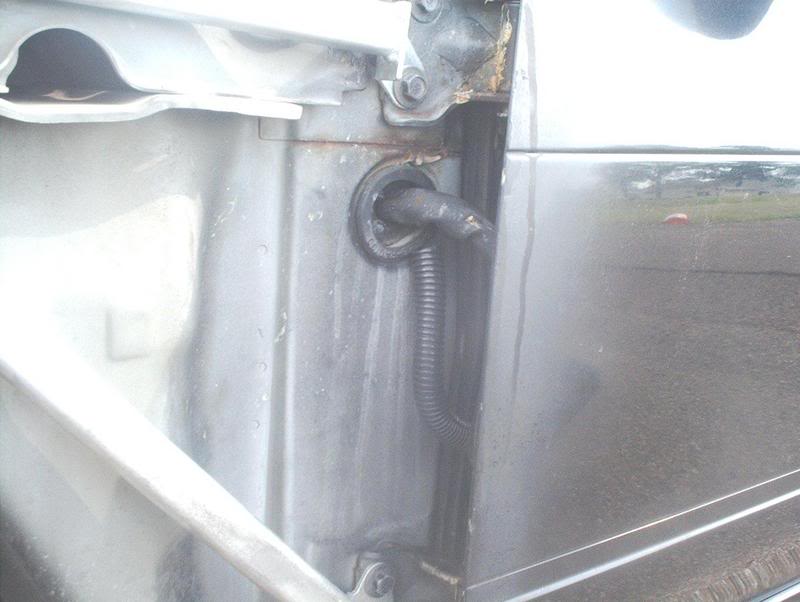
First, you need to run the coat hanger thru the rubber grommet on the door.
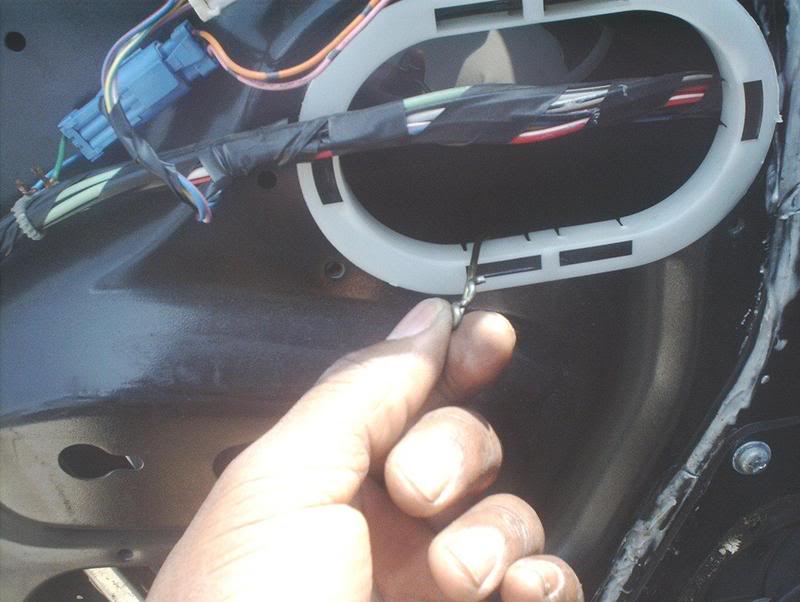
Out.
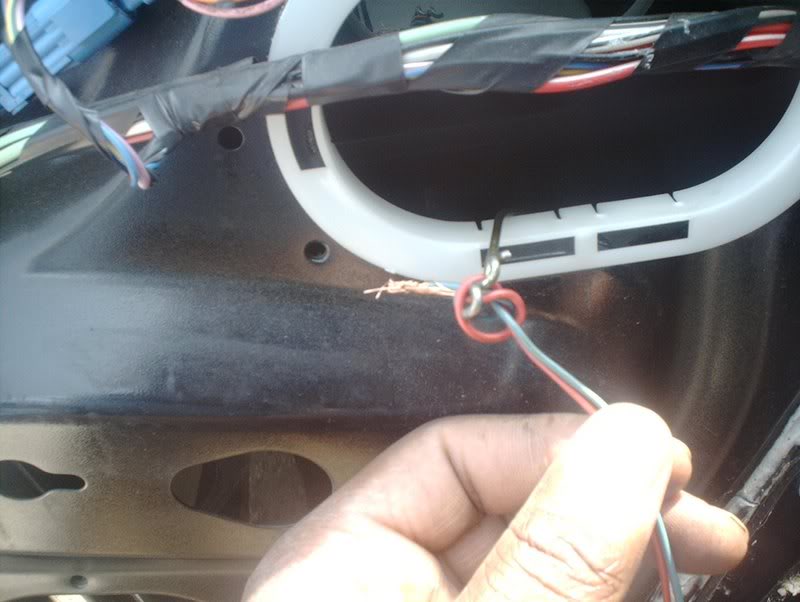
Tie the wires.
Pull them thru.
Now run the hanger thru the rubber grommet for the inside.
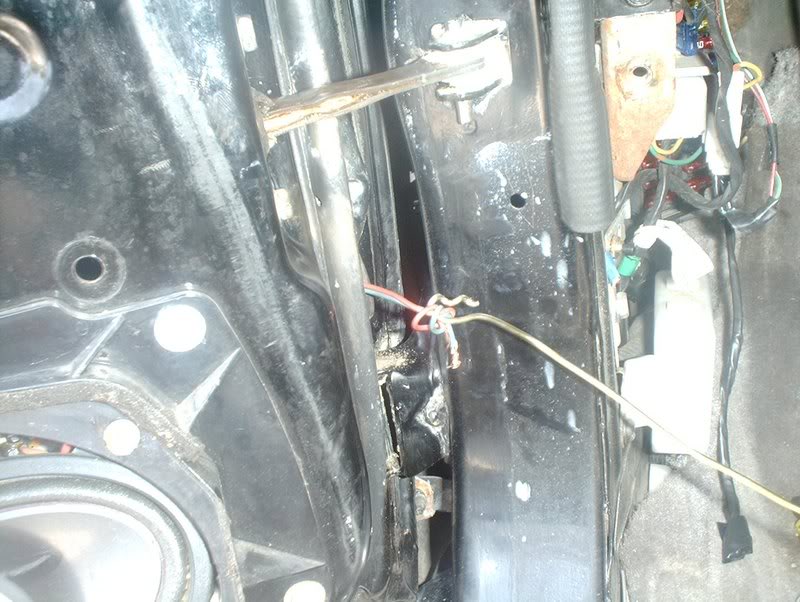
Tie the wires.
Pull the wires thru.
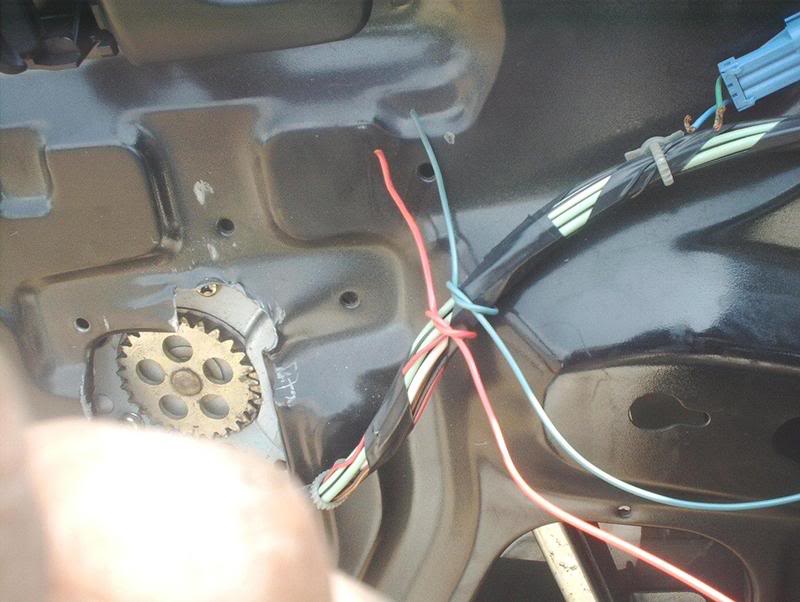
Before you go any further tie the wires at the door to something so that they don't get pulled through the door while you're tugging away on the other side.
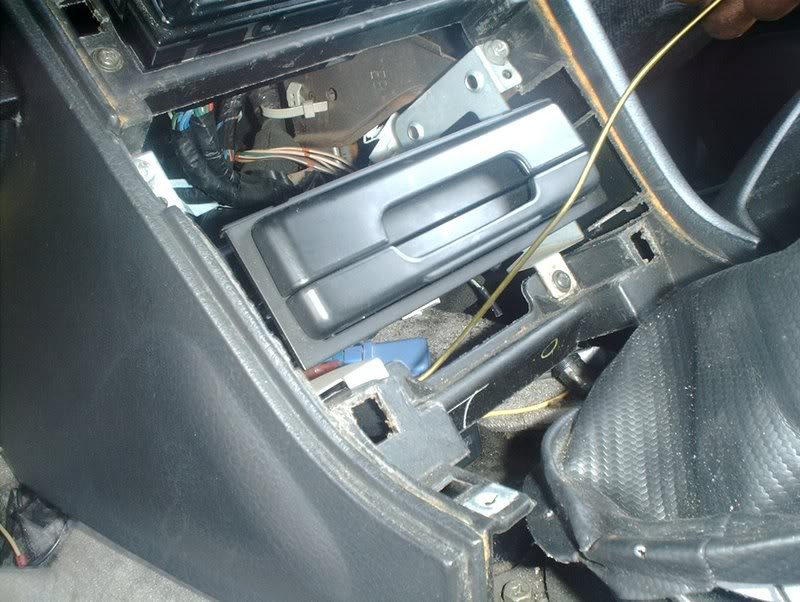
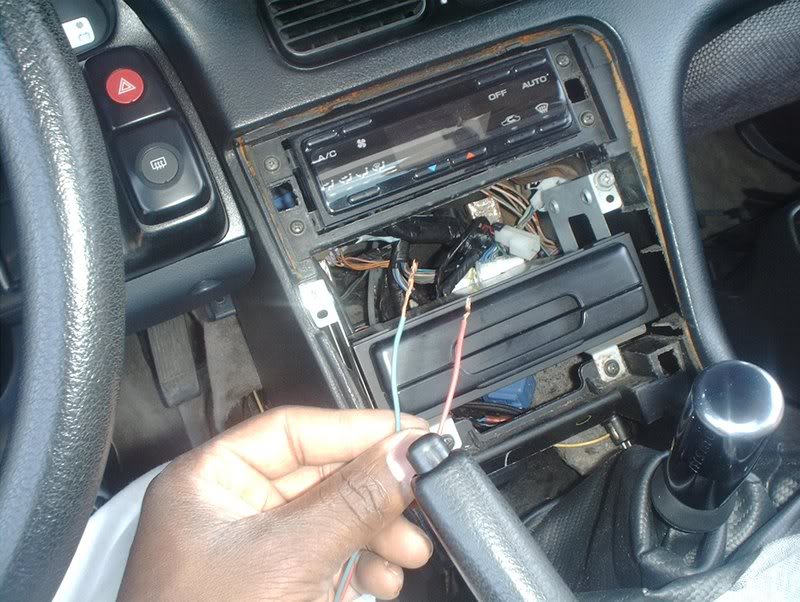
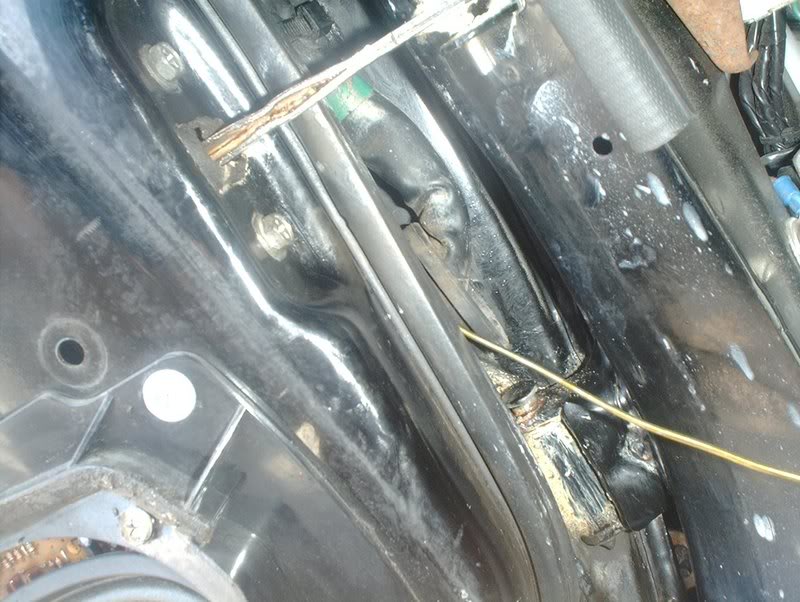
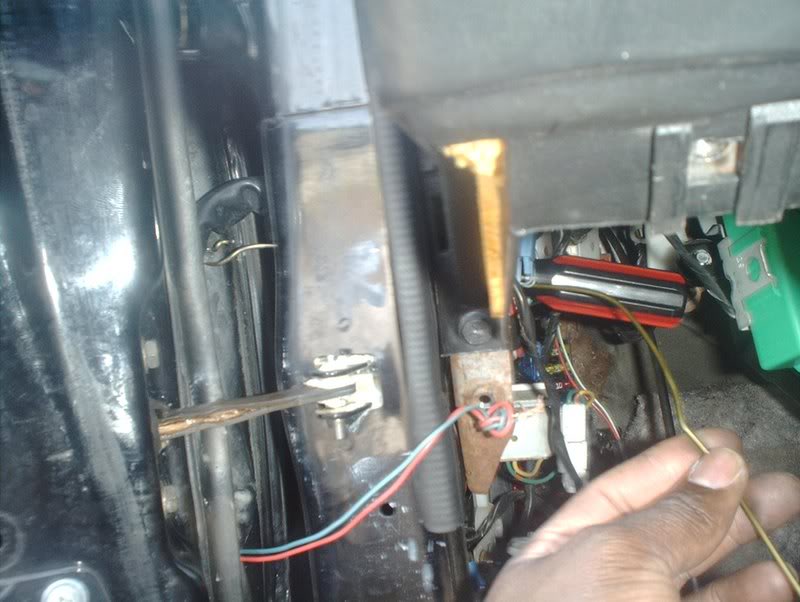
Almost done. Run the hanger through the center console and out the bottom of the dash near the gas pedal.
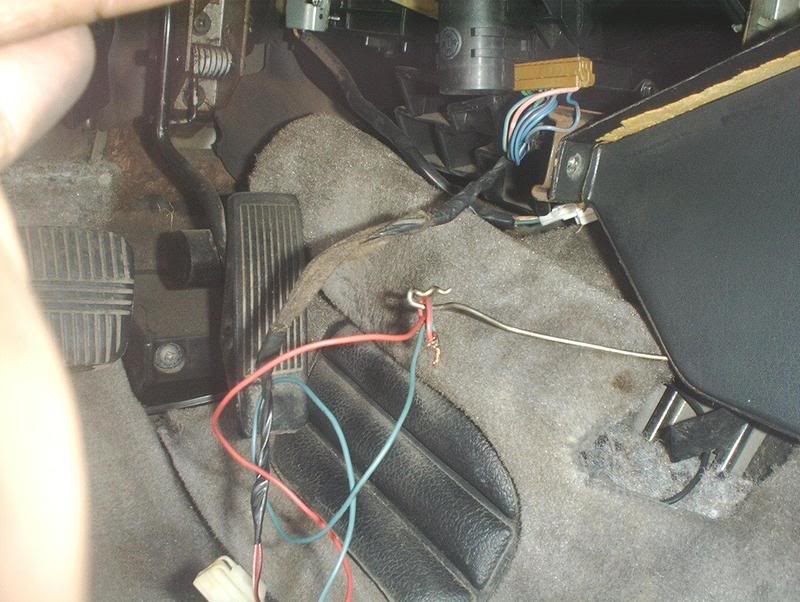
Finally, tie the wires and pull them through the center console. Now that you have the extra wires ran, you need to tie everything together again and test one last time to make sure that the mirrors still function.
If they do you can start cutting, soldering and shrink wrapping where it is required. If you don't know how to solder, read this very informative thread(props to Durdan) How To Solder Like A Man! http://www.club240.com/forums/showthread.php?t=39061

Repeat the procedure for the passenger side, secure the wires that you ran under the dash and the console.
Put everything back together and you're done.
You now have power folding mirrors.
Tools needed:
Phillips head screwdriver
Soldering kit
Electrical tape
Metal coat hanger
Wire cutters
Extra wire
Socket wrench
Power folding mirrors with switch. The reason that I failed on the first two attempts to install these mirrors was because my harness was incomplete, so make sure that you have a complete harness or your attempt to install these mirrors will be futile
The full JDM harness will have 10 wires total. My incomplete harness only had 7...whoops!
The full 10 wires compose of the following colors-yellow/blue, yellow/black, purple/white, black(for the ground), blue/black, blue/red, blue/white, blue(power folding), green/white, green(power folding). The plain blue and the plain green wires are the two extra wires that control the fold out fold in actions on the JDM mirrors. These are the two wires that you will need to splice and run to the center console. The other wires are exactly like your stock power mirrors if you have them and you will only need to connect the corresponding colors together and solder.
The first thing you need to do is disconnect your battery and then gain access to the power mirror harness by removing the trim plate and center console.
Grab the sides of the trim plate and carefully pull to remove it from the dash.
Use a phillips head screwdriver to remove the shifter trim plate from your shift boot.
Now you'll need to remove the screws on the center console. There's two at the top of the console...
and four on the sides of the front and back of the console.
Now you can pull the console away from the dash.
Before you do, remember to remove the cigarette lighter harness and the ashtray light harness from the underside of the console.
Sit the console on the passenger floorboard and out of the way.
The mirror harness.
Now you'll need to remove the door panel. If you don't know how, use this thread-S13 Door Panel Removal http://www.club240.com/forums/showthread.php?t=38899
After removing the door panels you'll need to swap out your USDM mirrors with the JDM mirrors.
Start by removing the black bases. They pull off with ease.
Using a phillips head screwdriver or a socket wrench, remove the three bolts holding the mirrors in and put the JDM mirrors in their place.
Now you need to take your stock mirror harness and your JDM harness and match up the corresponding wires.
Sloppily connect the wires on your USDM harness to the wires on your JDM harness. At this point it just needs a connection, we want to make sure everything works before we start running any wires or soldering.
The JDM mirrors will have a white harness for the power function on the mirrors and a blue harness for the power folding function.
The blue harness will have a blue and a green wire, this is where you need to run two extra wires in order for the folding function to work.
Go ahead and run the wires to the mirror harness...
and the switch harness.
Now that you have everything wired, you need to connect your battery and test the mirror to see if it works properly.
If everything goes well...voila! You now have power folding mirrors! Fold in!
Fold out!
If your mirrors didn't function at all you might want to check the fuse.
Mine didn't do anything the first time and it turns out that I didn't have a fuse for them.
Now that everything is functioning you can go ahead and run your extra wires thru the door and the dash.
Remove the kick panel.
And the lower column cover.
The coat hanger, man's best friend for running wires.
First, you need to run the coat hanger thru the rubber grommet on the door.
Out.
Tie the wires.
Pull them thru.
Now run the hanger thru the rubber grommet for the inside.
Tie the wires.
Pull the wires thru.
Before you go any further tie the wires at the door to something so that they don't get pulled through the door while you're tugging away on the other side.
Almost done. Run the hanger through the center console and out the bottom of the dash near the gas pedal.
Finally, tie the wires and pull them through the center console. Now that you have the extra wires ran, you need to tie everything together again and test one last time to make sure that the mirrors still function.
If they do you can start cutting, soldering and shrink wrapping where it is required. If you don't know how to solder, read this very informative thread(props to Durdan) How To Solder Like A Man! http://www.club240.com/forums/showthread.php?t=39061
Repeat the procedure for the passenger side, secure the wires that you ran under the dash and the console.
Put everything back together and you're done.
You now have power folding mirrors.
Last edited by positron; Oct 2, 2008 at 01:38 AM.
Nice write up man. I see you are a complete JDM ***** lol. Do you have all the correct sensors for that climate control too? And I take it thats the JDM cupholder? Does it actually hold drinks with that angle? I like how it all looks. Again, nice write up man. Makes me want folding mirrors.
Thread Starter
Contributing Member
Joined: Sep 2002
Posts: 1,192
From: Starkville, MS.
Nice write up man. I see you are a complete JDM ***** lol. Do you have all the correct sensors for that climate control too? And I take it thats the JDM cupholder? Does it actually hold drinks with that angle? I like how it all looks. Again, nice write up man. Makes me want folding mirrors.
 I have all the sensors for the digi-unit but I don't have A/C so the auto function is useless at this time. Airman Jackson, I know nothing of wiring, I'm praying my car doesn't burst into flames while I'm sleeping tonight.
 Thanks for the input guys!

Thread Starter
Contributing Member
Joined: Sep 2002
Posts: 1,192
From: Starkville, MS.
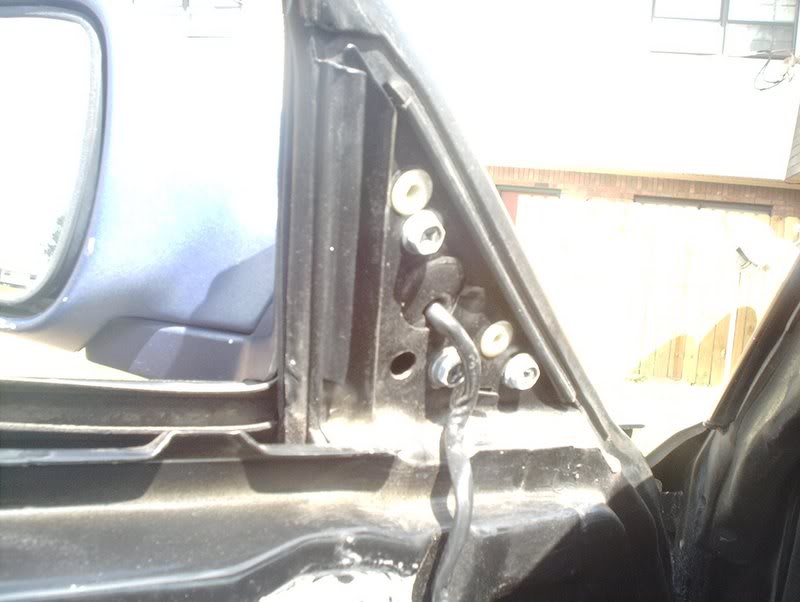
Update!!!
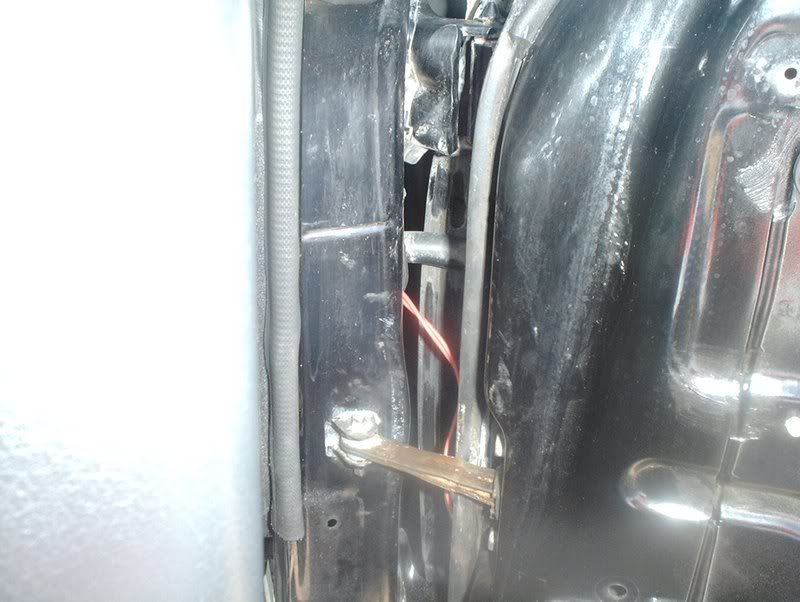
When running the wires on the passenger side...
make sure you close up the rubber grommets and replace the foam sealing the opening to prevent any chances of water getting in and onto your ECU which is directly below this opening.
Last edited by positron; Jun 8, 2007 at 06:17 AM.

Thread Starter
Contributing Member
Joined: Sep 2002
Posts: 1,192
From: Starkville, MS.
No, I haven't had any problems. The only thing is that the viewpoints are slightly different. Everything on the JDM mirrors looks smaller and closer than on the USDM mirrors but you can swap out the glass itself from the housing and solve this problem. I would have done it but I've gotten use to it as it is.

Registered User
Joined: Aug 2003
Posts: 57
From: SoCal 909
I just finished installing these on my S14 and there are some differences in the positioning of the mirrors. The adjustments of the mirror are meant for someone sitting on the right side. Some things that I've notice is the drivers mirror can't go to the left as far as you would like. The passenger mirror can't look at the ground.

Thread
Thread Starter
Forum
Replies
Last Post
whowutwut
For Sale - Interior / Exterior / Sound / Styling
2
May 19, 2008 05:09 AM
3S Drifter
Service, Parts & Tuning Review
1
Jan 15, 2004 10:03 AM