
S13 Rear Upper Control Arm Install

Thread Starter
Contributing Member
Joined: Sep 2002
Posts: 1,192
From: Starkville, MS.
S13 Rear Upper Control Arm Install
I finally got a set of rear upper control arms in. Here's the install!
Tools needed:
Jack
Jackstands
Crescent wrench
Socket wrench
Socket extension
3/4 socket
11/16 socket
3/4 wrench
Breaker bar
Torque wrench
Small hammer
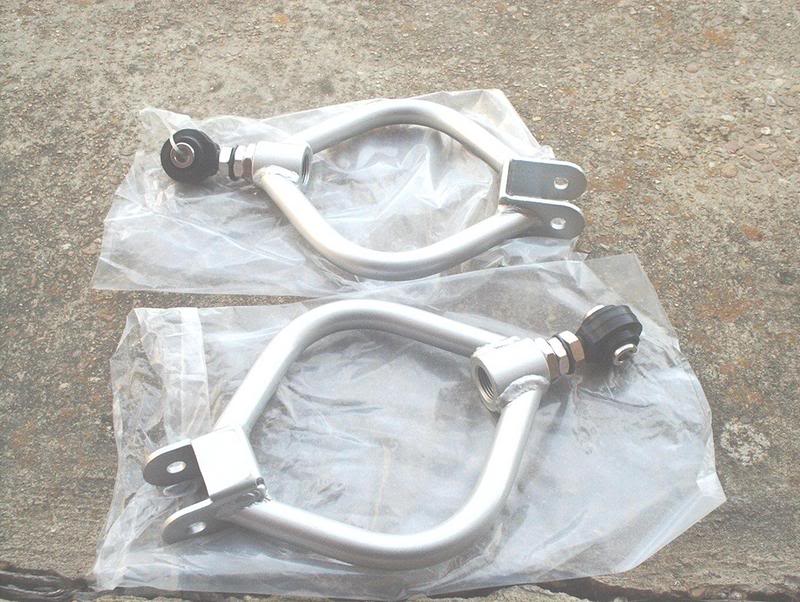
ProjectNissan RUCA's
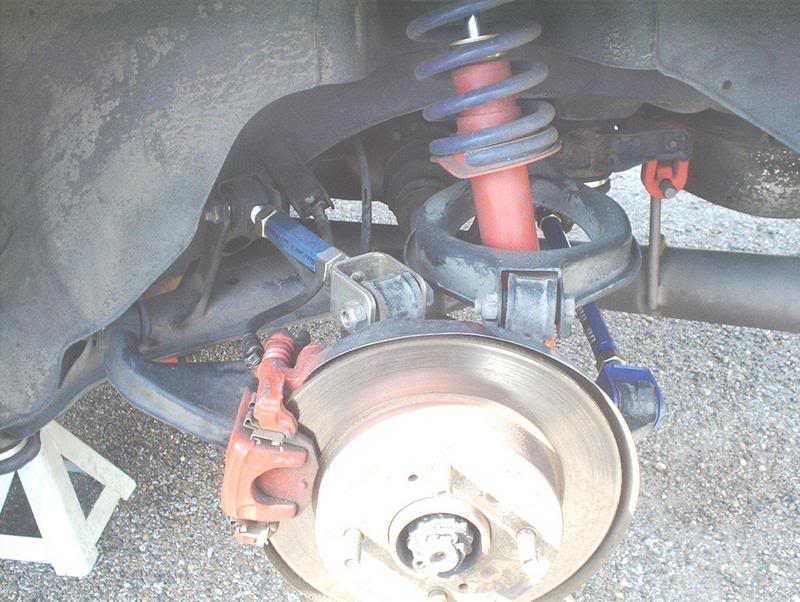
The RUCA's should have been the first rear mult-link suspension part I upgraded but I didn't...Whoops! Jack the car up and put the jackstands in the appropriate places.
Next you'll need to get the breaker bar to bust loose the inner control arm nut.
After you bust it loose, get an extension on your wrench and the 3/4 socket to remove the inner RUCA nut.
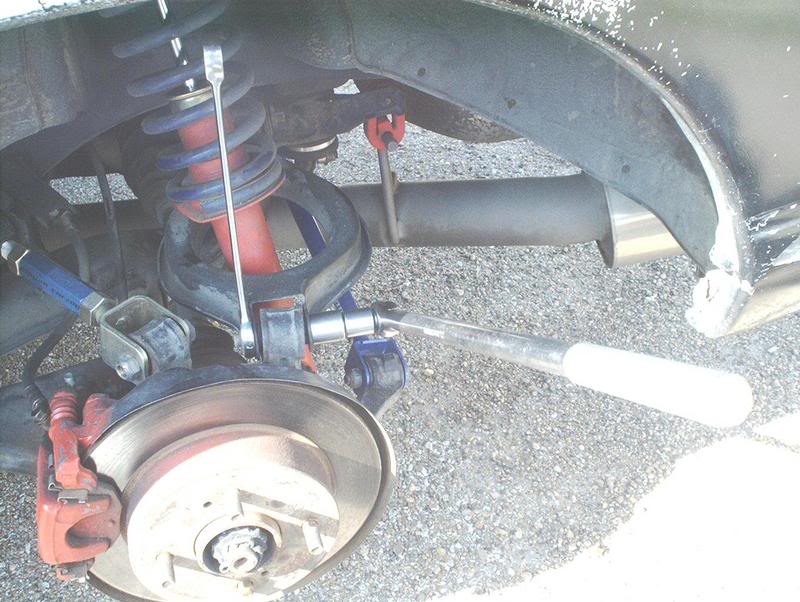
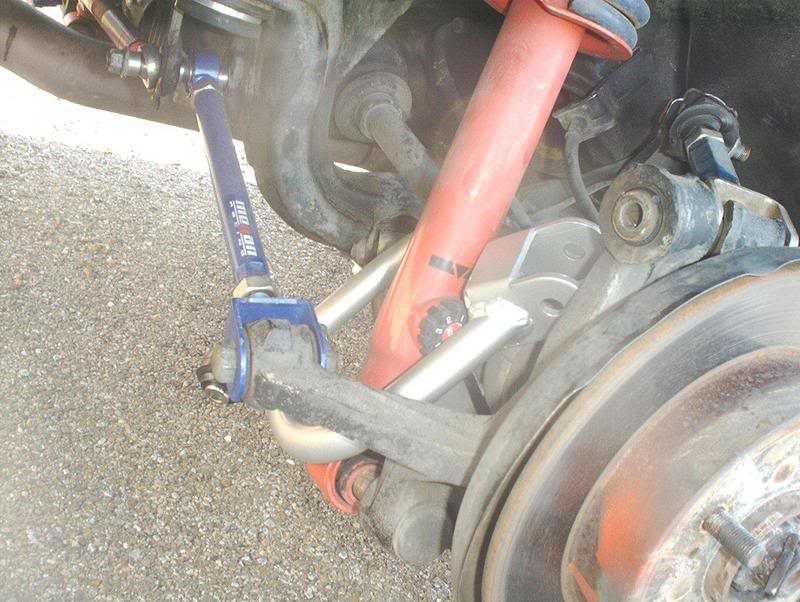
Now get the breaker bar and the 11/16 socket for the outer RUCA bolt. You'll need to use the 3/4 wrench to hold steady the outer RUCA nut while you bust it with the breaker bar.
Next, you'll need to remove the lower strut nut.
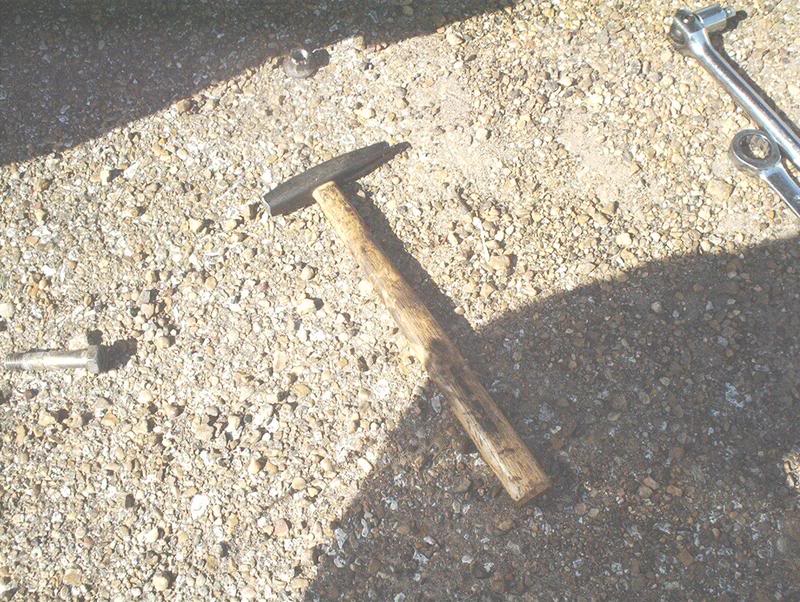
Small hammer
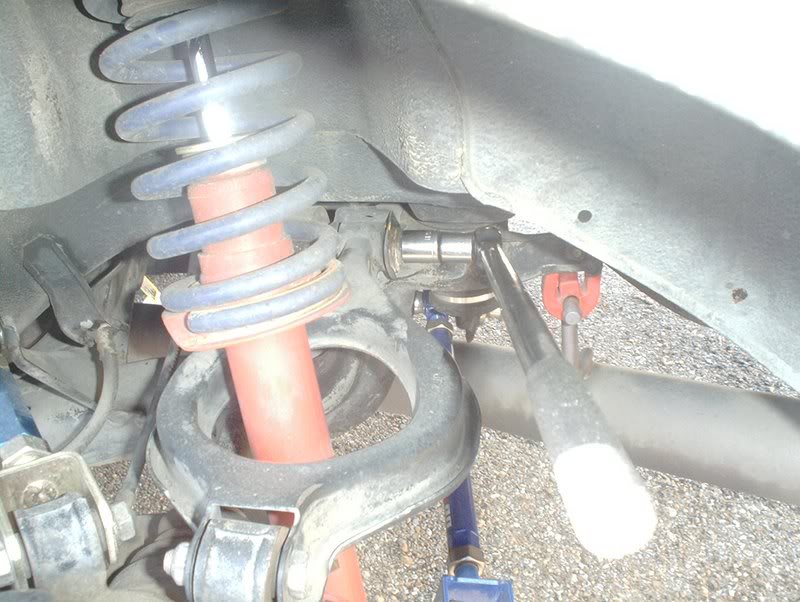
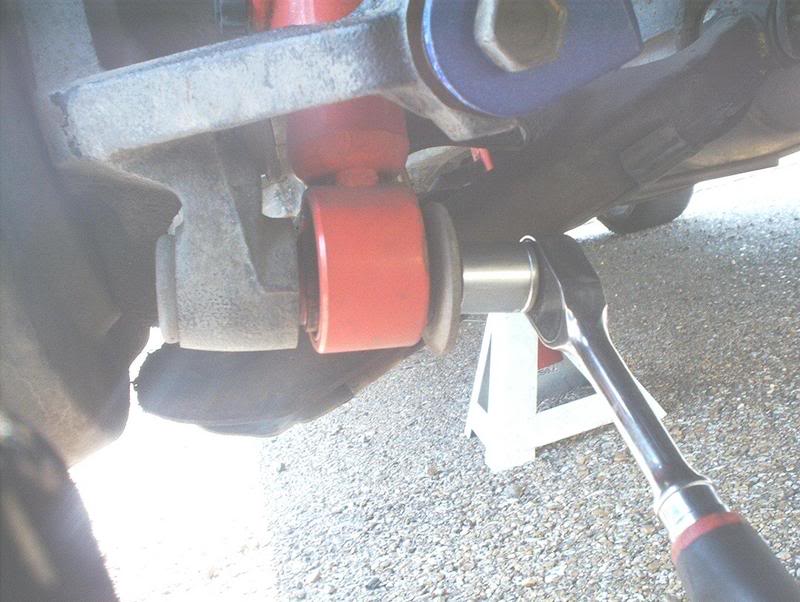
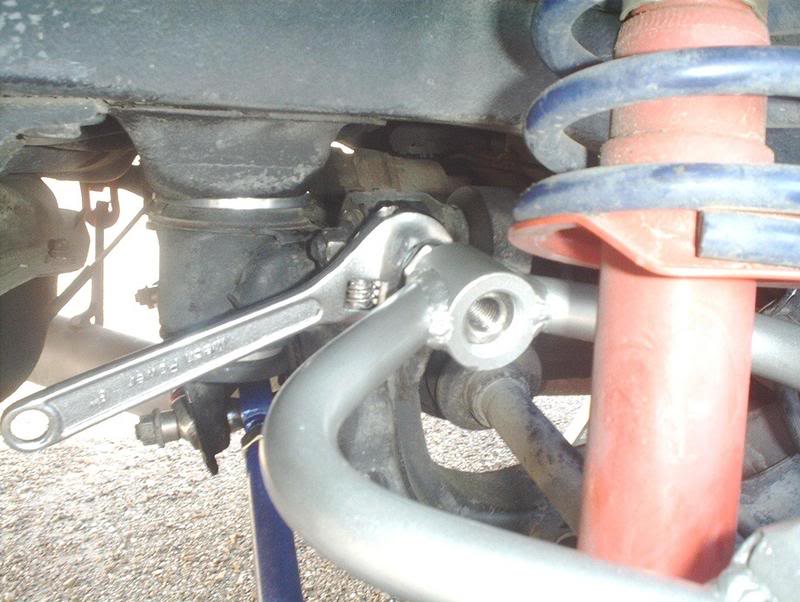
Using the small hammer, gently tap out the inner RUCA eccentric bolt but before you do that you should stop and use a sharpie to mark the position that the eccentric washer was in before removal so you can put it back in the same position later.
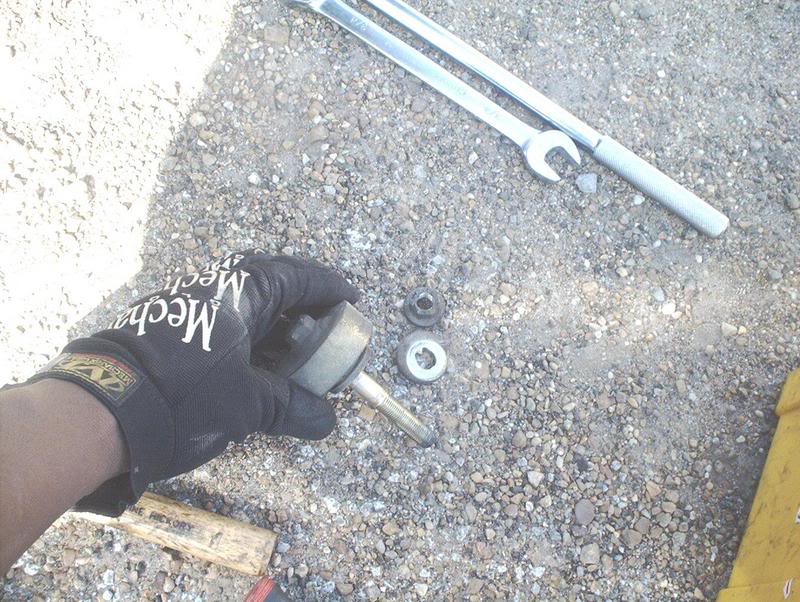
Eccentric bolt and washer.
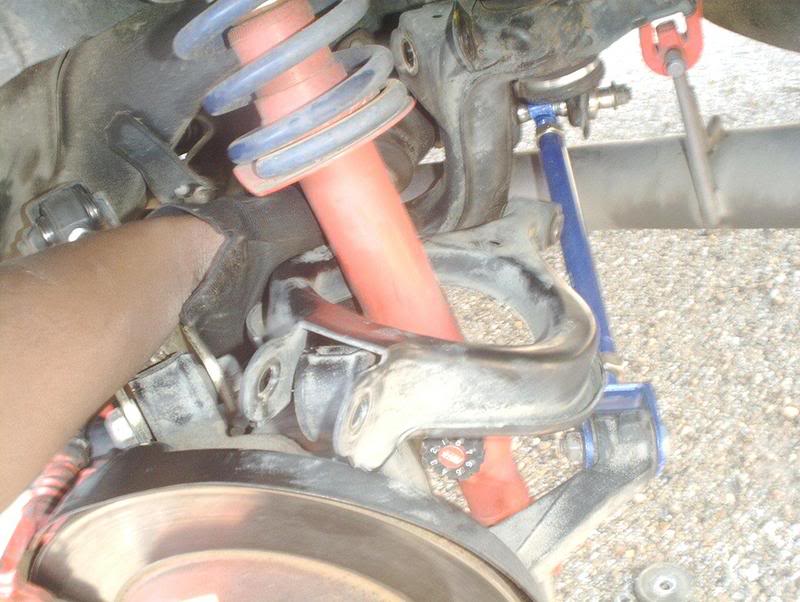
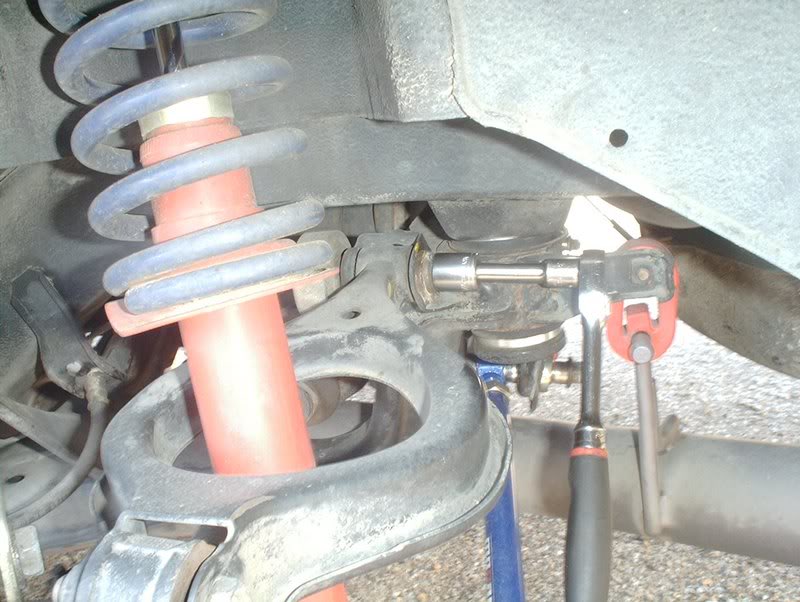
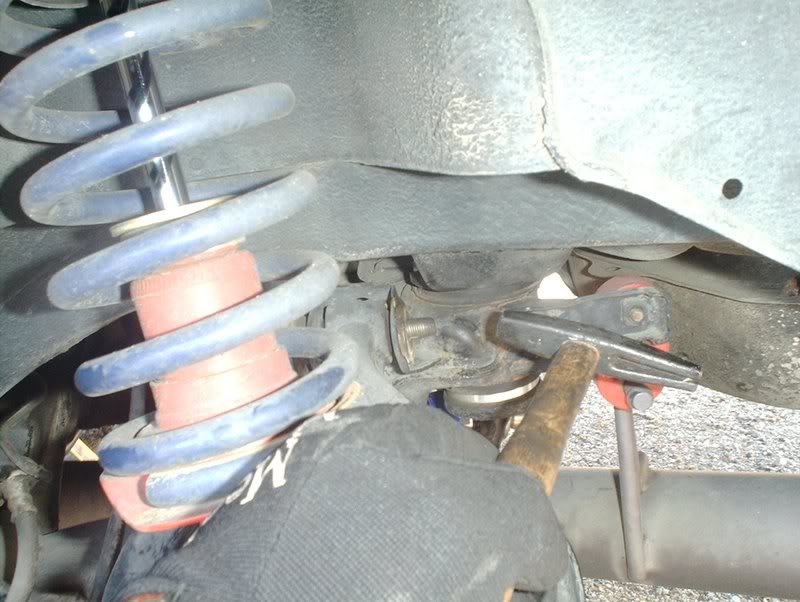
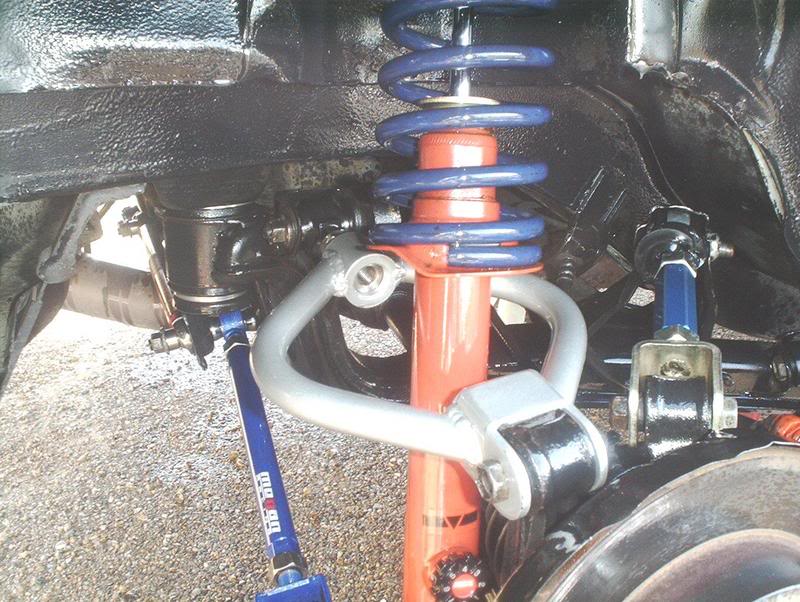
Now that you have the RUCA off you can slide it down the shaft of the strut assembly.
Push the strut to the side and remove the RUCA.

Take your new RUCA's and align them to the same length as the stock RUCA's.
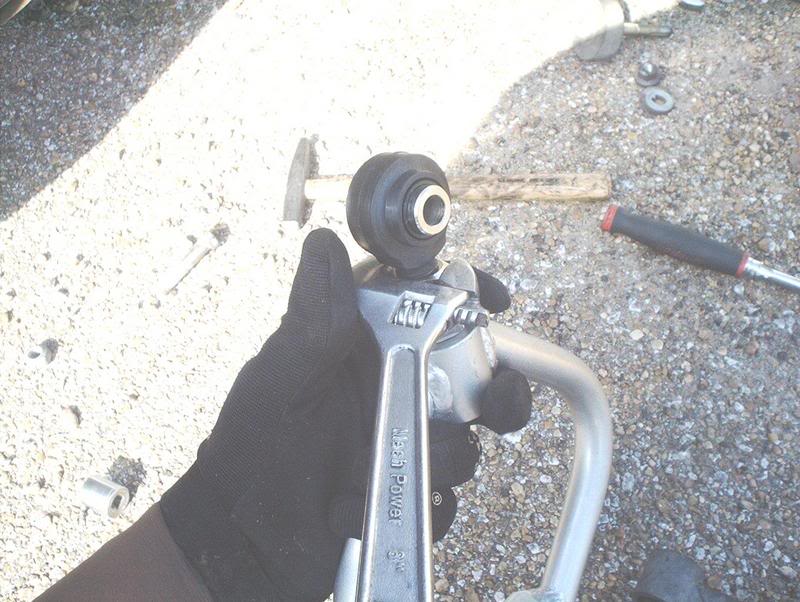
Use a crescent wrench to move the washers.
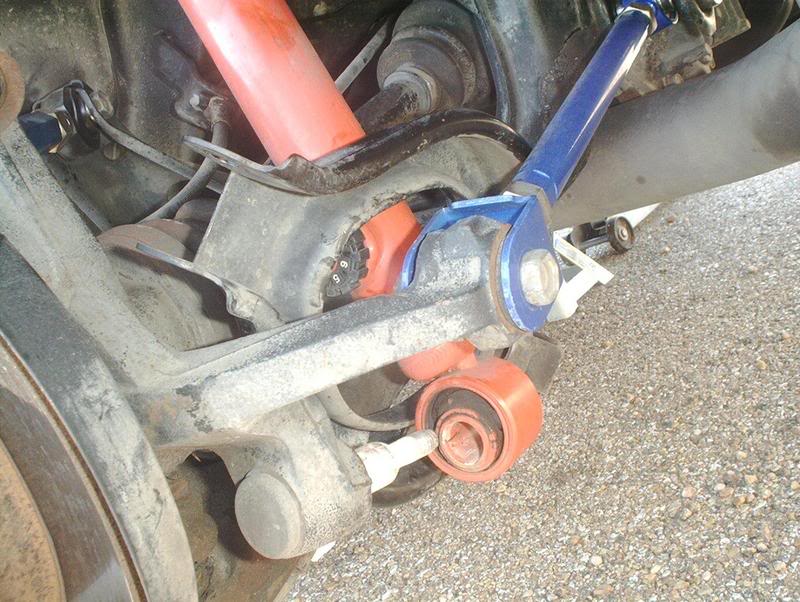
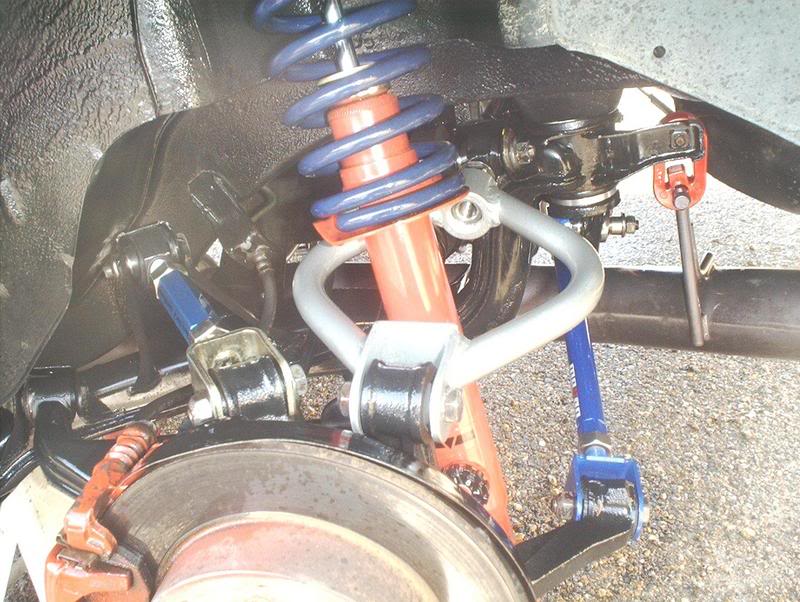
Now you can put the new RUCA's into place, put your inner, outer RUCA and lower strut nut back into place.
Use the crescent wrench to tighten the RUCA washers.
Torque the inner RUCA bolts to 51-65 ft. lbs and the outer RUCA bolts to 57-72 ft. lbs. Replace the lower strut nut and torque to 57-72 ft. lbs.
Finished! Hit up the alignment shop.
Tools needed:
Jack
Jackstands
Crescent wrench
Socket wrench
Socket extension
3/4 socket
11/16 socket
3/4 wrench
Breaker bar
Torque wrench
Small hammer
ProjectNissan RUCA's
The RUCA's should have been the first rear mult-link suspension part I upgraded but I didn't...Whoops! Jack the car up and put the jackstands in the appropriate places.
Next you'll need to get the breaker bar to bust loose the inner control arm nut.
After you bust it loose, get an extension on your wrench and the 3/4 socket to remove the inner RUCA nut.
Now get the breaker bar and the 11/16 socket for the outer RUCA bolt. You'll need to use the 3/4 wrench to hold steady the outer RUCA nut while you bust it with the breaker bar.
Next, you'll need to remove the lower strut nut.
Small hammer
Using the small hammer, gently tap out the inner RUCA eccentric bolt but before you do that you should stop and use a sharpie to mark the position that the eccentric washer was in before removal so you can put it back in the same position later.
Eccentric bolt and washer.
Now that you have the RUCA off you can slide it down the shaft of the strut assembly.
Push the strut to the side and remove the RUCA.
Take your new RUCA's and align them to the same length as the stock RUCA's.
Use a crescent wrench to move the washers.
Now you can put the new RUCA's into place, put your inner, outer RUCA and lower strut nut back into place.
Use the crescent wrench to tighten the RUCA washers.
Torque the inner RUCA bolts to 51-65 ft. lbs and the outer RUCA bolts to 57-72 ft. lbs. Replace the lower strut nut and torque to 57-72 ft. lbs.
Finished! Hit up the alignment shop.

Thread Starter
Contributing Member
Joined: Sep 2002
Posts: 1,192
From: Starkville, MS.
I've only had the toe rods and traction links on for about 2 months but I haven't had any problems yet. I haven't driven on the ProjectNissan RUCA's yet but I'll let everybody know how they perform as soon as I do.


Thread
Thread Starter
Forum
Replies
Last Post
positron
Suspension, Chassis, and Brakes
13
Mar 21, 2007 09:19 AM
nismoman
Private For Sale / Wanted
0
Dec 10, 2006 05:29 PM
Carparthookup
Private For Sale / Wanted
0
Dec 13, 2005 09:47 AM
Evo3
Private For Sale / Wanted
4
Jan 22, 2005 08:39 PM
jackyliem
Suspension, Chassis, and Brakes
1
Dec 25, 2004 05:03 PM