
Project:StreetSilvia (93 Coupe)

Thread Starter
Registered User
Joined: Aug 2008
Posts: 353
From: Red Lion PA
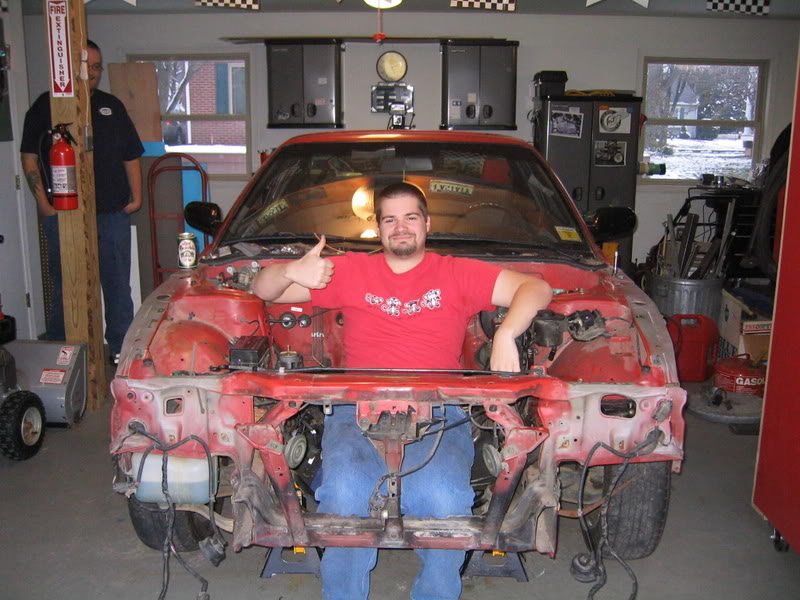
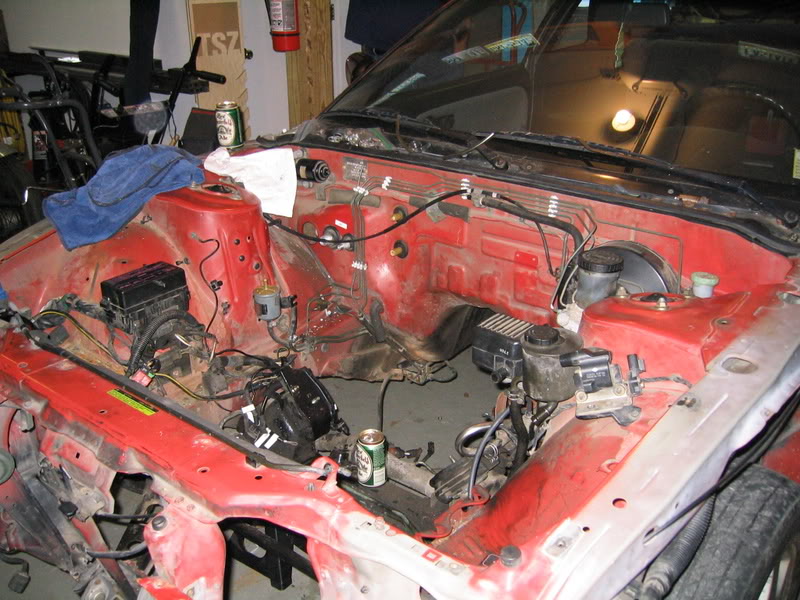
OK body question for anyone that has pulled off thier front end....
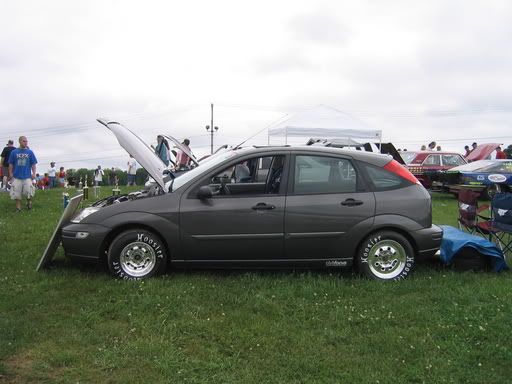
I know the previous owner forgot a few items but this one kinda scares me. I found THIS picture on car domain of a 240 without its nose. If you look at the pics of my tear down you will see there is no bumper bar on my car. My car lacked that peice when I bought the car. My question is where do I get one or will one come with the silvia conversion (if bought through JGY)?? I assume that it is a very important part of the car. I'm starting to think this car has very bad S13 Syndrome given that the headlights were held in by 2 bolts and the front fenders lacked a bolt or two as well.......
I know the previous owner forgot a few items but this one kinda scares me. I found THIS picture on car domain of a 240 without its nose. If you look at the pics of my tear down you will see there is no bumper bar on my car. My car lacked that peice when I bought the car. My question is where do I get one or will one come with the silvia conversion (if bought through JGY)?? I assume that it is a very important part of the car. I'm starting to think this car has very bad S13 Syndrome given that the headlights were held in by 2 bolts and the front fenders lacked a bolt or two as well.......
if you are going to run a FMIC you cant run the crash bar with out alterations which will make it weak anyway.
na it will not come with a Silvia front..
edit if you run a baby FMIC you can make it work.. some have even put the IC behind the crash bar. with ac that's like not going to happen do to the condenser.
also without the crash bar, you will have to find a way to stiffen up your front end.... without it.. you will have the droopy front end effect like most of use non crash bar 240 guys.
Last edited by Biggamehit; Oct 24, 2008 at 08:30 AM.
Thread Starter
Registered User
Joined: Aug 2008
Posts: 353
From: Red Lion PA
if you are going to run a FMIC you cant run the crash bar with out alterations which will make it weak anyway.
na it will not come with a Silvia front..
edit if you run a baby FMIC you can make it work.. some have even put the IC behind the crash bar. with ac that's like not going to happen do to the condenser.
also without the crash bar, you will have to find a way to stiffen up your front end.... without it.. you will have the droopy front end effect like most of use non crash bar 240 guys.
na it will not come with a Silvia front..
edit if you run a baby FMIC you can make it work.. some have even put the IC behind the crash bar. with ac that's like not going to happen do to the condenser.
also without the crash bar, you will have to find a way to stiffen up your front end.... without it.. you will have the droopy front end effect like most of use non crash bar 240 guys.
Thanks for the info. I have a feeling that my father and I will just fab up something that fits in there while we ar doing the work.
Thread Starter
Registered User
Joined: Aug 2008
Posts: 353
From: Red Lion PA
So those of you that saw my welcome thread remember these wheels:
Had a strange idea tonight and decided to try something....
The fronts fit at least. Tomorrow I'll find out if the rears fit. Might just run these as drag wheels (with REAL drag tires) after the project is done and the turbo upgrade finished.
Had a strange idea tonight and decided to try something....
The fronts fit at least. Tomorrow I'll find out if the rears fit. Might just run these as drag wheels (with REAL drag tires) after the project is done and the turbo upgrade finished.
Thread Starter
Registered User
Joined: Aug 2008
Posts: 353
From: Red Lion PA
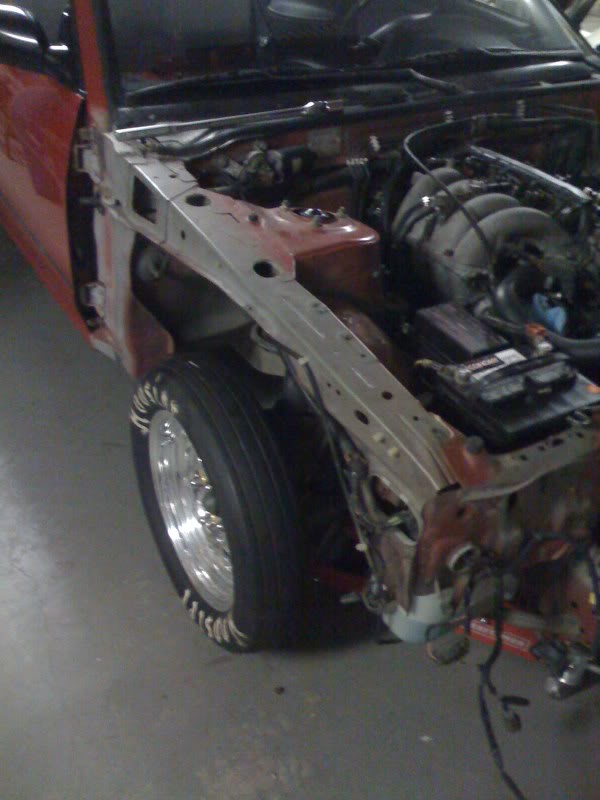
Did more work today. I took out the upper engine harness to get that ready for splicing when I can afford the SR and prepped the KA in the car for removal. I drained the oil pan, the transmission, and the radiator. All of them had fresh fluids in them and looked like the motor has never been run. All of them except the radiator......That one was bone dry. Even the fittings on the block were dry save for some rust/damp areas Seriously, who forgets coolant???
I also test fitted the wide rear wheels and sadly they wont work, there are some fitment issues and it rubs on either the banjo bolt that holds on the brake line or on the rear upper control arm, I'm not 100% sure which. I am going to sell the wide wheels on ebay and use the money to cover part of the cost for larger wheels that fit properly.
On the ebay note. I'm gathering alot of parts I don't need so I will be posting them for sale on ebay soon as well as having a thread on here with links to the ebay auctions. Pretty much the seats, seat belts, and most of the KA specific stuff will be up for grabs.
More to come later.
Seriously, who forgets coolant???I also test fitted the wide rear wheels and sadly they wont work, there are some fitment issues and it rubs on either the banjo bolt that holds on the brake line or on the rear upper control arm, I'm not 100% sure which. I am going to sell the wide wheels on ebay and use the money to cover part of the cost for larger wheels that fit properly.
On the ebay note. I'm gathering alot of parts I don't need so I will be posting them for sale on ebay soon as well as having a thread on here with links to the ebay auctions. Pretty much the seats, seat belts, and most of the KA specific stuff will be up for grabs.
More to come later.
Thread Starter
Registered User
Joined: Aug 2008
Posts: 353
From: Red Lion PA
I'm not sure that spacers will give me enough clearance. I'm going to try some tests using washers and see how far out they need to be spaced to work. It looks pretty mean with them on, and drag is the perfered racing form out here. Can we tell that I'm quickly running out of parts to remove?
Thread Starter
Registered User
Joined: Aug 2008
Posts: 353
From: Red Lion PA
UPDATE
I havent posted in here in a while because I have been busy with school and other projects. Just wanted to add that I went to a pull-a-part yard and got some altima fans, a replacement dash, replacement control stalks and a reinforcement bar. My only major concern is the dash is a 1994 non HUD dash and my car is a 93 with a HUD.
I also took the past weeks to get the KA prepped to be pulled, right now I have the engine mounts to remove and thats it, the trans tail is on a jackstand till I get the cherry picker for the pull.
I'll post up pics tomorrow.
Thread Starter
Registered User
Joined: Aug 2008
Posts: 353
From: Red Lion PA
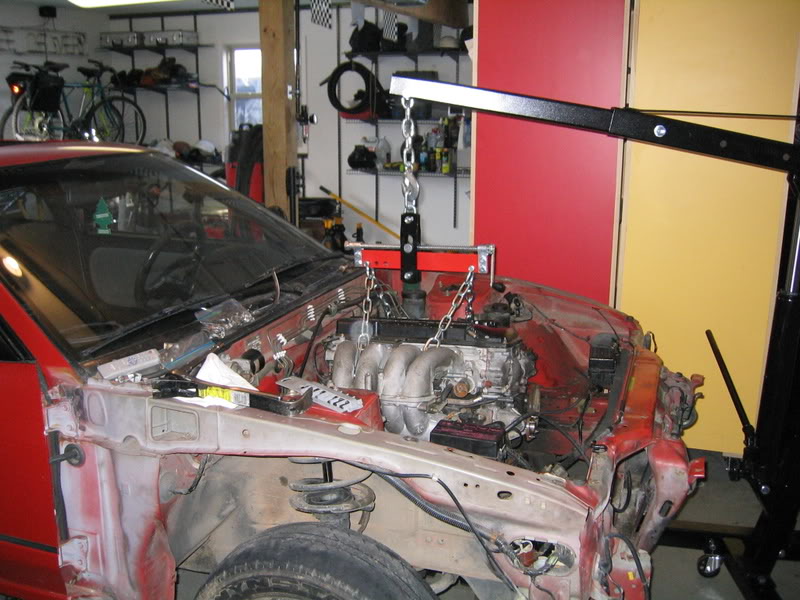
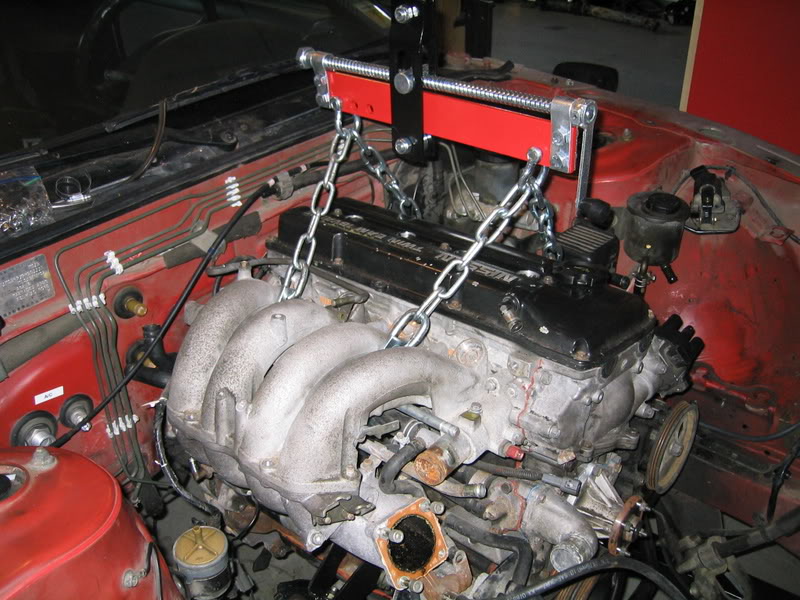
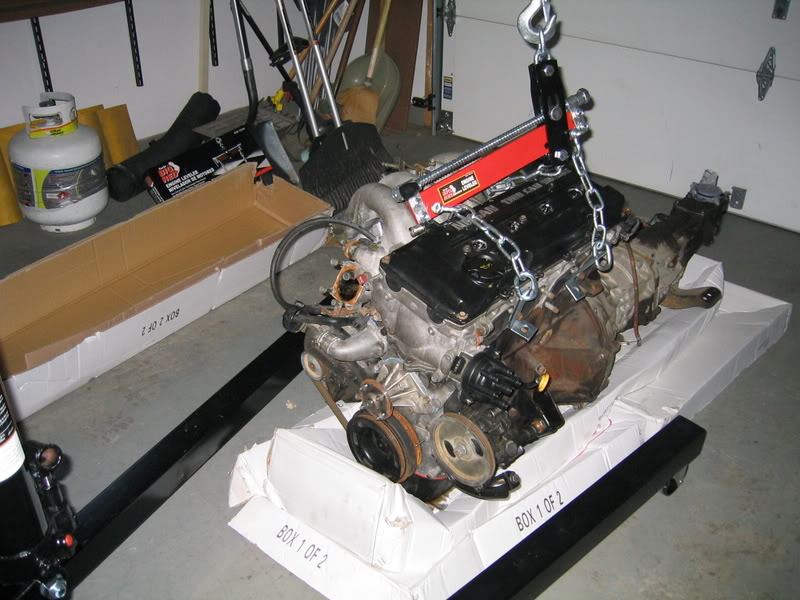
As promised here are some pics of the engine pull. It was a pretty easy time thanks to positron's KA removal how-to. Next up on the to-do list is cleaning out the rest of the parts in the engine bay and, after a through cleaning, paint the bay. We are looking at Black/grey speckle paint like they used to do trunks with. I figure that with a silver motor and cherry red valve cover should look great.
I should be tackeling the dash soon and getting rid of the cracked up stocker. I also plan on putting in a fixed toch screen with nav into the factory radio opening and ditching the pocket underneath the stock radio. It may be tight but worst case I will make my own bezel for the thing. Having access to CNC mills is a great bonus to my college classes.
Also got a decision on the paint job. I am going to have te factory red freshened up, and have the roof and pillars pained black for a nice two tone look. Hood and trunk will be carbon.
Anyway, here are the pics of the engine being pulled.
Last edited by Lord Umoja; Nov 23, 2008 at 01:02 PM.

Thread Starter
Registered User
Joined: Aug 2008
Posts: 353
From: Red Lion PA
Got more work done but instead of posting new pics and making essentially a copy of my other threads I'll provide links to the work I accomplished this weekend.
First of all I got modified the replacement dash to fit my factory heads up display unit. Took a little work but here is the new How-To thread that cover exactly how to modify the dash to fit it.
https://www.s-chassis.com/forums/how-tos-installations-48/installing-hud-non-hud-dash-45091/
Next is my interior refreshing thread showing how I repaired a broken tab and cleaned up the dash to like new shine (Pics don't do it justice).
https://www.s-chassis.com/forums/exterior-interior-lighting-92/interior-refresh-repair-45092/
Last edited by Lord Umoja; Nov 30, 2008 at 01:14 PM.