
My S13 SR20DET Prep


Thread Starter
Contributing Member
Joined: Sep 2002
Posts: 1,192
From: Starkville, MS.
Fuel Injector Seal Replacement
I decided to replace my fuel injector seals while I had the fuel rail off.
Tools needed:
Phillipshead screwdriver
Prybar
Small flathead screwdriver
Small hammer
Sock
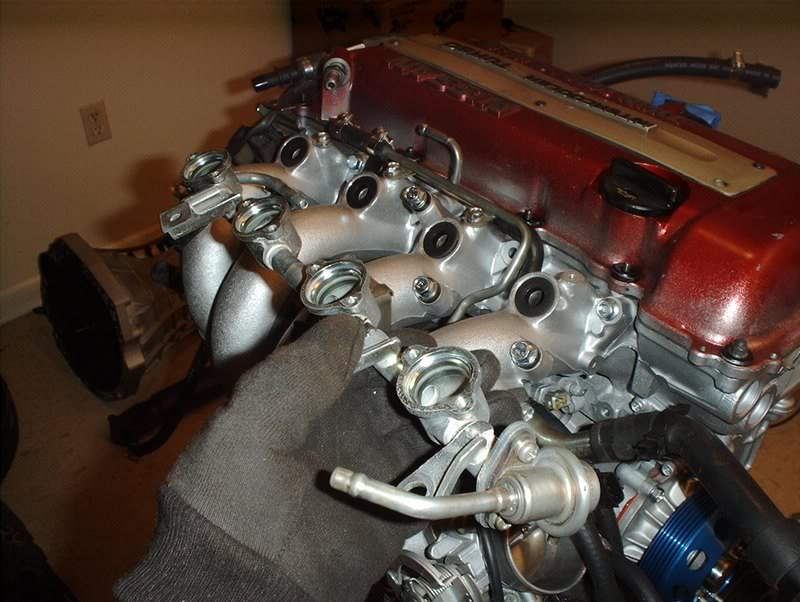
If you need to remove your fuel rail all you need is a 13mm socket for the four bolts on the curve of the intake manifold runners.
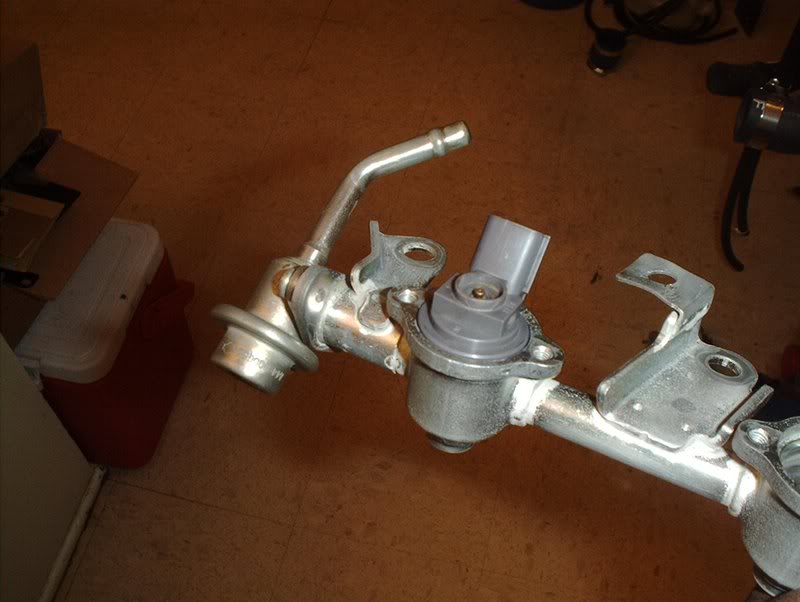
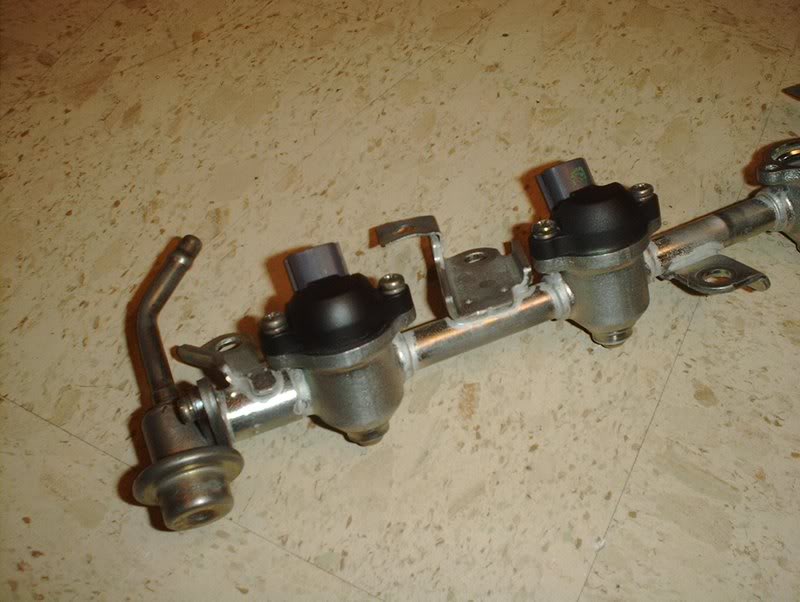
Fuel rail.
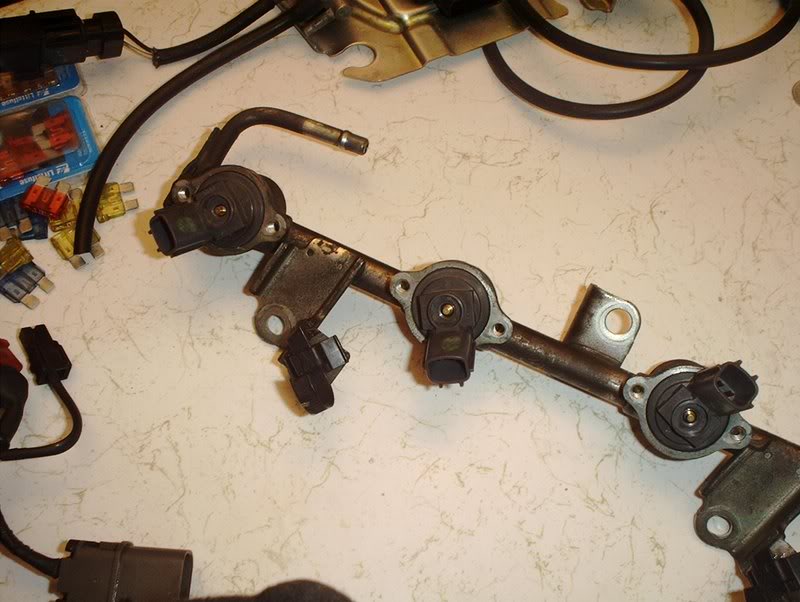
Before you can get to the injectors you need a phillipshead screwdriver to remove the injector caps.
Besides replacing the injector seals I also have a busted injector that needs to go as well.
Removing the fuel injectors was not as easy as I thought it would be. I tried to twist them out with my fingers...not gonna happen unless you got a big "S" on your chest. What did work for me was a medium sized prybar. I wedged the prybar under the tip where the injector harness is and popped it right out, you'll hear a loud pop when the seal is broken. You might want to place something small and soft in between the injector and the prybar so you won't damage the injector.
Can't use this, nothing for the harness to plug into.
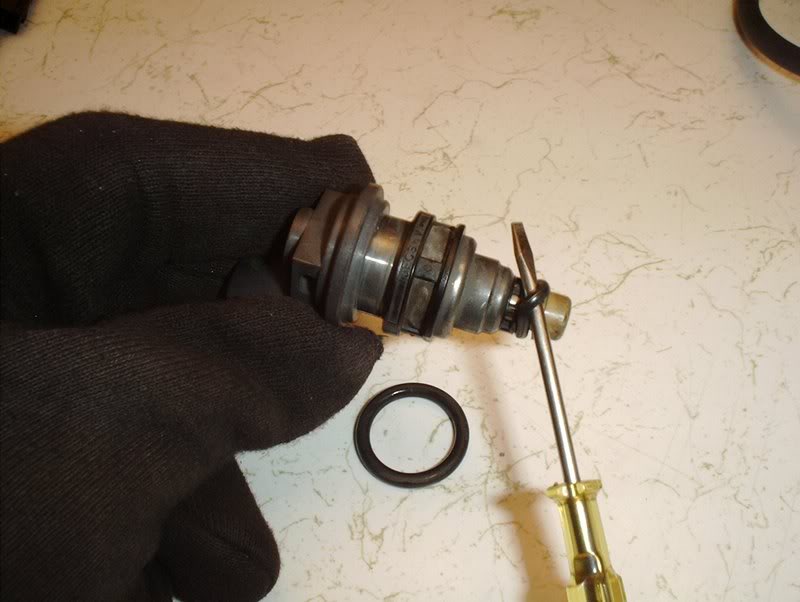
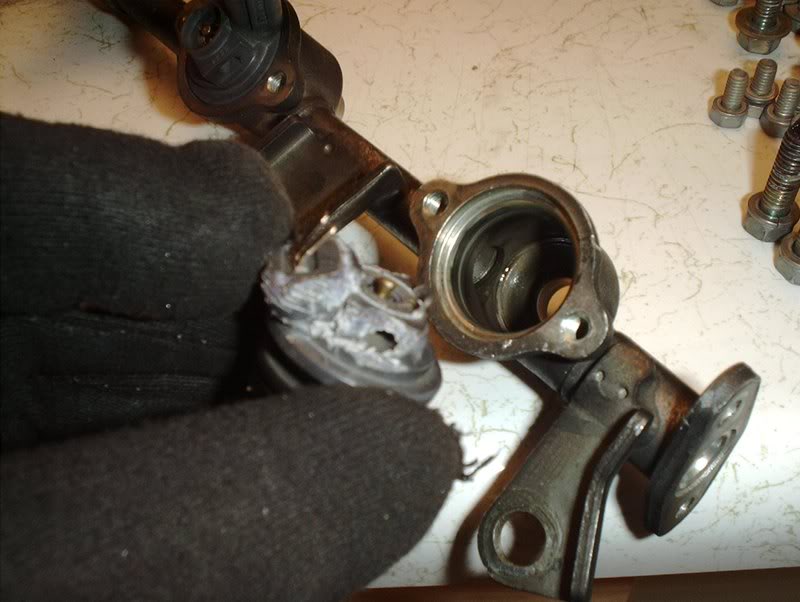
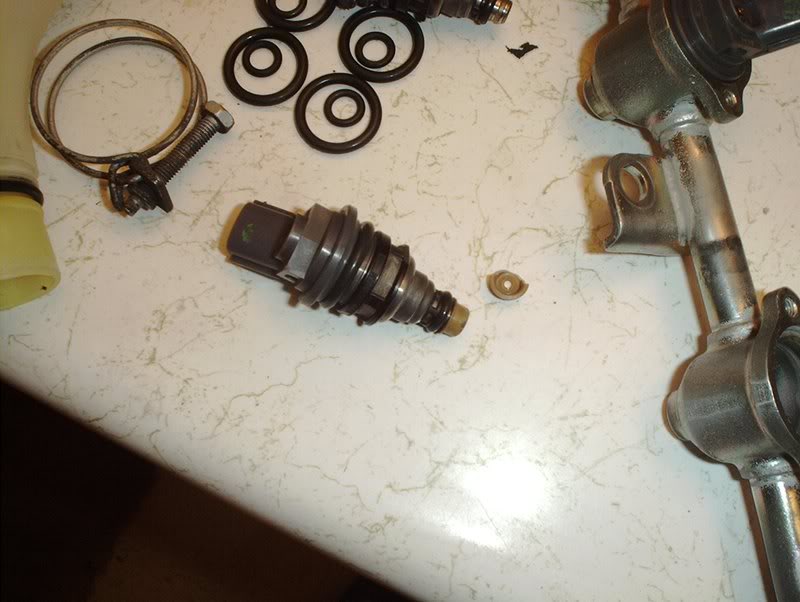
Use a small flathead screwdriver to pull the injector seals off the injector. There is a small injector seal on the lower portion and a larger one on the top.
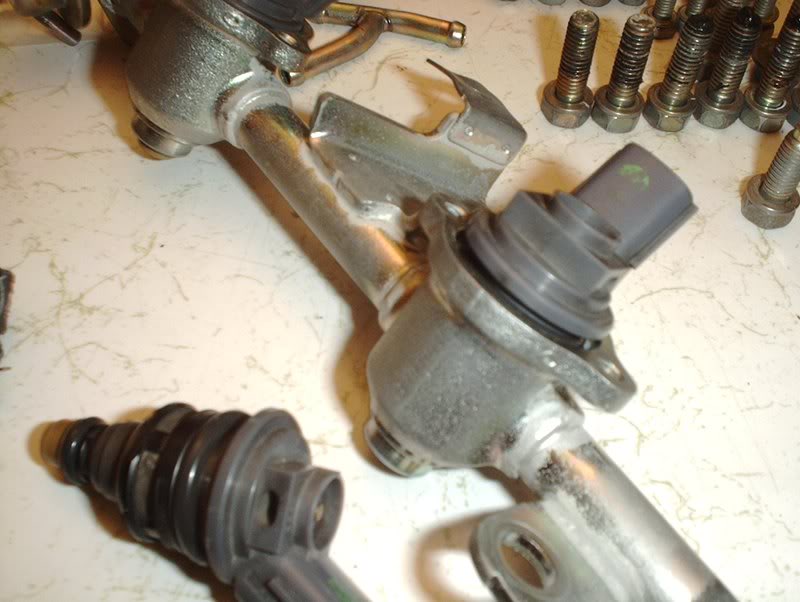
When I received the engine I had already decided to replace the fuel rail but after getting a look at this one I had second thoughts. It wasn't damaged or bent in any way at all so I decided to clean it up and use it.
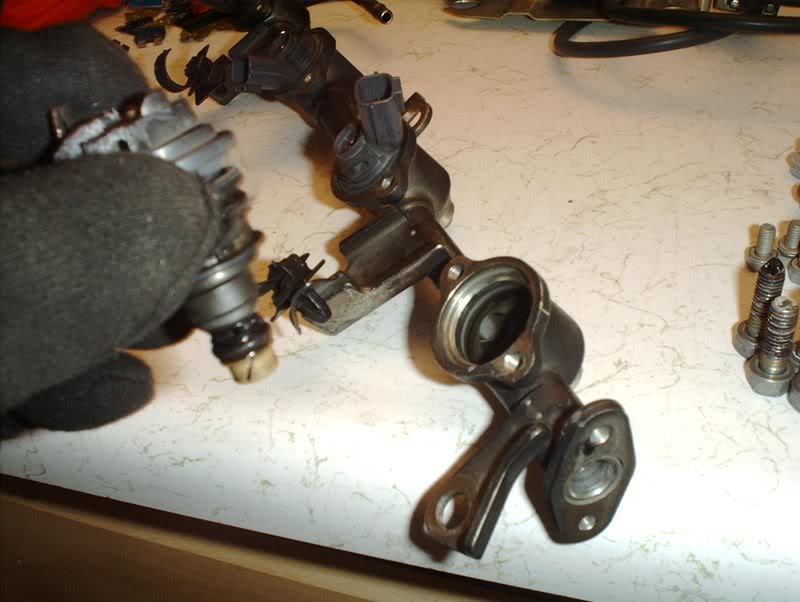
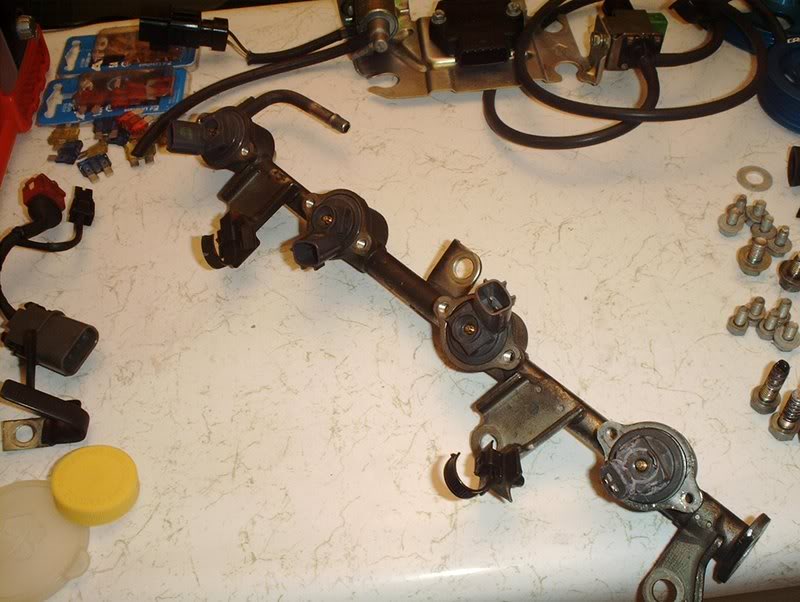
My fuel rail was pretty filthy...
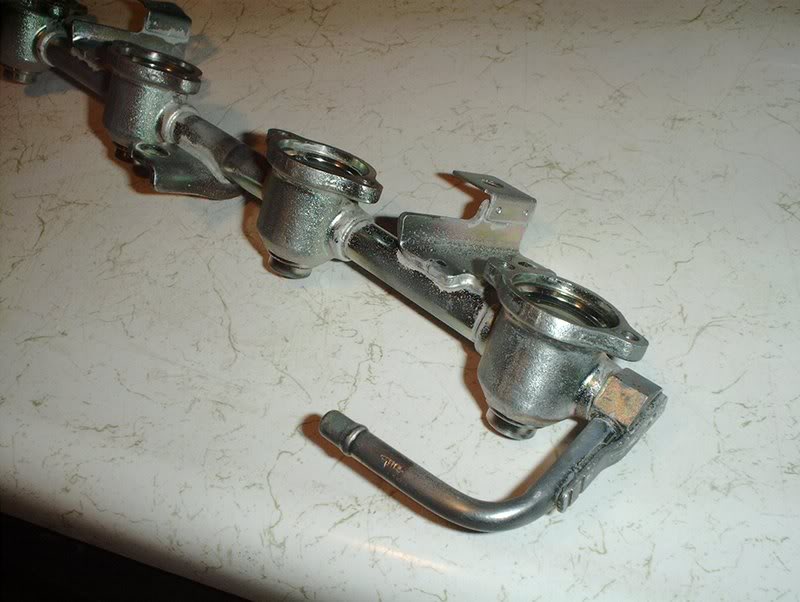
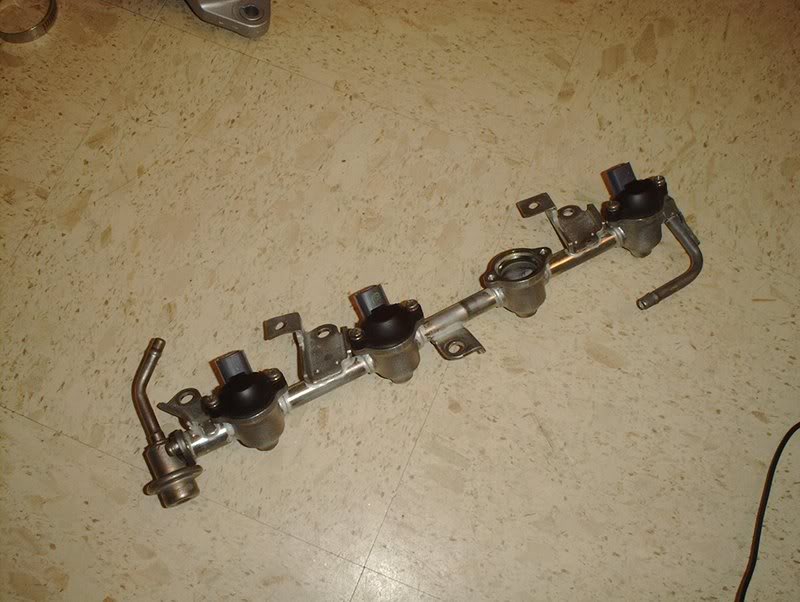
but a scrubbing session with some Mean Green really got the luster back.
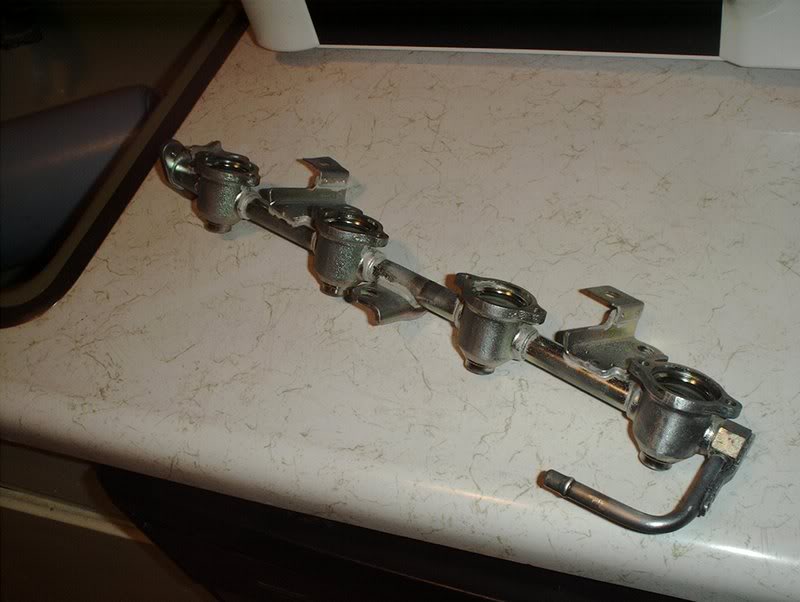
Just like nearly new.
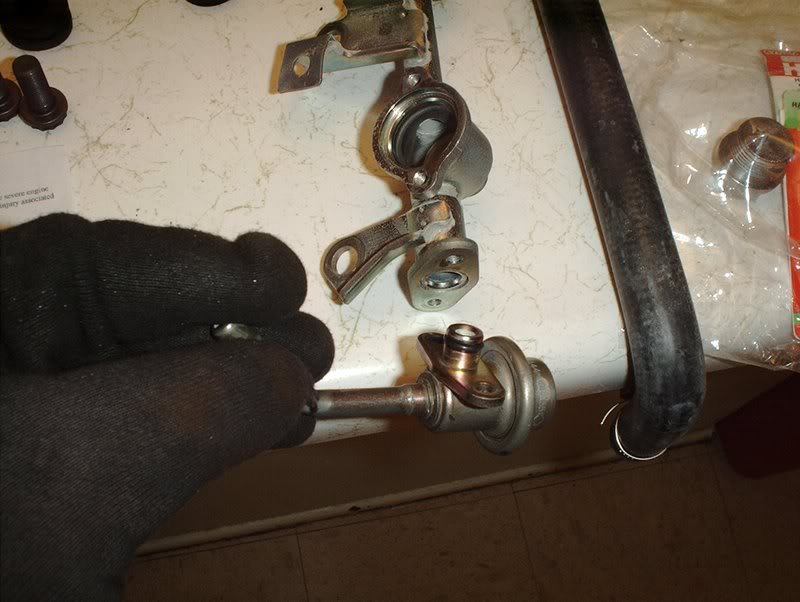
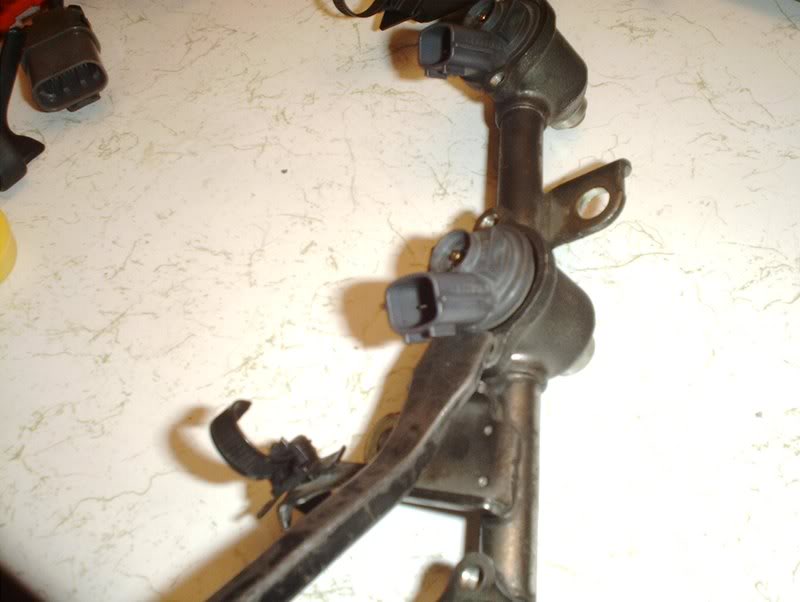
Also cleaned up the fuel pressure regulator. Just reattach it to the fuel rail with a phillipshead screwdriver.
I can use that $45 for something else.
Now back to the injectors.
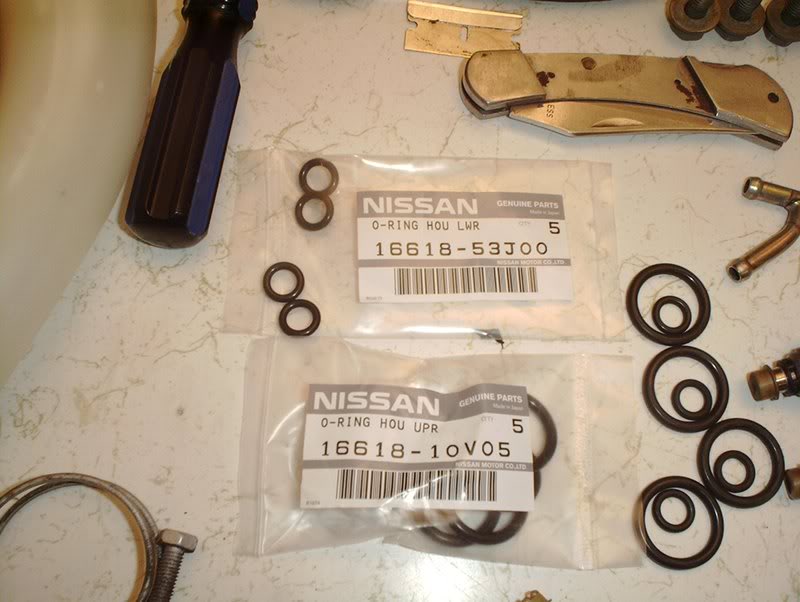
Upper injector seal Part#: 16618-10V05.
Lower injector seal Part#: 16618-53J00.
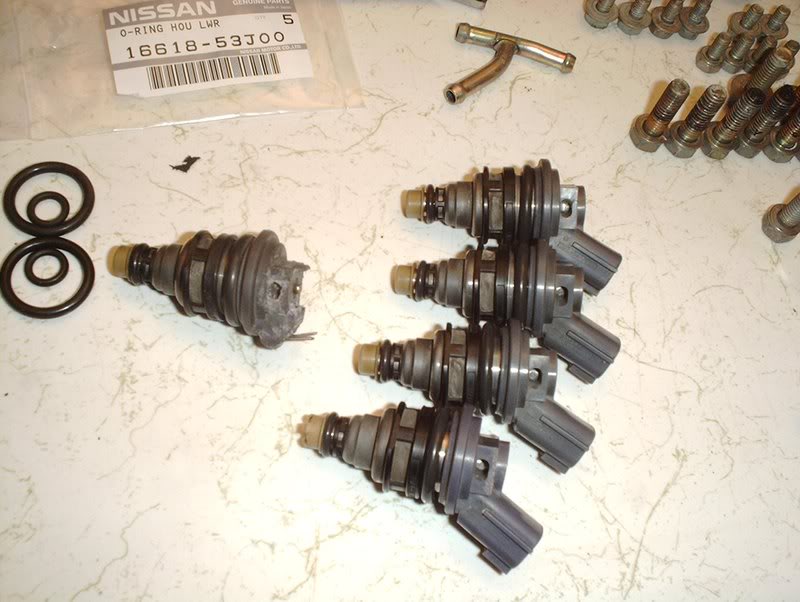
Put the new seals back on the injectors.
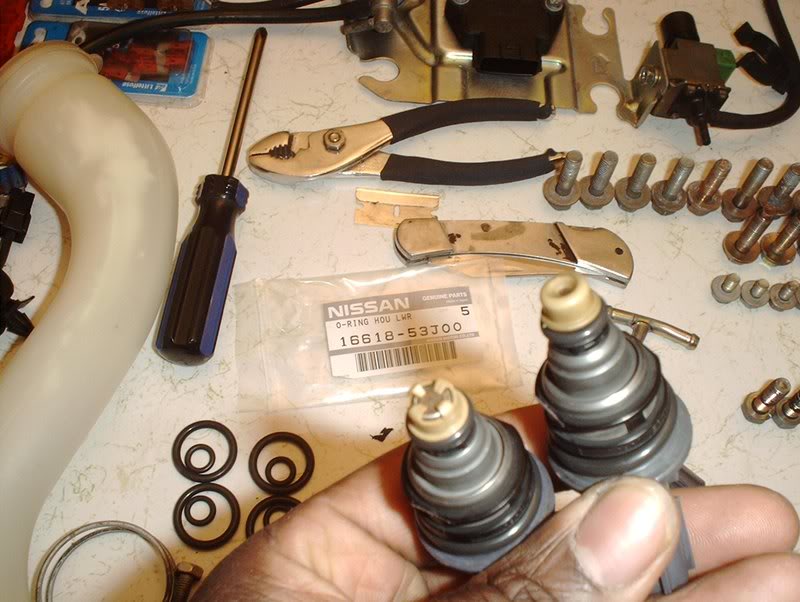
The one I replaced has a different tip than the others...hmm.
Insert the injector back into the fuel rail. There will be a gap and you will not be able to force them back in with your hands so it's time to improvise.
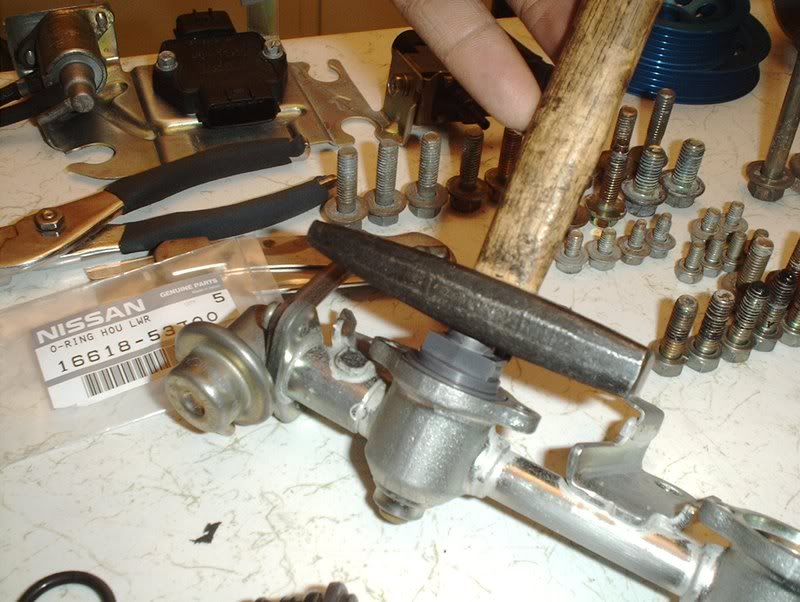
I used a small hammer to seat the injectors back into the fuel rail. Just place the flat part of the hammer on the top of the injector...
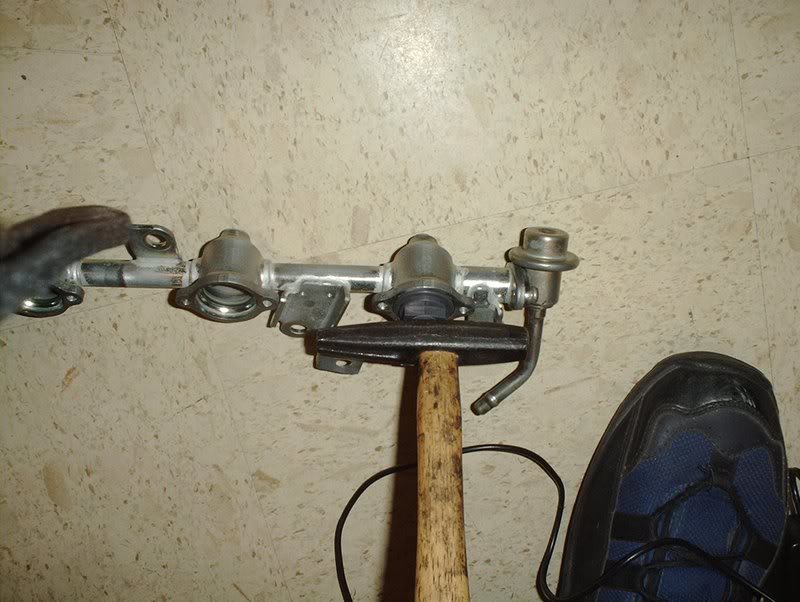
place the rail on the ground put your wieght into it and slowly push the injector down into the rail. Again use something soft in between the hammer and the injector as well as something soft in between the fuel rail and the ground to keep the bottom plastic caps on the injectors from making contact and getting busted.
Seated injector.
Now you have to replace the injector caps.
Screw the caps back on with a phillips head screwdriver and torque to 2.2-2.8ft.lbs.
Finished.
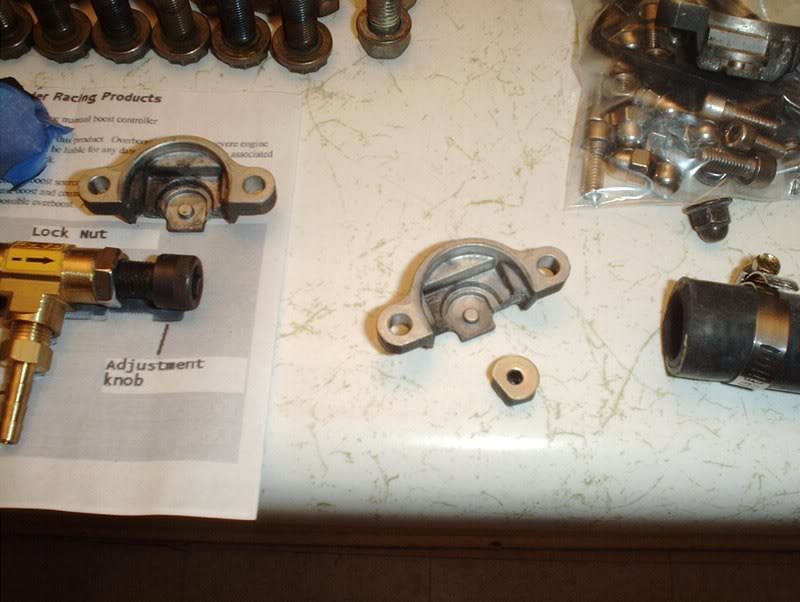
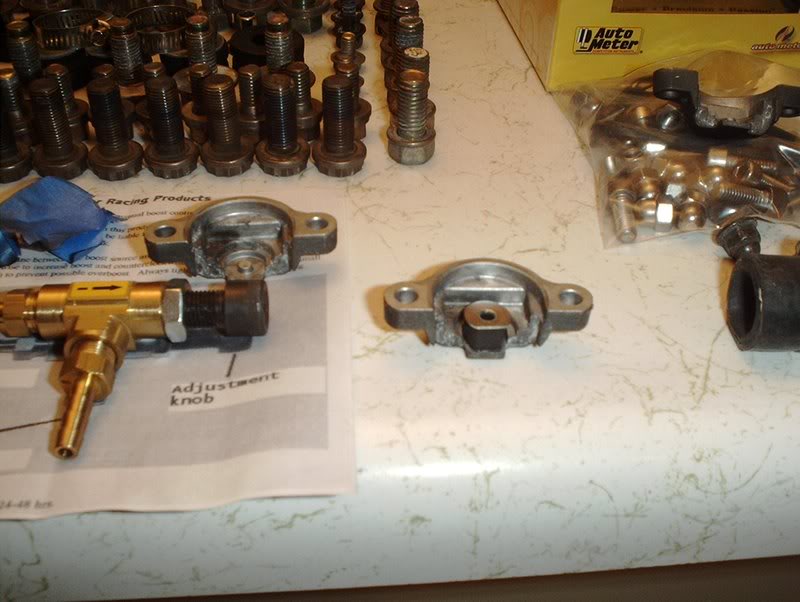
I dropped an injector and busted the little yellow cap on the bottom so I need to replace that before I can put this rail back on the manifold...doe!!!
Tools needed:
Phillipshead screwdriver
Prybar
Small flathead screwdriver
Small hammer
Sock
If you need to remove your fuel rail all you need is a 13mm socket for the four bolts on the curve of the intake manifold runners.
Fuel rail.
Before you can get to the injectors you need a phillipshead screwdriver to remove the injector caps.
Besides replacing the injector seals I also have a busted injector that needs to go as well.
Removing the fuel injectors was not as easy as I thought it would be. I tried to twist them out with my fingers...not gonna happen unless you got a big "S" on your chest. What did work for me was a medium sized prybar. I wedged the prybar under the tip where the injector harness is and popped it right out, you'll hear a loud pop when the seal is broken. You might want to place something small and soft in between the injector and the prybar so you won't damage the injector.
Can't use this, nothing for the harness to plug into.
Use a small flathead screwdriver to pull the injector seals off the injector. There is a small injector seal on the lower portion and a larger one on the top.
When I received the engine I had already decided to replace the fuel rail but after getting a look at this one I had second thoughts. It wasn't damaged or bent in any way at all so I decided to clean it up and use it.
My fuel rail was pretty filthy...
but a scrubbing session with some Mean Green really got the luster back.
Just like nearly new.
Also cleaned up the fuel pressure regulator. Just reattach it to the fuel rail with a phillipshead screwdriver.
I can use that $45 for something else.
Now back to the injectors.
Upper injector seal Part#: 16618-10V05.
Lower injector seal Part#: 16618-53J00.
Put the new seals back on the injectors.
The one I replaced has a different tip than the others...hmm.
Insert the injector back into the fuel rail. There will be a gap and you will not be able to force them back in with your hands so it's time to improvise.
I used a small hammer to seat the injectors back into the fuel rail. Just place the flat part of the hammer on the top of the injector...
place the rail on the ground put your wieght into it and slowly push the injector down into the rail. Again use something soft in between the hammer and the injector as well as something soft in between the fuel rail and the ground to keep the bottom plastic caps on the injectors from making contact and getting busted.
Seated injector.
Now you have to replace the injector caps.
Screw the caps back on with a phillips head screwdriver and torque to 2.2-2.8ft.lbs.
Finished.
I dropped an injector and busted the little yellow cap on the bottom so I need to replace that before I can put this rail back on the manifold...doe!!!
Thread Starter
Contributing Member
Joined: Sep 2002
Posts: 1,192
From: Starkville, MS.
Got them from West Covina Nissan http://www.thenismoshop.com/ikorb.php
Upper seal-$1.36
Lower seal-.63
Upper seal-$1.36
Lower seal-.63
Thread Starter
Contributing Member
Joined: Sep 2002
Posts: 1,192
From: Starkville, MS.
Oil Filter Sandwich Plate
I wanted to install a oil filter sandwich plate so I can install oil pressure and oil temperature guages. This plate has two ports on it to make adding the guages easy...or so I thought.
Tools needed:
Oil Filter Pliers
Rags
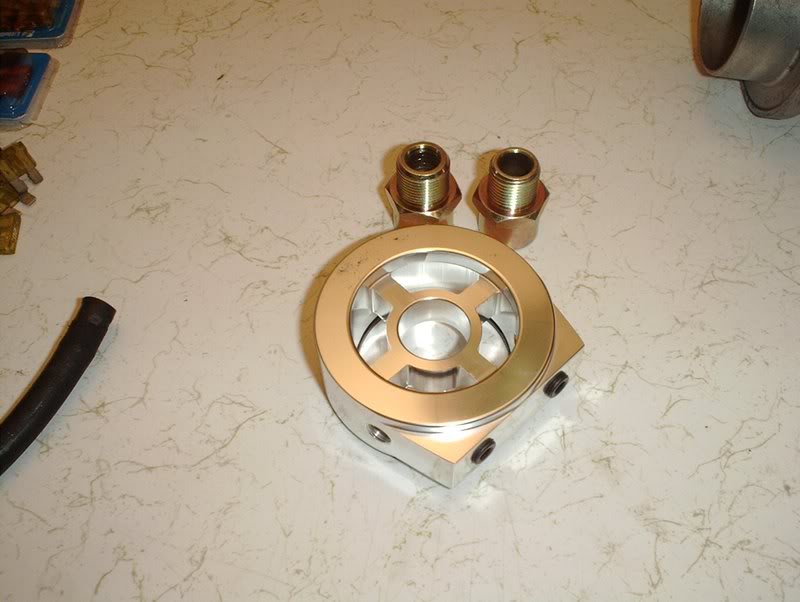
I got a stainless steel oil filter sandwich plate with three ports two of which were plugged and two different fittings....
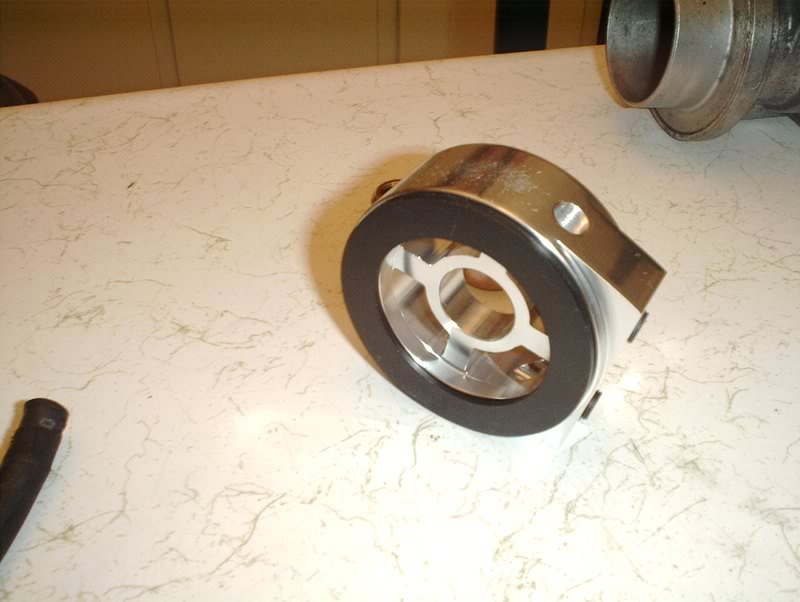
and a gasket on the backside.
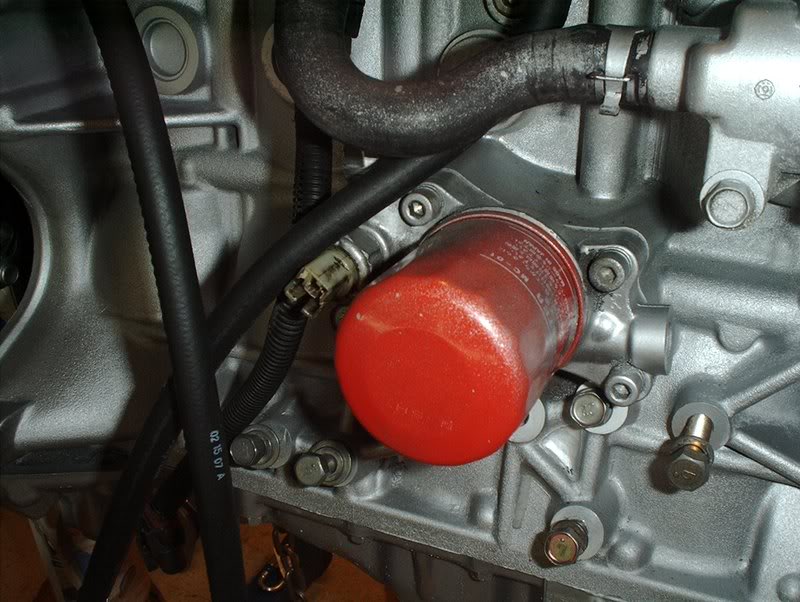
The first thing to do is to remove the old oil filter.
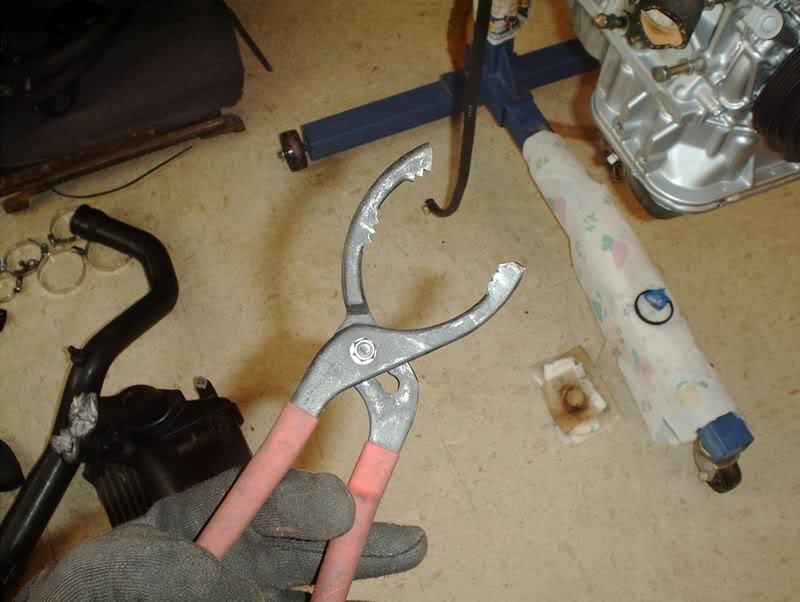
You need a set of oil filter pliers.
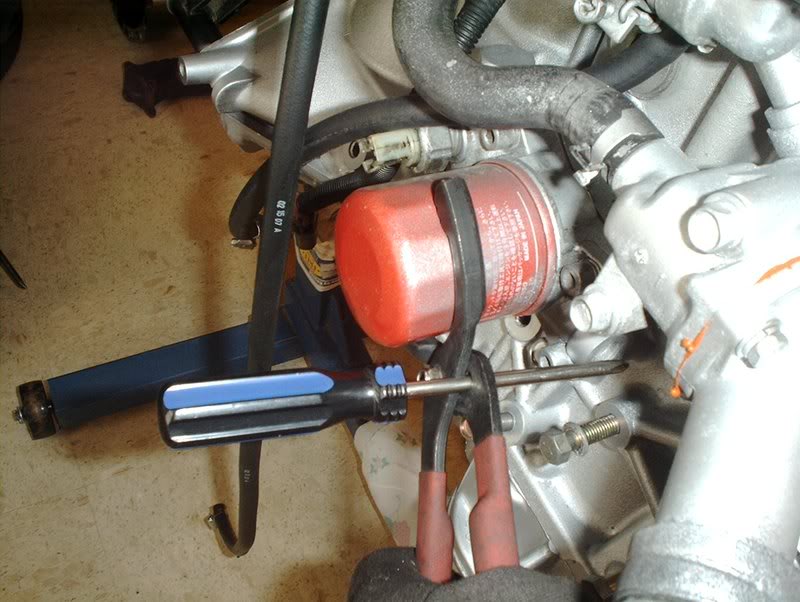
My oil filter pliers are busted so I need a screwdriver in there to keep 'em from sliding out of grip...ghetto style FTW!!!!

Get the filter off and have a rag ready for the runoff.
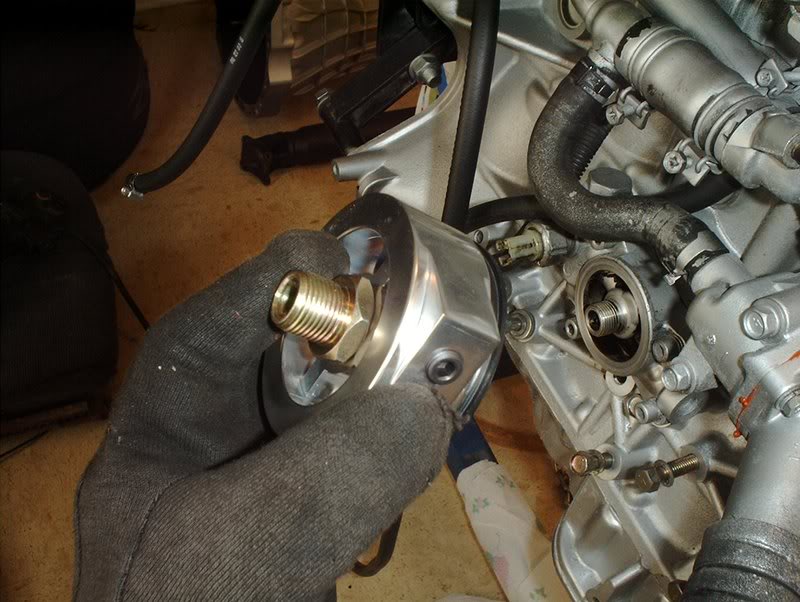
Clean the area up and get the oil filter sandwich plate ready.

Now this is where I ran into the problem.
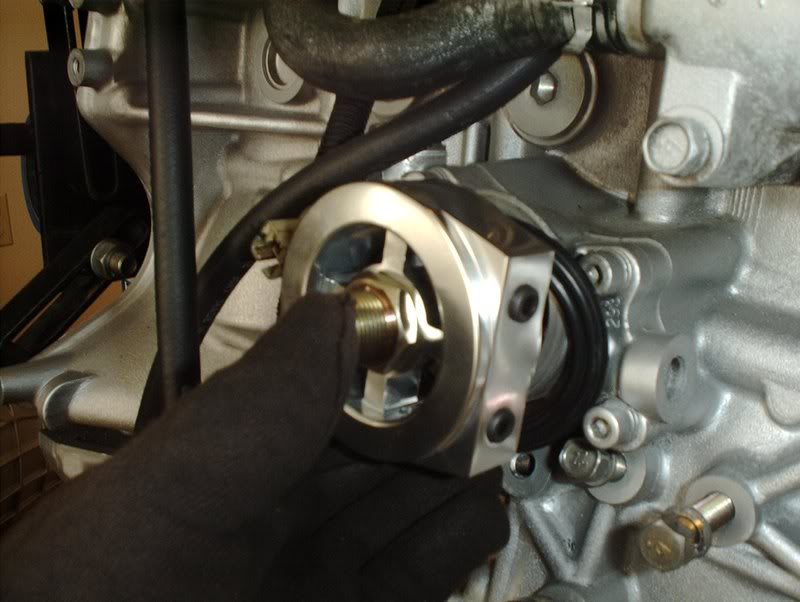
My plate will not fit. There doesn't seem to be enough thread on the fittings to mount snuggly against the block...WTF!!!
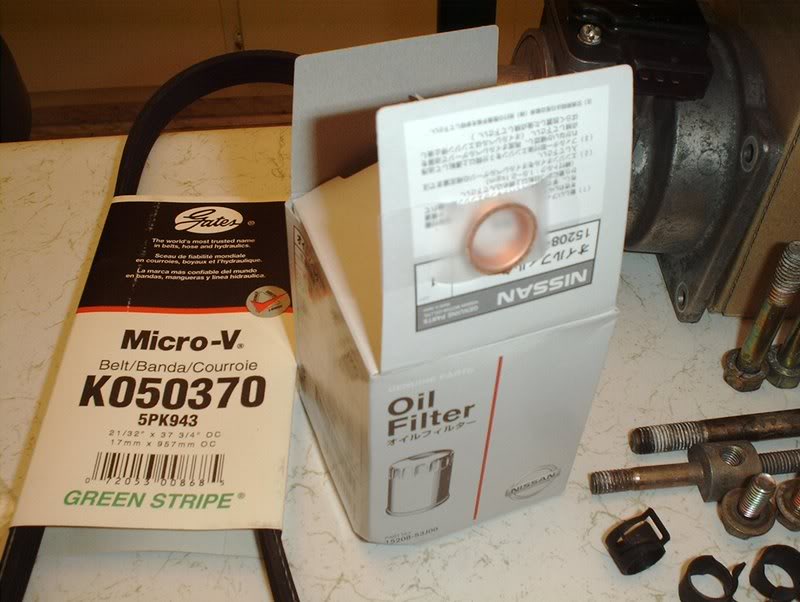
Nissan SR20DET oil filter Part#: 15208-53J00. I was gonna go with a fancy smancy oil filter but then I said just keep it simple and go OEM.
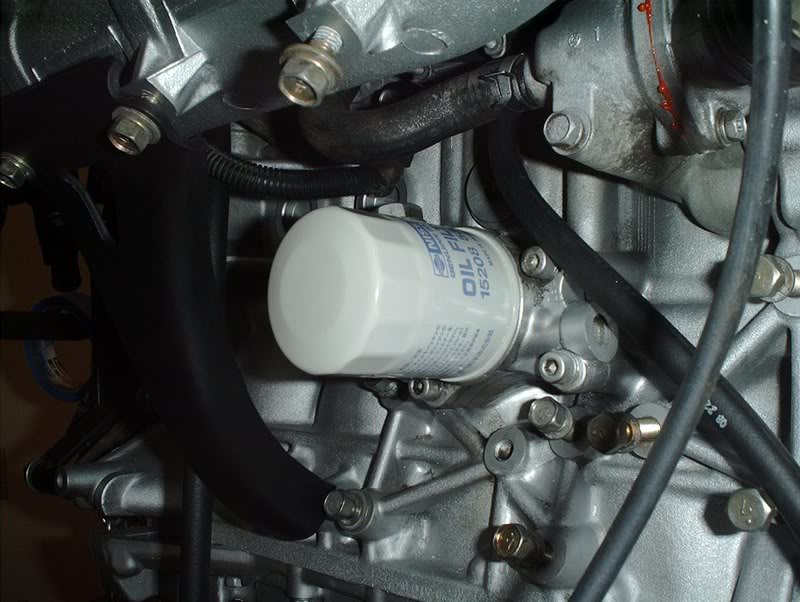
Installed, but without the oil filter sandwich plate. Weeks later and I still have no idea why that thing won't fit. Anyone???
Tools needed:
Oil Filter Pliers
Rags
I got a stainless steel oil filter sandwich plate with three ports two of which were plugged and two different fittings....
and a gasket on the backside.
The first thing to do is to remove the old oil filter.
You need a set of oil filter pliers.
My oil filter pliers are busted so I need a screwdriver in there to keep 'em from sliding out of grip...ghetto style FTW!!!!
Get the filter off and have a rag ready for the runoff.
Clean the area up and get the oil filter sandwich plate ready.
Now this is where I ran into the problem.
My plate will not fit. There doesn't seem to be enough thread on the fittings to mount snuggly against the block...WTF!!!
Nissan SR20DET oil filter Part#: 15208-53J00. I was gonna go with a fancy smancy oil filter but then I said just keep it simple and go OEM.
Installed, but without the oil filter sandwich plate. Weeks later and I still have no idea why that thing won't fit. Anyone???
nice man.
sorry about the oil filter plate i cant tell you why it dosnt fit.
also i see your oil is kinda dirty. I know you have never run the car yet but when i got my SR running for the first time i did Mobile 1 sythetic oil change 3 times at 2000 mile intervals and the inside of my SR is clean enough to eat off of if you dont mine clean oil on your food lol
i didnt do the oilchanges at 2000 miles because i wanted to clean my motor i just did it cause i was paranoid about my oilchanges and to my surprize when i tool the valve cover off it was clean as a whistle looked brand new insidelol
anyway just some advice i still need to clean the outside of my motor though haha
Thread Starter
Contributing Member
Joined: Sep 2002
Posts: 1,192
From: Starkville, MS.
nice man.
sorry about the oil filter plate i cant tell you why it dosnt fit.
also i see your oil is kinda dirty. I know you have never run the car yet but when i got my SR running for the first time i did Mobile 1 sythetic oil change 3 times at 2000 mile intervals and the inside of my SR is clean enough to eat off of if you dont mine clean oil on your food lol
i didnt do the oilchanges at 2000 miles because i wanted to clean my motor i just did it cause i was paranoid about my oilchanges and to my surprize when i tool the valve cover off it was clean as a whistle looked brand new insidelol
anyway just some advice i still need to clean the outside of my motor though haha
sorry about the oil filter plate i cant tell you why it dosnt fit.
also i see your oil is kinda dirty. I know you have never run the car yet but when i got my SR running for the first time i did Mobile 1 sythetic oil change 3 times at 2000 mile intervals and the inside of my SR is clean enough to eat off of if you dont mine clean oil on your food lol
i didnt do the oilchanges at 2000 miles because i wanted to clean my motor i just did it cause i was paranoid about my oilchanges and to my surprize when i tool the valve cover off it was clean as a whistle looked brand new insidelol
anyway just some advice i still need to clean the outside of my motor though haha
Registered User
Joined: Dec 2006
Posts: 434
From: VA
10w40 royal purple is what i run. with k&n oil filter. i'd really recommend it.
5w30 is for the gas mileage. for the turbo you want the thicker stuff.
i'd run an oil temperature sensor using a greddy oil pan that has a spot for it already.
my friend is running an oil pressure sensor where the stock oil pressure sensor is for the dummy light in the clsuter. he just ditched the stock oil pressure sensor, although you can run both if you wanted to.
if you have the $. run an oil cooler. i want to do that and a remote oil filter setup. i'm just poor
PS. mobil 1 is no longer 100% synthetic. it's 80%. i can upload the oil bible if you'd like to learn more
Last edited by Bumnah; Mar 5, 2008 at 08:05 AM.
Thread Starter
Contributing Member
Joined: Sep 2002
Posts: 1,192
From: Starkville, MS.
10w40 royal purple is what i run. with k&n oil filter. i'd really recommend it.
5w30 is for the gas mileage. for the turbo you want the thicker stuff.
i'd run an oil temperature sensor using a greddy oil pan that has a spot for it already.
my friend is running an oil pressure sensor where the stock oil pressure sensor is for the dummy light in the clsuter. he just ditched the stock oil pressure sensor, although you can run both if you wanted to.
if you have the $. run an oil cooler. i want to do that and a remote oil filter setup. i'm just poor
PS. mobil 1 is no longer 100% synthetic. it's 80%. i can upload the oil bible if you'd like to learn more
5w30 is for the gas mileage. for the turbo you want the thicker stuff.
i'd run an oil temperature sensor using a greddy oil pan that has a spot for it already.
my friend is running an oil pressure sensor where the stock oil pressure sensor is for the dummy light in the clsuter. he just ditched the stock oil pressure sensor, although you can run both if you wanted to.
if you have the $. run an oil cooler. i want to do that and a remote oil filter setup. i'm just poor
PS. mobil 1 is no longer 100% synthetic. it's 80%. i can upload the oil bible if you'd like to learn more
Last edited by positron; Mar 5, 2008 at 01:10 PM.
mobile 1 still has the cleaning detergents in it that clean out your engine real good. i actually bought Royal Purple 5-30w and a oem filter for when i put my sr back in.
i also bought 4 quarts of Royal Purple 75-90w gear oil for my tranny.
one quick question do u know how many quarts of gear oil the tranny takes? i know the j30 diff takes 1.5 quarts but not sure how much the tranny takes on a sr
i also bought 4 quarts of Royal Purple 75-90w gear oil for my tranny.
one quick question do u know how many quarts of gear oil the tranny takes? i know the j30 diff takes 1.5 quarts but not sure how much the tranny takes on a sr