
My S13 SR20DET Prep

nice valve cover. i have the RAS from tomei but i i dont know i havnt tried to install them yet.
also i only use thegrey RTV its the best one the black and orange one sux also the grey one dosnt smell funny either lol
also i only use thegrey RTV its the best one the black and orange one sux also the grey one dosnt smell funny either lol

Just to give you a heads up. This is my spec clutch w/ only 3k miles on it. Barely even drove the car hard, Pressure plate is ****ed up as well.
Might want to think twice about installing.

Might want to think twice about installing.

Are you sure that plate was installed correctly? Nothing should be touching the center hub where the springs are... and it looks like something's been wearing away at the outer section of the center hub...
Thread Starter
Contributing Member
Joined: Sep 2002
Posts: 1,192
From: Starkville, MS.
Clutch...That Thing That Turns And Makes It Go!!!
This just in.
I narrowed my choices down to the big three, Exedy, ACT and Spec. There was a stage 2 ACT in the KA that I pulled so...go with what you know.
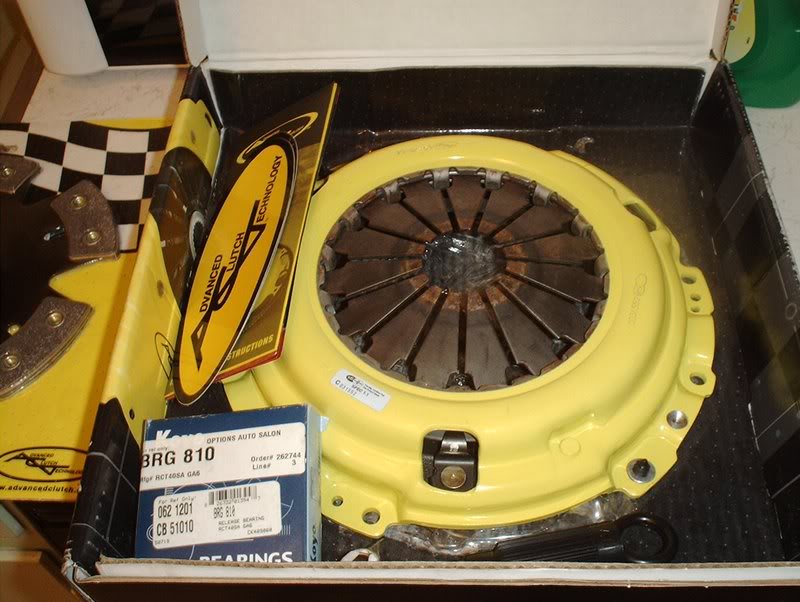
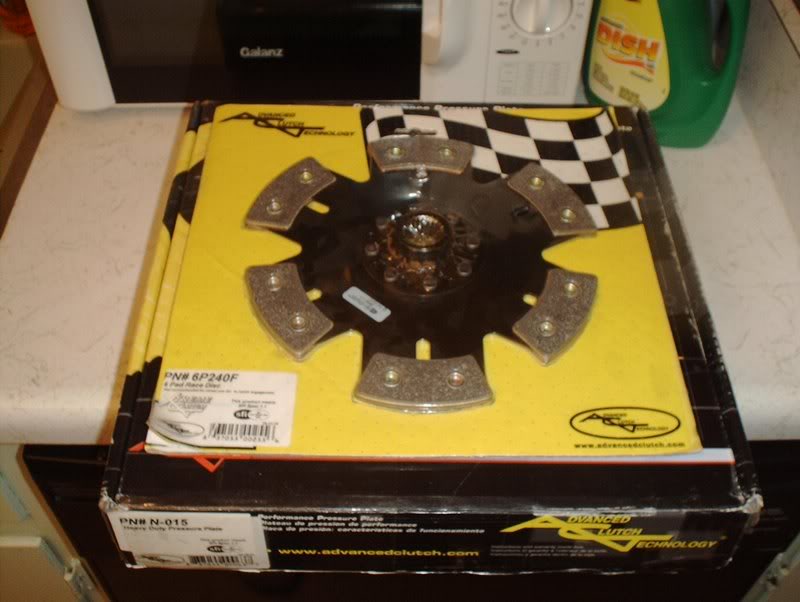
Pressure plate part#N-015

Disc part#:6P240F
Thanks for the heads up and the info people!
I narrowed my choices down to the big three, Exedy, ACT and Spec. There was a stage 2 ACT in the KA that I pulled so...go with what you know.
Pressure plate part#N-015
Disc part#:6P240F
Thanks for the heads up and the info people!
Hell, maybe it wasn't installed correctly. I dunno though, installed new pilot bushing. Bolted everything up and torqued it down. Not sure how much more you can do installing a clutch.
Kinda blows, ****ing thing went out the night before and event. And all I can afford right now is oem.
Kinda blows, ****ing thing went out the night before and event. And all I can afford right now is oem.
This is just me personally, but Im biased against unsprung clutches LOL
Unless youre going to track it a lot, its not really needed. But again, you could be tracking it a lot and the springs would harm the system rather than help...
Unless youre going to track it a lot, its not really needed. But again, you could be tracking it a lot and the springs would harm the system rather than help...
Registered User
Joined: Dec 2005
Posts: 188
From: wooster, ohio
everything your doing is what everybody thats getting an engine should absolutely do. no joke, i wish i had the time and money to pull mine and pretty much redo everything! ggrrr im jealous man. keep up the good work! MAJOR PROPS!
Thread Starter
Contributing Member
Joined: Sep 2002
Posts: 1,192
From: Starkville, MS.
Turbo Continued....
Well, that missing hardware that was supposed to come with my turbo elbow never showed up so I just emailed the seller and said send me $15 and I'll buy the studs myself so I finally got a set.
Tools needed:
Socket wrench
Socket extension
12mm deepwell socket
12mm wrench
Threadlocker
I already have gaskets and nuts so I only needed the studs anyway.

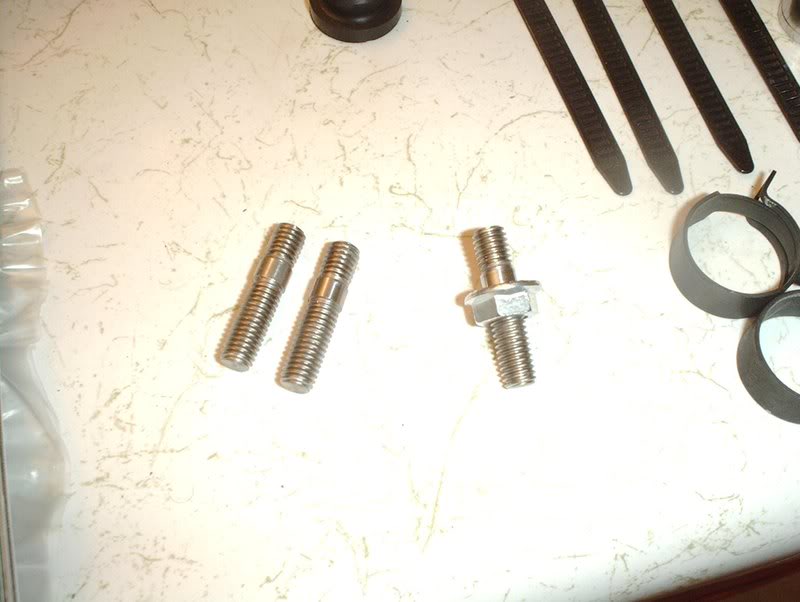
Circuit sports studs thread size M8x???MM.

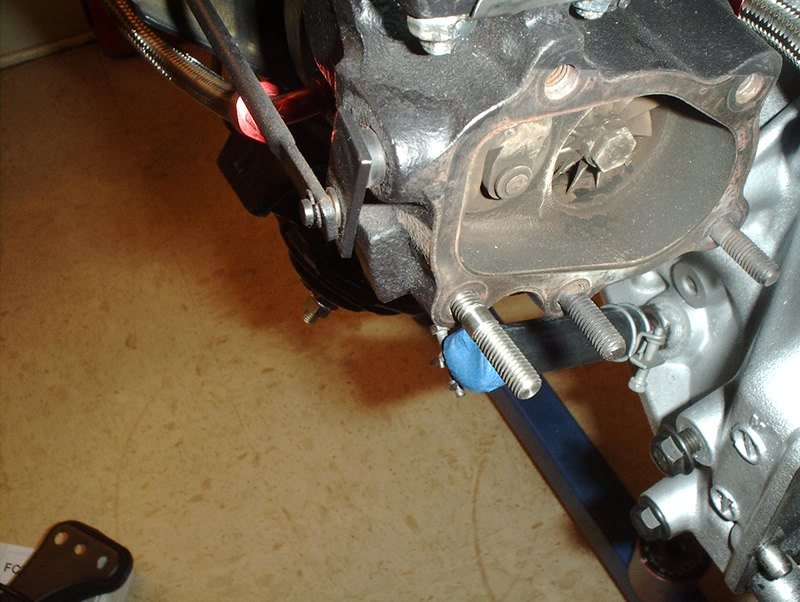
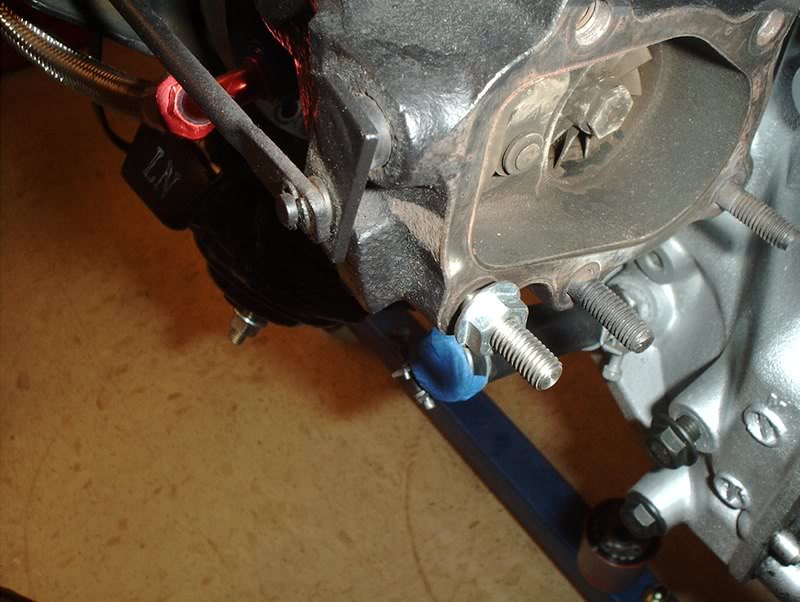
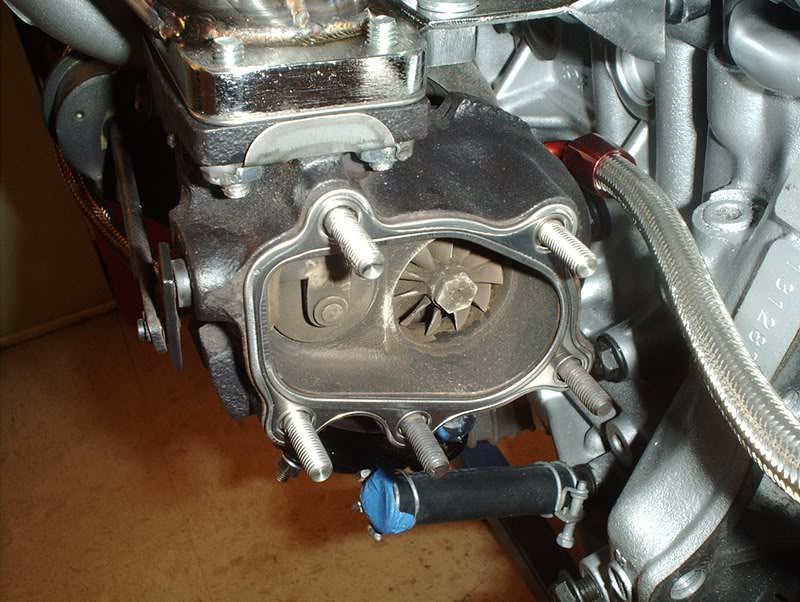
OEM T25 Turbo. There are two studs already on the outlet so I need to place three for a total of five.
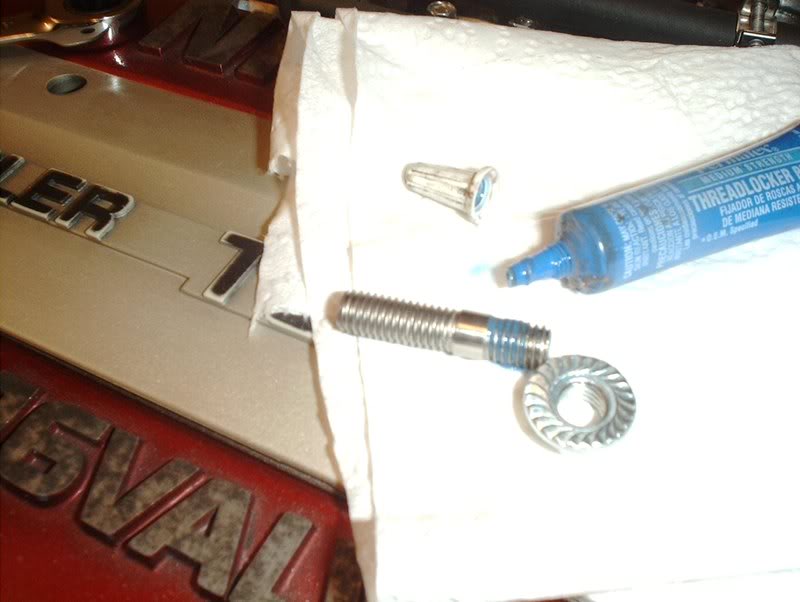
Probably not going to help much but I put a little thread locker on the studs before seating them.
Place them in the turbo and put a couple of washers on the stud...
to keep the nut that you use to seat them from bottoming out and getting stuck on the stud...
like this. I've seated plenty of studs so I should have known this, just impatient and not paying attention to what I was doing is all.
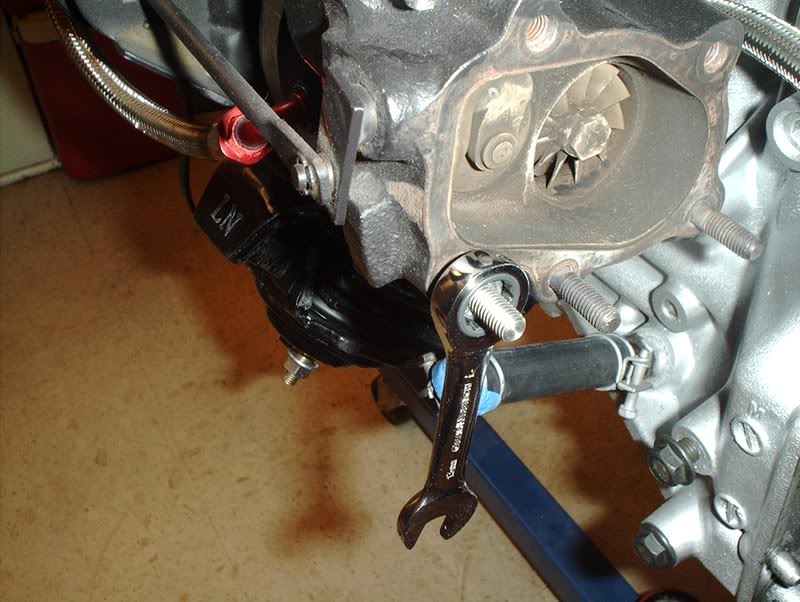
Use a 12mm wrench to seat the studs.
Seat all three studs into the turbo then move to the next step.
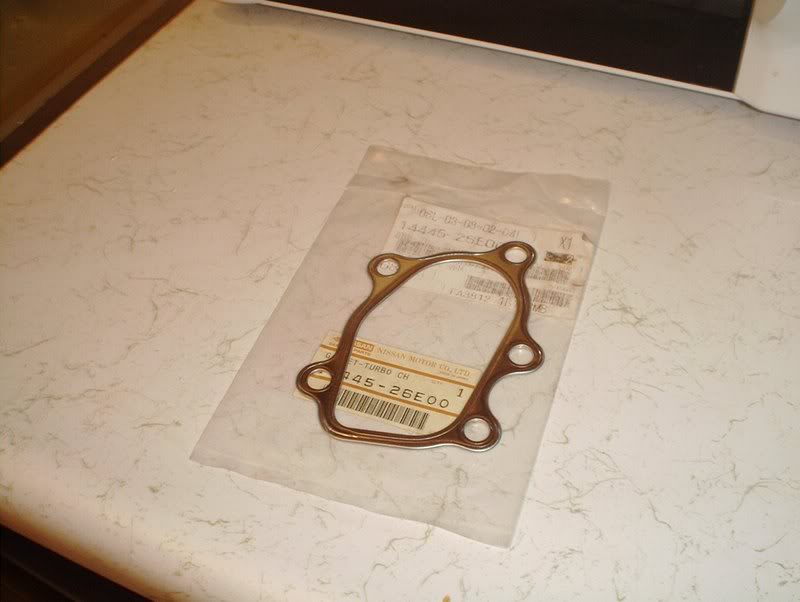
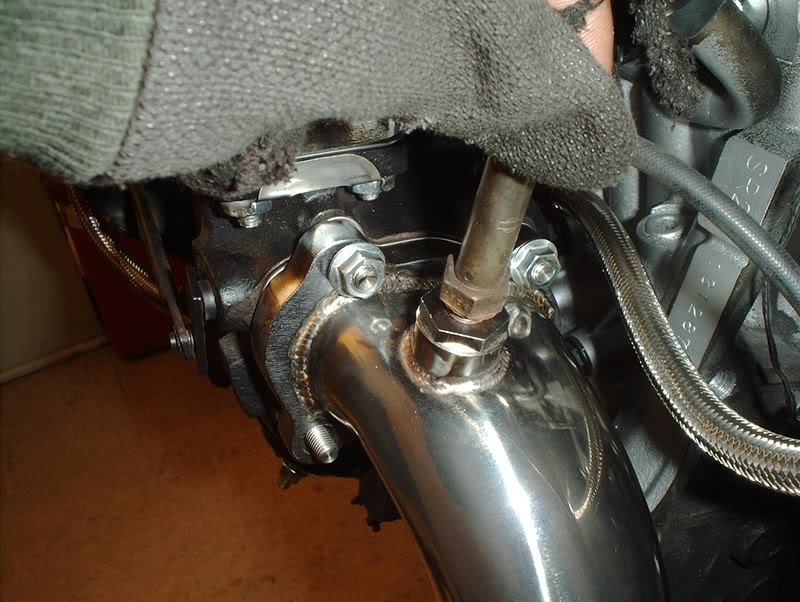
T25 OEM metal outlet gasket part#: 14445-26E00.
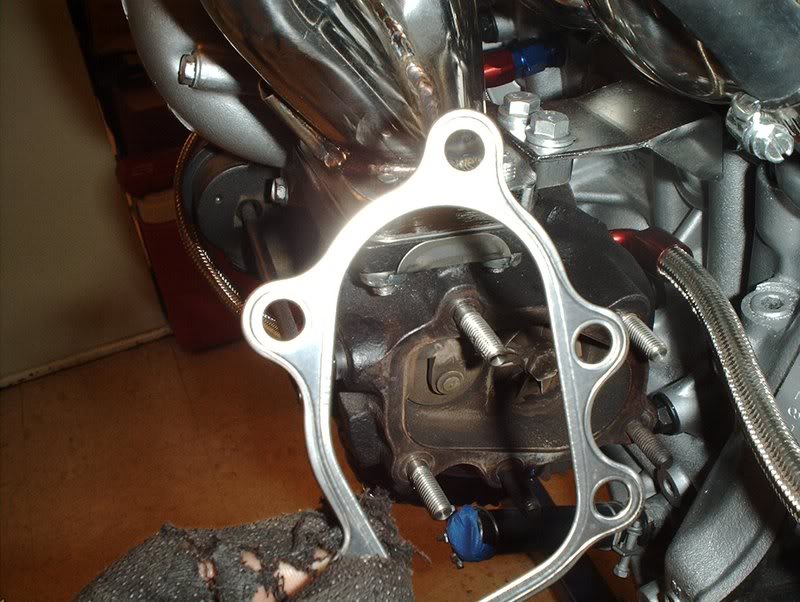
Take the gasket...
place it on the turbo.
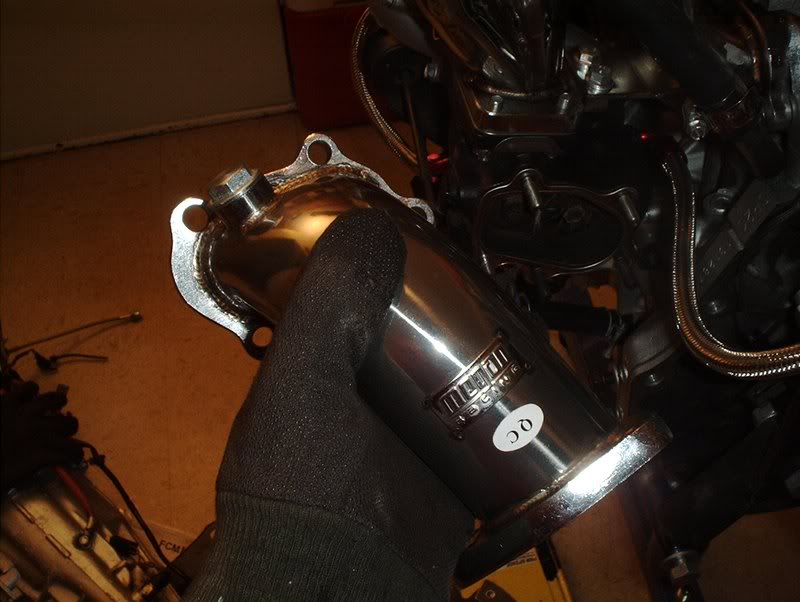
Take your elbow...
place it on the turbo.
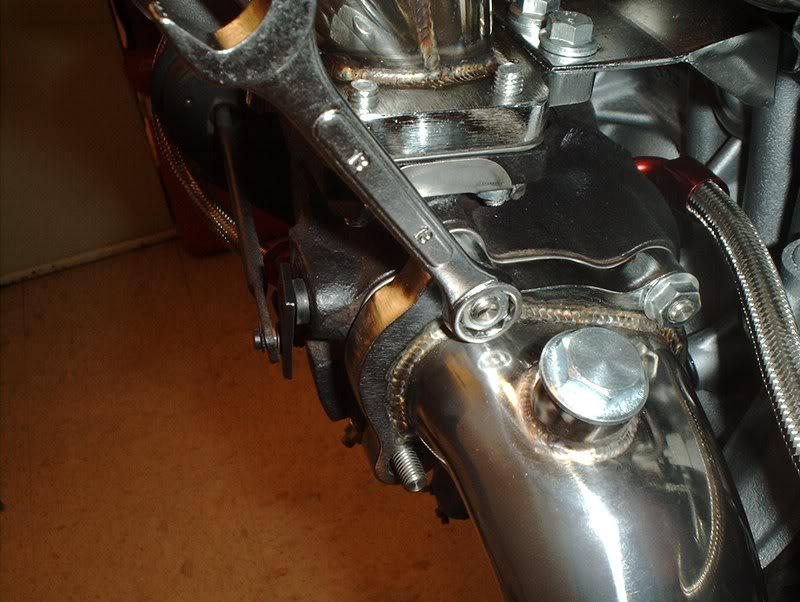
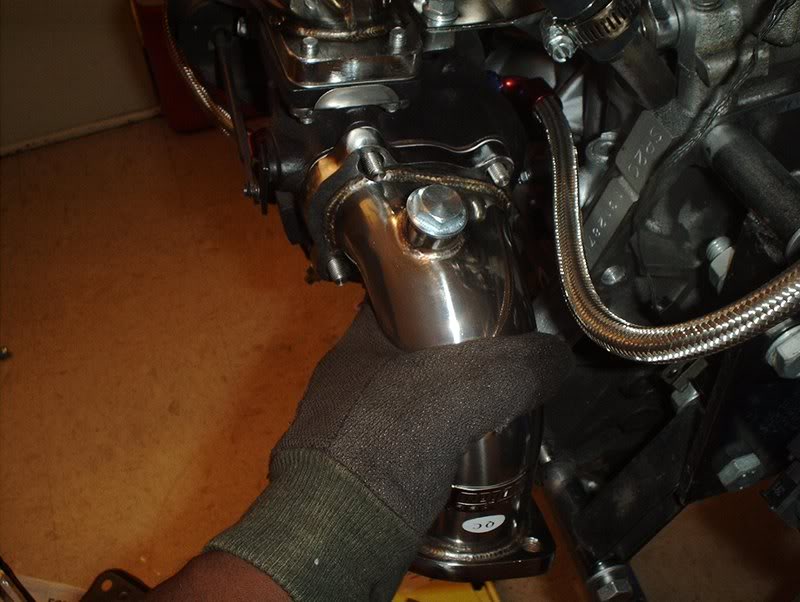
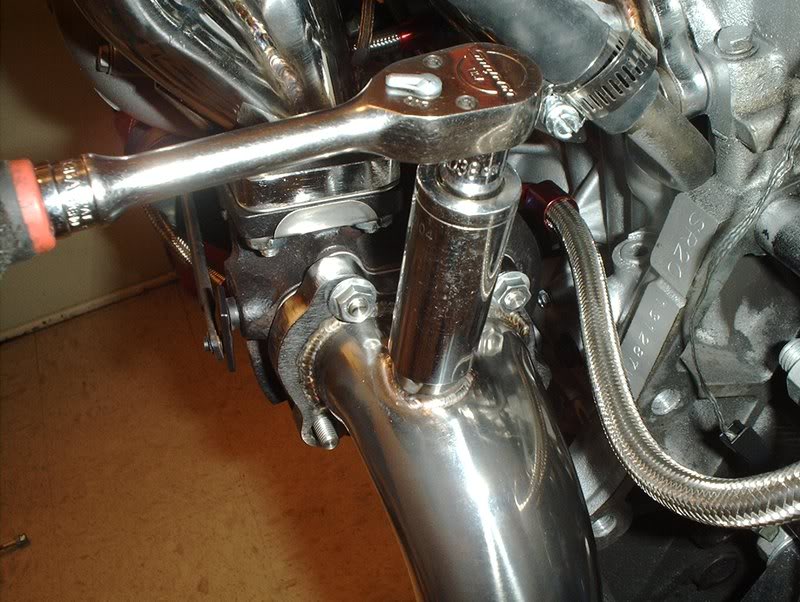
Put the nuts on. You can use M8x1,25 from the parts store. I had to use a wrench here because the O2 sensor port gets in the way of a socket wrench.
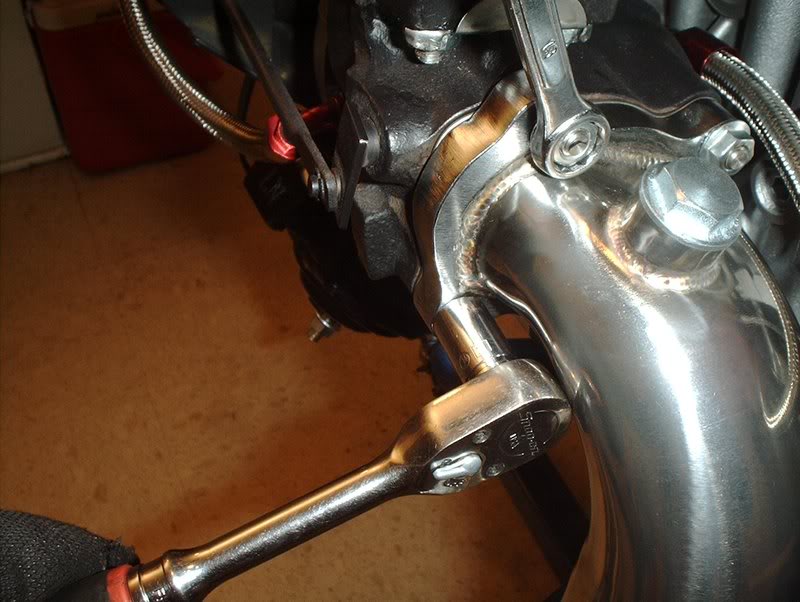
Use a 12mm socket, tighten and torque to 16-23ft.lbs.
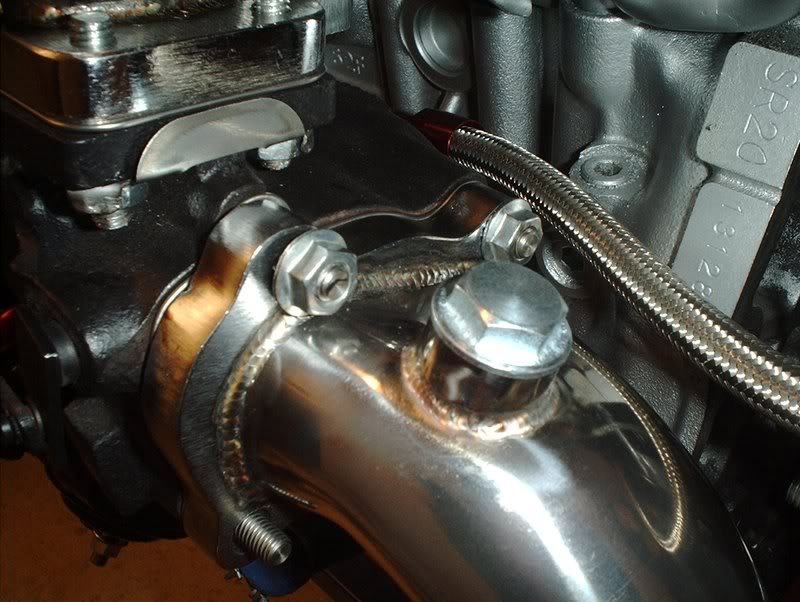
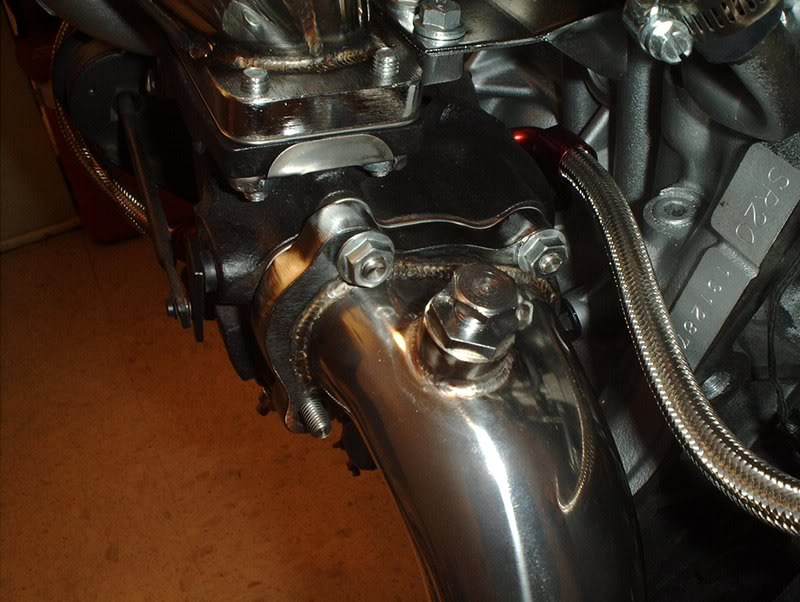
Here is the O2 sensor port. As you know by now, the blacktop and redtop engines have two different O2 sensors. The blacktops have a "fat" sensor while the redtops have a "skinny" sensor.
From what I've seen all the aftermarket elbows have a fat O2 sensor outlet so if you have a redtop, like me, then you will need a O2 sensor adapter to accomodate your "skinny" sensor.

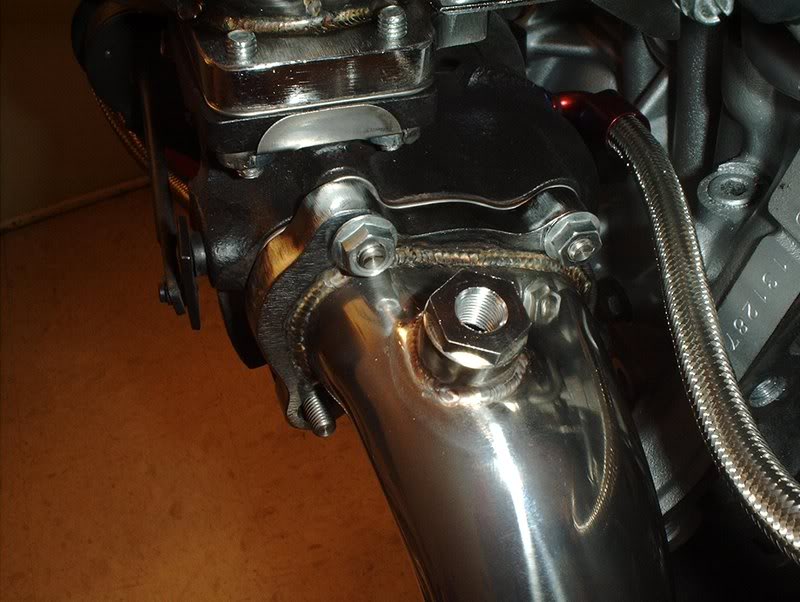
This is a O2 sensor adapter. It will screw into the "fat" O2 sensor bung and allow you to screw the "skinny" sensor into that.
Place it in like so.
Use a 22mm socket to tighten it, I don't have torque specs on this.
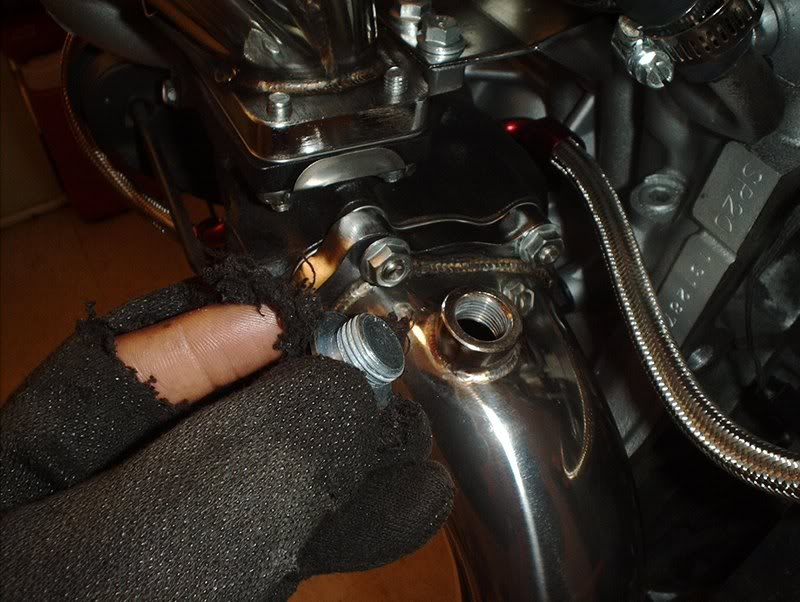
You unscrew the port...
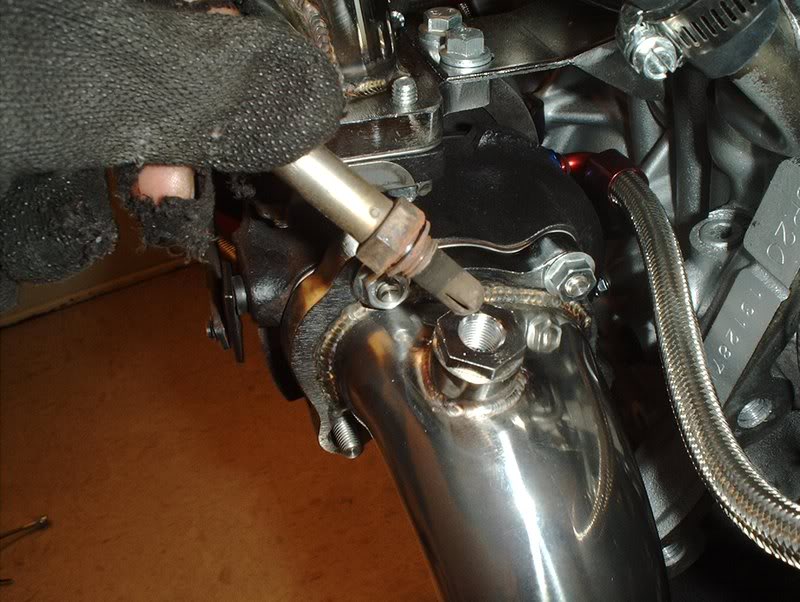
this is my old O2 sensor but you get the idea what has to happen here.
Once I get a new sensor then I'll be done with this side of the engine.
TO BE CONTINUED...
Tools needed:
Socket wrench
Socket extension
12mm deepwell socket
12mm wrench
Threadlocker
I already have gaskets and nuts so I only needed the studs anyway.
Circuit sports studs thread size M8x???MM.
OEM T25 Turbo. There are two studs already on the outlet so I need to place three for a total of five.
Probably not going to help much but I put a little thread locker on the studs before seating them.
Place them in the turbo and put a couple of washers on the stud...
to keep the nut that you use to seat them from bottoming out and getting stuck on the stud...
like this. I've seated plenty of studs so I should have known this, just impatient and not paying attention to what I was doing is all.
Use a 12mm wrench to seat the studs.
Seat all three studs into the turbo then move to the next step.
T25 OEM metal outlet gasket part#: 14445-26E00.
Take the gasket...
place it on the turbo.
Take your elbow...
place it on the turbo.
Put the nuts on. You can use M8x1,25 from the parts store. I had to use a wrench here because the O2 sensor port gets in the way of a socket wrench.
Use a 12mm socket, tighten and torque to 16-23ft.lbs.
Here is the O2 sensor port. As you know by now, the blacktop and redtop engines have two different O2 sensors. The blacktops have a "fat" sensor while the redtops have a "skinny" sensor.
From what I've seen all the aftermarket elbows have a fat O2 sensor outlet so if you have a redtop, like me, then you will need a O2 sensor adapter to accomodate your "skinny" sensor.
This is a O2 sensor adapter. It will screw into the "fat" O2 sensor bung and allow you to screw the "skinny" sensor into that.
Place it in like so.
Use a 22mm socket to tighten it, I don't have torque specs on this.
You unscrew the port...
this is my old O2 sensor but you get the idea what has to happen here.
Once I get a new sensor then I'll be done with this side of the engine.
TO BE CONTINUED...
Thread Starter
Contributing Member
Joined: Sep 2002
Posts: 1,192
From: Starkville, MS.
I'm rethinking my clutch decision, I need opinions on the best clutch for a stock SR. All I want to achieve is the 205hp that the manual promises me and I'm done. Stage 1 or a OEM equivalent?
Thread Starter
Contributing Member
Joined: Sep 2002
Posts: 1,192
From: Starkville, MS.
Flywheel
I decided to replace the stock flywheel with a aftermarket unit.

ACT Streetlite Flywheel part#:600225. I was going to get another brand but read that the chromoly forged one piece design was better and would not separate...porbably because it's one piece huh!
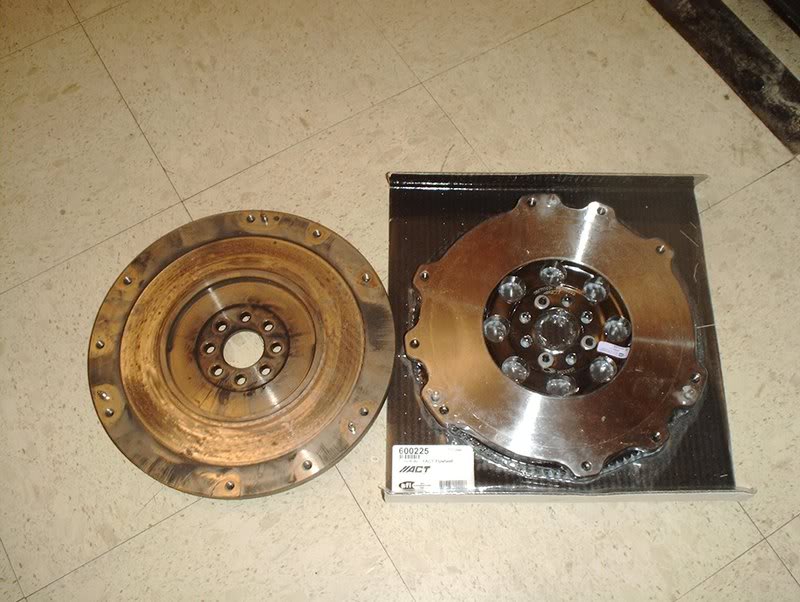
OEM vs. aftermarket flywheel. The OEM flywheel weighs in at 22lbs. and the Streetlite flywheel is 14lbs.
ACT Streetlite Flywheel part#:600225. I was going to get another brand but read that the chromoly forged one piece design was better and would not separate...porbably because it's one piece huh!
OEM vs. aftermarket flywheel. The OEM flywheel weighs in at 22lbs. and the Streetlite flywheel is 14lbs.
 I tried to follow your setup closely.

