
Operation Delete 240 insert 180!


Registered User
Joined: Mar 2004
Posts: 101
From: VACAVILLE, CALI
Wow, this is exciting, i spent a LONG while reading this post just to find out that it's still in progress! That's great! My CA is almost done, it is being put back into my 180SX (RHD) It came in originally but i got the car with a Ka, now i am just focused ont he upgrade path. Yes, i am also a true believer int he "Ebay special" I personally love SSautochrome. The turbo's though as controvercial as they are, can be made better for sure. The look nice but no joke, arn't up to par. My friend just bout one the other day and it is already spitting out oil.
Anyway, good luck with this swap and i will be looking at this daily.
Anyway, good luck with this swap and i will be looking at this daily.
Thread Starter
Registered User
Joined: Feb 2005
Posts: 232
From: Binghamton, NY
Sorry for the late response, I was away on vacation tearing up the slopes in Vermont... sucks to be back home, but good news is, I'm on vacation till Sunday. That means I get three solid days to work on the car.
The lengthening of the wire harness is complete, as far as I know. I still have to insulate and loom them up, but I'm holding off till once I'm sure everything is in working order.
Starting tomorrow, my goals are to get the fuel lines ran, radiator installed, heater hoses installed, and then finally get the intercooler and piping installed... then the processes of eliminating all those damn tiny air hoses, and all other miscellaneous trouble.
Thanks for reading!
Thread Starter
Registered User
Joined: Feb 2005
Posts: 232
From: Binghamton, NY
Originally posted by 93coupe
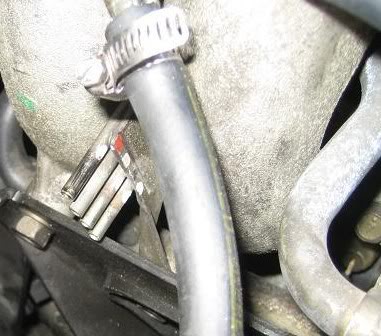
another question for trevor on my motor i was missing three vacuum lines right in between the middle of the third intake plenum and the fourth i was wondering where they go??
another question for trevor on my motor i was missing three vacuum lines right in between the middle of the third intake plenum and the fourth i was wondering where they go??
Last edited by trevr; Jan 14, 2007 at 09:35 AM.
Thread Starter
Registered User
Joined: Feb 2005
Posts: 232
From: Binghamton, NY
Dude, I cannot wait till I can start this f'n thing. It finally seems like it is all coming together. I just hope its runs!
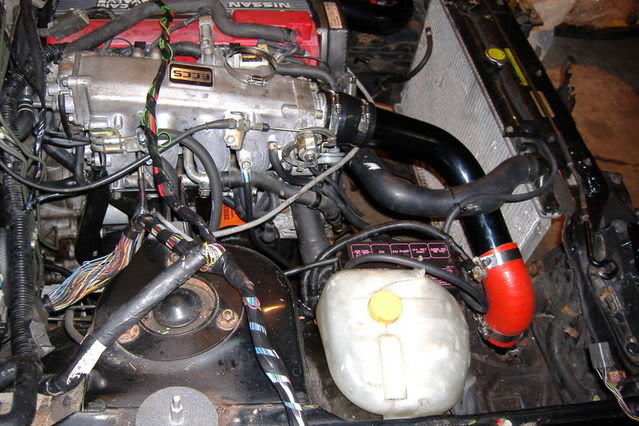
This past few days, I spend some hours connecting hoses. Heater hoses were simple enough, bought 6' length of 5/8 which was enough to do the heater lines, and PCV valve on the back right hand side. After all these lines were on, I replaced the coolant reservoir, and dumped coolant into the radiator.
Also, connected the filter, fuel/vapor lines and brake booster. Again, very easily done. Bought 4' of 3/8 heater hose and had some left over.
The next day, it was time to start looking at installing the intercooler.
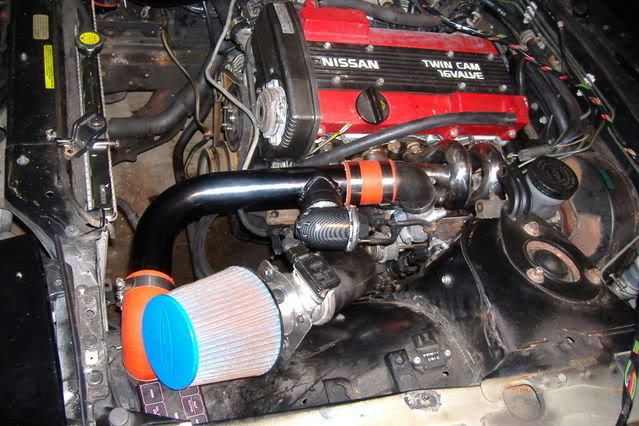
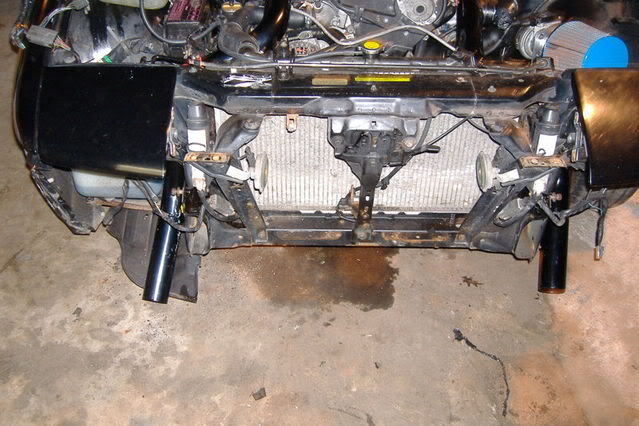
The turbo side was a breeze to install. From the turbo I used 2" to 2.5" 90 degree reducer to a 90 degree pipe to a 90 degree silicone elbow through the existing hole, and ended with a 45 degree pipe to the front.
The throttle body side, was a little more interesting. At first, I was thinking of running the pipe in between the radiator and support brace. There is plenty of room, but I later decided against it, due to the series of bends to come around and back up to meet the intercooler, plus the pipe is more exposed. In the end, going through the battery tray was the path.
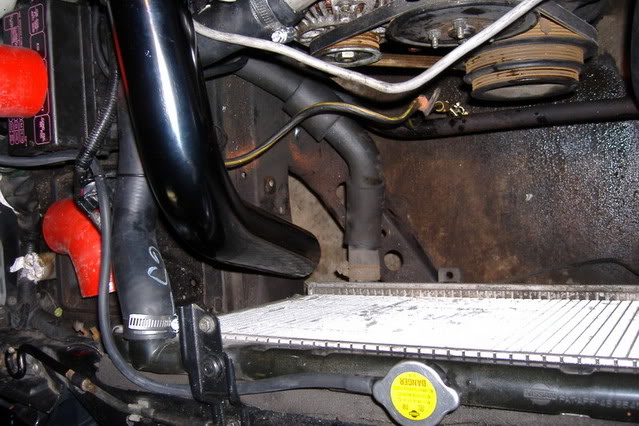
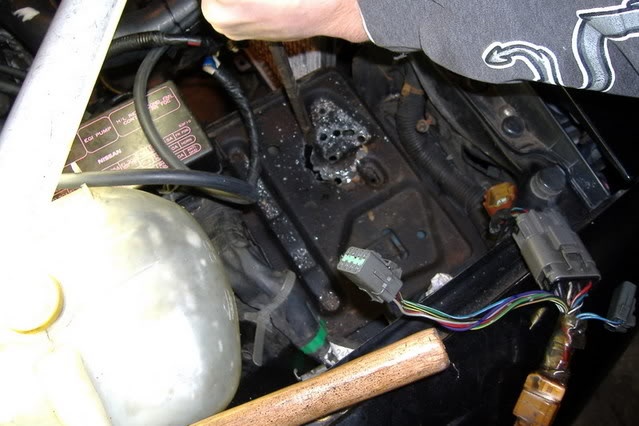
Drill a circle of holes, then punch out in between with a long strong screw driver.
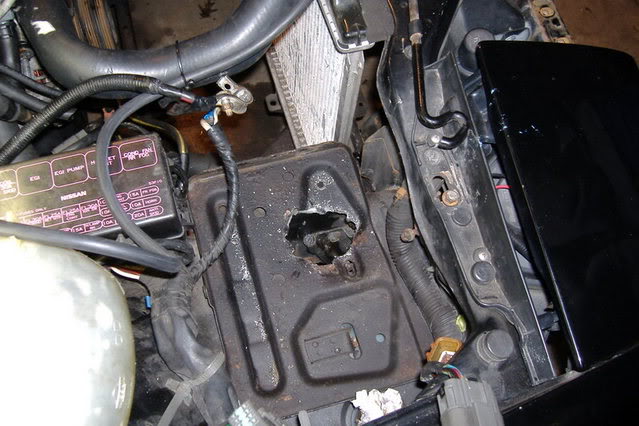
not the prettiest, but large enough for piping.
From the throttle body, I used a 3" to 2.5" reducer to a 90 degree pipe to a 90 degree silicone elbow down through the new hole and out the front with a 45 degree bend.
This is where the fun stopped. I bought my intercooler and piping kit from eBay, claiming it was a complete kit... well, I can assure you there is no such thing! (atleast not on eBay) I didn't mentioned it before, but I did have to cut some pipes to get the length I needed. My kit also shipped with only two 90 degree silicone elbows - I need four all together! I spent an additional $30 for just two elbows, plus, I previously spend $24 for the 2.5" to 2" reducer. Once they arrive, I will position up the intercooler and be done.
One last set back before I wrap this up for today. I am missing a piece of wire harness from the ECU to the fuel pump. It appears that there is a small linking harness between the two, I'm not sure if there is or not. I'm going to go check the junk yard to see how exactly it connects. Worse case, I will just have to splice the two ends together... who knows
This past few days, I spend some hours connecting hoses. Heater hoses were simple enough, bought 6' length of 5/8 which was enough to do the heater lines, and PCV valve on the back right hand side. After all these lines were on, I replaced the coolant reservoir, and dumped coolant into the radiator.
Also, connected the filter, fuel/vapor lines and brake booster. Again, very easily done. Bought 4' of 3/8 heater hose and had some left over.
The next day, it was time to start looking at installing the intercooler.
The turbo side was a breeze to install. From the turbo I used 2" to 2.5" 90 degree reducer to a 90 degree pipe to a 90 degree silicone elbow through the existing hole, and ended with a 45 degree pipe to the front.
The throttle body side, was a little more interesting. At first, I was thinking of running the pipe in between the radiator and support brace. There is plenty of room, but I later decided against it, due to the series of bends to come around and back up to meet the intercooler, plus the pipe is more exposed. In the end, going through the battery tray was the path.
Drill a circle of holes, then punch out in between with a long strong screw driver.
not the prettiest, but large enough for piping.
From the throttle body, I used a 3" to 2.5" reducer to a 90 degree pipe to a 90 degree silicone elbow down through the new hole and out the front with a 45 degree bend.
This is where the fun stopped. I bought my intercooler and piping kit from eBay, claiming it was a complete kit... well, I can assure you there is no such thing! (atleast not on eBay) I didn't mentioned it before, but I did have to cut some pipes to get the length I needed. My kit also shipped with only two 90 degree silicone elbows - I need four all together! I spent an additional $30 for just two elbows, plus, I previously spend $24 for the 2.5" to 2" reducer. Once they arrive, I will position up the intercooler and be done.
One last set back before I wrap this up for today. I am missing a piece of wire harness from the ECU to the fuel pump. It appears that there is a small linking harness between the two, I'm not sure if there is or not. I'm going to go check the junk yard to see how exactly it connects. Worse case, I will just have to splice the two ends together... who knows
Last edited by trevr; Jan 14, 2007 at 03:30 PM.

Registered User
Joined: Feb 2006
Posts: 50
From: Hastings,MN
looking good man it just snowed a bunch here so i haven't been able to work on my car its at my friends shop but i can't wait to fire mine up either! Do you have some more pics showing the wiring that would be helpful!!
Thread Starter
Registered User
Joined: Feb 2005
Posts: 232
From: Binghamton, NY
^^^^ I'm renting a garage across town, so as of now I'm waiting for the three silicone couplers to arrive before I make the trip over there... should be able to get the pics for you this weekend. Provide me with your email address, and I can get them to you asap.
Registered User
Joined: Feb 2006
Posts: 50
From: Hastings,MN
Thanks that would be helpful my e-mail is cwhite240sx@hotmail.com

Originally posted by trevr
 Click here to see Video
Here's a nice video of this motor in action. Its not the fastest CA I've seen but still nice. The motor is very rev happy being able to hit 8500rpm's with its smaller displacemnt and forged internals.
 Click here to see Video
40 - 145mph
Click here to see VideoHere's a nice video of this motor in action. Its not the fastest CA I've seen but still nice. The motor is very rev happy being able to hit 8500rpm's with its smaller displacemnt and forged internals.
Click here to see Video40 - 145mph
it's stupid stuff like that that makes it hard for the rest of us with the cops. that kind of driveing should be kept off the streets and on the track. i'm guilty of doing the samething when i was younger but i grew up. that stuff is dangerus. if the retaid doing the driveing died i a crash it's one thing but if others happen to be in your way it's something else.
get marreid have some kids and you'll se what i mean. if you want to have fun and show off do it where you'll be the only one to die and not someone else. there's a reason street race is illegal and not just because it involves people speeding.
Thread Starter
Registered User
Joined: Feb 2005
Posts: 232
From: Binghamton, NY
^^^ That is true, and I appreciate your opinion. These are videos that I have found, I am not affiliated with any of them. I posted them to demonstrate the motor, and not carelessness of illegal street racing.
i'm glad to see you understand the dangers associated with this sort of stuff. i didn't want to direct my coments towards you beacuse i figuered you just found the vids on the net.
but to anyone doing this stuff do us all a favor and knock it off or drive off a cliff so i don't have to worry about a loved one being killed by some idiot with more hp than brains.
but to anyone doing this stuff do us all a favor and knock it off or drive off a cliff so i don't have to worry about a loved one being killed by some idiot with more hp than brains.


Contributing Member
Joined: Sep 2006
Posts: 589
From: WI
there was a 200sx in america too, which is entirely different than a silvia or 180sx. yes, australian and european 200sx's did have ca's but so did the early 180sx's
Last edited by cronux; Feb 1, 2007 at 10:05 AM.
Thread Starter
Registered User
Joined: Feb 2005
Posts: 232
From: Binghamton, NY
Originally posted by AZdrifterS13
hey so i have a suggestion. switch the name of this thread to "...insert 200", because the 240's that came with the CA were the Australian/European ones that were called 200sx's. I think.
hey so i have a suggestion. switch the name of this thread to "...insert 200", because the 240's that came with the CA were the Australian/European ones that were called 200sx's. I think.
* 1987-1988 Nissan Silvia S12 GT-X(International market)
* 1989-1990 Nissan Silvia/180SX S13 (International market)
* 1989 Nissan Bluebird RNU12 SSS ATTESA Limited (JDM Market)
* 1989-1993 Nissan 200SX S13-U Europe.
Since my motor had Japanese writing all over it, I would assume it came from the International (Japanese included) 180sx S13 and not the Euro 200sx S13.
Last edited by trevr; Feb 1, 2007 at 10:22 AM.