
View Poll Results: was this thread helpful?
yes


3
75.00%
no


1
25.00%
Voters: 4. You may not vote on this poll
Complete suspension refresh

Thread Starter
Contributing Member
Joined: Apr 2005
Posts: 2,550
From: Slidell, LA
Hey all you people driving s13's with suspension so worn out that every time you hit a bump its like being on a waterbed.. this is for you. I bought a set of tein s-tech springs for my 240sx, along with a set of KYB gr-2 struts. I decided i would make a post showing in detail some of the steps involved, so that others may benefeit from my experimentation.
First i started with the rear suspension. Jack the car up, preferably with a floor jack on the rear differential, and set jackstands underneath each side, and be sure you dont jack up on the lower control arm.
Next i would recommend taking off the wheels and doing some spring cleaning.. a clean suspension is easier to work on.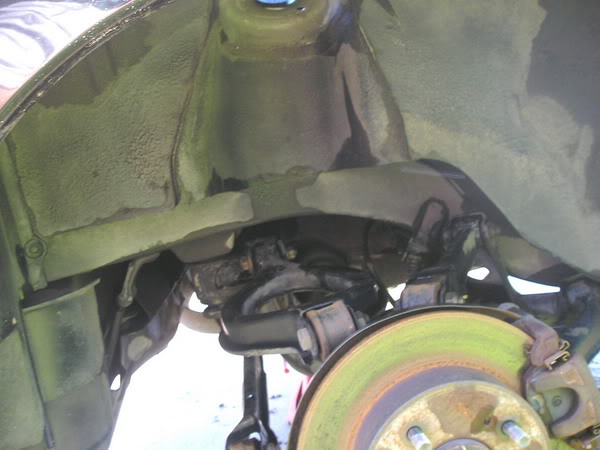 now go in the trunk area, and there should be 2 plastic carpeted panels covering the top of the strut towers.
 after taking those off, there should be 2 nuts opposite each other... take those off... theyre 12mm i would recommend using a gear wrench, they make life a whole lot easier because you cant get a ratchet in there. After taking those 2 nuts off, move to the underside of the car and take the nut off the lower end of the strut, it is a 17mm... use a breakerbar first to avoid stripping the stud or the nut. after taking the nut off, slide the strut off the stud and slide the strut out... it helps if the wheel is out of the way

Next use a spring compressor to compress the spring to the point where there is no more tension on the upper mounting plate ( the piece with the 2 studs with the 12mm nuts.) Once the spring is compressed enough, take a 14mm wrench (not socket) and a crescent wrench and take the nut off the strut rod. BE SURE NOT TO STRIP THE END OF THE STRUT ROD WITH THE CRESCENT WRENCH... DO NOT USE PLIERS OR CHANNEL LOCKS!!!! With the upper mounting plate off, remove the bushings and plates and such and set them aside. Take your new struts and springs and place the spring on the strut, and reassemble the strut in the same order which the pieces from the old strut came off.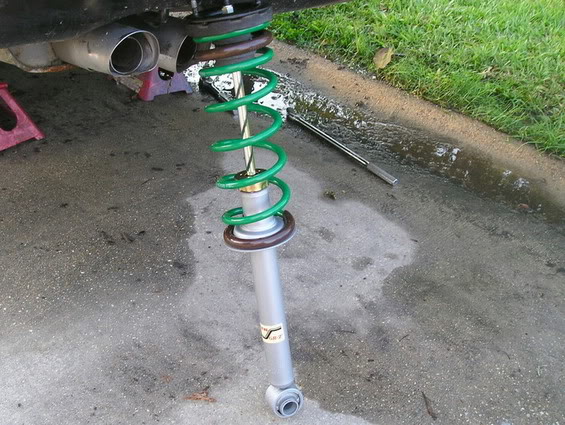 NOTE: if you use lowering springs, you may not have to use a spring compressor to assemble the strut. Now take the strut, and stick it through the control arm and up into the top where it mounts, and put the nuts on just snug, not tight. once you have that done, take the hub and pull it down enough to get the stud though the bottom of the strut. Put the nut back on, along with the washer, and be extremely careful not to strip it or twist it off... that would suck. Put the wheels back on and drop the car... take the 12mm wrench and tighten the 2 nuts that mount the strut to the tower... TADA all done...
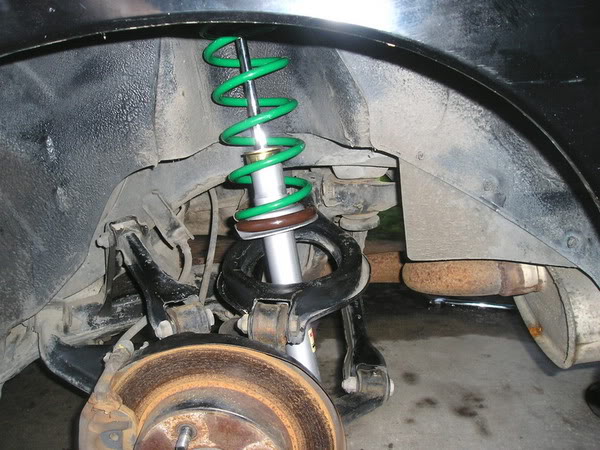 that wasnt so hard was it?
>>>>> I will be taking the front suspension down this week and will take pictures of it also... if anyone would like pics ormore info on either of these teardowns, feel free to email me at tsandlin212@charter.net <<<<<<<<
First i started with the rear suspension. Jack the car up, preferably with a floor jack on the rear differential, and set jackstands underneath each side, and be sure you dont jack up on the lower control arm.
Next i would recommend taking off the wheels and doing some spring cleaning.. a clean suspension is easier to work on.
now go in the trunk area, and there should be 2 plastic carpeted panels covering the top of the strut towers. after taking those off, there should be 2 nuts opposite each other... take those off... theyre 12mm i would recommend using a gear wrench, they make life a whole lot easier because you cant get a ratchet in there. After taking those 2 nuts off, move to the underside of the car and take the nut off the lower end of the strut, it is a 17mm... use a breakerbar first to avoid stripping the stud or the nut. after taking the nut off, slide the strut off the stud and slide the strut out... it helps if the wheel is out of the way Next use a spring compressor to compress the spring to the point where there is no more tension on the upper mounting plate ( the piece with the 2 studs with the 12mm nuts.) Once the spring is compressed enough, take a 14mm wrench (not socket) and a crescent wrench and take the nut off the strut rod. BE SURE NOT TO STRIP THE END OF THE STRUT ROD WITH THE CRESCENT WRENCH... DO NOT USE PLIERS OR CHANNEL LOCKS!!!! With the upper mounting plate off, remove the bushings and plates and such and set them aside. Take your new struts and springs and place the spring on the strut, and reassemble the strut in the same order which the pieces from the old strut came off.
NOTE: if you use lowering springs, you may not have to use a spring compressor to assemble the strut. Now take the strut, and stick it through the control arm and up into the top where it mounts, and put the nuts on just snug, not tight. once you have that done, take the hub and pull it down enough to get the stud though the bottom of the strut. Put the nut back on, along with the washer, and be extremely careful not to strip it or twist it off... that would suck. Put the wheels back on and drop the car... take the 12mm wrench and tighten the 2 nuts that mount the strut to the tower... TADA all done... that wasnt so hard was it? >>>>> I will be taking the front suspension down this week and will take pictures of it also... if anyone would like pics ormore info on either of these teardowns, feel free to email me at tsandlin212@charter.net <<<<<<<<
Last edited by LA_phantom_240; Apr 27, 2005 at 07:45 PM.


Thread
Thread Starter
Forum
Replies
Last Post
farmmaster56
For Sale - Suspension / Brakes / Handling
0
Dec 19, 2008 10:22 AM
RB26DETT_240sx
Suspension, Chassis, and Brakes
11
Feb 16, 2006 12:51 AM